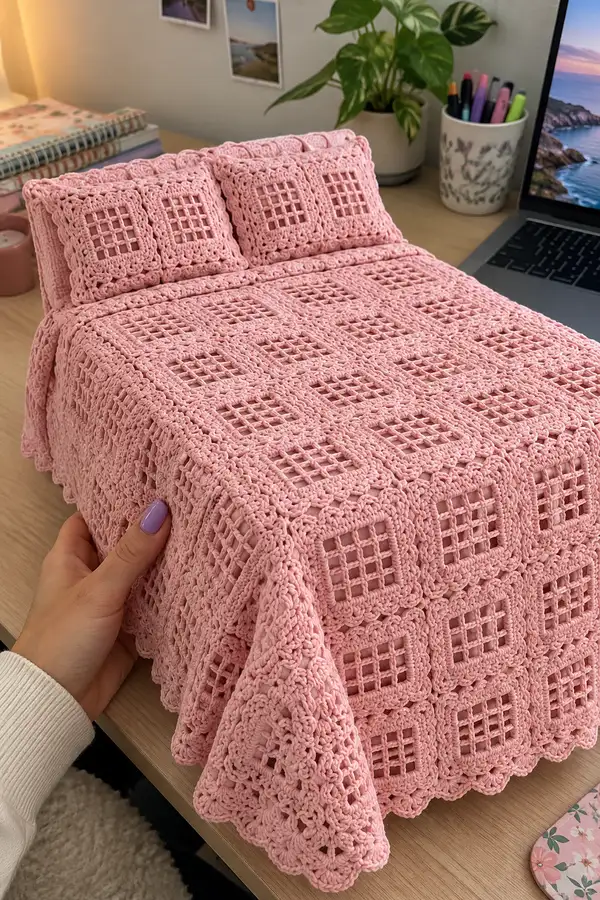
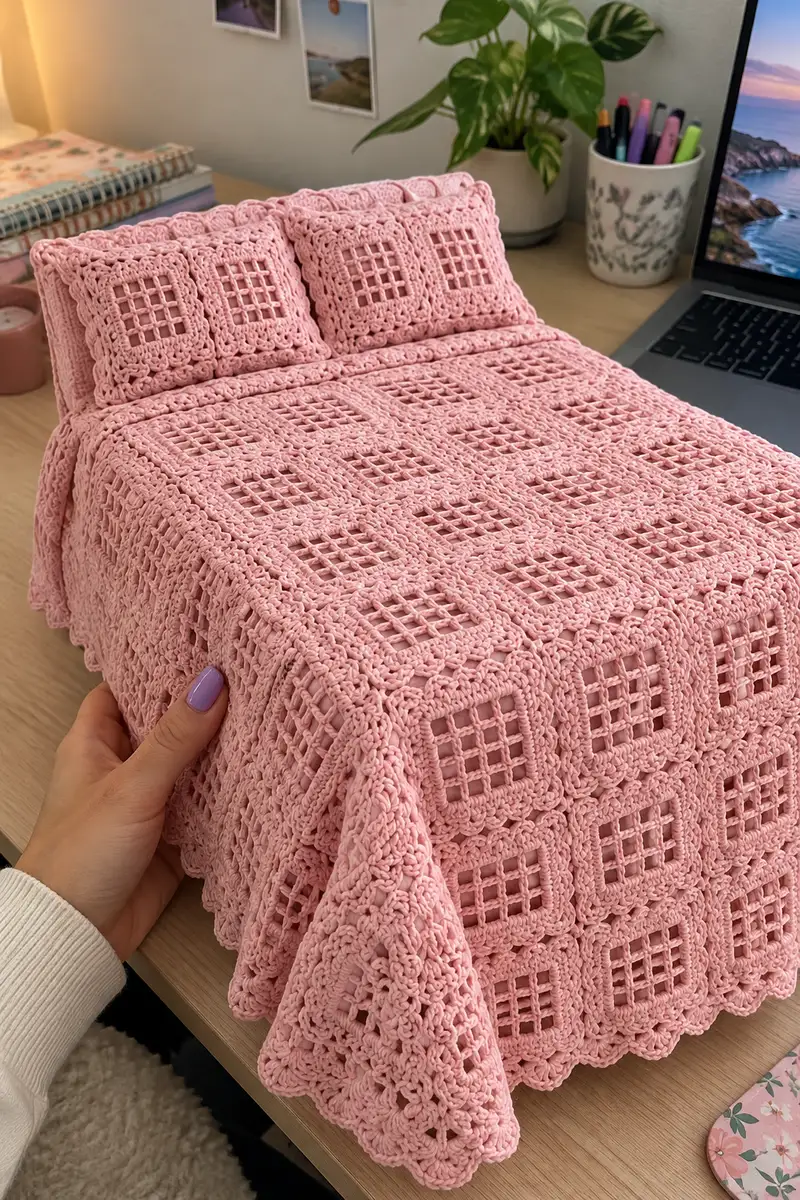
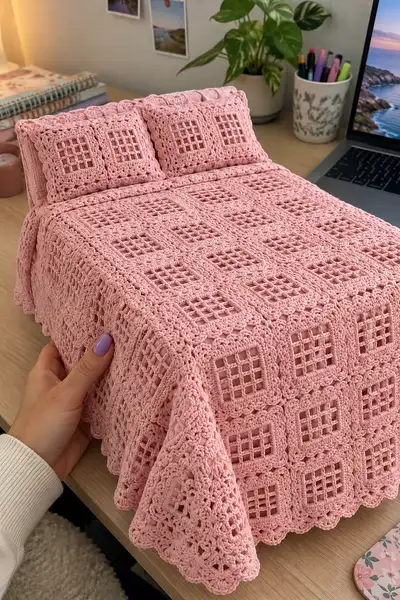
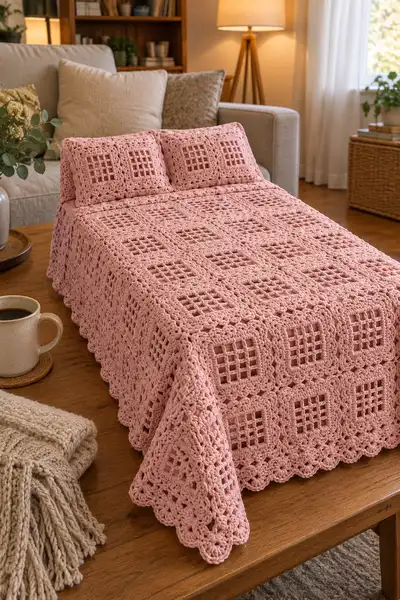
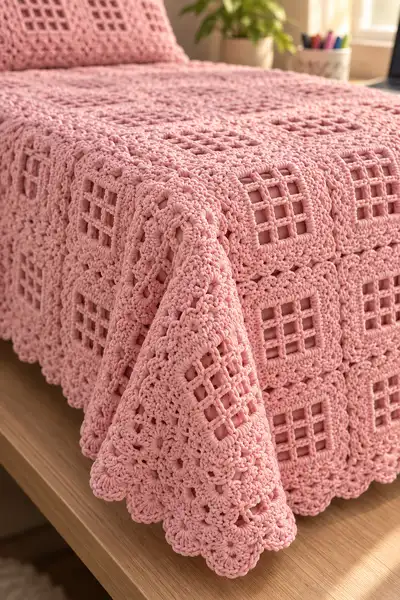
A romantic, vintage-inspired pink bedspread worked from repeating openwork square motifs joined together and finished with a scalloped flounce. The design uses bulky, rope-style cotton to create soft raised clusters and a lattice window at each square center for a light, breathable throw. Perfect for a statement bedspread or cozy sofa throw, this project highlights textured puff clusters, tidy mesh grids, and a decorative scallop edging.
Progress Tracker
0% Complete
— Overview & Gauge :
Info :
This pattern consists of repeating square motifs worked in the round, joined as you go into panels and finished with a scalloped flounce. Sample bedspread layout: 5 squares across by 6 squares down (30 motifs) for a twin/throw size; scale up by adding motif rows/columns. Gauge (important): One finished motif = approx. 6.5" - 8" square depending on yarn and hook. Sample gauge: after Round 12 of motif using bulky cotton and 6.0mm hook, motif measures 7.25" across.
Info :
Techniques used: join-as-you-go (JAYG) method to assemble motifs, puff/cluster stitches for raised texture, and a multi-row scallop edging. If you prefer to seam squares after making them, a mattress stitch or whip stitch works well, but JAYG produces a cleaner continuous surface.
— Motif (Make 30 or adjust) :
Notes :
Each motif begins with a compact center and develops into an open 3x3 window mesh (a central grid of nine small ‘windows’), surrounded by textured cluster rounds. The counts below are given as total stitch clusters or reference counts by side - check tension and keep motifs flat. Make a swatch motif and block to match dimensions before making full set.
Round 1 :
Ch 6, join with sl st to form ring. Ch 3 (counts as dc), 11 dc into ring. Join with sl st to top of ch-3. (12 dc)
Round 2 :
Ch 3 (counts as dc), dc in same st, *dc in next 2 sts, (2 dc, ch 2, 2 dc) in next st (corner made)*, repeat from * to * around to form four corners, dc in remaining sts to complete the side. Join with sl st to top of ch-3. This round creates 4 corner ch-2 sps and establishes a small square. (Work evenly across to maintain 4 sides)
Info :
Round 2 creates the foundation square with corner chain spaces that will become the edges of the lattice center. Keep tension relaxed when working corners to let the square lie flat.
Round 3 :
Ch 1, sc in same st, *ch 3, sk 2 dc, sc in next dc; in corner ch-2 sp work (sc, ch 3, sc)*; repeat across each side so you create a chain-laced grid row (you now have ch-3 meshes along each side and ch-3 corners). Join with sl st to first sc. This round produces start of open mesh. (sc and ch-3 pattern across sides)
Round 4 :
Ch 3 (counts dc), dc in same st, *dc in top of next sc, ch 1, dc in next sc, ch 3, sk to next sc and work dc in top of sc (this creates vertical bars), in corner ch-3 sp work (2 dc, ch 3, 2 dc)*; repeat around. Join with sl st to ch-3. This round begins to establish vertical posts for the lattice windows.
Info :
Work Round 4 slowly to keep bars evenly spaced. The ch-1 spaces between vertical posts will form the fine lattice squares in the center later.
Round 5 :
Ch 1, sc in same st, *ch 3, sc in next ch-1 space, ch 3, sc in next ch-1 space (creating horizontal connectors), in corner ch-3 sp work (sc, ch 3, sc)*; repeat around. Join with sl st to first sc. The center should now present a grid-like openwork with small square openings (aim for a 3x3 tiny-window center).
Round 6 :
Ch 3 (counts dc), (dc, ch 1, dc) in each sc across the side to build the framing posts, working (2 dc, ch 3, 2 dc) in each corner ch-3 sp. Join with sl st. After this round you will have an open central grid bounded by sturdy dc posts and corner clusters.
Info :
If your center mesh is too loose or the windows appear stretched, work Round 6 with a slightly smaller hook (or use dc in BLO only for one round to tighten edges). The idea is a stable grid that still reads as openwork.
Round 7 :
Ch 1, sc in same st, *ch 1, puff stitch over next 3 dc (yarn over, insert hook, yo and pull through, yo, insert hook, yo and pull through, repeat until 5 loops on hook; yo and pull through all loops, ch 1 to close puff) in next dc, ch 1, sc in next dc; in corner ch-3 sp work (sc, ch 3, sc)*; repeat around. Join with sl st. This introduces the first textured puff accents around the window frame.
Round 8 :
Ch 3, dc in same st, *dc in next st, (dc, ch 2, dc) in next corner ch-3 sp, dc in each st across side*; repeat around and join. This round builds a small raised frame to hold puff clusters in following rounds. (Even count across sides expected, adjust by adding one dc in a side if needed to keep motif square)
Info :
Puff stitch repeat: make each puff using exactly 3 yarn-over insertions (for consistent puff size). After pulling loops through to finish puff, secure with ch 1 on both sides to keep spacing even.
Round 9 :
Ch 1, sc in same st, *ch 2, sk the next dc and work a 3-dc cluster into the next st (cluster: yo, insert, pull up loop, yo, insert, pull up loop, yo, insert, pull up loop, yo and draw through all loops on hook), ch 2, sc in next st; in corner ch-2 sp work (sc, ch 2, sc)*; repeat around. Join with sl st. This round places clusters evenly around the frame for texture.
Round 10 :
Ch 3 (counts as dc), dc around side working dc in each sc and dc across, in corner work (2 dc, ch 3, 2 dc) in corner ch-2 sp. Join. The motif now looks like a framed window with clusters spaced evenly on each side.
Info :
At this stage keep motifs unblocked if you plan to join-as-you-go — some stitch smoothing occurs during joining. If you plan to seam later, blocking will help sizes match.
Round 11 :
Ch 1, sc in same st, *ch 3, sc in next dc; puff in next dc (as Round 7), ch 3, sc in next dc; in corner ch-3 sp work (sc, ch 3, sc)*; repeat around and join. You will create a decorative chain loop between textured puffs for a lacy border effect.
Round 12 :
Ch 3 (counts dc), dc in same st, dc across each st on side, working (2 dc, ch 3, 2 dc) in corners. After joining, count final stitches per side: you should have consistent dc counts across each side to allow tidy joins. Example reference: if you have 18 dc along each side plus corner clusters, note this number down for later matching.
Info :
This is a good round to adjust tension: add or remove a dc in a side if necessary to square up the motif. Record the number of dc per side on your notes for consistent joining later.
Round 13 :
Ch 1, sc in same st, *(ch 2, puff in next 2 dcs, ch 2, sc in next dc) across side; in corner ch-3 sp work (sc, ch 3, sc)*. Repeat around. The double-puff group creates a fuller frame that reads as a braided border around the lattice center.
Round 14 :
Ch 3, dc in same st and across, working into top of puffs carefully so they sit flush. Work (2 dc, ch 3, 2 dc) in each corner. Join. After this round the motif has a solid visual square border approximately 1.1" - 1.5" wide depending on yarn.
Info :
From Round 11–14 the repeats are decorative; if you need a slightly larger motif you can repeat Rounds 11–14 once more before finishing outer edge. Each added repetition increases motif by roughly 0.6"–1" in bulky yarn.
Round 15 :
Edging round: Ch 1, sc in same st, *ch 2, 3 sc shell (3 sc in next st) in the next spacing to make scallop anchors, ch 2, sc in next st; in corner ch-3 sp work (sc, ch 3, sc)*; repeat around. Join.
Round 16 :
Final scallop shaping: Sl st into first ch-2 sp of shell, ch 3 (counts as dc), work 4 dc into same ch-2 sp, skip to next ch-2 sp and work 5 dc, repeat across sides and in corners work (7 dc) for a rounded corner scallop. Fasten off and weave in ends. Each scallop will create the raised rounded edge visible in the photos.
Info :
Make the number of motifs required for your size: Example sample layout (bedspread shown): 5 motifs across x 6 motifs down = 30 motifs for a throw/twin-ish coverage with drape; adjust to fit mattress or sofa. Make an extra motif or two as spares for testing gauge and replacement.
— Pillow Shams (Make 2) :
Info :
Pillow shams in the photos are formed by a single motif folded and closed with a pillow form inside (envelope style) or two squares joined back-to-back. Use the same motif recipe but make 2 motifs per sham for a back-front pair, or make one motif and construct a lining for an envelope closure.
Round 1-16 :
Work Motif Rounds 1–16 as above for each square. Make 4 motifs (two pairs) if you prefer a double-thick sham, or 2 motifs for a single-thick envelope style. If making envelope: make two motifs and seam three sides, leaving opening for pillow insertion; overlap opening edges by ~2" and slipstitch closed when pillow inserted.
Info :
For sturdier shams, add a lightweight cotton lining sewn into the sham interior before inserting pillow to keep the insert from poking through the mesh center.
— Join-As-You-Go (JAYG) Instructions :
Info :
We recommend join-as-you-go to produce a tidy, continuous bedspread surface. You'll join motifs in rows, working the final Round 14 (the solid framing round) and joining to adjacent motifs through the ch-1 or ch-2 spaces with slip-stitches or sc to create a visible, slightly recessed joint. Always join motifs while the connecting motif's Round 14 is still on your hook to get a firm join.
Step A :
Start by making a full first motif and lay it flat. Make the second motif through Round 13. On Round 14 of motif #2, when you come to a side that will touch motif #1, align the motifs so corners and dc posts match. Instead of working 2 dc in corner ch-3 sp as usual, work: (2 dc, ch 3, 2 dc), then sl st into the corresponding ch-3 corner sp of the joined motif and continue the round.
Step B :
For side joins: when you reach a dc on motif #2 that sits across from a dc on motif #1, work a dc into motif #2 then sl st into the corresponding dc post of motif #1 (or into the ch-1 space created in the joining round). This creates a neat ladder-style join. Continue around the side and complete motif #2. Repeat joining as you add motifs.
Info :
If joining a full grid (5x6), construct rows of motifs first, joining motifs left-to-right. Then join rows top-to-bottom using the same method, aligning seams carefully. Use pins or clips to keep motifs aligned before final joining passes.
Step C :
When joining corners of four motifs together, insert your hook through the corner spaces of both adjacent motifs and complete the stitch to bind all four into a neat intersection. Work slow the first few joins to ensure correct alignment.
Info :
If you prefer invisible joins, use a yarn needle and mattress stitch after blocking motifs. For a decorative exposed seam follow the sl st or sc join technique described above for visible grid lines between squares.
— Assembly Sequence and Counts :
Info :
Sample bedspread layout (shown): 5 x 6 motif grid = 30 motifs. Each motif outer edge scallop sits next to adjacent motifs scallop; when joined, the scallops nest and form gentle wave across the bedspread. For full size queen/king increase columns/rows proportionally.
Step :
Assemble row 1: make 5 motifs, join left-to-right. Block row if needed. Make row 2 and join to row 1 along top-bottom borders aligning stitches. Continue until full grid assembled. After joining all motifs, examine edges and count sts per side to prepare for border; record dc counts on each edge to distribute scallops evenly (you may need to add a short spacer row to even counts).
Info :
When joining long runs, rest and check alignment frequently; placing stitch markers at every corner helps keep corners true and square.
— Border & Skirt (Multiple Rounds) :
Info :
After motifs are joined, work a multi-row border that softens the grid edge into a flowing scalloped skirt like in the photos. The border consists of a join row (B1), a textured spacer row (B2), a puff cluster row (B3), and finishing scallop rounds (B4-B7). Border rounds add significant drape and finished look.
B1 - Join Border Round :
With RS facing, attach yarn at any corner. Ch 1, sc evenly around outer edge working 1 sc in each dc and 1 sc in each ch-space across the sides; place 3 sc in each corner to keep it flat. Join with sl st. Count total sc along each side (record for next rounds).
Info :
This round evens the raw motif edges and gives a uniform base for decorative border work. Keep stitches even and avoid stretching edges while working.
B2 - Raised Ridge Round :
Ch 3, dc in same st, *1 dc in next st, 1 hdc in next st; repeat across side; in corners work (2 dc, ch 3, 2 dc). Join. This mix of dc and hdc creates a subtle raised ridge that gives the scallops a base to sit on.
Info :
If you prefer a firmer border, work this round in BLO to create a pronounced ridge visible from the front.
B3 - Cluster Row :
Ch 1, sc in same st, *ch 2, (puff, ch 2, sc) across each repeat; in corners work (sc, ch 3, sc). Puff clusters: yo, insert hook, pull loop (repeat 3 times) yo and pull through all loops, ch 1. Repeat around and join. This round creates the chunky texture seen between motif squares and the scalloped edge.
Info :
Space your clusters evenly; use markers to map out where each scallop or cluster will sit around large edges so scallops align at corners and midpoints.
B4 - Scallop Round 1 :
Ch 3 (counts dc), 4 dc in next ch-2 sp, skip to next ch-2 sp and work 5 dc, repeat across edges; in corners work 7 dc for rounded corner scallops. Join. Adjust the number of dc per scallop so you get an even number of scallops around each side (you may add or reduce a dc to fit).
Info :
Count scallops per long side; aim for an integer number of scallops that gives an even rhythm to the border (for example, if side has 90 base sts, 10 scallops of 9-dc each = correct). If needed, work a preceding row to modify base stitch count so scallop spacing is regular.
B5 - Scallop Round 2 :
Sl st to center of scallop, ch 1, (sc, hdc, 3 dc, hdc, sc) into same scallop for a deeper shaped scallop. Repeat into the center of each scallop around the entire bedspread. Join and weave ends.
Info :
For a deeper, ruffled skirt repeat Scallop Round 2 an additional time, staggering scallop centers between previous rounds. Blocking after this round gives the scallops their final smooth curve.
B6 - Decorative Frill (Optional) :
Ch 1, sc into the back loop of each stitch around the scallop peaks, then work ch-4 picots between peaks (ch 4, sl st in 4th ch). This adds a dainty crochet picot edge visible in close-up shots.
Info :
Block the entire bedspread flat, pinning scallop points to get a neat finished drape. Use steam blocking with cotton yarn or wet block for best results (follow yarn care instructions).
— Alternate Join / Seaming Method :
Info :
If you prefer seam-joining, make all motifs first and block them. Lay them in desired layout and seam motifs using mattress stitch or whipstitch through the outermost loops on motifs for an invisible join. For a decorative raised seam, use sl st seams showing a ladder texture.
— Finishing Touches & Care :
Info :
Weave in all ends by threading a yarn needle and passing the tail through a few interior stitch paths to hide. Trim close but leave 1/2" for security. For washing, follow yarn manufacturer’s care; generally, cool gentle hand wash and flat dry recommended for cotton blends to preserve shape and scallops. Re-block if needed after washing.
Info :
To add weight and reduce slippage on the bed, consider a lightweight cotton or linen lining sewn to the back of the joined motif grid, attached by hand to the inside seam allowances. This lining will not show through the windows if chosen in a complementary tone.
Completing this pink bedspread is a truly satisfying journey — each motif is like placing a small tile in a larger handmade mosaic. The textured puffs and lattice windows create an elegant, cozy piece that will transform any bedroom or living area. I love how the scalloped edge flows, giving the bedspread a romantic, handcrafted finish. 🧶💗 Take your time, enjoy the rhythm of the repeats, and celebrate each completed motif — your finished bedspread will be a cherished heirloom. 🌸✨