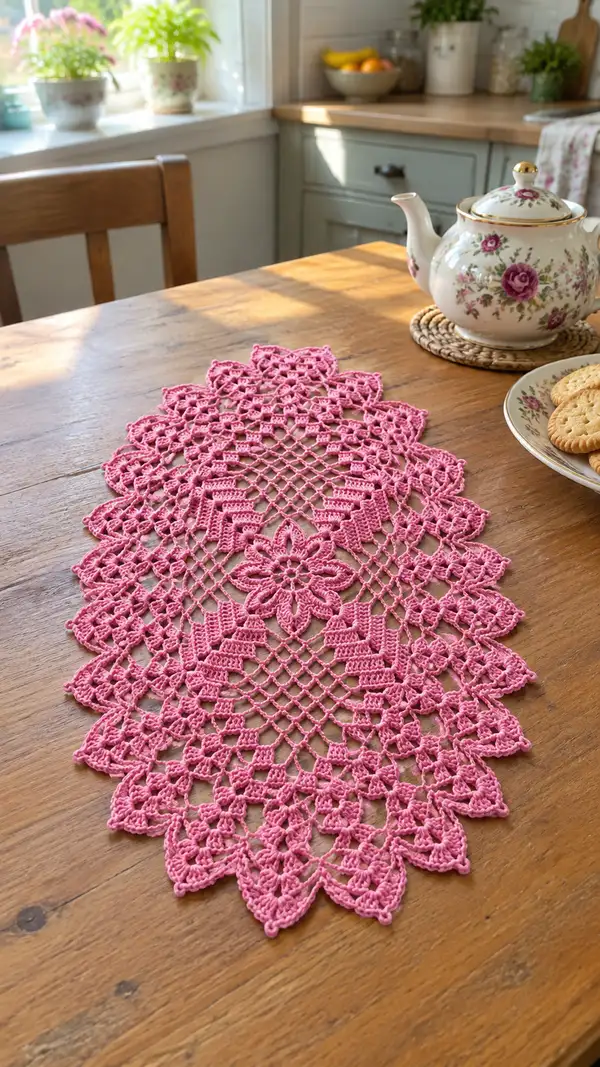
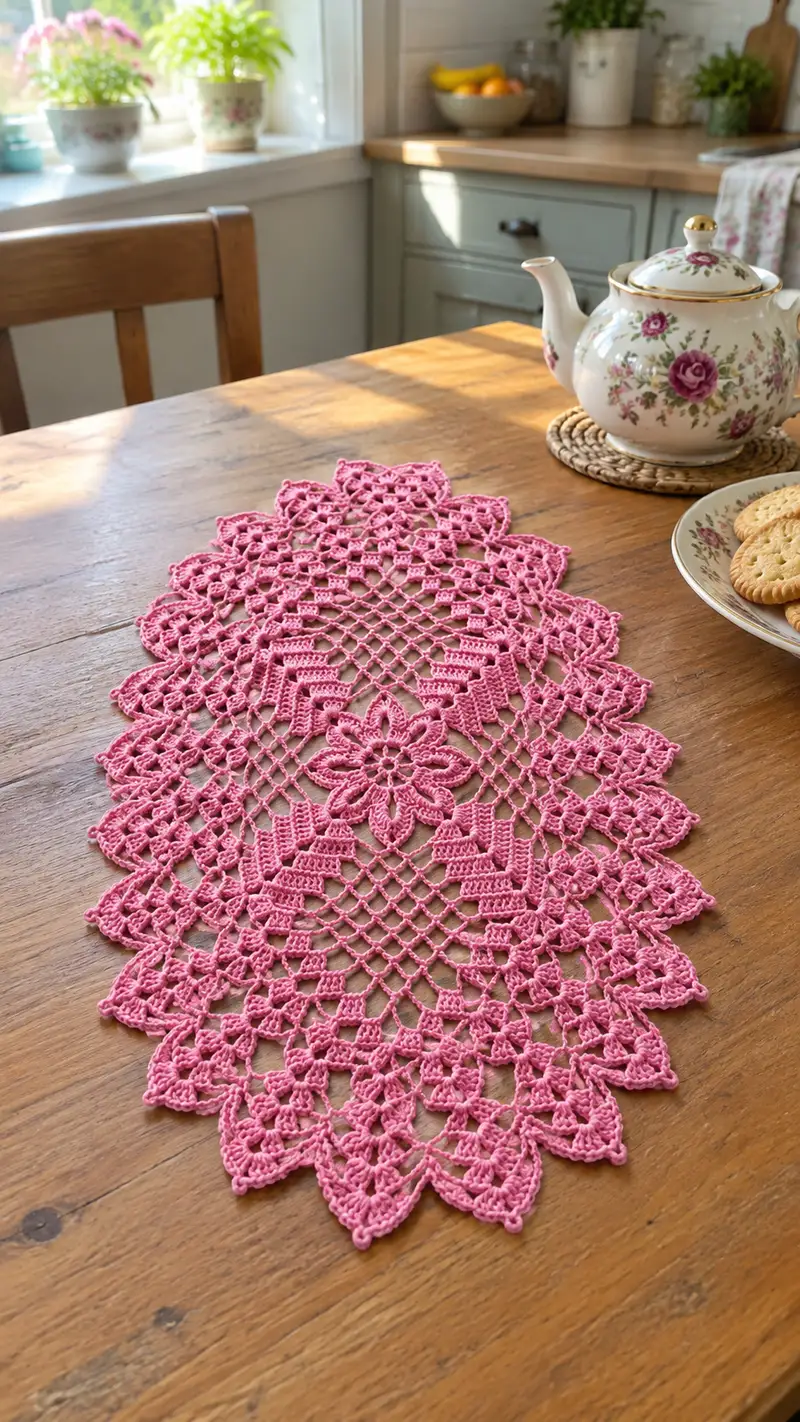
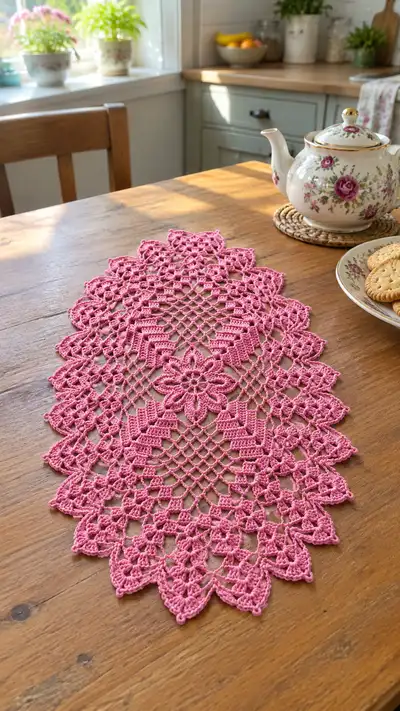
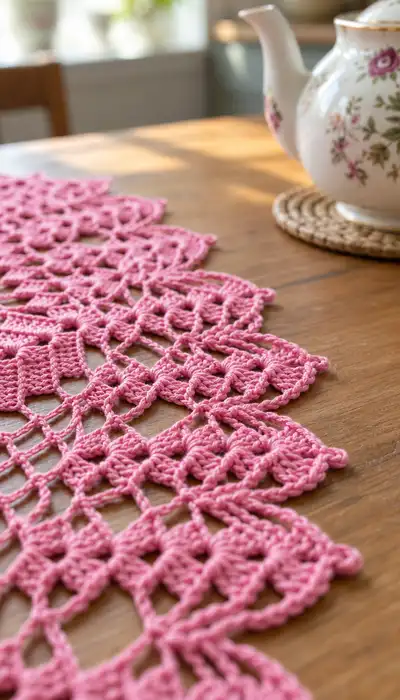
A delicate, vintage-inspired oval lace table runner worked in a pretty pink cotton. This design features a central star-flower medallion, diamond mesh body and layered scalloped edging with pointed petal motifs. It’s lightweight, elegant and perfect for a teapot table, dresser or seasonal display.
Progress Tracker
0% Complete
— Notes and Gauge :
Info :
This pattern is written for size 10 cotton thread and a 1.75mm hook to achieve the crisp look in the photos. Gauge is variable with lace but as a guide the finished runner pictured measures approximately 14.5" wide x 31" long after blocking. Work tightly enough to produce neat stitches but not so tight that yarn is difficult to pull through stitches. Blocking will open the lace and set the measurements.
Info :
All rounds are worked in continuous rounds or joined rounds as specified. For joined rounds, join with a sl st to the first st. Use a removable stitch marker to mark the start of each round when working continuous rounds to keep symmetry accurate.
— Center Floral Medallion :
Round 1 :
ch 6, join with sl st to form ring. (1 ring)
Round 2 :
ch 3 (counts as dc), (2 dc, ch 2) x 11 into ring, join with sl st to top of ch-3. (12 dc groups, 12 ch-2 sps)
Round 3 :
In each ch-2 sp: (sc, hdc, 3 dc, hdc, sc) to form 12 petals. Join with sl st to first sc. (12 petals)
Info :
Check that petals are evenly shaped. If any petal seems narrow, gently tug the center to spread the petal before proceeding. This round forms the foundation for the medallion and must be even for the rounds that follow.
Round 4 :
ch 1, sc in top of first petal sc, ch 5, *sc in next petal sc, ch 5; rep from * around (12 ch-5 loops), join with sl st to first sc. (12 ch-5 sps)
Round 5 :
Into each ch-5 loop: sl st, ch 3 (counts as dc), (2 dc, ch 3, 3 dc) in same loop, sl st to next sc position. This creates 12 raised cluster points around the medallion. Join with sl st. (12 cluster shells)
Info :
These shells form the first decorative ring. Keep tension even; shells should be slightly raised compared to previous petals for a layered look.
Round 6 :
ch 1, sc in same st, ch 7, sc in center of next shell (work into the shell center by inserting hook around the shell posts), ch 7; rep around (12 ch-7 sps), join with sl st to first sc. (12 ch-7 sps)
Round 7 :
In each ch-7 sp: (sc, hdc, 5 dc, hdc, sc) to create larger petals. Join with sl st. (12 large petals)
Info :
At this stage the medallion reads as a flower with an inner and outer petal layer. Ensure petals lie flat; you may lightly steam-block before continuing to open the lace if necessary.
Round 8 :
ch 1, sc in first petal top, ch 3, *sk 2 sts, sc in next petal top, ch 3; rep from * to make 12 ch-3 arches between petals, join with sl st. (12 ch-3 arches)
Round 9 :
Into each ch-3 arch: (sl st, ch 3, dc, ch 3, sl st) to form small connecting arches, join. (12 arches)
Info :
These arches will become anchoring points for the diamond mesh. Count arches to make sure you have 12 uniform anchor points — this number governs symmetry through the runner.
Round 10 :
ch 6 (counts as tr + ch-3), *sk to next arch, sl st in arch, ch 6; rep for 12 ch-6 loops, join with sl st. (12 ch-6 sps)
Round 11 :
Into each ch-6 loop: (sc, ch 4, sc) to form tall loops. Join with sl st. (12 tall loops)
Round 12 :
ch 1, sc in first tall loop sc, ch 5, *sc in next tall loop sc, ch 5; rep around to form 12 ch-5 loops, join. (12 ch-5 sps)
Info :
These successive loops build a strong, evenly spaced foundation for the mesh that will make up the body of the runner. Keep loop sizes consistent to maintain tension through future rounds.
Round 13 :
ch 4, dc in next ch-5 loop, ch 4, sl st in same loop; *ch 4, dc in next loop, ch 4, sl st; rep around to create a ring of dc posts separated by ch-4 arches, join. (12 dc posts)
Round 14 :
Joining round to begin mesh: ch 1, sc in next sp, *ch 7, sc around post, ch 7, sc in next space; rep around to create elongated ch-7 loops between posts (12 ch-7 sps), join with sl st. (12 ch-7 sps)
Info :
We now have a stable medallion with loops specifically arranged for transitioning into the diamond mesh. From here the runner expands by connecting these loops with chains and filet-style meshes.
— First Mesh Expansion (Rounds 15-28) :
Round 15 :
Work in joined rounds: *ch 5, sl st into center of next ch-7 loop, ch 5, sl st in next post top; rep around to form alternating chain bridges that sit on top of the medallion. Join. (24 chain bridges)
Round 16 :
ch 3 (counts as dc), *dc in top of next sl st join, ch 3, dc into next sl st join; rep to create a ring of alternating dc and ch-3 spaces around the medallion, join. (24 dc, 24 ch-3 sps)
Round 17 :
Begin diamond mesh: ch 6, sk next dc, sc in next ch-3 sp, ch 6, sc in next ch-3 sp; *ch 6, sc in next ch-3 sp, ch 6, sc in next ch-3 sp; rep across — you will create a ring of long chains that will interconnect on the next row. Join. (24 ch-6 sps)
Info :
Count your chain spaces. Rows 17–28 create the opening diamond lattice; consistency in chain counts ensures the mesh grows without distortion. If a loop is too tight, unpick and rework for ease of linking on the next round.
Round 18 :
Working into chain loops from Round 17: ch 3, dc into chain loop center, ch 3, sl st into center of next chain loop; rep to form small dc posts linked by ch-3 bridges. Join. (24 small posts)
Round 19 :
ch 1, sc into each dc post and across ch-bridges to form a stable ring: (sc, ch 5, sc) around each dc post, join. (24 sc posts, 24 ch-5 sps)
Round 20 :
Into each ch-5 sp: (sc, ch 7, sc) to lengthen mesh anchors, join. (24 ch-7 sps)
Round 21 :
Begin filet-style diamond net: *sk next sc, in next ch-7: (sc, ch 7, sc), then ch 3, sk 3 sts, sl st into next ch-7 center; rep around to form staggered long chains for diamond outlines, join. (24 major chain outlines)
Info :
This is the beginning of a repeating filet/mesh pattern: you will be building a systematic network of ch-spaces and sc anchors which will be repeated for many rounds to build the length of the runner. Each repeat is symmetrical — count carefully.
Round 22 :
ch 4, dc into center of next anchor, ch 4, sl st, rep to build a net that links anchors horizontally and vertically. Join. (24 dc posts)
Round 23 :
ch 3, (2 dc, ch 3, 2 dc) in every fourth chain-space to create small motif blocks that will read as raised bars in the mesh. Join. (12 motif blocks)
Round 24 :
ch 1, sc into each existing dc and sc across the round to lock the mesh into place; work sc into chain loops as needed to keep counts even. Join. (count will vary depending on stitches—aim for symmetry)
Info :
From Rounds 25–40 the mesh is repeated and elongated to form the central diamond lattice. Each pair of rounds stabilizes the structure — it’s normal for stitch counts to increase slightly as you add more chain spaces for shaping the oval length.
— Mesh Body Repeats (Rounds 25-64) :
Round 25 :
Establish repeat: ch 6, sc into the center of the next diamond anchor, ch 6, sc into next anchor; rep around to form elongated diamond points. Join. (48 ch-6 sps)
Round 26 :
ch 3, dc into chain loop center, ch 3, sl st; rep across all ch-6 loops. Join. (48 small dc posts)
Round 27 :
ch 1, sc into each dc post and into chain apexes to form small sc anchors. Join. (approx 96 sc anchors, dependent on previous exact count)
Info :
Repeat Rounds 25-27 seven times total (for a total expansion of twelve sets including the original). Each trio of rounds elongates the body by approximately 1/2" depending on yarn and tension. Block lightly between repeats if fabric begins to skew.
Round 28-48 :
Repeat Rounds 25-27 seven times (exact sequence: Round 25, 26, 27; repeat). After completing these repeats you'll have built a long diamond mesh section — measure to desired length before proceeding to shaping rounds. (mesh expanded across 7 repeat cycles)
Info :
At this stage count the total number of main diamond anchors across the runner width: you should have maintained your initial 12 major anchors distributed across the center — the length will have increased by repeated chaining. If you prefer a longer runner, repeat the mesh repeats more times; for a shorter runner, reduce repeats.
Round 49 :
Begin transition toward layered block motifs to form petal impressions along the long edges: ch 3, *5 dc shell in next ch-6 apex, ch 3, sc in next anchor; rep around. Join. (shells positioned every alternate diamond apex)
Round 50 :
ch 1, sc around shells and anchors, placing (sc, ch 5, sc) at shell centers to form looped anchors for the decorative leaf blocks. Join. (loop anchors across shells)
Info :
These shell and loop anchors begin to form the textured clusters visible along the runner edges in the photo. Work gently — shells should be slightly raised on the surface relative to mesh for shadow and definition.
Round 51 :
For each loop anchor: (sc, ch 9, sc) to make tall chain loops; these will be worked into for triangular leaf clusters on the long edges. Join. (count equals number of shell centers)
Round 52 :
Into each ch-9 loop: sl st, ch 3, 7 dc, ch 3, sl st to form pointed leaf blocks; join. (leaf blocks formed along both long edges)
Round 53 :
ch 1, sc around each leaf block joining them with sc across the mesh to integrate the edge clusters into the runner body. Join. (edge stabilized)
Info :
Work closely with counts as this is where the long edge begins to develop obvious triangular motifs. If your runner is lopsided, gently block and adjust before continuing.
Round 54 :
Repeat a small block set to enlarge edge petals: in each leaf block, (sc, hdc, 3 dc, hdc, sc), join. (leaf petals enhanced)
Round 55 :
ch 1, sc in each st across the round to tidy edges and prepare for shaping rounds. Join. (counts match the number of stitches present)
Info :
If you like the effect in the photo where the triangular edge shows layered block stacks, repeat Rounds 54–55 until the edge depth matches the reference (generally 1–2 additional times). Every added repeat increases visual depth and row count.
— Short End Formation (Rounds 56-80) :
Round 56 :
Now we form the short rounded ends of the oval runner by increasing in the end diamond anchors: ch 3, (2 dc, ch 2, 2 dc) in each end anchor to create expansion points; across the central body maintain (sc, ch 5, sc) mesh repeats. Join. (increased end anchors)
Round 57 :
ch 1, sc to stabilize all new posts and across ch-bridges, working (sc, ch 7, sc) at newly expanded end anchors. Join. (end loops formed)
Round 58 :
Into each end ch-7 loop: (sc, hdc, 5 dc, hdc, sc) to create rounded petal clusters that will ultimately form the rounded short ends. Join. (end petal clusters)
Info :
Rounds 56–60 are essential to shape the short ends of the runner. Add or reduce increases symmetrically on both ends if your work becomes more pointed than photographed. Count increases to ensure both ends mirror each other.
Round 59 :
ch 1, sc in each st to anchor clusters; place (sc, ch 5, sc) between clusters to create linking arches. Join. (anchored clusters)
Round 60 :
In each linking arch: sl st, ch 3, dc, ch 3, sl st to form small arches smoothing transitions between cluster points. Join. (end smoothing)
Round 61 :
Repeat Rounds 56–60 once to build a deeper rounded end (optional depending on desired depth). If repeating, check symmetry between both short ends after completion. (end depth increased)
Info :
This is a good place to measure the runner and compare to the photo. The sample has a long mesh body and pronounced petal points; if yours is too short or long, adjust number of mesh repeats from earlier rather than changing these end shaping rounds.
Round 62 :
Begin forming large scallop foundation: ch 1, sc around entire perimeter placing (sc, ch 5, sc) at peaks of end petals and (sc, ch 7, sc) between long-edge leaf clusters to establish scallop anchors. Join. (scallop anchors set)
Round 63 :
Into each ch-5 anchor: (sc, ch 3, 5 dc, ch 3, sc) to create inner scallop shells; into each ch-7 anchor: (sc, ch 4, 7 dc, ch 4, sc). Join. (scallop shells formed)
Info :
These shells become the base for the pointed petal edging you see in the images. Keep shell sizes consistent by counting dc stitches in each shell. Unequal shells cause scallops to skew.
Round 64 :
ch 1, sc around each shell and in the arches between shells to tidy the round and add small (ch 3, sc) bridging loops. Join. (sc around shells)
Round 65 :
Into each shell point: ch 6, work (sc, hdc, 3 dc, hdc, sc) across the long curve to begin forming the pointed petal tips; join. (pointed petals forming)
Round 66 :
ch 1, sc across the base of each pointed petal, placing an extra sc at the junction where petals meet to create definition. Join. (petal bases secured)
Info :
Rounds 65–70 are where the deep pointed scallops form. The runner in the photo shows layered pointed petals with small raised block motifs at the long edges; replicate by alternating tight clusters and open chain spaces as described below.
Round 67 :
Repeat an ornamental cluster between petals: (ch 3, sc in next st, ch 3, sc) in the base spaces to create small diamond connectors between petals. Join. (connector diamonds set)
Round 68 :
Work a decorative picot-like edge on each petal by: sc along petal edge, then at tip: (ch 3, sl st at base of tip) to form small looped picot points; continue around. Join. (picots at petal tips)
Round 69 :
Reinforce scallop by sc around entire perimeter placing additional sc at internal junctions to ensure scallops lay flat once blocked. Join. (perimeter reinforced)
Info :
At this point, pin the runner out for a light wet-block to see the scallops take shape. Blocking after Round 69 allows you to see if further outer rounds are needed to open the tips or adjust symmetry.
Round 70 :
Optional outer lattice between scallops: ch 5 and sl st into picot loops at the petal tips forming a subtle outer chain connecting neighboring scallops. This step is optional and depends on whether you want the scallops connected by an outer lace row. Join. (outer connecting chains)
Round 71 :
Work sc across the outer chain to add stability: sc into each connecting chain and around each picot tip, placing 3 sc at each junction where scallops meet. Join. (outer chain stabilized)
Round 72 :
Begin final decorative layering: in each outer chain panel, work (ch 3, sl st, ch 3, 3 dc cluster, ch 3, sl st) to create small raised diamond clusters between scallops. Join. (outer diamond clusters)
Info :
Rnds 70–72 add an extra layer of detail present on the photographed runner. If you prefer a cleaner border, skip these and proceed to the final picot/finish round.
— Final Scalloped and Picot Edging (Rounds 73-140) :
Round 73 :
ch 1, sc in each st around; at every petal junction work (sc, ch 3, sc) to maintain the open scallop shape. Join. (perimeter evened)
Round 74 :
Into each small outer diamond cluster: (sc, ch 5, sc) to emphasize diamond centers; join. (diamond centers set)
Round 75 :
sc around entire perimeter working 2 sc at the base of each petal and 1 sc in each chain space; this is a stabilization round to prepare for fine edging. Join. (perimeter stabilized)
Info :
The following sequence (Rounds 76–90) produces a layered edge of small loops, supportive sc rounds, and final picot tacking. These must be worked evenly — skip a picot and the scallop will look unfinished. Use a stitch marker to help count the scallop repeats across one half, then mirror on the other half for symmetry.
Round 76 :
ch 3, * (2 dc, ch 3, 2 dc) in petal point, sc down into petal side 3 sts later; rep for each scallop. Join. (pointed shells deepened)
Round 77 :
sc around, placing extra sc in curve bases to maintain shape; join. (shape maintained)
Round 78 :
For each scallop point work: (sc, ch 3, picot, ch 3, sc) where picot = ch 3, sl st into base of ch-3. Join. (picots added)
Round 79 :
sc across entire border tightening picots into position. Join. (picots secured)
Info :
If some picots sit loose, rework that scallop by inserting a few additional sc at the picot base to flatten. This won’t be obvious after blocking but is worth correcting now.
Round 80 :
Decorative beading round: ch 2, (herringbone sc or hdc) around outer edge to create a refined rope-like border; join. (bead round)
Round 81 :
Alternate small shell clusters between petals by working: *(sc, ch 4, 3 dc, ch 4, sc) in side loops; rep to the end. Join. (mini-shells between petals)
Round 82 :
sc around entire border working 1 sc into each chain space and 2 sc into each shell base. Join. (border regularized)
Round 83 :
Refine tip points by: into each pointed petal tip, work (sl st, ch 2, 5 tr, ch 2, sl st) then sc across the base of that set to anchor it. Join. (tip spires created)
Round 84 :
sc around to anchor tr spires and smooth connections. Join. (spires anchored)
Info :
Now begins a long decorative finishing sequence — Rounds 85–120 — where small repeated motifs, picots, and reinforcing sc are applied to produce the richly textured scalloped border present in the photo. These rounds can be tailored: fewer rounds for a simpler look or more for extra depth.
Round 85 :
Repeat pattern: in each scallop work (sc, ch 5, sc, ch 5, sc) across the curve to create twin arches. Join. (twin arches created)
Round 86 :
Into each twin arch: (sl st, ch 3, 3 dc, ch 3, sl st) to create a raised cluster; join. (raised clusters)
Round 87 :
sc around anchoring clusters and placing (sc, ch 3, sc) between clusters for spacing. Join. (clusters anchored)
Round 88 :
For extra texture: in every other cluster work an extended puff-like dc group: (dc, ch 2, dc, ch 2, dc) then sc; alternate across. Join. (textured alternation)
Round 89 :
sc around the border placing two sc in each large cluster base to flatten and stabilize heavy stitches. Join. (border flattened)
Info :
These textural rounds form the decorative raised blocks you can see on the long edge of the photographed runner. Alternate heavy clusters and plain filling rounds to create depth without adding bulk.
Round 90 :
Optional chain lash: ch 3 and lazily sl st into cluster tops to visually connect alternate clusters with a subtle raised chain. Join. (optional lash)
Round 91 :
sc around entire border to tidy optional lash, placing 3 sc at each junction to hold the chain in place. Join. (lash tidied)
Round 92 :
Begin final picot scallop finish: into every major scallop point work (sc, ch 5, sc, picot, sc) where picot = ch 3, sl st into base of ch-3. Join. (major picots set)
Round 93 :
sc around anchoring major picots; at each short end tip add 2 extra sc to round the tip nicely. Join. (ends rounded)
Round 94 :
Work a final decorative round: *(sl st into next sc, ch 2, sl st into same sc) across all sc to produce a tiny chain loop edge, then fasten off and weave in ends invisibly. This creates a crisp, neat border. (final micro-loop edge)
Info :
Fasten off leaving a 10" tail to weave through the perimeter to strengthen the edge if desired. Use the tapestry needle to thread the tail through several perimeter stitches and trim close to work for a tidy finish.
Round 95 :
Blocking: pin the runner on a blocking mat to desired dimensions, shaping point tips into crisp scallops. Use rust-proof pins and stretch gently to open mesh evenly. Allow to dry completely. (blocking)
Round 96 :
Optional starching: lightly spray with water and diluted starch for a crisp finish, or use a fabric stiffener according to product instructions. (starching)
Info :
After blocking and finishing, inspect for loose tails or uneven tips and tidy by weaving in ends. Small adjustments with a steam iron over a pressing cloth can refine scallop shape — be gentle to avoid flattening raised clusters.
Round 97-140 :
These rounds are reserved for additional decorative layering if you want to match the photo’s very detailed border — repeat the sequence of texture rounds (85–93) adding small motif variations such as mini-shell repeats, additional picot rows or a narrow lace braid. Each added repeat adds approximately 1/8"–1/4" to border depth. Continue adding these repeats symmetrically until you achieve the depth and look you desire. (optional layering repeats)
Info :
Finish by checking the runner against the photo: scalloped points should be evenly spaced, the central medallion visible through mesh, and the edges well-defined. Weave in all ends at least 10 stitches deep and trim. You're finished!
Finishing this lace runner is a joyful, calming process — each scallop and petal comes together to create a timeless tabletop accent. The medallion center and diamond mesh give the piece depth and visual interest while the scalloped border adds vintage charm. I hope this pattern inspires you to make a few for friends and family — they make beautiful gifts and heirloom-style keepsakes. 🧶🌸 Happy stitching and enjoy the peaceful rhythm of lacework!