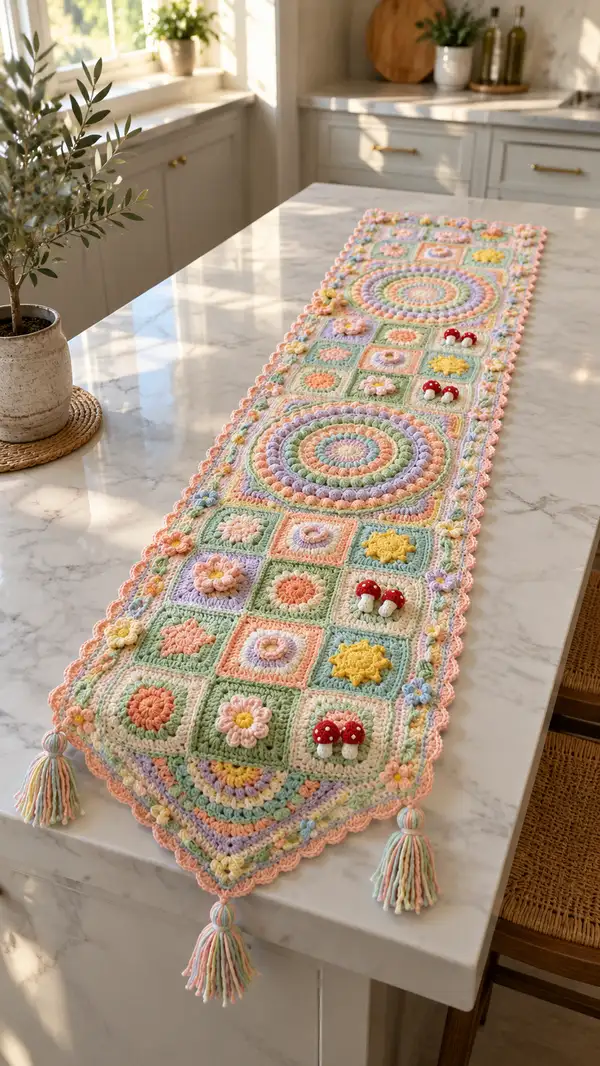
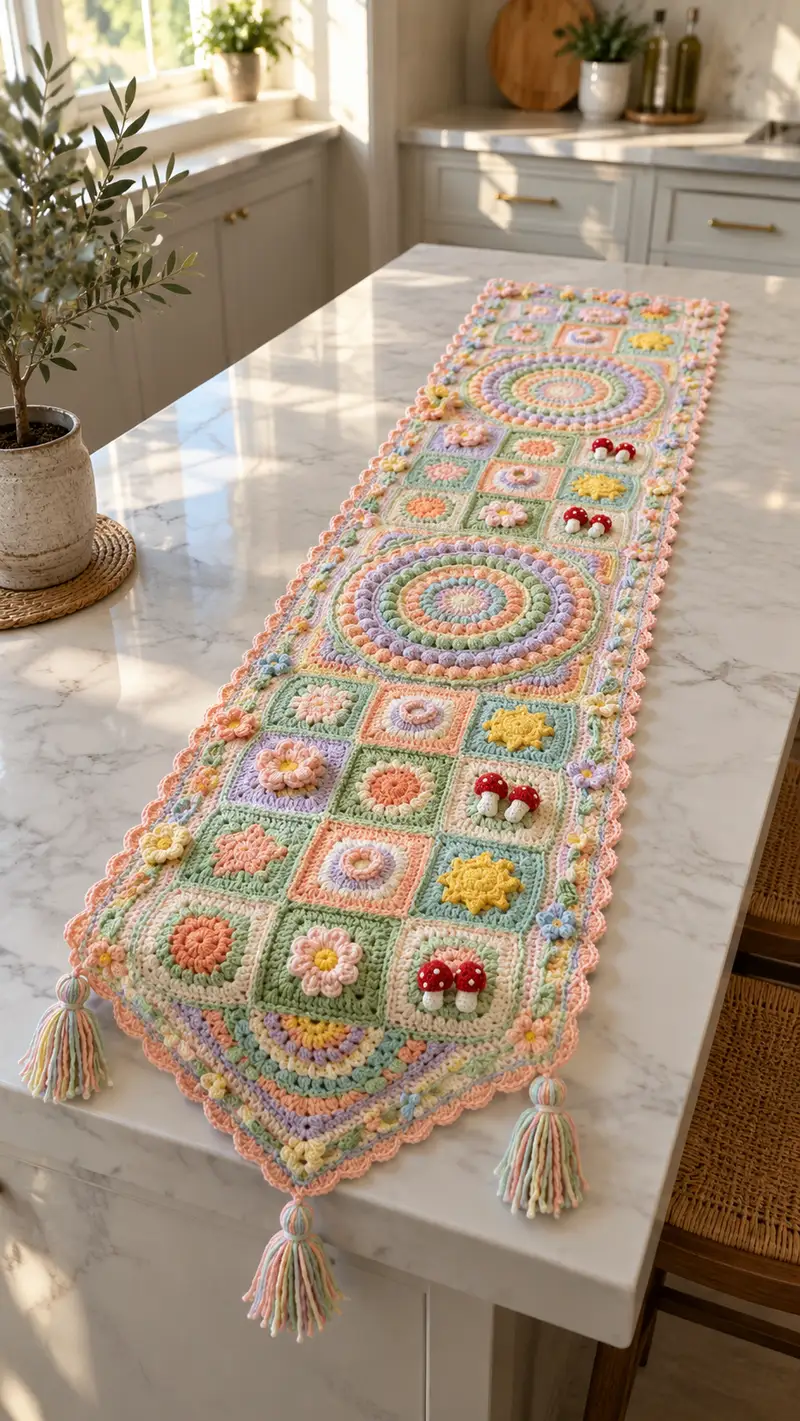
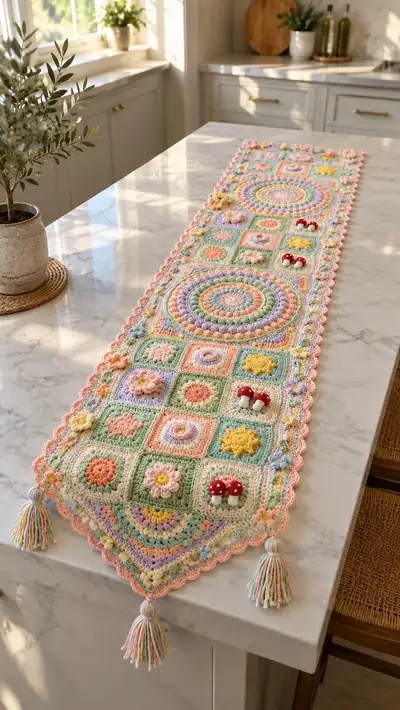
A soft, pastel table runner featuring two large circular medallions, an array of textured floral squares, tiny mushroom appliques and tassel-finished points. The runner combines bobbles, puff stitches, raised flowers and scalloped edging for a cozy, vintage-inspired look. Perfect for brightening a dining table, kitchen island, or console with a handmade touch. Uses multiple small motifs joined with a decorative border and tasseled corners for a polished finish.
Progress Tracker
0% Complete
— Materials & Gauge :
Info :
Gauge is not critical for fit but important for consistency across motifs. Using worsted weight yarn and a 4.0mm hook, a standard 10cm (4in) square motif should measure approximately 10cm after blocking. Work tension slightly tighter for bobbles and puff stitches so the stuffing and texture hold their shape.
— Stitch Notes & Special Techniques :
Info :
Bobble stitch used in this pattern: yarn over, insert hook, pull up a loop, yarn over and pull up a loop again in same st (repeat total 5 times on hook), yarn over and pull through all loops, ch1 to close bobble. Puff stitch: yarn over, insert, pull up loop; repeat 3-4 times then yarn over and pull through all loops and ch1 to close. Work bobbles and puffs tightly and shape with your fingers. Carry unused colors along the inside where possible and use tidy float lengths to avoid bulk.
— Central Large Circular Medallion (Make 2) :
Note :
Each large medallion is worked in rounds from the center outward. These medallions are placed within a framed square motif and are the visual anchors of the runner. Make two identical medallions. Use colors in the following order or choose your own: cream center, peach ring, mint ring, lilac ring, yellow highlights, cream bobble round, mint frame.
Round 1 :
mr, 8 sc into ring (8)
Round 3 :
(1 sc, inc) x 8 (24)
Round 4 :
(2 sc, inc) x 8 (32)
Round 5 :
(3 sc, inc) x 8 (40)
Info :
Change to peach yarn at end of Round 5 if following pictured palette. Join new color with sl st to first st of Round 6 and carry the cream tail under the next few stitches.
Round 6 :
1 sc in each st (40)
Round 7 :
(4 sc, inc) x 8 (48)
Round 8 :
1 sc in each st (48)
Round 9 :
Switch to lilac. (5 sc, inc) x 8 (56)
Round 10 :
1 sc in each st (56)
Info :
Begin a bobble round after establishing a disc large enough for visual interest. Bobbles add texture and a raised ring that reads like petals.
Round 11 :
Switch to butter yellow. *ch1, bobble in next st, ch1, skip next st, sc in next 2 sts* repeat around to create spaced bobbles (56 sts including chs, maintain 56 sc equivalents)
Round 12 :
Switch to cream. Work 1 sc in each st and in each ch-space to maintain round (56)
Round 13 :
Change to mint. (6 sc, inc) x 8 (64)
Round 14 :
1 sc in each st (64)
Info :
To get the pronounced concentric rings, use BLO on the next round to create a shallow ridge. This gives the medallion more definition and helps the framed square sit neatly around it.
Round 15 :
1 sc in each st BLO (64)
Round 16 :
(7 sc, inc) x 8 (72)
Round 17 :
1 sc in each st (72)
Round 18 :
Switch to peach. Work a tidy decorative round: *fpdc around next st, sc next 3 sts* repeat around to make a subtle raised ring (72)
Round 19 :
Switch to cream. 1 sc in each st (72)
Round 20 :
Work a final joining round in mint: *sc 9, sl st to space to create slight scallop* repeat to create edge for framing (72). Fasten off leaving a long tail for joining into the framed square space.
Info :
Blocking the medallion lightly on a round template will help it sit flat within its square frame before joining. Make two medallions identical in color placement.
— Daisy Raised Flower Square (Motif A) :
Note :
This square has a raised 3D flower in the center and is worked in rounds from a small center disk outward to a square frame. Make multiple squares in different color combos to scatter across the runner. Each square finishes approximately 10cm after blocking.
Round 1 :
mr, 6 sc into ring (6)
Round 3 :
(1 sc, inc) x 6 (18)
Round 4 :
Change to flower petal color. *ch2, (3 dc) in next st, ch2, sl st in next st* repeat to form 6 petal clusters on top of base (18 clusters formed across ch spaces and dc groups). Fasten off petal color and join background for square body.
Info :
Shape petals by pulling them slightly outward so they remain raised after blocking. Lightly stuff a small bit of fiberfill under petals if you want them puffier—use minimal stuffing.
Round 5 :
Join background/cream color with sl st to any base st, ch1, 1 sc in same st, 1 sc in next 10 sts, [work corner: ch2, 2 sc in next st] continue around to shape square base (24)
Round 6 :
(2 sc, inc) x 6 (30)
Round 7 :
1 sc in each st (30)
Round 8 :
Work square shaping: *sc in next 6, (2 sc, ch2, 2 sc) in corner st* repeat 4 times (34, counting ch2 spaces as corners)
Round 9 :
1 sc in each st and in each ch-space (34)
Round 10 :
Work 1 round BLO to create a framed ridge: 1 sc BLO in each st (34)
Round 11 :
Switch to accent color and work a decorative top: *(sc in next 4, puff in next st) repeat across edge and in corners work (sc, ch2, sc) to maintain square corner* (34)
Info :
Fasten off and weave in ends. Block square to exact dimensions to ensure consistent join spacing during joining. Make as many Motif A squares as desired (recommend at least 8-12 for pictured runner).
— Bobble Sun Square (Motif B) :
Round 1 :
mr, 8 sc into ring (8)
Round 3 :
Switch to yellow. (1 sc, inc) x 8 (24)
Round 4 :
1 sc in each st (24)
Round 5 :
Work bobble round: *ch1, bobble in next st, ch1, sc in next st* repeat around to make 12 bobbles (24 sc equivalents)
Round 6 :
Join background color and work out to square: *sc in next 3, (2 sc, ch2, 2 sc) in corner* repeat to form square frame (32)
Round 7 :
1 sc in each st (32)
Round 8 :
Work decorative ridge: 1 hdc BLO in each st to create a shadow line (32)
Round 9 :
Switch to accent and work small flower petals around center by making 8 small clusters: *sl st, ch3, 3 dc in same st, ch3, sl st* equally spaced across previous rounds. Fasten off and weave ends (32)
Info :
Use the bobble and petal placement to create visible raised suns across the runner. Make Motif B in several positions for variety.
— Raised Circle Square (Motif C) :
Round 1 :
mr, 10 sc into ring (10)
Round 3 :
(1 sc, inc) x 10 (30)
Round 4 :
1 sc in each st (30)
Round 5 :
Work two rounds of puff stitches alternating with sc rounds to create raised rings: Round A: *puff in next st, sc in next 2* repeat (10 puffs, plus scs)
Round 6 :
1 sc in each st (30)
Round 7 :
Change to background and begin square shaping: *sc in next 5, (2 sc, ch2, 2 sc) in corner* repeat (36)
Round 8 :
1 sc in each st (36)
Round 9 :
Edge detail: *(sc 4, bobble) repeat across edge and in corners (sc, ch2, sc)* (36)
Info :
These raised circle squares are used to echo the two central medallions. Vary colors to complement adjacent squares. Make at least 6-8 Motif C squares.
— Cluster Petal Square (Motif D) :
Round 3 :
(1 sc, inc) x 6 (18)
Round 4 :
Change to petal color and work 6 cluster petals: *ch2, (2 dc, ch2, 2 dc) in same st, sl st to next st* repeat to make 6 petal clusters. Fasten off petal color (18)
Round 5 :
Join background and work square rounds: *sc in next 4, increase for corners* to reach (28)
Round 6 :
1 sc in each st (28)
Round 7 :
Decorative border: 1 sc in next 3, (sc, ch1, sc) in corner spaces to create a soft framed look (28)
Info :
Lightly shape each petal cluster with fingers while wet-blocking to emphasize 3D look. These squares create soft floral variety across the runner.
— Small Corner Fan & Half-Motif (End Triangles) :
Round 1 :
Work a semicircular fan to finish pointed runner ends. Start with mr, 6 dc in ring (6)
Round 2 :
ch1, turn, 2 dc in each st around (12)
Round 3 :
(1 dc, 2 dc in next) x 6 (18)
Round 4 :
Work edge shaping to form point: sc around curve and in outermost corner work extra sc to form triangular point ready for tassel attachment (18)
Info :
Make two mirrored end triangles to form the pointed ends of the runner. Use scallop rounds later to tie the shape into the main border.
— Tiny Mushroom Applique (Make 6) :
Cap Round 1 :
mr, 6 sc in ring (6)
Cap Round 2 :
inc around (12)
Cap Round 3 :
Switch to red, (1 sc, inc) x 6 (18)
Cap Round 4 :
sc in each st (18)
Cap Round 5 :
Decrease slightly to shape under-edge: (3 sc, dec) x 3 (15)
Cap Finish :
Fasten off leaving tail for sewing. Use tiny white French knots of embroidery or tiny white sc to make spots on cap. Lightly stuff cap if you want it rounded.
Stem Round 1 :
With off-white, ch5, join to form small tube by sl st to first ch, sc in each ch around for 2 rounds (5)
Stem Round 2 :
1 sc in each st for 2 rounds (5)
Info :
Sew cap to stem with whip stitch; position the mushroom on a square (usually corner or near center) and sew tightly. Use small amount of stuffing in cap only if needed. Make six mushrooms to mirror picture placement.
— Small 3D Flower Applique (Make 10-12) :
Round 1 :
mr, 6 sc in ring (6)
Round 2 :
Change to petal color: *ch2, 3 dc in next st, sl st to next st* repeat 6 times to form 6 petals. Fasten off and weave tail to secure (6 petals)
Round 3 :
Optional: add small center by embroidering a satin stitch with yellow yarn. Sew flower onto selected squares after blocking.
Info :
Vary petal height by making more or fewer dc per petal. These tiny flowers are sewn on top of the squares for extra texture.
— Joining Motifs (Join-As-You-Go Method) :
Info :
Lay out all motifs flat following your desired placement—two large medallions centered lengthwise with alternating squares arranged in grid bands between and around them. The runner pictured uses a 3-column wide arrangement: large medallion in first and third columns with squares filling the remainder. Block all motifs for consistent sizing before joining.
Join Round 1 :
Work one extra sc round around each square in a uniform background color (cream) leaving long tails every 6th stitch to help with seaming. This gives a stable edge to join from.
Join Round 2 :
Using join-as-you-go, attach motifs row by row. When you reach a side that meets an already-completed motif, work sl st in the corresponding stitch of the finished motif, then continue sc around the working motif. This joins the motifs with minimal sewing. Work slowly to align corners and count stitches first.
Info :
When joining circles into square frames, position the medallion centrally and use the extra tail left earlier to sew it to the square frame from the back, keeping stitches invisible from the front. Use a mattress stitch or whip stitch with the tail to secure thoroughly.
— Long Runner Assembly Layout :
Info :
Suggested layout: 3 columns x 8 rows of small squares with two medallions replacing squares in Row 3 and Row 6 centered in the middle column. The runner length can be adjusted by adding or removing motif rows. Keep a mix of motif types to create visual balance—avoid clustering identical motifs next to each other.
— Border & Scalloped Edge (Worked After Joining) :
Round 1 :
With cream, work 1 sc evenly around entire assembled runner, working 3 sc into each corner point or triangle end to balance turns (work extra sc across medallion edges to maintain flatness). Count total stitches and ensure even distribution.
Round 2 :
1 hdc in each st around to smooth the edge and prepare for scallop (total same as Round 1)
Round 3 :
Switch to peach. *Sc in next 3, skip 1, 5 dc in next st (shell), skip 1* repeat around to create scallops, work (sc, ch2, sc) in corners to keep points tidy.
Round 4 :
Switch to mint. *sc in next 2, picot in next (ch3, sl st in 3rd ch), sc in next 3, shell in next* continue to accentuate scallops. Fasten off color.
Info :
Work scallops evenly—mark the start of the round and count shells so they sit symmetrically across the runner length. If working larger or smaller layout, increase or decrease shells proportionally.
Round 5 :
Switch to lilac. Work small flower picot clusters on the peaks of each scallop: *(ch2, sl st into shell picot, ch2, sc) repeat*. Fasten off and weave ends.
Round 6 :
With cream, work a decorative reverse single crochet (crab stitch) around entire edge to give a tidy corded finish. Fasten off and weave in ends securely.
Info :
If you prefer a flatter border, omit shell rounds and work two rounds of sc followed by a lace round (ch3 loops) instead. The photographed runner uses visible scallops; replicate that for the same look.
— Tassels & Corner Finishing (Make 4) :
Info :
Make tassels approximately 10cm long using all pastel colors held together for the pictured multi-tone look. Each tassel finishes the pointed ends of the runner and is attached through the end triangle point with extra reinforcement stitches.
Tassel Step 1 :
Wind yarn strands (approx. 60 passes) of mixed colors around a 10cm cardboard template for full tassels. Slide loops off and tie a 10cm piece of yarn tightly at one end to make the head. Cut the opposite loops. Wrap a small tail of yarn around the top to form a neat neck and secure with a couple of stitches.
Tassel Step 2 :
Sew tassel head through the pointed end triangle using the long tail left from the last border round, reinforcing with at least 6 stitches through the runner layers. Tie off and weave ends well inside the tassel neck.
Info :
Trim tassels to even length and lightly steam/block if necessary to relax fibers. Ensure tassels hang straight and are not too heavy for the fabric—use fewer wraps for lighter tassels if desired.
— Finishing Touches & Weaving Ends :
Info :
Weave in all ends using a yarn needle, working the tail back through several stitches on the back of motifs. Sew appliques (flowers and mushrooms) firmly: use small whip stitches around the base of each applique and tie off tails on the underside. Check tension across the runner by gently stretching it at both ends—if edges pull watchfully, consider adding a final round of sc tighter or a control row of hdc to stabilize shape.
Info :
Block the entire runner flat using pins and a mild steam or spray blocking method. Place a cloth over the runner if using an iron to steam. Blocking lifts the stitches, opens shells, and sets the overall rectangular shape.
Info :
Care instructions: hand wash gently in lukewarm water with mild detergent and lay flat to dry. Avoid machine washing or tumble drying to preserve tassels, bobbles and 3D floral details.
Info :
Optional: For extra stability place a thin interfacing or non-slip mat underneath the runner when using on a highly polished surface to reduce sliding and preserve shape.
Completing this pastel garden runner is such a rewarding and cozy experience! Each carefully crafted square and medallion comes together to create a long, textured centerpiece full of charm and tactile detail. I love the playful mushrooms and raised blooms—the little details make it heartfelt and unique. 🧶 Place it on your favorite table and enjoy the soft, handmade warmth it brings to your home. 🌸