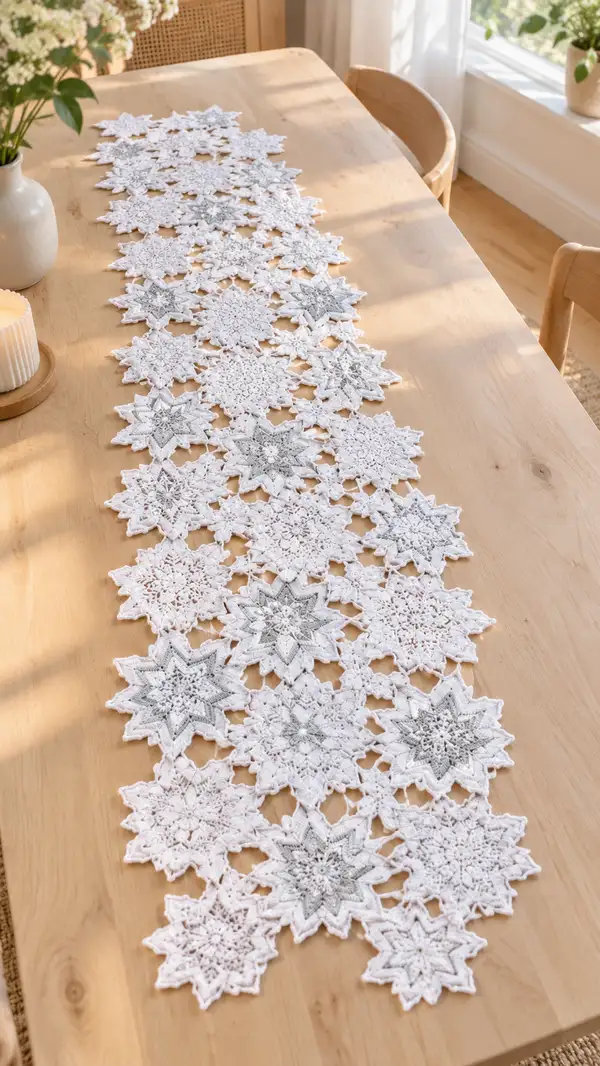
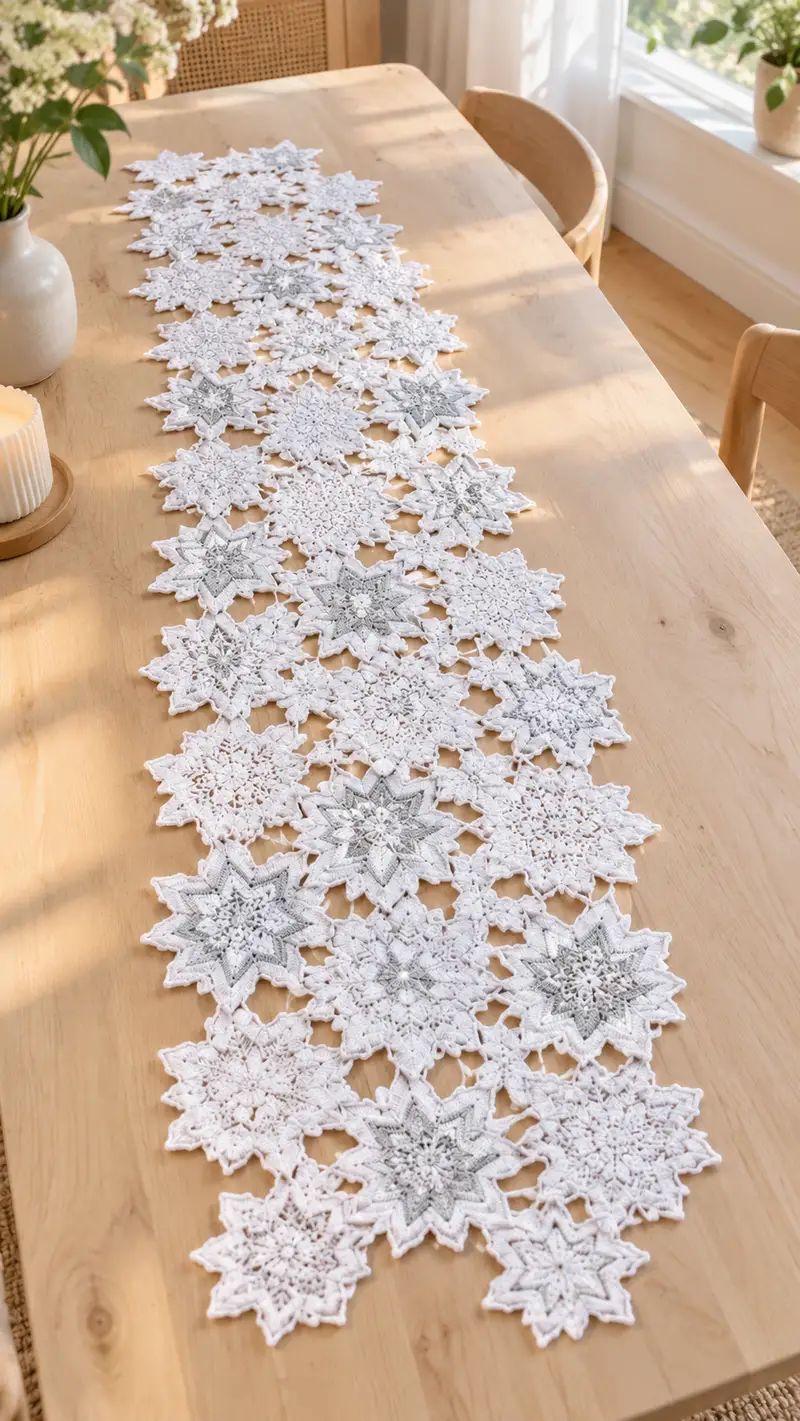
Create a delicate snowflake lace table runner made from interlocking star motifs in crisp white with subtle silver centers. This elegant runner is perfect for holiday or year-round decor, featuring openwork petals, pointed star tips, and a soft scalloped edge. The pattern includes three motif sizes, detailed stitch-by-stitch rounds, and clear join-as-you-go and finishing instructions. Designed to lay flat on a dining table, this runner creates a handmade heirloom with beautiful texture and light-catching detail.
Progress Tracker
0% Complete
— Overview :
Info :
This pattern creates three motif sizes (Large, Medium, Small) assembled in a staggered grid to form a long table runner. All motifs are worked in the round from the center outward using cotton yarn and a small hook for crisp definition. Use a stitch marker to mark round starts. Block each motif prior to joining for best results. Join motifs with a join-as-you-go slip-stitch method described later, or sew them with matching thread.
— Legend & Special Stitches :
Info :
Puff stitch (3-loop puff): yarn over, insert hook, yarn over and pull up loop (repeat 3 times to have 7 loops on hook), yarn over and pull through all loops, ch1 to close puff. Picot: ch3, sl st into first ch. Invisible decrease: insert hook into front loop of next two sts and complete sc2tog for smooth finish.
— Large Snowflake Motif :
Round 1 :
8 sc in magic ring (8)
Round 3 :
(1 sc, 1 inc) x 8 (24)
Round 4 :
(2 sc, 1 inc) x 8 (32)
Round 5 :
(3 sc, 1 inc) x 8 (40)
Info :
Maintain even tension. At this stage the circle is the tight foundation for lace rounds; do not over-tighten increases or the center will pucker.
Round 6 :
(4 sc, 1 inc) x 8 (48)
Round 7 :
(5 sc, 1 inc) x 8 (56)
Round 8 :
(6 sc, 1 inc) x 8 (64)
Round 9-10 :
1 sc in each st (64)
Info :
Rounds 9-10 create a solid base round before lace arches. Place a stitch marker at the first stitch of Round 9 so you always know center alignment when making points.
Round 11 :
*1 sc in next 6 sts, ch4, sk 2 sts, sl st in next st* x 8 around (64 anchors, 8 ch4 loops)
Round 12 :
Work into each ch4 loop: (sc, hdc, 3 dc, hdc, sc) in ch4 loop to form petal (8 petals). Sl st to join. (each petal worked in loop, stitch count anchored to 8 petals)
Info :
Make petals even by working same tension on each cluster. Use a stitch marker after you complete the first petal to check symmetry.
Round 13 :
Ch3 (counts as dc), (2 dc, ch2, 3 dc) in base between petals to form small points, sl st to join (8 points)
Round 14 :
*Ch5, sl st into tip of next petal (creates open LACE arch), ch3, sk to next space* repeat around to create 8 wide arches
Round 15 :
Into each ch5 arch: sc, hdc, 5 dc, hdc, sc (creates fuller star points). (Work 8 star points)
Info :
If you prefer a denser center, replace 5 dc with 7 dc. Keep counts consistent across each point to maintain an 8-point star.
Round 16 :
*At point tip: ch3, 1 puff stitch (3-loop puff) anchored in tip, ch3, sl st back to base of puff; sk along foundation to next point base* repeat 8 times (adds textured raised tips)
Round 17 :
Work a round of small connecting arches: *ch4, sl st into between-point space* x 16 (creates smaller spaces for later joining)
Round 18 :
Into each ch4 arch: sc, ch3, sc (creates chain loops that will become joining anchors). (16 loops)
Info :
At this stage the motif measures approximately 9-10cm across with the hook and yarn specified. Block to measured diameter and pin points sharply for crisp edges before continuing.
Round 19 :
*Between two adjacent star points on the outer edge: sl st to outermost dc, ch6, sl st back to next outermost dc* repeat 8 times (forms elongated arches between points)
Round 20 :
Into each ch6: (sc, ch3, sc, picot) to create decorative tiny scallops along star edges (8 scalloped points plus picot tips)
Round 21 :
*Ch2, sl st around the base of each picot to create a small raised ridge, then sc in next two base sts* repeat around to tidy edge and secure picots
Info :
If you want to add accent color at centers, change to silver yarn at the end of Round 10 before Round 11 and work Rounds 11-15 in silver. Carry unused yarn loosely along the back and catch in occasional stitches to avoid long floats.
Round 22 :
Work a finishing round of sc evenly along all exposed edges, placing 2 sc in larger spacing and 1 sc in tighter spaces to maintain flatness. Count should average to 64 base anchors adjusted by sc placements.
Round 23 :
Fasten off and weave in ends. Block motif flat, pinning star tips sharply and measuring to match other large motifs.
— Medium Snowflake Motif :
Round 1 :
8 sc in magic ring (8)
Round 3 :
(1 sc, 1 inc) x 8 (24)
Round 4 :
(2 sc, 1 inc) x 8 (32)
Round 5 :
1 sc in each st (32)
Info :
Medium motifs are slightly smaller to allow alternating pattern placement. Keep tension consistent with large motifs so motifs block to harmonious sizes.
Round 6 :
*Ch4, sl st into next st* x 8 around to create 8 chain arches
Round 7 :
Into each ch4: sc, 3 dc, sc (8 petals)
Round 8 :
*At top of petal: ch3, picot, ch3, sl st into next petal top* x 8 to make small lace joining arches
Round 9 :
Work (sc, ch3, sc) into each ch3 arch to make 8 small loops
Round 10 :
Form star tips: into each loop work (sc, hdc, 3 dc, hdc, sc) creating 8 compact points
Round 11 :
Ch2, *sl st into tip of point, ch5, sl st into next tip* around to create connecting loops (8 loops)
Round 12 :
Into each ch5: sc, ch3, sc to produce joining anchors (8 anchors)
Info :
Medium motifs often sit between two large motifs in the layout—mark one stitch as 'top' to ensure consistent orientation for joining.
Round 13 :
Work a neat sc round around the outermost edges, adding picots at every third sc to add delicacy. Fasten off and block flat to desired diameter (approx 6-7cm).
— Small Snowflake Motif :
Round 1 :
8 sc in magic ring (8)
Round 3 :
(1 sc, 1 inc) x 8 (24)
Round 4 :
1 sc in each st (24)
Round 5 :
*Ch4, sl st into next st* x 8 to form arches
Round 6 :
Into each arch: (sc, 3 dc, sc) to make small petals (8)
Round 7 :
Ch3, sl st between petals to create small connecting loops, then sc around edge placing small picots at each corner. Fasten off and block gently (approx 4-5cm across).
Info :
Small motifs act as spacers in the runner and should be blocked so their star points match the size and angle of larger motifs for seamless joining.
— Joining & Runner Layout :
Info :
Layout: The photographed runner uses a staggered grid where rows alternate Large-Medium-Large and Small motifs fill the gaps and make a continuous lace path. Alternate silver-centered large motifs every 4-5 positions to mimic the pictured shimmer. The finished runner length shown uses 16 large motifs, 12 medium motifs and 20 small motifs arranged in 4 staggered columns.
Info :
Choose join method: A. Join-as-you-go (JAYG) slip-stitch method described here for crisp seams, or B. Sew with cotton thread for invisible seams. JAYG is recommended for openwork alignment and speed.
Joining Step 1 :
Pin motifs in layout on blocking board with points aligned. For JAYG, work one motif completely and then join subsequent motifs into it on the final edge round (the round that has chain loops designed as anchors).
Joining Step 2 :
When you reach the round that has small loops (for example Round 18 in Large motif), before fastening off, orient the new motif atop the pinned motif edges and use sl st to join through the loop of the new motif to the corresponding stitch or loop of the pinned motif: *insert hook into loop of new motif, insert hook into loop of adjacent pinned motif, yarn over and sl st through both loops* repeat at each anchor point where motifs touch.
Info :
When motifs touch at more than one point, make joins at two or three symmetric anchor points to secure alignment. Make joins snug but not tight—hooks should rest flat and motifs should not pucker when joined.
Joining Step 3 :
For corners or triple joins (where a small motif sits between two large motifs), join the small motif to each adjacent motif using the same sl st through corresponding ch-loops. Work joins from the center outward so edges remain flat.
Joining Step 4 :
If using sewing method, use a blunt sharps needle and matching cotton thread, ladder-stitch or whip-stitch through the back loops of connecting chain spaces to create an invisible seam. Weave in the thread tail securely and bury into motif back.
Info :
Check alignment frequently—after joining every 3-4 motifs, lay the runner flat on the table and adjust any misalignments before continuing. Blocking after partial joining can also help maintain a flat, even surface.
— Edge Finishing :
Edge Round 1 :
Once all motifs are joined and runner is pinned flat, pick up the outermost loops along the runner perimeter with white yarn and sc evenly around entire edge, placing 2 sc in wide spaces and 1 sc in narrow to maintain flatness. This forms a consistent border.
Edge Round 2 :
*Ch3, sk 1 sc, sl st into next sc* repeat around to create a delicate picot-loop edging. Add picots at each apex for a crisp star look.
Edge Round 3 :
In the next round place picots: *sc, picot, sc* at each outer tip to accent points and then sc across straight edges.
Info :
For a slightly firmer edge that holds shape, work one additional round of sc holding hook in BLO so the edge forms a subtle ridge that frames the runner.
Edge Round 4 :
Optional decorative round: Use silver yarn and work a round of hdc in between the outer picots to add shimmer. Fasten off and weave in ends neatly on the back side.
— Border & Blocking :
Info :
After finishing edge, wet block the entire runner. Pin each star tip to a blocking board at even distances. Stretch gently so motifs lie flat and edges are smooth. Allow to dry completely before unpinning to preserve shape.
Finishing :
Weave in all tails with a yarn needle following the motif back rounds to hide tails. Use small, neat stitches and trim close. Lightly steam over the wrong side if needed to relax any stubborn curves, but do not press directly on textured puffs or picots.
Info :
To create a runner of different length, repeat motif rows in the same staggered pattern. Keep a consistent ratio of Large:Medium:Small motifs so the joining pattern continues evenly.
— Alternate Color Placement :
Info :
Accent motifs with silver centers: change to silver yarn at the end of Round 10 in a Large motif then continue Rounds 11-16 in silver for a subtle metallic center. Return to white for outer rounds by fastening off silver and rejoining white where required. Carrying silver across backs leads to tidier joins—catch it into inner stitches to avoid long floats.
— Notes on Gauge & Sizing :
Info :
Gauge depends heavily on yarn and hook choice: the sample runner uses light fingering cotton and a 2.75mm hook. Each large motif measures roughly 9-10cm after blocking, medium ~6-7cm, and small ~4-5cm. Alter hook size or yarn weight to scale motif sizes while preserving stitch counts.
— Troubleshooting Tips :
Info :
If points do not lie flat, block more aggressively or add one extra sc in the outermost edge to ease tension. If joins gape, add another sl st or a small sewing stitch at that anchor point to tighten the seam.
This snowflake lace table runner is a beautiful mix of delicate openwork and structured star points that bring a refined, handmade touch to any table. Each motif is a little celebration of texture and light, coming together to form a long, elegant centerpiece you will be proud to display. The finishing border and careful blocking give it a professional look—perfect for holidays or everyday cozy style. Enjoy the meditative rhythm of making each snowflake and the joy of seeing them join to create something larger than the sum of its parts. 🧶❄️