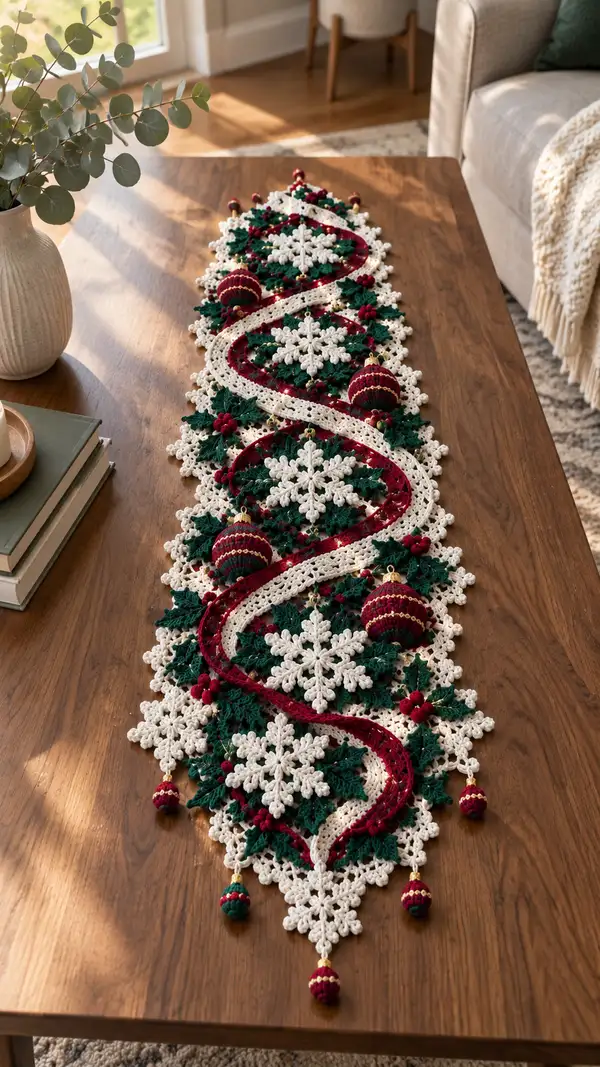
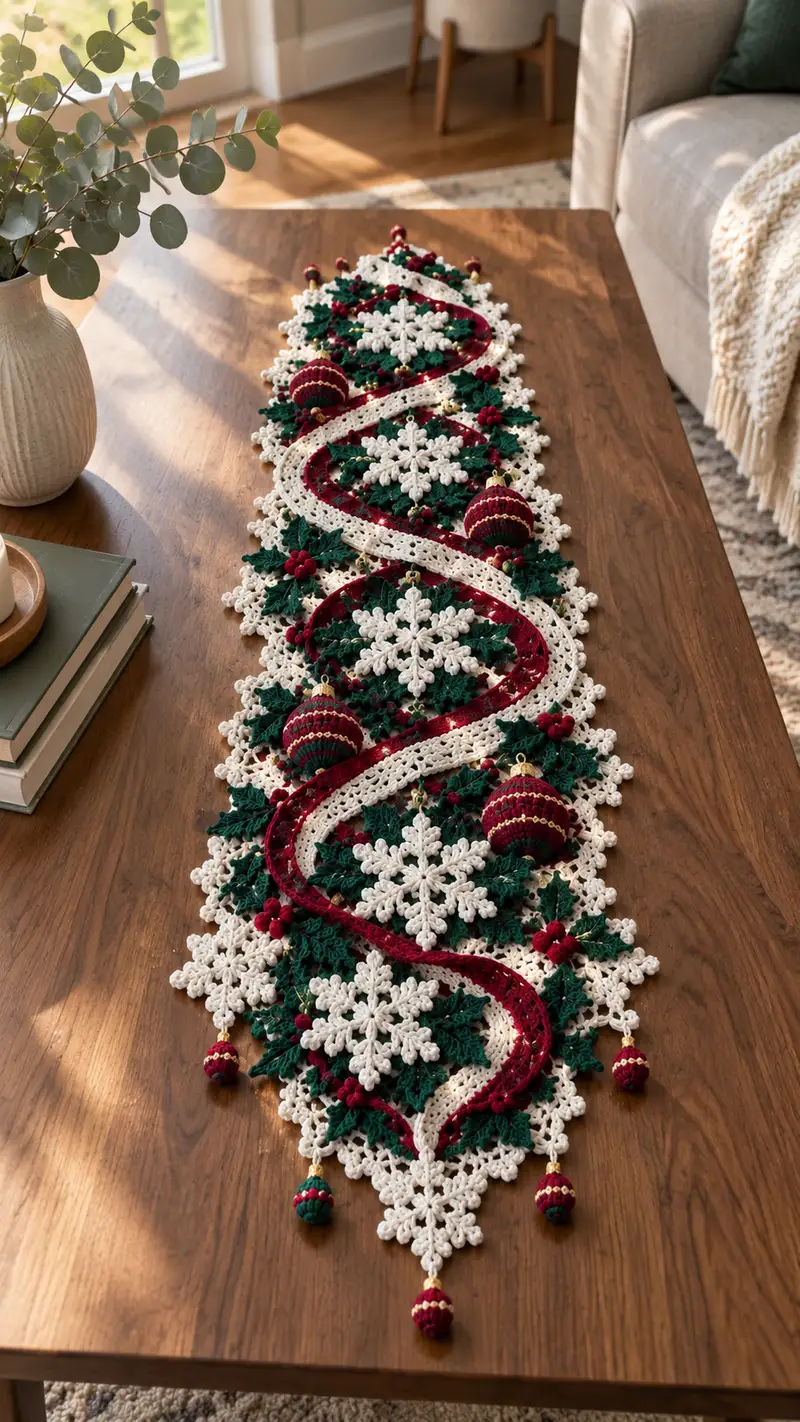
Create a stunning holiday table runner inspired by classic Christmas decor — layered snowflake motifs, clustered holly leaves, velvet ribbon swirls and tiny hanging baubles. This richly textured runner features cream snowflakes, deep green holly, and burgundy accents for a cozy, elegant centerpiece. The pattern includes modular motifs that are crocheted separately and assembled for a crisp, heirloom finish.
Progress Tracker
0% Complete
— Pattern Overview :
Info :
This runner is built from repeating motifs: large snowflake motifs (A), holly leaf clusters (B), small rosettes/connector diamonds (C), burgundy berry clusters (D), central ribbon applique (E) and hanging bauble ornaments (F). Make the number of repeats to suit your table length; the sample photographed uses 5 full snowflake repeats along the center and measures approximately 50" long and 10-12" wide when blocked.
Info :
Gauge is not critical for decorative runners, but consistent tension is important so motifs match when joining. Block each motif flat to the same dimensions before joining. Use stitch markers for round starts and a tape measure to keep motif spacing consistent during assembly.
— Snowflake Motif (Make 10 or as desired) :
Round 1 :
6 sc in magic ring (6)
Round 3 :
(1 sc, inc) x 6 (18)
Round 4 :
(2 sc, inc) x 6 (24)
Round 5 :
(3 sc, inc) x 6 (30)
Round 6 :
(4 sc, inc) x 6 (36)
Round 7 :
(5 sc, inc) x 6 (42)
Round 8 :
(6 sc, inc) x 6 (48)
Info :
Rounds 1-8 form a solid circular center for the snowflake. Keep tension even; if your circle cups, go up one hook size for these rounds and then return to main hook for lacework.
Round 9 :
1 sc in each st around (48)
Round 10 :
*(ch 4, sk 3, sc in next) repeat from * around to create radial chain points (12 chain points, 48 sts base)
Info :
We are creating 12 radial loops; these will be paired to make 6 primary snowflake arms. Count carefully so chain loops align in pairs.
Round 11 :
Working into each ch-4 loop: *(sc, ch 3, 3 dc, ch 3, sc) in loop, sl st into next sc on base. Repeat for all 12 loops to create pointed petals (12 petals)
Round 12 :
Join pairs of adjacent petals to form 6 arms: *sl st into petal 1, ch 2, sc in petal tip, ch 2, sl st into petal 2, then make 3 sc across the base bridging the petals. Repeat x6 (maintain 48 underlying base anchor points)
Round 13 :
Into each arm tip: *(ch 6, sc in tip), secure, then sc across next 8 base sts, repeat across 6 arms. This creates a larger outer loop for the point (48 sc anchors)
Round 14 :
Work decorative picot edging around each arm loop: Into each ch-6 loop work (sc, ch 3, sl st into ch-3) then sc into tip. Repeat for all arm loops (6 arms)
Info :
Take care to keep the arms symmetrical. If any arm looks narrow, lightly block it with pins to the same length as other arms while wet-blocking.
Round 15 :
Between arms, add small connecting chains and shells: *sc in next 6 base sts, (ch 3, 3 dc in next st, ch 3, sc) in next base anchor to form shell; repeat around (48 base anchors)
Round 16 :
Finish outer ring: *[ch 1, sc in next 2 sts, picot (ch 3 sl st to last sc)] repeat across entire outer edge to form delicate points and small picots between arms
Round 17 :
Slip stitch all around to tidy edge and fasten off, leaving a long tail for blocking and joining (48)
Info :
Block each snowflake flat: pin each of the 6 arms to the exact same radius and steam/block or wet-block with starch to stiffen lightly. Snowflakes should measure approximately 8-9" across blocked (adjust hook if you want larger/smaller).
— Small Rosette Connector Motif (Make 10-12) :
Round 1 :
6 sc in magic ring (6)
Round 3 :
(1 sc, inc) x 6 (18)
Round 4 :
*(ch 5, sl st in next st) repeat around to create 6 ch-5 loops for petals
Round 5 :
Into each ch-5 loop work (sc, hdc, 3 dc, hdc, sc) to form small petals (6 petals total)
Round 6 :
Edge: sc around entire rosette working 2 sc in the base of each petal and 1 sc between petals (approx 24 sc). Fasten off and leave long tail for joining
Info :
These rosettes serve as small filler motifs between snowflakes and leaves and will be joined with surface slip stitches to create the lacy base that supports the ribbon applique.
— Holly Leaf (Make many for clusters) :
Round 1 :
ch 9, sc in 2nd ch from hook, hdc in next, dc in next 3, hdc in next, sc in last 2, turn to work along other side of chain: sc in next 2, hdc, dc 3, hdc, sc 1 (total approx 16 sts across both sides)
Round 2 :
Along leaf edge: *sl st into next st, ch 3, (sc, hdc, dc) all in same stitch to create serrated tip, sl st into next, repeat around leaf to create 3-4 serrations per side. Fasten off leaving tail for sewing
Info :
Work leaves using deep green yarn. Leaves are made flat — block lightly flat with a slight center ridge by pinning and steaming. Each leaf should finish approx 2.25-2.5" long when blocked.
Round 3 :
Optional center vein: with contrasting green or same yarn, use a running stitch with yarn needle down the center and secure for definition
— Berry Cluster (Make many small berries) :
Round 1 :
6 sc in magic ring (6)
Round 3 :
12 sc around (12)
Round 4 :
(1 sc, dec) x 4 (8)
Round 6 :
Stuff lightly with tiny amount of fiberfill, continue: (dec) x 4 (4)
Round 7 :
4 dec (2) Fasten off leaving long tail and pull through remaining 2 sts; secure tightly. Leave tail for sewing onto leaf clusters
Info :
Make berries in burgundy. Group berries in clusters of 3-5 and sew onto leaf clusters to emulate holly clusters. For a rounder berry, use tighter tension or smaller hook for these rounds.
— Long Diamond Base Motif (Make 6-8) :
Round 1 :
ch 10, join with sl st to form ring (10 ch)
Round 2 :
ch 3 (counts as dc), 19 dc into ring (20 dc total), sl st to top of ch-3 (20)
Round 3 :
ch 3, dc in same st, 2 dc in each st around (40) — work increases to create oval expansion: [dc, 2 dc] across rounding points to create diamond-ish long shape
Round 4 :
Work shell row to lace the center: *skip 2 dc, (dc, ch 2, dc) in next, skip 2, sc in next, repeat across to form 12 shells (counts vary based on shaping)
Round 5 :
Edge lace: sc around, on long points work (5 sc in same st) to create pointed tips (approx 56 sc overall). Fasten off and block to a long diamond measuring approx 8" long and 4.5" wide.
Info :
These diamonds are the structural connectors that sit under each snowflake and hold leaf clusters at the edge. Make enough for your desired runner length; the sample uses 5 center diamonds with tapered end diamonds to form the tapered runner point.
— Burgundy Applique Ribbon (Central Swirl) :
Info :
You have two options for the burgundy swirl: 1) use a 6-10mm crushed velvet ribbon and tack it onto the runner, or 2) crochet a narrow I-cord / tubular cord using burgundy yarn for a hand-crocheted ribbon effect. Instructions below for crocheted I-cord.
Round 1 :
Using 4.0mm hook, ch 30, join to work in the round making a tube: fold chain into a loop and sc through both loops of the chain to form the first round of tube (30)
Round 2-18 :
1 sc in each st around (30) — repeat until tube measures approx 40-45" long or desired runner spiral length. For curved appearance work slightly tighter tension every 10th round to encourage subtle curling
Info :
Press the I-cord flat with steam and light starch if desired. If using velvet ribbon, finish ends with a small hand-stitched hem and optionally glue with fabric glue to prevent fraying.
— Hanging Bauble Ornaments (Make 8-10) :
Round 1 :
6 sc in magic ring (6)
Round 3 :
(1 sc, inc) x 6 (18)
Round 4 :
(2 sc, inc) x 6 (24)
Round 5-7 :
1 sc in each st around (24)
Round 8 :
(2 sc, dec) x 6 (18)
Round 9 :
1 sc in each st around (18) Stuff lightly
Round 10 :
(1 sc, dec) x 6 (12)
Round 11 :
6 dec (6) Fasten off leaving long tail; pull through remaining sts and secure. Sew in a small loop of gold thread or a crochet loop for hanging and glue a small gold bead cap if using for a finished look
Info :
Embellish baubles with stripes of metallic yarn or small gold thread wrapped rings before stuffing. Make sure each bauble is evenly weighted so it hangs straight when attached.
— Edge Scallop and Point Finishing :
Round 1 :
Once motifs are joined (see assembly below), work a continuous edging around the runner: join cream yarn at one outermost point with sl st, ch 1, sc around edge evenly
Round 2 :
*skip 2 sc, (5 dc in next sc), skip 2 sc, sc in next; repeat around forming scallops. On sharp points where diamonds meet, work (7 dc in tip) to reinforce points
Round 3 :
Decorative final row: *sc in each sc across scallop, into the center dc of each 5-dc shell work (sc, ch 3, sc) to create open picot spaces for attaching small baubles; repeat around
Info :
Blocking after edging will set the scallops and points perfectly; pin the runner to the final dimensions and leave to dry overnight.
— Joining Motifs and Creating Runner (Assembly Rounds) :
Info :
Lay out motifs on a blocking board in the desired arrangement: central diamond long motif, snowflake centered on diamond, holly leaf clusters positioned at diamond points, rosettes filling gaps. Use pins to hold positions before sewing. The following rounds are a step-by-step plan for joining motifs using whip stitch, sl st join, and surface slip stitch for the lace connection.
Round 1 :
Begin by joining central diamonds along the runner spine: place first diamond and second diamond overlapping by 6 sc along long edges; whip stitch through corresponding sc anchors with matching cream yarn across the overlap to create a flat seam. Repeat to create a long spine of joined diamonds (approx 5 diamonds for sample length)
Round 2 :
Place snowflake motif onto each diamond centering precisely. Using the long tail left from snowflake, mattress stitch through the center circle (round 8 area) of the snowflake down into the center of the diamond; secure with invisible knots. Repeat for all snowflakes.
Round 3 :
Attach rosette connectors between snowflakes: position rosette between two adjacent diamond edges where gaps occur. Join rosette to adjacent diamonds and to the nearest snowflake arm using surface slip stitch with cream yarn; make sure top surfaces are smooth and joins are invisible from the top view.
Round 4 :
Sew holly leaf clusters around the outer edge of each diamond and between snowflake arms. Group 3-5 leaves together and sew their tails (long yarn tails) onto the base diamond/motif so clusters sit outward. Attach berry clusters (groups of 3 small berries) into center of leaf clusters using whip stitch and hidden tails.
Round 5 :
Once all motifs are sewn, add the burgundy I-cord ribbon: position the cord in a sweeping S spiral along the center of the diamonds. Pin the cord in place where it crosses rosettes and passes over snowflakes. Using tiny invisible stitches of burgundy yarn, tack the cord in 1" intervals to the base diamond, being careful not to pull too tight or distort the lace below.
Info :
Stitch the ribbon from the underside for minimal visible thread. If using crushed velvet ribbon, apply a small dab of fabric glue at intervals under the ribbon to keep it from shifting, then hand-sew at strategic anchor points as above.
Round 6 :
Prepare hanging baubles: attach a crocheted loop to the top of each bauble and sew a small gold bead or cap to create a decorative finish. Pin baubles to the outermost scallop points as in the photo — one bauble at each tapered end and three along each side spaced equidistantly.
Round 7 :
Secure baubles by stitching through the loop into the base scallop with matching yarn and a few stitches into the underlying diamond to ensure durability. If weight is a concern, add a small reinforcement disc of felt on the underside where bauble stitches are anchored.
Info :
After all attachments are complete, weave in all remaining tails on the underside using a yarn needle and trim close. Steam/block the entire runner one more time, pinning to final dimensions and ensuring ribbon sits flat and all scallops are even.
— Final Finishing Touches :
Round 1 :
Examine runner for any loose stitches or uneven spacing. Add small invisible stitches from underside to adjust spacing or flatten bulging areas.
Round 2 :
Trim and secure any exposed yarn ends. If any motifs look too soft, stiffen slightly with diluted fabric stiffener applied carefully to the underside only.
Info :
Allow any stiffeners to dry fully overnight before placing decorations on the runner. Store rolled or flat; avoid folding to prevent permanent creases in the lace and ribbon.
Completing this festive table runner is deeply satisfying — each snowflake, holly cluster and ornament adds personality and holiday warmth. The modular approach makes the project manageable and endlessly customizable. Display it proudly every season and enjoy the comfort of handmade holiday decor. 🎄🧶✨