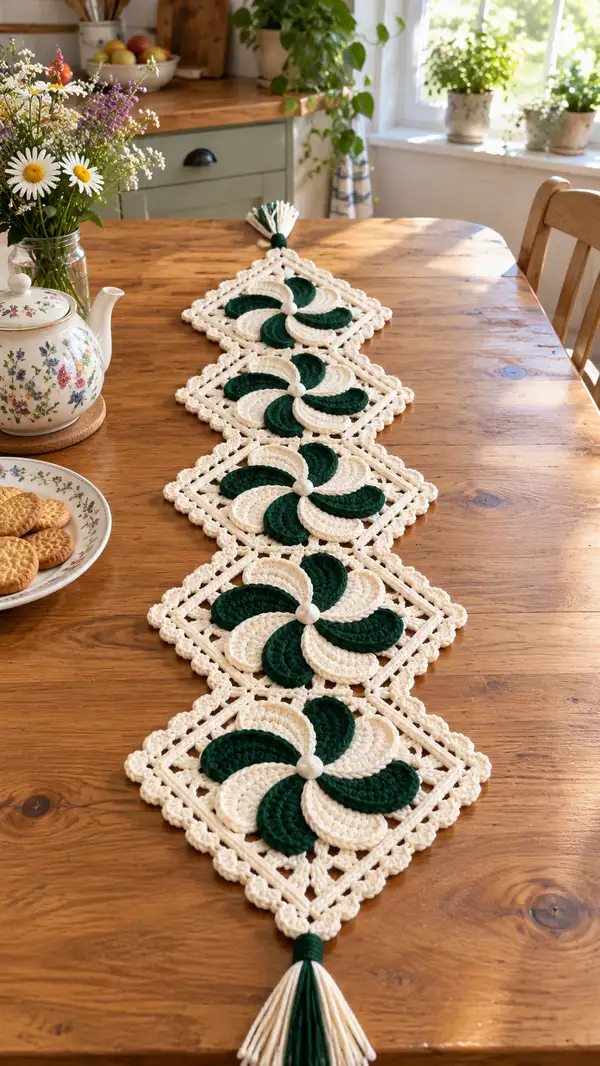
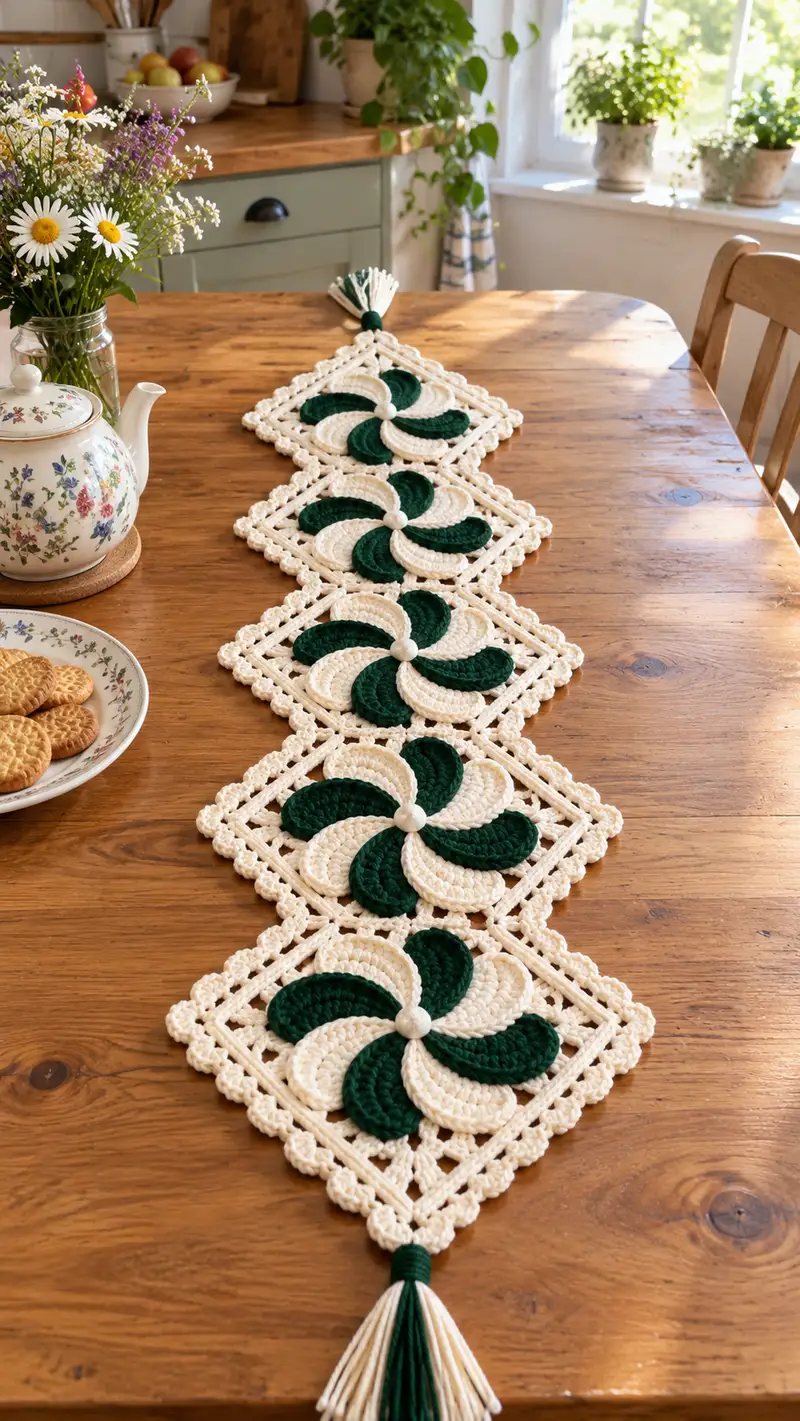
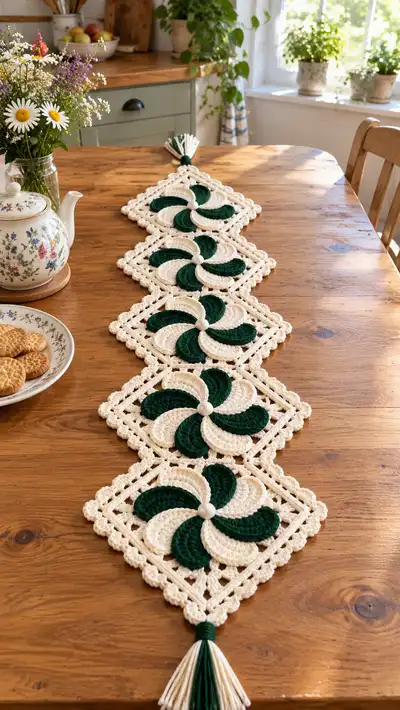
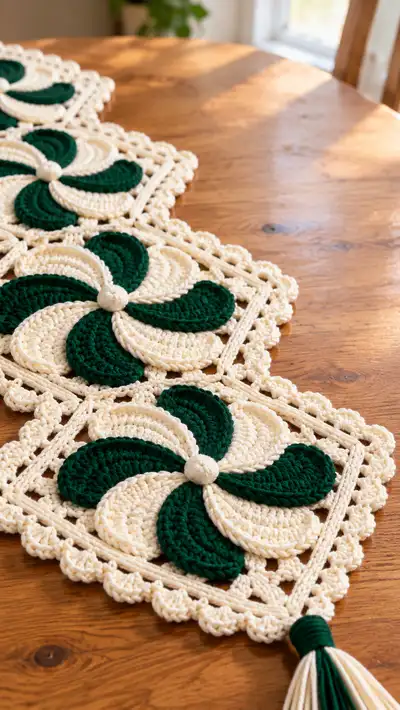
A vintage-inspired pinwheel table runner made from four joined square motifs featuring layered pinwheel petals in deep green and warm cream. Each square has a textured framed border and a wrapped yarn tassel at either end for a finished, cozy look. Perfect for a rustic or cottage-style table centerpiece, this runner combines layered crochet petals, raised edging and a neat joining technique to create a magazine-ready finish.
Progress Tracker
0% Complete
— Overview :
Info :
This pattern makes a table runner of four identical square motifs joined in a straight line. Each square contains eight layered petals (four dark green, four cream), a covered center, a square frame that sits behind the petals, and a scallop border. Finally, the four squares are joined and finished with wrapped yarn tassels. Read through the entire pattern before starting to understand the construction sequence: make petals, make centers, stitch petals to centers, create a square frame per motif, attach petal/center stacks to frame, join squares, add outer scalloped border and tassels.
Gauge/Size :
Each finished square measures approximately 18cm (7in) across corner-to-corner (when measured as a diamond), or 12cm (4.7in) side-to-side. The full runner shown (four squares + tassels) measures about 1.2m (47in) including tassels. Gauge can vary with personal tension; use a 4.5mm hook to match proportions—if your petals appear too small or too dense, try a 5mm hook, if too loose, switch to 4mm.
— Petal (Make 8 per square; 4 dark green, 4 cream) :
Round 3 :
(1 sc, inc) x 6 (18)
Round 4 :
(2 sc, inc) x 6 (24)
Round 5 :
(3 sc, inc) x 6 (30)
Info :
These first 5 rounds form the bulb of the petal. Work tightly to keep the petal slightly cupped – this helps when layering atop the square frame. Fasten off color if you plan alternating colors; otherwise continue on in same yarn.
Round 6 :
(4 sc, inc) x 6 (36)
Round 7 :
(5 sc, inc) x 6 (42)
Round 8 :
(6 sc, inc) x 6 (48)
Info :
At round 8 you should have a relatively flat circle that will be shaped into a teardrop petal. Leave a long tail for sewing later (about 30–40cm) when finishing off. If you want a deeper petal curve, you can work round 8 in BLO to create a ridge (48)
Round 9 :
1 sc in each st (48)
Round 10 :
1 sc in each st BLO (48)
Round 11 :
1 sc in each st (48)
Round 12 :
1 sc in each st (48)
Info :
Rounds 9–12 build the length of the petal. Use BLO on one round (round 10 here) to add a subtle ridge that helps petals hold shape when layered. Keep your tension steady; these rounds determine how long the petal will sweep into the center.
Round 13 :
(6 sc, dec) x 6 (42)
Round 14 :
(5 sc, dec) x 6 (36)
Round 15 :
(4 sc, dec) x 6 (30)
Info :
Begin tapering the outer edge of the petal so the tip narrows. At this point the petal should start to take on a teardrop shape rather than a full circle. If you prefer a shorter petal, remove one decrease round.
Round 16 :
(3 sc, dec) x 6 (24)
Round 17 :
(2 sc, dec) x 6 (18)
Round 18 :
(1 sc, dec) x 6 (12)
Round 20 :
Fasten off leaving long tail for sewing; stitch through 6 sts to close small hole if present. Flatten petal along diameter, forming the petal ridge. (6)
Info :
Make 8 petals per square (alternate colors: dark green, cream, dark green, cream etc to make the pinwheel). When finished, press gently with a warm, damp cloth if using cotton, and pin to a flat surface until dry to keep uniform shape.
— Petal Raised Edging (optional for extra definition) :
Round 1 :
Join same color at one edge st. ch1, sc evenly around petal edge working 1 sc into each outer loop across the petal curve (approx 48 sc) (48)
Round 2 :
*sc in next 3 sts, 2 sc in next st; rep from * around (approx 60)
Round 3 :
*sc in next 4 sts, 2 sc in next st; rep from * around (approx 72)
Info :
This raised edging adds a small rope-like border around the petal and helps each petal stand away from the square background. If you add edging, ensure you made petals slightly smaller in earlier rounds so they still fit 8 per square footprint.
Round 4 :
1 sc in each st (72)
Round 5 :
Fasten off and leave long tail for sewing. Make 8 edged petals per square only if you chose this textured option.
— Center Button/Cover (Make 1 per square) :
Round 1 :
MR, 6 sc in ring (6)
Round 3 :
(1 sc, inc) x 6 (18)
Round 4 :
(2 sc, inc) x 6 (24)
Round 5 :
1 sc in each st (24)
Round 6 :
Fasten off leaving a 40cm tail for covering a small button or sewing directly into the petal stack. If you are covering a button, pull the fabric tightly around the button and sew to secure.
Info :
Covering a wooden bead or small button with the rounds above gives a raised, neat center. Alternatively, you can stuff a tiny bit of fiberfill and flatten for a yarn-covered bobble effect—either is visually effective.
— Square Frame (Make 1 per square) :
Round 1 :
With cream yarn, ch 6, join with sl st to form a ring. ch1, work 12 sc into ring (12)
Round 2 :
Work (1 sc, inc) x 6 (18)
Round 3 :
(2 sc, inc) x 6 (24)
Round 4 :
(3 sc, inc) x 6 (30)
Info :
Rounds 1–4 create a small circular foundation which we will square off using corner increases. The frame should be slightly smaller than the overall petal span so petals sit comfortably on top without hanging over.
Round 5 :
1 sc in each st (30)
Round 6 :
*(4 sc, inc) x 5, 4 sc, ch 3, sl st into next st to make corner; rep from * 3 more times to form four corners. Continue to next round with even sc along sides and corners created by the ch3 loops. (Approx 36 + 4 corners)
Round 7 :
1 sc evenly across each side and in each corner loop (work 3 sc in each corner ch-3) to square shape (approx 48)
Round 8 :
1 sc in each st (48)
Round 9 :
*(6 sc, inc) x 6 (approx 54)
Round 10 :
1 sc in each st (54)
Info :
Use rounds 6–10 to square off the motif. When counting, treat corner ch-3 loops as three stitches for the purpose of evenness so the frame becomes a clean square when blocked.
Round 11 :
Work 2 rounds of HDC in each st to add body and depth: Round 11: 1 hdc in each st (54). Round 12: 1 hdc in each st (54)
Round 13 :
Switch to 2.75–3.75mm hook if needed and work a decorative rail: *ch4, sk 2 sts, sc in next st; rep around to create small lacy holes across sides and in corners (maintain corner spaces as worked earlier). (Approx 18 ch4 spaces)
Round 14 :
Sl st into spaces and sc around each side to even out edge (54)
Round 15 :
Work a raised ridge around the inside edge where the petal stack will sit: 1 sc in next 3 sts, hdc2tog over next 2 sts; rep around (approx 54)
Info :
The square frame should now be a flat platform with a discreet inside ridge. This ridge is where you will position and tack the petals so they fan evenly. Block each frame flat before attaching petals to ensure a uniform square shape.
Round 16 :
Work 2 rounds of sc to tidy the outer edge but keep counts: Round 16: 1 sc in each st (54). Round 17: 1 sc in each st (54)
Round 18 :
Create corner loops for joining: *in corner area: (sc, ch3, sc) in corner; along side: 1 sc in next 6 sts; rep from * around. This will give a neat joinable edge with ch-3 corner loops. (Approx 54 + 4 corners)
Round 19 :
Fasten off and weave ends. Block square flat and ensure corner loops are open well to allow joining sections later.
Info :
Make 4 identical square frames for the runner. Blocking at this stage is important — pin each square to a flat board into a diamond orientation if you want the runner shown in the photos (squares aligned corner-to-corner).
— Attaching Petals and Centers to Frame (per square) :
Round 1 :
Lay one square frame flat. Mark the center of each side with a stitch marker so you can evenly space 8 petal positions (each petal will sit between side-center and corner). Place first petal so the base of the petal aligns with the inner ridge along the frame, tip pointing toward the center of the square.
Round 2 :
Pin the petal in place with sewing pins. Using the long tail from the petal, stitch the petal base to the inside ridge of the frame using small whip stitches. Secure with a double knot and weave tail through the underside of the frame. Repeat for the remaining 7 petals alternating color sequence to create the pinwheel effect (Green, cream, green, cream etc.).
Round 3 :
Place the covered button or yarn bobble center over the petal bases so it sits squarely in the middle, covering the inner tips of each petal. Using the tail from the covered center, sew through the center several times catching each petal tip to anchor the petals into place. Fasten securely and weave ends through the underside of the frame.
Info :
Work slowly to ensure petals are evenly spaced and evenly overlapped—each petal should slightly overlap its neighbor so the eight blades form a continuous pinwheel swirl. Use pins outside the stitches to hold placement while you sew.
— Outer Decorative Scallop Border (per square) :
Round 1 :
With cream yarn, attach at any corner loop. ch3 (counts as dc), 2 dc in same corner loop, ch1, sl st in next corner loop to start scallop along this side; along side work: *sk 2 sts, (5 dc) in next st (shell), sk 2 sts, sl st in next st; rep across side until you reach next corner loop. In corner: (2 dc, ch2, 2 dc) in corner loop to form corner shell.
Round 2 :
Work shells across each side with (5 dc) shells separated by sl sts. Keep a total of 6 shells per side if space allows; adjust spacing so four sides have equal distribution. After last side, sl st to starting st and fasten off. (Approx 24 shells total)
Info :
For a tighter scallop use (4 dc) shells or make shells in FLO to create a subtle raised edge. Blocking the scallops into shape after finishing will make them even and open.
Round 3 :
Weave in ends, bury them into the underside of the frame. If you like a bead at each corner, sew a small wooden bead into the center of the corner shell now for an extra decorative touch.
— Joining Squares (4 squares in a straight runner) :
Round 1 :
Lay squares with corners touching so they form a diamond row. Working from the rightmost corner of the first square, join cream yarn with a sl st into the ch-3 corner loop. ch1.
Round 2 :
Join squares using slip-stitch join through the corner loops: *sl st into next ch-3 corner loop of next square, sl st into next corner loop of current square to bind; repeat along touching corners until all four squares are connected (use two sl sts for extra strength at each join). Fasten off and weave ends. (Number of joins depends on squares used — for 4 squares you will have 3 join seams between squares.)
Info :
Alternatively, use a neat mattress stitch with matching yarn for an invisible seam — this is stronger if the runner will be handled frequently. Pin all joins first and check alignment of scallops before final stitching.
Round 3 :
If preferred, work a crocheted join: ch1, sc around touching ch-3 loops of both squares (working through both layers) to create a wide decorative join. This will add visual continuity across the runner.
— Long Runner Edge & Final Border (after joining all squares) :
Round 1 :
With cream yarn, join at any outer scallop foundation. Work a round of 1 sc in each st around the entire runner outline (including the scallop peaks) to even out joins and prepare for a final edging. Keep stitch count even by adding small sc spacers where necessary (approx 220–260 sc around runner depending on join method).
Round 2 :
*(Ch5, sl st into 2nd ch from hook, sc in next sc along body) repeat to create a small picot-laced chain across the runner edge; join at completion with sl st. This forms a small linking chain around perimeter and softens any unevenness from joins.
Info :
Work this final border loosely enough so the scallops remain open and pretty. If the runner sits on a table where it will be used, consider adding a non-slip backing fabric later, attached by hand-stitching through the small sc round.
Round 3 :
Fasten off and weave in all ends on the underside to hide tails. Give the runner a final steam-block, pinning scallops open, to set the shape permanently. Allow to dry fully before use.
— Tassels (Make 2, one for each end) :
Round 1 :
Cut 36 strands of yarn each 20cm long using both colors (cream and green) arranged in a pleasing striped order. Fold the bundle in half and loop the folded end through the end corner loop of the runner (use the corner joining loop under the tassel position). Pull the tails through the loop and tighten to form a lark's head knot.
Round 2 :
Wrap a 20cm length of green yarn around the top of the tassel several times to create the wrapped head. Tie securely and weave the ends into the wrap. Trim tassel ends evenly to desired length (approx 12–15cm hanging length in photo).
Round 3 :
Repeat for other end. If desired, make a small pompom instead of a tassel using leftover yarn scraps and sew to corner loop.
Info :
For a neater appearance, wrap the tassel head with a contrasting color to match the pinwheels; ensure wrap is tight and ends are woven into the tassel to avoid unraveling.
— Finishing Touches :
Round 1 :
Check all joins and sewn petal bases. If any petals lift at their tips, add a hidden stitch from tip to frame underside. Add a drop of fabric glue under a covered center if you used a covered button and want extra security (allow to dry fully).
Round 2 :
Carefully steam-block again, flatten runner on blocking board, pin scallops and tassels in place. After drying, trim any stray fibers and lightly brush with a soft-bristled brush if using natural fiber to raise texture slightly.
Info :
To launder the runner: hand wash gently in lukewarm water with mild detergent, reshape while damp and lay flat to dry. Avoid machine washing to preserve shape and tassels.
Round 3 :
Your runner is complete — enjoy using it as a dining table centerpiece, dresser runner, or adapt the motif count to make coasters or a trivet set using a single motif each.
Info :
If you want to lengthen the runner, simply make more squares and join them using the same method; each additional square adds approx 12–14 cm to the runner length depending on tassel size.
Completing this runner is such a satisfying, hands-on project — watching each petal stack and framed square come together feels like building a tiny quilt in yarn. The final scalloped edge and tassels add that handcrafted flourish that makes it special. Display it on your table for instant warm, cottage-style charm. 🧶🌿 Whether you gift it or keep it, each stitch shows your care. Happy crocheting! 🎀