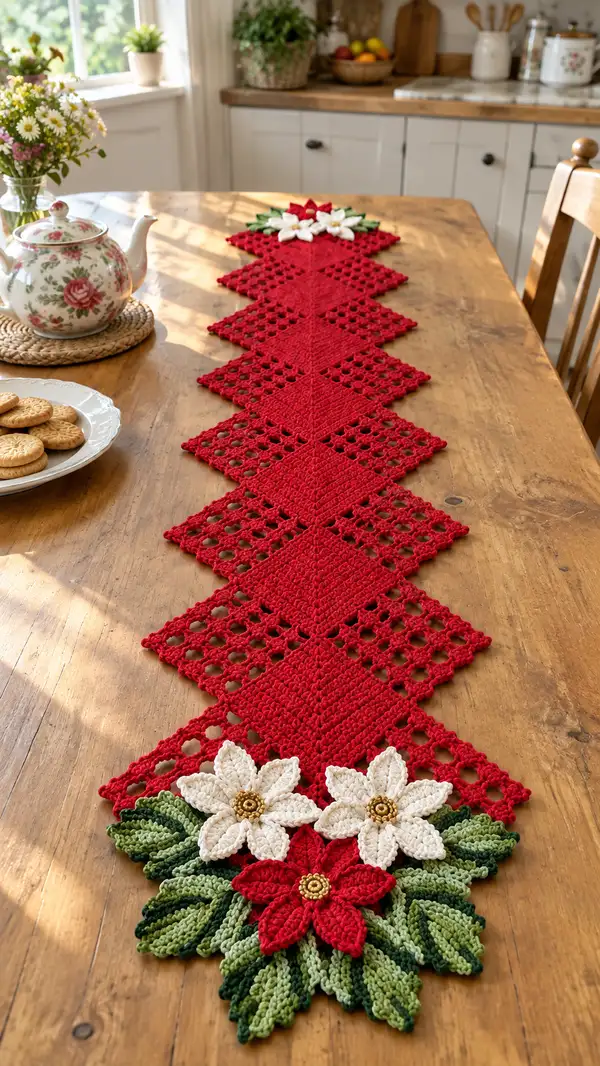
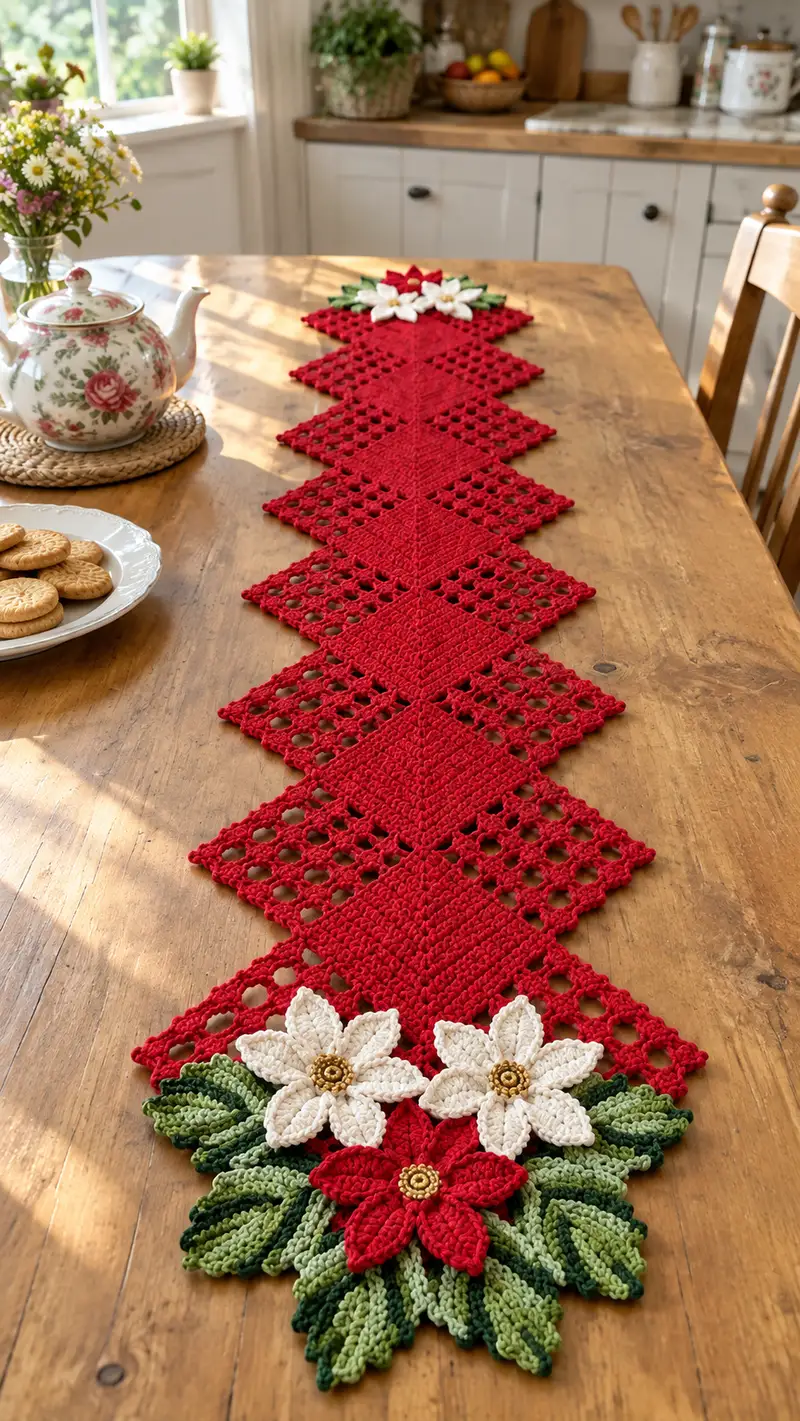
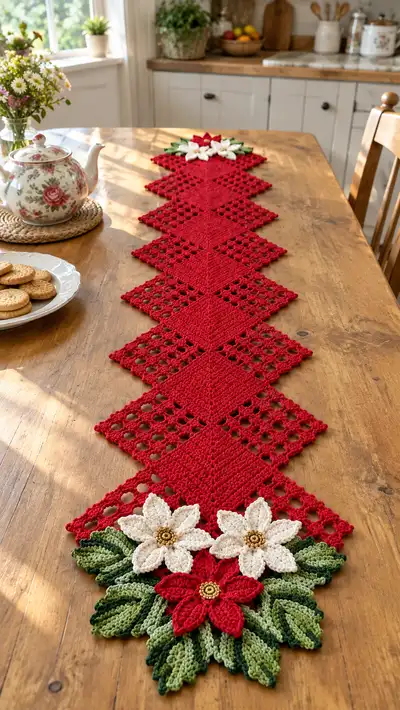
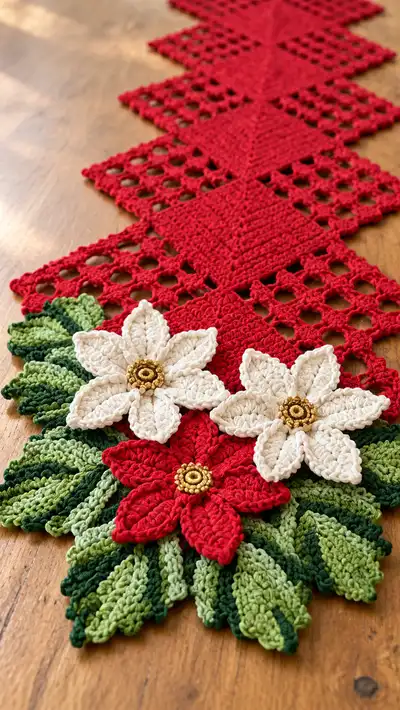
A festive, elongated table runner made of linked diamond motifs with openwork mesh and a dramatic poinsettia cluster at each end. Deep red diamonds create a striking zigzag line down the table, finished with layered green leaves and red and cream flowers with golden centers. The piece uses simple repeated motifs and textured layered leaves and petals for an heirloom look.
Progress Tracker
0% Complete
— Notes & Gauge :
Info :
Finished runner shown measures approximately 12 inches (30 cm) wide at the widest diamond and roughly 60-72 inches (150-180 cm) long depending on number of diamonds you choose to join. Gauge is not critical for overall design but affects final size and yarn requirements. Using worsted weight cotton and a 4.0 mm hook gives the proportions shown.
Info :
Work right-handed unless otherwise stated. All rounds are worked in continuous rounds for the square motif unless step indicates join-with-sl-st. Use stitch markers at corners and at the beginning of each round for accuracy. Block all motifs, leaves and petals before assembly.
— Diamond Square Motif (make 9 to 11 motifs depending on runner length) :
Round 1 :
Start with a magic ring, ch1, 8 sc in ring, pull tight (8)
Round 2 :
2 sc in each st around (16)
Round 3 :
(1 sc, inc) x8 (24)
Round 4 :
(2 sc, inc) x8 (32)
Round 5 :
(3 sc, inc) x8 (40)
Info :
These first rounds build a dense square center. Keep your tension fairly firm to produce a stable foundation for the later mesh rounds.
Round 6 :
(4 sc, inc) x8 (48)
Round 7 :
(5 sc, inc) x8 (56)
Round 8 :
(6 sc, inc) x8 (64)
Round 9-12 :
1 sc in each st (64)
Info :
Work four rounds even to build the solid center of the diamond. This will become the dense middle square when the motif is turned to a diamond orientation during assembly. Place a stitch marker at the corner points you will establish in the next rounds (see Corner Info).
Round 13 :
To begin corner shaping for the diamond edges, work as follows: *1 sc in next 14 sts, (sc, ch2, sc) in next st (corner)* repeat from * to * 3 more times, 1 sc in remaining sts to join (instructions create 4 corner ch2 spaces)
Round 14 :
Working into each corner ch2: (sc, ch2, sc) in corner space, then 1 sc in each sc along side. Maintain even tension (64 + corner chains remain as part of motif geometry)
Info :
If you prefer a pronounced diamond point, count stitches between corners before committing to next round and adjust by adding or removing 1-2 side sc to keep points even. The numbers above assume exactly 16 sc along each side between corners; adjust marker placement if your stitch counts vary slightly.
Round 15 :
Change to mesh/openwork round: ch3 (counts as first dc), *sk 2 sc, dc in next sc, ch2* repeat along side, working (dc, ch2, dc) into corner ch2 space. Continue around to establish openwork grid. This creates evenly spaced holes for the diamond points.
Round 16 :
Work a stabilizing sc round: sc in each dc and sc and ch2 spaces around, placing (sc, ch2, sc) in corners to keep the diamond shape square and flat. Maintain stitch count equal to previous solid round equivalents.
Round 17 :
Open mesh row: ch4 (counts as tr), *sk next 2 sts, tr in next st, ch1* across sides, (tr, ch2, tr) into corners, creating a lace-like mesh. The ch1 spaces along sides form a secondary grid of smaller holes.
Info :
Blocking tip: After finishing the motif, pin it out to a diamond shape with the corner points elongated slightly. This helps the mesh open evenly and creates the long diamond points visible along the runner edges.
Round 18 :
Stabilize mesh with sc round: 1 sc in each tr and ch space, working corner (sc, ch2, sc) to maintain corner definition. Count will approximate 64 stitches plus corner chain spaces; the goal is a neat even edge.
Round 19 :
Decorative edging: *sc in next 6 sts, picot on next st* around sides, and picot in corner outermost scs as well. This gives a delicate pointed border around each diamond when blocked.
Round 20 :
Finish: Fasten off leaving long tail for joining. Weave in the starting tail partially; save ends for final finishing after blocking and joining.
Info :
Make as many motifs as you need for your desired length. The sample runner uses 9 full diamonds plus half-detail at each end created by the flower cluster. Before joining, block each motif to identical width and diagonal length.
— Mesh Connector Triangle (worked to create the lacy points between diamonds) :
Round 1 :
With main color, ch6, join with sl st to form ring (6)
Round 2 :
ch3 (counts as first dc), 2 dc in ring, ch2, 3 dc in ring, sl st to top of ch3 to form a small triangle cluster (6 dc groups and 1 ch2 corner)
Round 3 :
Work in rounds that expand the triangle: into each outermost chain space work (3 dc, ch2, 3 dc), sk to next corner, creating 3 corner points for a triangular mesh wedge.
Round 4-6 :
Continue expanding triangle by working dc clusters separated by ch1 or ch2 depending on desired openness, ending with a lattice of ch spaces that match the sides of the diamonds when joined. Keep counts even on each side to match motif openings.
Info :
Mesh connector wedges are created to fill the triangular gaps between diamond motifs at the top and bottom points. Make these only for the interior joins where you want extra openwork; the sides of the runner are formed from the diamond edges themselves.
Round 7 :
Fasten off leaving long tail for join-as-you-go. Block the triangle wedge to shape. Make two wedges for each full diamond-to-diamond connection where indicated in target layout.
— Joining Motifs (Join-as-you-go recommended) :
Info :
Find a flat surface and lay out motifs in runner order before joining. The pictured runner alternates solid-dense diamond centers and mesh points so that every diamond shares its corner chains with adjacent diamonds (corner-to-corner join). Use the long tail from the finishing round or join with matching yarn.
Round 1 :
Position two motifs right sides up, overlapping so that corner picots or corner (sc,ch2,sc) points align. With RS together, use sl st or whip stitch through the back loop of both motif edge stitches across the overlap to join evenly. Join 1 edge at a time.
Round 2 :
For join-as-you-go method while working last round of a motif: when you reach a corner that meets an existing motif, work sc into the live stitch of your motif, sl st into the corresponding stitch of the adjacent motif, then continue your edge round in pattern. This secures a flat join without bulky seams.
Info :
Keep joins loose enough to allow a slight lay but not so loose that points separate. Pin motifs along the seam and check the runner lies flat after each third join to prevent skewing.
— Leaves (make 14–18 leaves total in two greens for layered look) :
Info :
Leaves are worked in rounds/semi-rows to create a long sculpted leaf. You'll make approximately 8 medium leaves and 6–8 small leaves for each end cluster. Use the medium green for the fuller body and dark green for accent tips. Leaves are worked flat; block and starch lightly if you want them rigid.
Round 1 :
ch11, sc in 2nd ch from hook, sc in next 3 ch (4), hdc in next 2 ch (2), dc in next 3 ch (3), hdc in last ch, turn to work down the opposite side: dc in next 3 ch, hdc in next 2 ch, sc in next 3 ch, sl st to first sc to close lightly. Total symmetrical leaf length established.
Round 2 :
Turn leaf shaping: ch1, sc across top edge into each stitch, at tip work 5 sc into tip base to create a pointed top, continue sc across opposite side. This creates a modest ridge at the tip for dimension.
Round 3 :
Edge texture: *sc in next 2 sts, hdc in next st, dc in next st, hdc in next st* across to tip, 5 sc into tip, then mirror back. This adds the central raised rib when worked in the next round.
Round 4 :
BLO rib round: With BLO only, sc in each st around, pull slightly to create a raised central vein. Fasten off, weave ends. Make medium leaves in medium green and small accent leaves in dark green using slightly smaller hook for tighter edge if desired.
Info :
To create a fuller layered look, after making leaves, slightly steam-block them to flatten, then shape the central vein by pinching and placing a single run of embroidery thread down the center and securing on the back with small whip stitches. This gives depth and a natural folding towards the tip.
— Large Sculpted Leaf (alternate style, make 6) :
Round 1 :
ch14, sc in 2nd ch from hook, sc across first 5 ch (5), hdc in next 3 (3), dc in next 4 (4), hdc in next 2 (2), sc in next 2, work 7 sc into last ch to form tip (7), continue on opposite side mirroring counts back to first sc. Join with sl st to first sc.
Round 2 :
BLO round: ch1, sc BLO across to create a pronounced rib. At the tip, work sc decreases to shape the point slightly. Fasten off and block. Use dark green for tips by overlay crocheting with slip stitches along outer edge in contrasting green for an outlined effect if desired.
Info :
Make a set of leaves in two shades and arrange alternately around the flower base. Pin and adjust until the cluster reads full but not top-heavy.
— Flower Petals (Poinsettia petals – make 3 single-color flowers: 2 cream 1 red; each flower has 6 petals) :
Info :
Each petal is worked flat and then assembled around a center disc. Petals use elongated front-post stitches to create depth and ridge-like veins. Use a slightly smaller hook for crisp petal edges.
Petal Round 1 :
ch8, sc in 2nd ch from hook, hdc in next, dc in next 3, tr in last ch, continue on opposite side mirroring: dc in next 3, hdc in next, sc in last. Join with sl st at base to form a long teardrop. (petal length established)
Petal Round 2 :
Front ridge round: ch1, work FLO hdc across each stitch, at tip work 3 hdc into tip to give height, then FLO hdc across opposite side. This creates a raised ridge on the front of the petal. Fasten off and block on a slightly curved surface to get a natural cupped petal.
Petal Round 3 :
Edge finish: With RS facing, slip stitch evenly around petal edge to create a finished rim. Make 6 petals per flower. For the small accent red flower, follow same instructions in red yarn for 6 petals.
Info :
Layer petals in two slightly offset rows for fullness: work an inner row with 3-4 petals and an outer row of 6 petals, sewing the inner petals just above the center disc and stacking outer petals slightly below and overlapping. For the large cream flowers in the photo, you can make inner petals slightly shorter (by omitting the final tr on inner petals) to achieve a tiered look.
— Flower Center Disc & Beadwork :
Round 1 :
With gold/mustard yarn, ch2, 8 sc in 2nd ch from hook, sl st to join (8)
Round 3 :
sc in each st around (16), finish and leave long tail for sewing. Sew a small ring of beads around this disc with beading needle or sew a decorative button in place. The disc acts as the golden eye in the center of each poinsettia.
Info :
For a more textured center mimic the photo by sewing small gold seed beads densely onto the disc; secure each bead through the disc and knot yarn well on the back. A small decorative shank button also gives a vintage look and sits nicely in the centre of the layered petals.
— Assembly of Flowers and Leaves :
Round 1 :
Arrange a base circle of leaves (3–4 medium leaves) slightly overlapping and sew them together at their bases using a yarn needle and length of yarn. This forms the bottom foliage layer for the cluster.
Round 2 :
Layer petals on top of the leaves: position one ring of 6 petals, sew each petal securely at the base to the leaf base. If you created an inner smaller set of petals, sew those in first to the center disc, then add the outer ring, offsetting between inner petals for fullness.
Round 3 :
Sew the center disc over the petal bases; reinforce by sewing through the center of all petal bases and the leaf base several times to form a secure cluster. Fasten off and weave ends to the back of the cluster.
Info :
Make two identical clusters for both ends of the runner: each cluster on the sample is composed of one red 6-petal flower, two cream 6-petal flowers, and 10–12 leaves layered and staggered behind. Tuck a few small leaves under the outer petals for a natural look.
— Runner Edging (optional, works around entire runner after joining) :
Round 1 :
With main color, join at any outermost edge stitch, ch1, sc evenly around the entire runner, working (sc, ch2, sc) in each motif corner and placing extra scs to keep edge flat. This creates a uniform border connecting the whole piece.
Round 2 :
Decorative scallop: *skip 2 sc, 5 dc in next sc, skip 2 sc, sl st in next sc* repeat around. Offset at corners by working 7 dc into corner sc to maintain shape. Fasten off and weave ends.
Info :
If you prefer a simple finish, work a single round of crab stitch (reverse sc) around the outer edge for a neat, rope-like border. Note that heavier border may reduce the openness of side mesh slightly.
— Final Blocking & Finishing :
Info :
After assembly, carefully block the entire runner on a flat surface using pins to emphasize the diamond points and smooth the mesh openings. Lightly steam or wet-block cotton yarn and pin until fully dry. Sew floral clusters to runner ends centered over the final diamond point with small whip stitches passing through leaf bases and motif edge stitches.
Info :
Weave all ends on the back and trim. Optionally add a few hand stitches to hold petals and leaves in place if they lift. If using beads, ensure all bead threads are tied off inside the center disc and trimmed close to knots.
Info :
Final touch: press lightly from the front with a cloth between iron and crochet if desired to achieve the flat, neat finish pictured. For long-term care, hand-wash in cool water and reshape while damp.
This poinsettia diamond table runner is a lovely way to bring handcrafted charm to any table — the red diamond chain and layered floral clusters create a classic holiday focal point. The modular construction makes it enjoyable to crochet in sections, and the layered leaves and petals let you add your own creative flair. Each stitch builds into a festive heirloom piece you'll enjoy displaying and gifting. Happy crocheting and may your home feel extra cozy with this runner! 🧶🌿🎄