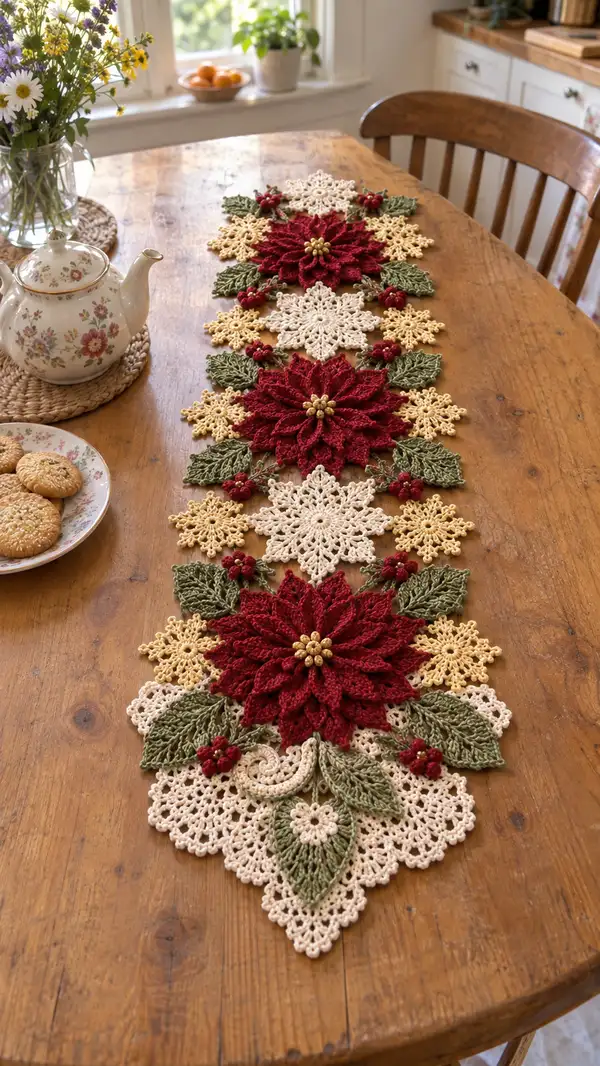
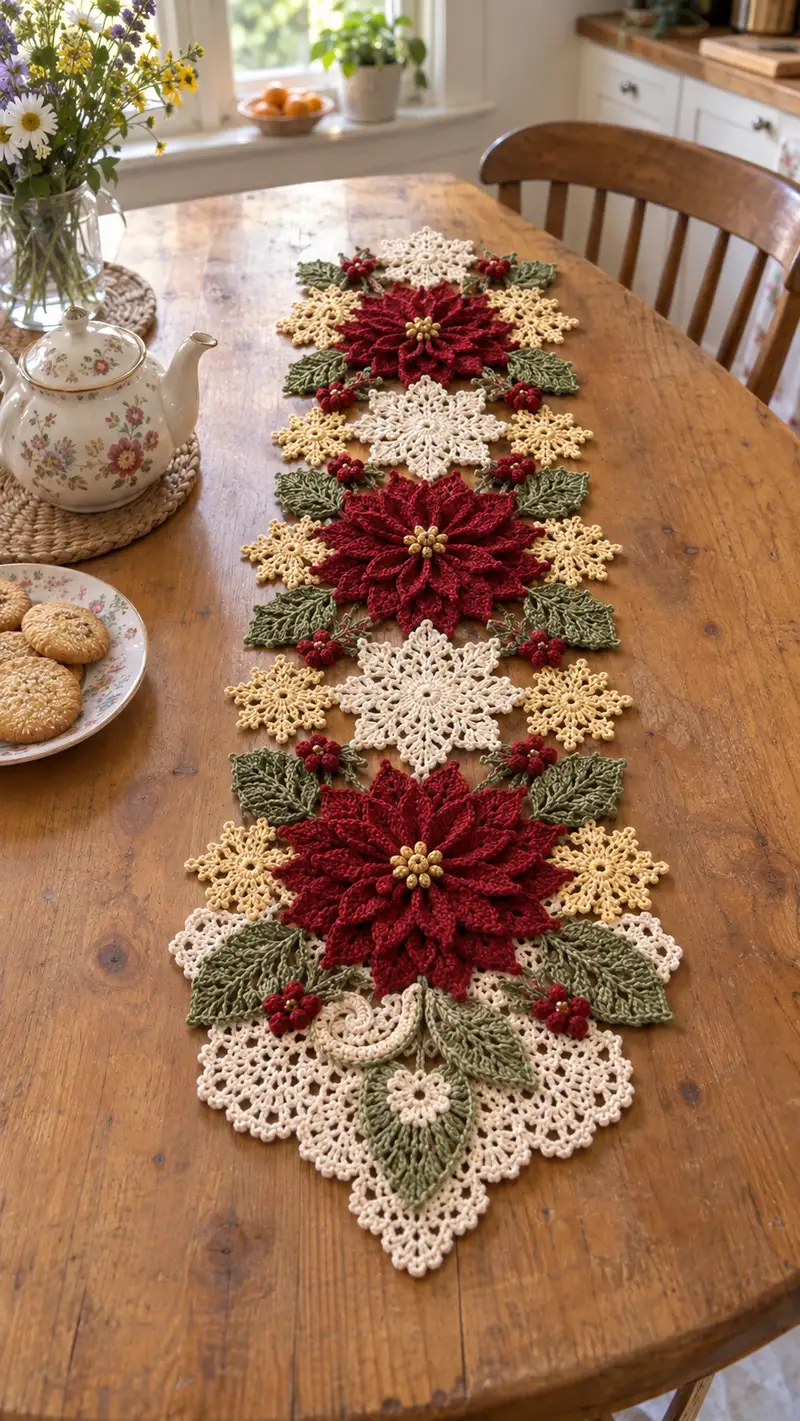
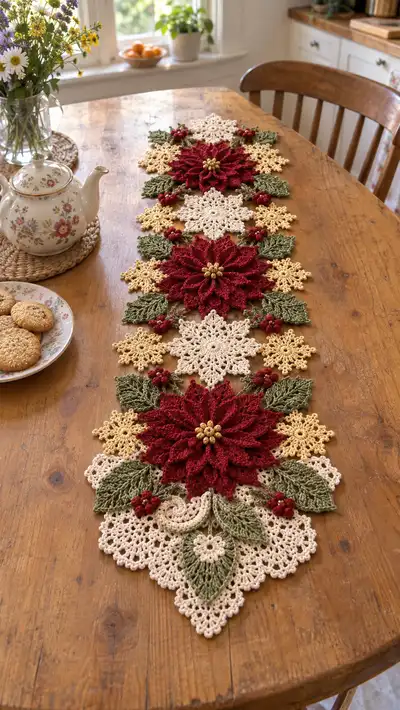
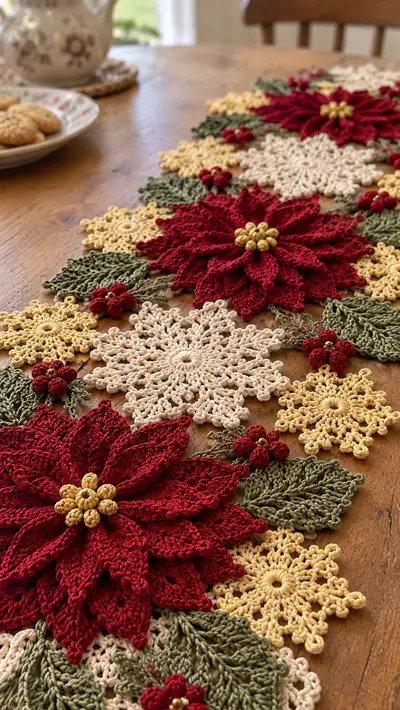
Create a stunning holiday table runner made from layered crochet motifs: deep red poinsettias, cream snowflakes, soft gold accents and olive green leaves join together to form an elegant runner. This pattern uses modular motifs crocheted separately and joined, with raised petals and bead centers for a rich, textured finish. Detailed instructions guide you through each floral, leaf and snowflake piece, plus joining and finishing tips for a professional result. Perfect for festive tables or seasonal home decor.
Progress Tracker
0% Complete
— Materials & Gauge :
Info :
Use sport weight mercerized cotton for a crisp lace effect. Gauge is not critical for motif matching but aim for approximately 9-10 motifs across a 40cm width using the specified hook and yarn. Block motifs to identical measurements before joining for even edges.
— Poinsettia - Center Disk :
Round 1 :
With red yarn, mr, ch1, 6 sc into ring, pull tight (6)
Round 2 :
Inc in each st around (6 inc) (12)
Round 3 :
(1 sc, inc) x6 (18)
Round 4 :
(2 sc, inc) x6 (24)
Round 5 :
(3 sc, inc) x6 (30)
Round 6 :
1 sc in each st around (30)
Info :
Block this small center disk flat. This forms the base from which raised petals will be attached. Place a stitch marker at the front of round for reference.
Round 7 :
(4 sc, inc) x6 (36)
Round 8 :
1 sc in each st around (36)
Round 9 :
Ch2 (counts as first hdc), hdc in next 35 sts, sl st to join (36)
Info :
We will use this disk as the anchor for three concentric petal layers. Keep the last round unfastened so you can join petals directly into the round with sl sts for neatness.
— Poinsettia - Petal Layer 1 (Inner Petals, 12 petals) :
Info :
Work petals in the round around the center disk. Each petal occupies 3 base stitches; there are 36 base sts so 12 petals are ideal. Use 2.0mm hook if you prefer firmer petals.
Petal 1 - Round 10 :
Attach yarn with sl st to first petal base (any evenly spaced st). Ch1, (sc, ch2, 2 dc, ch2, sc) in same base st – this creates a short pointed petal base. Sl st into next base st to anchor. (Petal formed)
Petal 1 - Round 11 :
Turn to outer edge: From base sl st point, ch1, sc in next ch2 loop, (3 dc in center ch sp, picot), sc in opposite ch2 loop, sl st into next anchor stitch. Fasten off or continue to next petal.
Info :
Repeat the Petal 1 sequence twelve times around the center disk so each petal uses 3 base stitches. Keep tension consistent so petals sit evenly; place a stitch marker at every 3rd base stitch to mark petal anchors.
Petal Rounds 12-20 :
Work each additional petal to build height: Ch1 at base, sc into base st, ch3, (tr, dtr, tr) into ch space, ch3, sc into opposite base st; sl st to next base st. Repeat for all 12 petals so each petal receives an inner raised ridge. After all petals are attached, fasten off and weave ends (12 petals).
Info :
After finishing layer 1, steam-block or wet-block petals to form a gentle cup; pin each petal in slightly raised position so second layer will sit neatly above.
— Poinsettia - Petal Layer 2 (Middle Petals, 12 petals) :
Round 21 :
With red yarn, join at base directly behind each inner petal: ch2, (hdc, 2 dc, hdc) in the chosen base loop to form a larger petal base; sl st to next anchor (12 larger petal bases)
Round 22 :
Into each petal base: ch1, sc in base, ch4, (dtr, tr, dtr) into ch space, ch4, sc into opposite base; sl st to next. Repeat around (12 petals)
Round 23 :
Work a decorative picot edge around these petals: *sc along petal edge, picot at peak (ch3 sl st into first ch), continue sc down.* Repeat for each petal. This creates a scalloped outer edge that overlaps inner petals.
Info :
Place these middle petals staggered between inner petals so they fill gaps and create fullness. Use a pin to hold each in place while crocheting the next to keep symmetry.
Round 24-26 :
Repeat a single crochet round around the full flower base catching both inner and middle petal anchors: 1 sc in each anchor stitch and in chain spaces (approx 72 sc) to secure layers. Fasten off leaving tail for sewing to lace doily base.
— Poinsettia - Petal Layer 3 (Outer Petals, 12 petals) :
Round 27 :
Join yarn behind middle petals in the larger chain spaces: ch2, (2 dc, 2 tr, 2 dc) in space to form a prominent outer petal base; sl st to next (12)
Round 28 :
Build height: ch1, sc in base, ch5, (tr, dtr, tr) into center, ch5, sc into opposite base; sl st to next petal base. Repeat for all 12 outer petals.
Round 29 :
Edge each outer petal with BLO slip stitches to create a defined ridge: working into back loops only of the petal base, sc around petal edge, sl st into base after each petal. This helps petals retain an upright stance (12 petals)
Info :
If petals are floppy, block them with a shallow curve so they slightly arch upward. Use wool or starch spray for a firmer hold when dry-blocking.
Round 30 :
Work one more securing round around the flower joining inner, middle and outer petal anchors: 1 sc in each join point, slip stitch to close. Count should be approx 84 sc depending on how many anchor points you use (approx 84)
Info :
Leave a long tail from this round to temporarily baste the poinsettia onto the lace doily base later. Do not fasten off completely until assembly for adjustment.
— Poinsettia - Gold Center Beads (Make 1 cluster per poinsettia) :
Round 31 :
With pale gold yarn, make 7 small bead-balls: for each bead ball, mr, ch1, 6 sc into ring (6). Fasten off leaving 6-8cm tail to sew into cluster.
Round 32 :
Sew 7 bead-balls together tightly into a small circular cluster. Use a beading needle to add a gold seed bead into the center of each small ball if desired. Stiffen slightly with a drop of fabric glue if beads are loose.
Info :
Sew the cluster into the very center of the poinsettia using the long tail left on the flower. Secure with several passes to ensure cluster sits flat and stable.
— Large Snowflake Motif (Cream) :
Round 1 :
With cream yarn, mr, ch3 (counts as dc), 11 dc into ring, sl st to top of ch3 (12)
Round 2 :
Ch5 (counts as dc+ch2), *dc in next st, ch2* around, sl st to 3rd ch of starting ch5 (12 dc, 12 ch2 spaces)
Round 3 :
Into each ch2 sp: (sc, ch5, sc) - large loop made into each spoke to form lace points. After completing 12 loops sl st to base (12 loops)
Info :
These large loops will accept layered snowflake detail and will serve as anchoring points for the small gold snowflakes between the main motifs.
Round 4 :
Working into each large loop: ch1, (sc, hdc, 3 dc, hdc, sc) - creates a scalloped point. Sl st to next loop and repeat (12 points)
Round 5 :
Picot edging round: into each point peak work (sc, picot, sc). This forms the crisp snowflake tips. After finishing, fasten off and block each snowflake flat and star-shaped.
Info :
Block these snowflakes to the same outer diameter as your stripped petals will occupy between poinsettias so they fill the gaps evenly in the runner.
— Small Snowflake Motif (Gold) :
Round 1 :
With pale gold yarn, mr, ch1, 6 sc into ring (6)
Round 2 :
Inc in each st around (6 inc) (12)
Round 3 :
(1 sc, inc) x6 (18)
Round 4 :
Ch4, sl st in next st, repeat around to make loops forming 6 small rays. After completing, sl st to join and fasten off. Block gently.
Info :
These tiny snowflakes (gold) are worked quickly and act as fillers around the large snowflake and petals for visual rhythm. Make multiples to match the spacing seen in the photos.
— Leaf Motif (Olive Green) :
Round 1 :
With green yarn, mr, ch1, 6 sc in ring (6)
Round 2 :
Inc in each st (6 inc) (12)
Round 3 :
(1 sc, inc) x6 (18)
Round 4 :
Ch3, (dc, tr, dc) into next st; continue working elongated stitches down one side of leaf: ch1, (dc in next, hdc next) until midpoint (approx 9 sts), ch1, turn and mirror down other side so leaf is worked in the round in long oval shape; sl st to base. (leaf shape)
Round 5 :
Working along center spine: attach yarn at base then ch1, 10 sc along center chain, each sc made into the back loop only to create a raised vein (10). Fasten off and block with gentle curve.
Info :
Make leaves in two sizes by increasing chain length for longer leaves used around poinsettias and smaller leaves for filler. Block each leaf slightly cupped for a natural look.
— Berry Cluster (Red) :
Round 1 :
With red yarn, mr, ch1, 6 sc into ring, pull tight (6)
Round 2 :
Inc in each st around (12)
Round 3 :
Fasten off leaving long tail. Make 3-4 mini balls and sew together into tight clusters of 3. Add a small gold bead (or two) in the middle for sparkle. Use long tails for sewing clusters between petals and leaves.
Info :
Berry clusters are decorative and placed near leaf junctions and between flower and snowflake motifs. Make enough clusters to match the photos — typically around 8-12 clusters for a runner of three large flowers.
— Lace Doily Base Motif (Cream - anchor for each flower) :
Round 1 :
With cream yarn, mr, ch3 (counts as dc), 11 dc in ring, sl st to join (12)
Round 2 :
Ch1, sc in same st, *ch5, sk 1 st, sc in next* around to create 6 large loop arches. Sl st to join (6 loops)
Round 3 :
Into each loop work (sc, hdc, 3 dc, hdc, sc) to form scallop petals (6 scallops)
Round 4 :
Ch2, (dc cluster across scallop 7 times) around to create a dense lace area. After finishing, sl st to join and block open to a fan shape roughly matching the outer diameter of poinsettias and snowflake motifs.
Round 5 :
Edge with picot and small loops to form scalloped outer edge: *sc, ch3, picot, ch3, sc* around. Fasten off and block flat.
Info :
Make doily bases for the positions of each poinsettia. The runner pictured uses a doily base at each flower end so that the full runner has scalloped ends and framed flowers.
— Joining Motifs & Connecting Vines :
Round 1 :
Arrange motifs on flat blocking board: place a central poinsettia + doily base, then a large cream snowflake above it, then another poinsettia, repeating the sequence. Use photos as placement guide — three poinsettias alternating with two full snowflakes creates the pictured runner.
Round 2 :
Using matching cream or green yarn, whip-stitch the outer edge of the doily base to the petal securing round of the poinsettia using the long tail left. Use small, evenly spaced whip stitches to make joins invisible. Do not pull tight — keep seam flat (approx 10-12 stitches per join area).
Info :
Pin each motif in final position before joining to ensure symmetry. For the runner, leave 6-10cm gaps (measured) so snowflakes and smaller motifs can fill those spaces without bunching.
Round 3 :
To create connecting vines between motifs: chain 20 from the join point, fasten off and position small leaves along chain by sewing through chain spaces. Attach small snowflakes and berry clusters at strategic points along chain using long tails. Make two vines between each main motif to create visual connection.
Round 4 :
Use slip-stitch chain join method for a flatter seam where motifs overlap: on overlapping edges, work sl st through stitches of both motifs simultaneously for 3-4 passes to strengthen the seam. Count seam stitches so both sides remain even.
Info :
For a neater look, use invisible whip-stitch (weave needle from front to back, catching inner loops only) across join areas. This keeps the decorative outer loops from catching and maintains lace visibility.
— Runner Edging and Final Blocking :
Round 1 :
Once all main motifs are joined, edge the entire runner with a cream scalloped border to unify the look. Attach cream yarn at one corner and ch1, sc evenly along edge rounding corners with extra stitches as needed (approx 4-6 extra sc at corners).
Round 2 :
Work scallop edging: *ch3, 5 dc in next space, ch3, sl st in next* repeat around. At edges that meet petals, reduce scallop size with *ch1, 3 dc, ch1* to avoid overlap.
Round 3 :
Final picot round for crisp finish: sc in each stitch, picot every 8th stitch across long edges. Weave in ends, trim, and perform a final wet-block. Use spray starch lightly to set shape if desired.
Info :
Blocking is essential. Pin the runner to the desired final shape and size, ensuring all scallops and petals are evenly spaced. Allow to dry completely before use. If you plan to launder, hand-wash gently and re-block while damp.
— Making the Full Runner (Layout & Counts) :
Info :
For the pictured runner length: make 3 poinsettia assemblies (each with doily bases), 2 large snowflakes and 18 small gold snowflakes as fillers, approximately 18-24 leaves and 8-12 berry clusters. Adjust quantities to lengthen or shorten the runner. For a longer table, repeat the middles: [poinsettia - snowflake - poinsettia] sequences until desired length is reached.
Round Example :
Example joining order per section: Doily base + Poinsettia (joined), two side leaf clusters, two small gold snowflakes between doilies and main snowflake, join to large snowflake, repeat. Count and mark each motif as you go to avoid mismatches.
Info :
Check alignment by moving the runner onto a table while pinned: slight shifts can be corrected before permanent sewing. Ensure bead clusters face upwards and are centered on each poinsettia.
— Finishing Touches :
Info :
Sew any loose petals down lightly at their bases to prevent catching. Use a small dab of fabric glue to secure bead clusters if you expect heavy use. For long-term storage, keep flat between tissue paper to avoid flattening petals.
Care :
Spot-clean or hand-wash in lukewarm water; reshape and re-block when damp. Avoid machine laundering to keep beads and raised petals intact.
Completing this poinsettia lace runner is truly rewarding — the layered petals, delicate snowflakes, and soft green leaves come together to create a richly textured centerpiece that feels handcrafted and timeless. Each tiny bead and picot edge adds character and sparkle, making it a perfect seasonal showpiece. Lay it on your table, pour a cup of tea, and admire how the handmade details transform your space. 🎄🧶