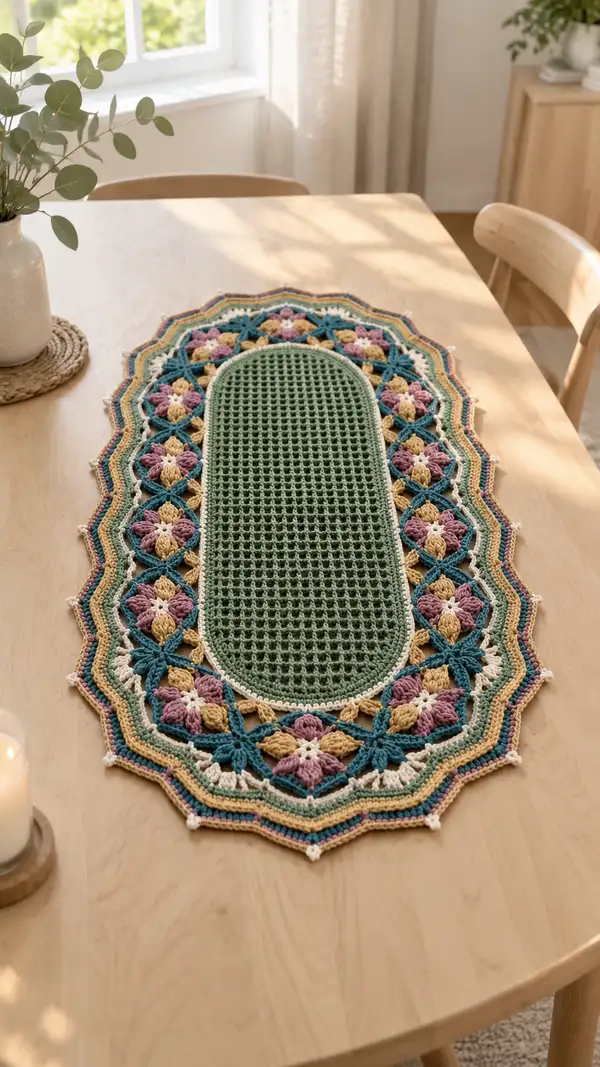
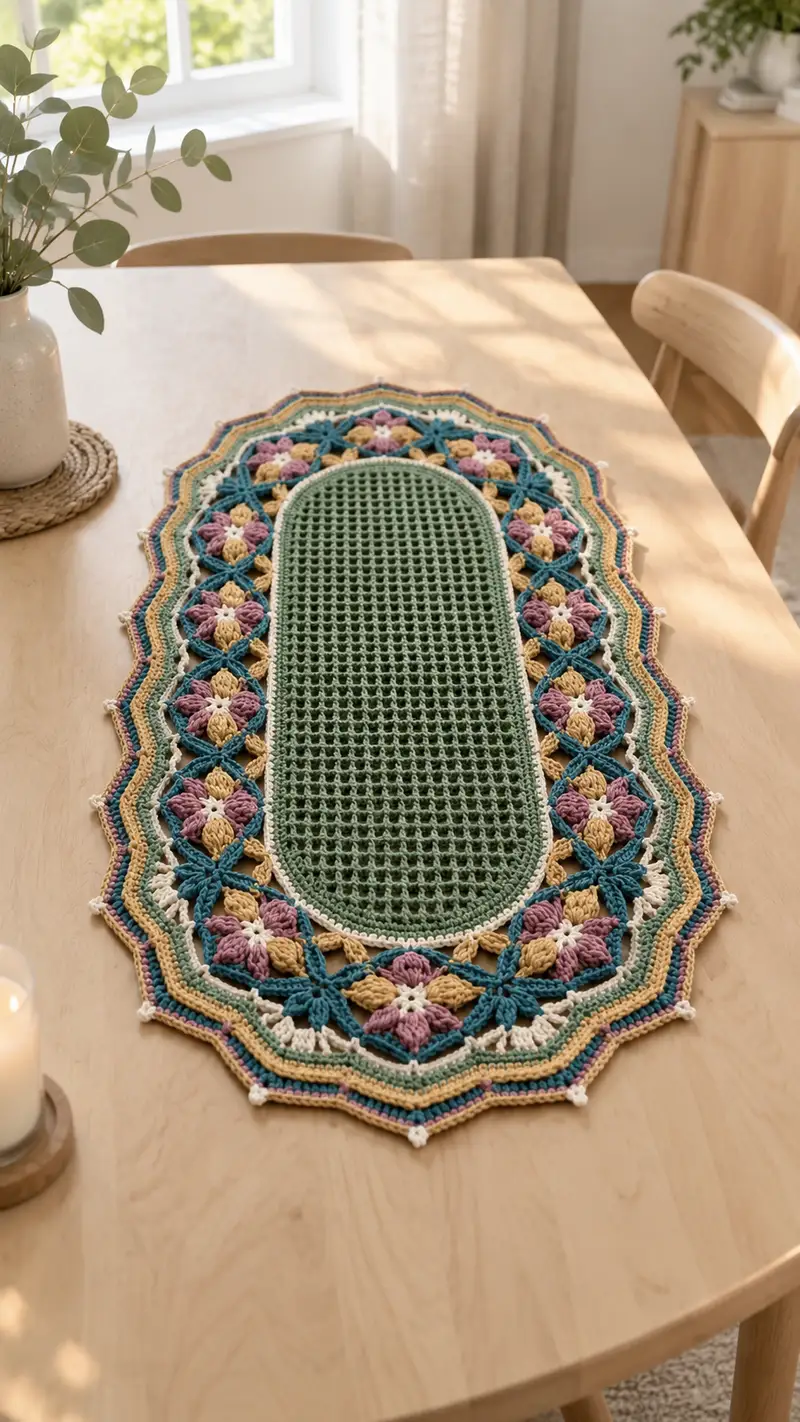
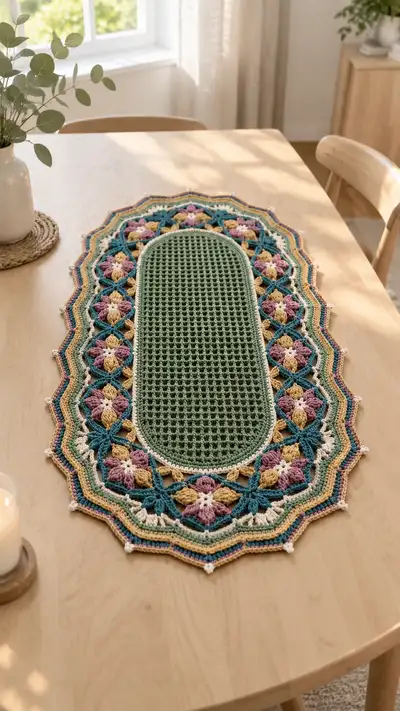
A vintage-inspired oval table runner featuring a dense central lattice and a floral-petal border in soft pastel hues. This pattern combines mesh filet, puff/petal motifs and an ornate scalloped edge to create a stunning centerpiece. Worked in worsted weight cotton with thoughtful color changes for a layered, textured look. Perfect for a dining table, sideboard, or as a decorative vignette.
Progress Tracker
0% Complete
— Notes & Gauge :
Info :
Gauge is not critical for this runner but for reference: using worsted cotton and 4.0mm hook the central mesh should measure approximately 5 sc/dc = 2 cm. Adjust hook to reach desired drape. The finished runner shown measures approximately 95cm long x 33cm wide (37 x 13 inches).
Info :
Use stitch markers to mark the center points on both short ends of the foundation chain (these are the 'turn corners' where increases create the oval curve). Work consistently in joined rounds; when instructed to join, sl st to first stitch unless otherwise noted.
— Foundation Oval & Round 1 (Center Start) :
Round 1 :
Ch 60. Start in 2nd ch from hook: 1 sc in each ch across to last ch, 3 sc in last ch, now work along remaining side of foundation chain (working into the opposite side of chain): 1 sc in each ch back to first ch, 3 sc in first ch. Join with sl st to first sc. Total = 124 sc.
Info :
This classic oval foundation creates two 'corner clusters' of 3 sc which form the rounded ends. Mark the first stitch of the round with a removable marker to keep track of round starts.
— Center Mesh Construction (Rounds 2-28) :
Round 2 :
Ch1, 1 sc in same st, *ch1, sk next st, dc in next st* repeat from * to * around meeting the skpattern across the circular base so you maintain an even mesh. Join with sl st to first sc. When worked evenly this produces 62 dc and 62 ch1 spaces across the round; total base units = 124.
Round 3 :
Sl st into the first ch-1 space, ch2 (counts as dc), dc in same ch-1 sp, *ch1, sk next dc, (dc, ch1, dc) in next ch-1 sp* repeat around. Join. This creates vertical mesh columns that align every round. Count of dc posts per round will be 62; ch-1 loops remain 62.
Round 4 :
Sl st to next ch-1 space, ch1, sc in ch-1 sp, *ch1, sk next dc, sc in next ch-1 sp* repeat around. Join. This alternating sc round tightens the mesh slightly while keeping the same base count 124 units.
Round 5 :
Ch2, dc in same st, *ch1, sk next sc/dc post then (dc, ch1, dc) worked into next ch-1 sp* repeat around. Join. Maintain stitch math: each repeat uses 2 base spaces, so 62 repeats = 124 base units.
Info :
Begin stuffing or adding weight is not used for a table runner. Instead focus on consistent tension to keep the mesh flat. If your mesh tends to ripple, switch to a slightly larger hook for the mesh rounds or tighten tension on the sc reinforcement rounds.
Round 6 :
Repeat Round 3 (dc grid) to keep a stable column. Join. Count: 62 dc posts, 62 ch1 loops.
Round 7 :
Repeat Round 4 (sc reinforcement into ch-1 loops). Join. This repeats the grid construction and stabilizes the oval.
Round 8 :
Ch2, dc in same st, *ch1, dc in next ch-1 sp, ch1, sk next dc, dc in next ch-1 sp* repeat around. This subtle variation opens the mesh slightly giving the vertical squares more definition. Join. Base unit count remains consistent: 124 units.
Round 9 :
Sl st into ch-1 space, ch1, sc in ch-1 space, *ch1, sk dc, sc in next ch-1* repeat around. Join. This stabilizing sc row ensures uniformity around the oval. Total base units unchanged.
Info :
At this stage you can measure center length and width. The printed runner has a fairly dense mesh; repeat the sequence of (dc grid, sc reinforcement, dc grid, sc reinforcement) until you reach the desired center length. For the pictured runner we work until Round 28.
Round 10 :
Repeat Round 3 (dc grid). Join. Maintain even tension; check that the oval remains oval not wavy.
Round 11 :
Repeat Round 4 (sc into ch-1). Join. Count: 124 base units.
Round 12 :
Repeat Round 5 (dc pairs separated by ch1) to create minor vertical ridges in the center. Join.
Round 13 :
Repeat Round 6 (dc grid). Join.
Round 14 :
Repeat Round 7 (sc reinforcement). Join.
Round 15 :
Repeat Round 8 (alternate dc grid opening). Join.
Info :
Keep the four corner clusters (where you worked 3 sc in the foundation) facing outward; these marking points correspond to the ends of the oval and help when aligning motifs that will be joined around the perimeter.
Round 16 :
Repeat Round 3 (dc grid). Join. Count unchanged.
Round 17 :
Repeat Round 4 (sc into ch-1). Join.
Round 18 :
Repeat Round 5 (dc pair openings). Join.
Round 19 :
Repeat Round 6 (dc grid). Join.
Round 20 :
Repeat Round 7 (sc reinforcement). Join.
Info :
Stop and count the rounds you have done from the foundation: you should be at approx half of center length. The pictured runner uses a center depth that fills about 60-65% of the eventual total runner length to leave a generous border for motifs.
Round 21 :
Repeat Round 8 (alternate dc opening). Join.
Round 22 :
Repeat Round 3 (dc grid). Join.
Round 23 :
Repeat Round 4 (sc into ch-1). Join.
Round 24 :
Repeat Round 5 (dc pair openings). Join.
Round 25 :
Repeat Round 6 (dc grid). Join.
Round 26 :
1 sc in each st around (124 sc). This solid sc round creates a neat border and base for joining the floral motifs. Join with sl st. Count = 124 sc.
Info :
The sc round (Round 26) is important because you will use these scs as footholds to anchor petals and connecting stitches of the border motifs. If your sc count is off, adjust by adding or subtracting evenly spaced sc to return to 124 total.
Round 27 :
Ch1, sc in same st and in next 2 sc, *ch3, sk next 3 sc, sc in next 3 sc* repeat around to create regular spacing of chain arches for motif attachment. Join. Pattern produces 31 chain-3 arches around the oval (these are approximate; if your foundation count varies, space arches evenly across circumference).
Round 28 :
Work a light decorative round in cream: sl st into each ch-3 arch, (ch1, 3 sc) into arch to create small cluster arches around the oval. Join. These small arches form a neat transition between the center and the petal motifs.
Info :
At the end of Round 28 the center is complete. Secure yarn and fasten off cream. Prepare to work the floral petal motif units that form the wide band surrounding the center. The motifs will be worked individually and joined as you go into the chain arches and into each other.
— Floral Petal Motif (Make 14 per side, repeat around) :
Motif Round 1 :
With teal (contrasting color) start each motif: ch6, join with sl st to form ring. Ch3 (counts as dc), work 11 more dc into ring, join with sl st to top of ch3. (12 dc in ring)
Motif Round 2 :
Ch1, sc in same st, *ch3, sc in next dc* repeat around to create 12 ch-3 loops. Join. These loops create petal foundations. Place markers on every 3rd loop if you want symmetric alignment.
Motif Round 3 :
Switch to mauve (petal color). In each ch-3 loop make (ch2, 3-tr puff, ch2) cluster: to make a petal: yarn over, insert hook in loop, yarn over and draw up loop, repeat 3 times (4 loops on hook), yarn over and pull through all loops, ch1 to secure. Repeat around to create 12 puff petals. Join. These puffs will form the outward-facing petals.
Info :
Puff stitches must be made consistently with the same number of loops to make petals uniform. If your puffs are too tall, use a smaller hook (3.5mm) just for petals and then change back to main hook for joining.
Motif Round 4 :
Switch to mustard. Working behind the mauve puffs, slip-stitch to the base of a petal then ch4, sc into base between petals to create a connecting loop, *ch4, sc between next two petals* repeat around. Join. You now have 12 ch-4 connecting arches around the motif.
Motif Round 5 :
With teal, work a 6-dc cluster (dc cluster) into each ch-4 arch: (dc, dc, dc, dc, dc, dc) spaced across the arch, ch1 and sl st to next base. This gives a textured star-like connector that will be joined to neighboring motifs. Join.
Motif Round 6 :
Switch to cream. Work ch1, sc in each dc of the cluster and sc into the base between clusters to create a neat rim and small picot spacing points: (sc across cluster, sc in base). Join.
Motif Round 7 :
Edge the motif: ch2, (dc, ch1, dc) in each of the 12 base sc positions to make little V shapes. Join. Fasten off leaving tails for sewing if you prefer to join motifs later; otherwise keep yarn attached for joining as you go.
Info :
Each motif is worked in 7 small rounds producing a 12-petal medallion. The motif diameter should be approx 8-9 cm when blocked. You will make as many motifs as needed to encircle the oval; the pictured runner uses a repeating pattern of 28 motifs all around (14 on each long side and 2 at each short end arranged slightly differently). For simplicity make 28 motifs total and position them evenly around the center.
— Joining Motifs to Center & to Each Other (Rounds J1-J8) :
Info :
Join motifs to the center by aligning each motif's cream rim sl st or sc stitches with the chain-3 arches on Round 26-28 of center. You will join motifs as you crochet Motif Round 7 by slip-stitching into the center's ch-3 arches at regular intervals. Pin motifs to the oval before joining for accuracy.
Join Round J1 :
Place first motif so that four of its base sc align with four consecutive ch-3 arches on the oval. Attach motif by sl st from motif into the center ch-3 arch, then continue motif rim round. Repeat to join motifs sequentially, connecting each motif to the previous motif with 2 sl sts per adjacent cluster to make a continuous band. Continue around the oval. You should join approximately 28 motifs total (adjust as needed for your spacing).
Join Round J2 :
Once all motifs are positioned and joined to the oval center, weave an additional connecting round using teal: with motifs attached, ch1, sc in each join point around through both motif rim and center sc, and work ch3 chain-loops between motifs where gaps appear to secure the motifs and create a lattice. Join.
Info :
Take time to pin and measure spacing. If motifs appear crowded, unpin and shift slightly outward (away from center) or inward as required. The chain loops created in J2 fill small gaps and allow later edging stitches to work smoothly.
Join Round J3 :
Work a round in cream: ch1, sc in each sc around both motif and center join area, and in each ch3 loop work (sc, ch3, sc) to make small arches. Join. This gives a consistent line of cream that highlights the motif row and forms the inner decorative ridge seen in the photo.
Join Round J4 :
Switch to teal: ch2, dc in same st, *ch2, sk next sc or ch-arch, 2 dc in next sc* repeat to create a narrow ridged ring that frames the motifs. Join.
Info :
At this point the runner has a fully attached floral band. The next rounds build the outer scalloped shell and colors visible in the picture: alternating mustard stripes, mauve rows, teal rows and cream picot points at the peaks.
— Outer Scalloped Border & Color Bands (Rounds B1-B30) :
Round B1 :
With mustard, ch1, sc in each st across the motif rim and joins (work through both layers where motifs and joiners meet), spacing evenly to achieve approx 148 sc around. Join with sl st. Count = 148 sc (adjust your count by adding or reducing evenly spaced sc to keep shape smooth).
Round B2 :
With mustard, ch2, (2 dc, ch1, 2 dc) in every 6th sc to create wide shell points around the runner, otherwise work 1 dc in each sc between shells. Join. This round begins forming the scallops.
Round B3 :
Switch to mauve. Into each shell arch work: sl st to center of shell, ch1, (sc, ch3, sc) to create a mini arch, join to next shell center with single crochets. Join. This adds a petal-like ridge between shells.
Round B4 :
Switch to cream. Work a decorative picot row: ch1, sc across, *ch3, ps into next sc (make picot), sc in next 3 sc* repeat around to add delicate points between shell peaks. Join.
Info :
Color bands shown in the photo alternate mustard, mauve, teal and cream. You can vary the number of rounds per color for wider or narrower stripes. Always join color changes on a seam that aligns with one of the motif join points to keep a tidy edge.
Round B5 :
Switch to teal. Ch2, dc in same st, *ch1, skip one, dc in next 3 sts, ch1, dc in next 2 sts* repeat to create small raised ridges; join.
Round B6 :
Switch to mustard. Ch1, 1 sc in each st for one round to smooth the ridge (approx 148 sc). Join.
Round B7 :
Switch to mauve. Work shell clusters along each scallop peak: into the top of each previous shell work (3 dc, ch2, 3 dc). Join. This increases the visual depth of each scallop point.
Round B8 :
Switch to cream: ch1, sc in each st around, placing an extra sc in shell troughs to maintain oval curvature. Join. Count will vary slightly; keep shaping smooth and even.
Round B9 :
Switch to teal. Work a textured round in BLO to create subtle ridges: ch1, 1 sc in each st BLO around. Join. This creates a shadow line between bands.
Round B10 :
Switch to mustard. Ch2, *2 dc in next st, ch2, skip next 2 sc, 2 dc in next st* repeat to form small arches between previous larger shells. Join.
Info :
From Round B1 to B10 you have created a layered scalloped border. The pictured runner has multiple repeats of color bands; continue alternating these band sequences to build visual depth. The next set of rounds tightens peaks and adds picot beads at the very edge.
Round B11 :
Switch to mauve. Ch1, sc in each st across smoothing row. Join.
Round B12 :
With cream, make decorative points: *sc in next 2, ch3, ps into 3rd ch for picot, sc in same st* repeat around to create small bead-like points on every second scallop. Join.
Round B13 :
Switch to teal: ch2, dc in same st, 1 dc in each st across until you reach shell peaks, at peaks work (dc, ch1, dc) to accentuate the point. Join.
Round B14 :
Switch to mustard. Ch1, sc in each st around. Join. This evens the edge and prepares for final picot points. Count approximate: 160 sc (adjust evenly as needed).
Info :
Check the runner edge: if scallops are too shallow, work one additional cluster round (3-3 dc shells) before the final picot round; if too tall, omit one shell repetition. Blocking will also enhance scallop definition.
Round B15 :
Final edging in cream: ch1, *sc in next 2 sc, ch3, ps into 3rd ch for picot, sc in next 2 sc, sl st into shell tip* Repeat around to create pointed peaks with picot beads at each peak. Join. Fasten off and weave in ends.
Round B16 :
Optional beading: If desired, with a contrasting color add a tiny bead by working a bead round: sl st into center of each scallop and work a small cluster (sc, picot, sc) to emphasize points. Join. Fasten off.
Info :
Weave in all starting/ending yarn tails on the wrong side of the runner with a tapestry needle. Press and block: wet-block or steam block carefully to open lace and pin scallops to precise points. Allow to dry fully before displaying.
— Finishing Touches & Customization Notes :
Info :
To lengthen or shorten runner, change foundation chain length at the beginning (add or subtract multiples of 2 for mesh repeats). If you change the number of foundation chains, recalculate the number of motifs around the oval accordingly so spacing remains even. You can also add a second row of motifs for an even wider band.
Info :
For a reversible look, use alternate joining methods: instead of joining motifs by slip-stitching, whipstitch them on the wrong side for cleaner visible edges on the right side. Use matching thread to make seams nearly invisible.
Info :
If you prefer narrower border colors, reduce the number of color rounds per band from 2-3 rounds down to one round per color. Conversely, increase rounds for bolder stripes.
This colorful oval runner brings texture and layered vintage charm to any table. Each section—center mesh, floral motifs, and scalloped edge—works together to create a rich, tactile centerpiece. Blocking reveals the lace-like details and crisp scallops. Enjoy the meditative rhythm of petals and shells as your runner takes shape. 🧶🌼✨