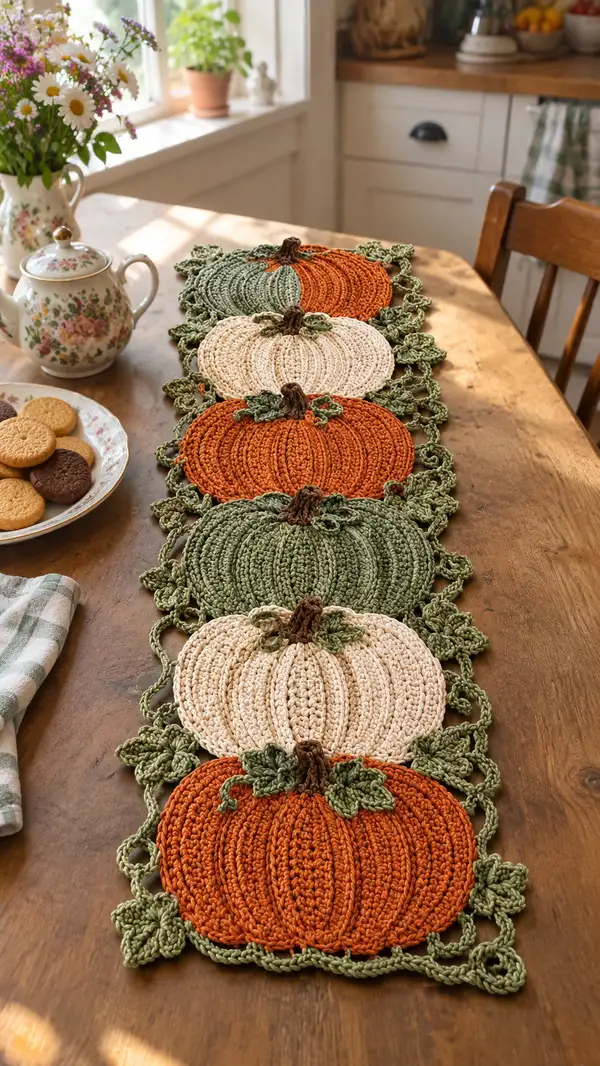
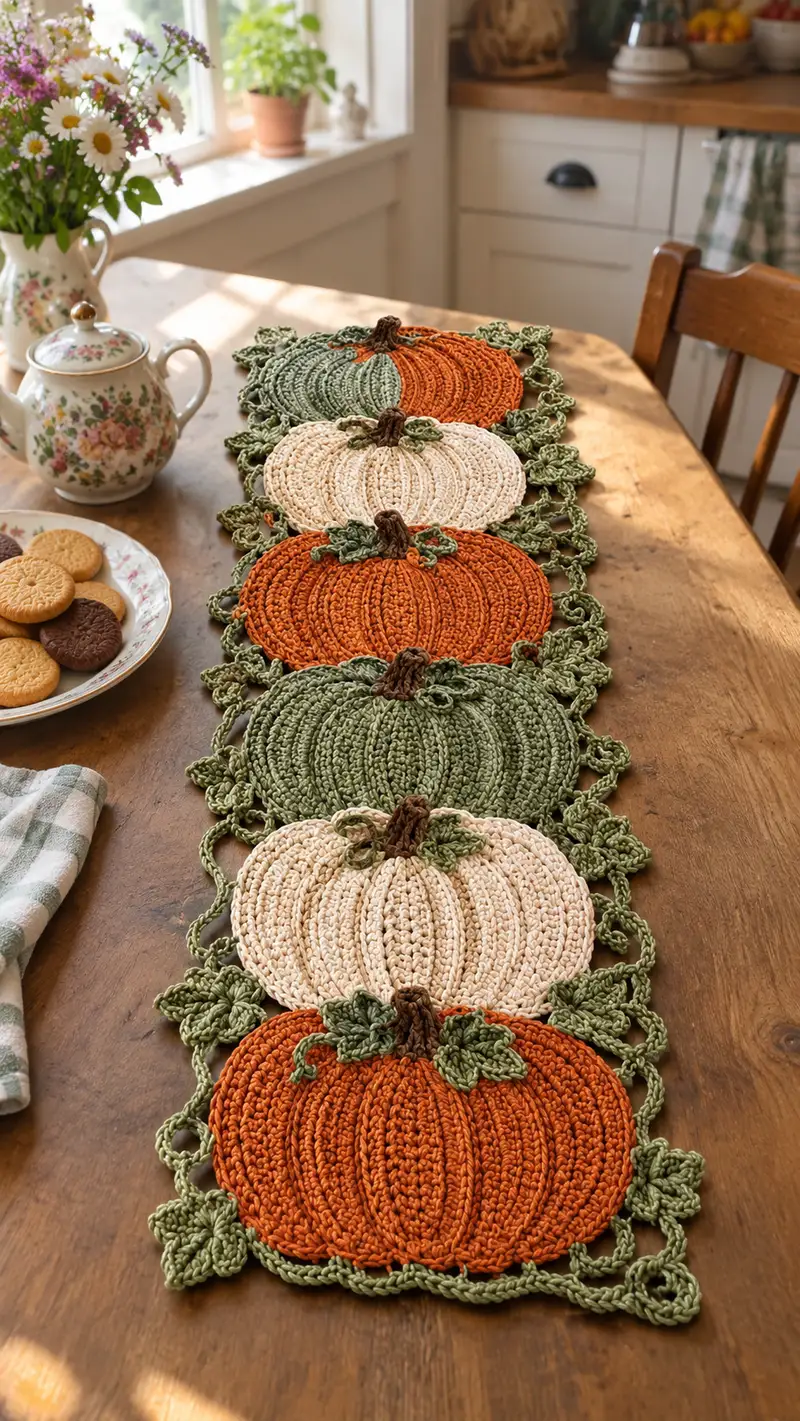
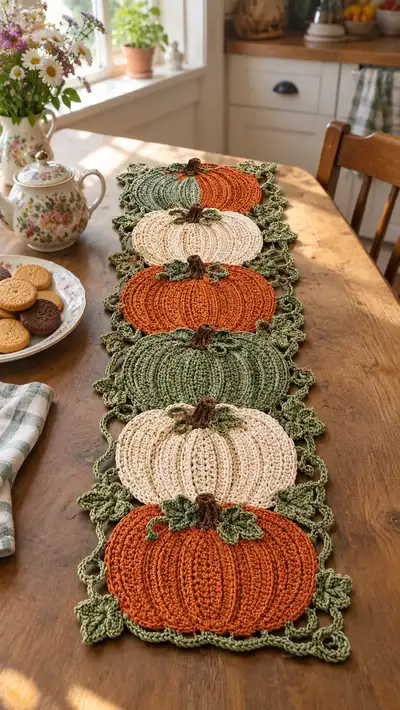
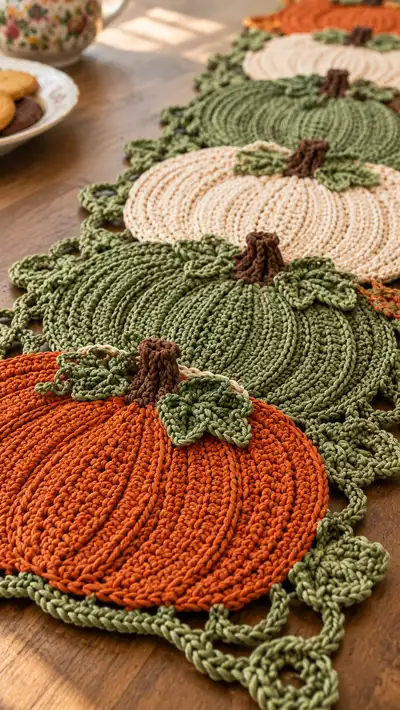
Create a charming pumpkin-patch table runner with stacked pumpkin motifs, leafy vines and braided edges. This cozy home decor pattern features alternating pumpkin colors, textured ribbing to mimic pumpkin grooves, cute curled stems and layered leaves. The finished runner lays flat and drapes beautifully across a wooden table for seasonal display. Clear round-by-round instructions, helpful Tips/Info sections, and joining guidance make this project approachable.
Progress Tracker
0% Complete
— Pumpkin Motif (Make 5 or more to desired runner length) :
Round 1 :
6 sc in magic ring (6)
Round 3 :
(1 sc, inc) x 6 (18)
Round 4 :
(2 sc, inc) x 6 (24)
Round 5 :
(3 sc, inc) x 6 (30)
Round 6 :
(4 sc, inc) x 6 (36)
Round 7 :
(5 sc, inc) x 6 (42)
Round 8 :
(6 sc, inc) x 6 (48)
Round 9-12 :
1 sc in each st (48) for 4 rounds to build body of the motif (48)
Info :
Choose the pumpkin color for this motif now (Pumpkin Orange, Sage or Cream). Carry color thread along the back side if you prefer not to fasten off between motifs. Use a stitch marker to note the start of round for reference when adding ribs.
Round 13 :
(10 sc, inc) x 4 (52)
Round 14 :
1 sc in each st (52)
Round 15 :
(12 sc, inc) x 4 (56)
Round 16-20 :
1 sc in each st (56). Work 5 rounds even to flatten and widen the motif (56)
Info :
At the end of round 20, mark 8 evenly spaced stitches to use as vertical ribs (56 / 8 = 7 stitches between rib anchors). Use removable markers or contrast scrap yarn to mark these key anchor points for later surface work.
Round 21 :
1 sc in each st BLO (56)
Info :
Working in the BLO (back loops only) on round 21 creates a subtle ridge that helps the surface slip stitches and post stitches read as pumpkins grooves. Keep the tension even; this round does not change stitch count.
Round 22 :
Surface ribbing pass 1: With the right side facing, attach yarn at first marker. Working surface slip stitch (sl st) method: insert hook from front to back at marker stitch, yarn over, pull a loop and sl st along the top surface toward center of motif for 12 steps, ch1, then sl st back to outer edge. Repeat at every second marker (perform on 4 of the 8 markers) creating four mirrored ribs. Fasten off and weave ends. (56)
Round 23 :
Surface ribbing pass 2: Re-attach yarn at the remaining 4 markers and repeat the surface slip stitch ribs on the opposite sides so all 8 ribs are present. Ensure ribs meet near center but do not pucker fabric. Fasten off and weave ends. (56)
Info :
Surface slip stitch ribs give the visual pumpkin segments. If you prefer raised, use fpdc (front post double crochet) columns worked around the corresponding stitches instead: fpdc around the post of the stitch indicated by the marker for 3-5 rounds to build height.
Round 24 :
1 sc in each st (56)
Round 25 :
1 sc in each st (56)
Round 26 :
1 sc in each st (56)
Info :
Check the pumpkin for fullness and flatness. If the motif cups up slightly, block it flat with pins and a damp cloth or light steam. Blocking evens out surface ribs and makes joining easier later.
Round 27 :
(7 sc, dec) x 7 (49)
Round 28 :
(6 sc, dec) x 7 (42)
Round 29 :
(5 sc, dec) x 7 (35)
Round 30 :
(4 sc, dec) x 7 (28)
Round 31 :
(3 sc, dec) x 7 (21)
Round 32 :
Fasten off leaving a long tail for sewing to the vine/edge. Weave the tail through remaining stitches and close; knot and hide the end. Press or block flat. (21)
Info :
These final decrease rounds sculpt a slight scalloped outer edge so that the motif sits neatly when joined. Because motifs are flat, stuffing is not used. Instead, keep the fabric relatively un-stretched for best results.
— Stem (Make 1 per pumpkin) :
Round 1 :
6 sc in magic ring using Chocolate Brown (6)
Round 3 :
1 sc in each st (12)
Round 4 :
1 sc in each st (12)
Info :
For a short chunky stem, work 6-8 rounds even. For a taller stem, continue rounds to desired length (8-10 rounds total). The stem is worked in continuous rounds without turning to form a small hollow tube.
Round 5 :
(2 sc, dec) x 3 (9)
Round 6 :
1 sc in each st (9)
Round 7 :
1 sc in each st (9)
Round 8 :
Fasten off leaving a long tail for sewing. Optionally stuff a very small amount of fiberfill into the top of the stem for shape before sewing to pumpkin center. (9)
Info :
To make the stem ridgey, before fastening off, work 1-2 rounds of fpdc around the tube in Chocolate Brown to create a bark-like texture. Alternatively, use hdc for a softer look.
— Leaf (Make 2-3 leaves per pumpkin) :
Round 1 :
With Leaf Green, ch 8, sl st to 2nd ch from hook, 1 sc in next, hdc in next, dc in next, tr in next, dc in next, hdc in next, sc in last, sl st to join base. This creates a small pointed leaf shape (work is not in continuous round but in an elongated chain). Count:/not applicable
Info :
The leaves in the sample photo are small layered leaves with a curled tendril. Work leaves in open chain and stitch increases to give a gentle curve. You can also make leaves larger by starting with ch 10-12 and adding more tall stitches in the center.
Round 2 :
Working along the outer edge from tip to base: sl st, sc, hdc, (dc, ch1, dc) at the widest point to create a slight scallop, hdc, sc, sl st to base. Fasten off leaving long tail for sewing.
Round 3 :
Optional surface vein: With same leaf color, use surface slip stitch to create a central vein from base to point, anchoring at tip. (This does not change stitch counts.)
Info :
Pin leaves around the stem before sewing to decide placement. Leaves can be layered and slightly overlapped to mimic the photo. Curl leaf edges gently with fingers or by blocking on a curved surface.
— Small Curled Tendril (Make 1 or 2 per pumpkin) :
Round 1 :
With Leaf Green, ch 20, sl st in 2nd ch and each ch back to create a tight spiral cord (or ch 12 for shorter tendril). Fasten off and leave tail for sewing.
Info :
Tendrils are simple chain spirals. To create a spiral that holds shape, after making the chain, twist it tightly and spray with a light starch or a mixture of water and glue, then dry wrapped around a pen to set the curl.
— Vine Border & Motif Connector :
Round 1 :
Using Vine Green, join at outermost stitch of a pumpkin motif (choose point between scallops). Ch 6, sl st into the next outer stitch to create a loop. Repeat around motif placing loops approximately every 6-8 stitches for a decorative chain loop border. Work this same method for each motif. (This is decorative and does not change motif stitch count.)
Round 2 :
After creating loops around each motif, join to the next motif by ch 12 (connector chain), sl st into the adjacent motif loop. Continue chaining between motifs across the runner length to link motifs in a ladder-like vine. Keep chain tension even to avoid puckers. (chain length x connectors as needed)
Info :
Measure your motif spacing visually as in the photo — connectors are long enough to lay flat but loose enough to create slight scalloped negative space. Adjust ch 10–16 depending on desired spacing and table width. Pin the entire runner before final joining to ensure even spacing.
Round 3 :
Work small leaf clusters along the vine: In vine green, in connector chain center ch 6 space, work (sc, hdc, dc, picot, dc, hdc, sc) all into the same chain space to create a 7-stitch leaf cluster. Repeat every other connector along the runner. Fasten off. (no change to motif counts)
Round 4 :
Decorative scallop: Along the outer edge of the loops, work in Vine Green: *(sl st into loop base, ch3, 5 dc into loop, ch3, sl st into same base) skip next loop; rep* to create scallop sections between motifs. This creates the leafy edging visible in the photo. Fasten off and weave ends. (edging does not alter motif stitch counts)
Info :
The vine border is worked after motifs are assembled so you can shape chains and leaves around actual spacing. If you are making a single motif for a placemat, work fewer connector chains and reduce repeats accordingly.
— Joining Motifs (Sewing & Connecting) :
Round 1 :
Lay two pumpkin motifs right sides up with the decorative vine/loop edges facing outward. Decide orientation (pumpkins can alternate colors as in the photo). Using long tail from one motif, whip stitch through the outermost rows of both motifs along three or five evenly spaced points to anchor them together; leave connectors loose for the vine then sew across more fully later. (no stitch count change)
Info :
Use mattress stitch or whip stitch spaced 6-8 mm apart when attaching motifs to create a nearly invisible seam. Start by pinning two motifs in position and checking alignment before any sewing. Re-position if necessary to ensure stems and leaves face the top consistently.
Round 2 :
After pinning and sewing the first seam, join the connector chains (ch 12) to the loops on each motif using sl st and single crochet to secure connection points. Reinforce connector chain attachment with 1-2 additional stitches so the runner stays flat. (no stitch count change)
Round 3 :
Continue joining each additional motif the same way until the runner reaches desired length. Keep an even number of pumpkins or a symmetrical arrangement for a neat visual flow. Fasten off and weave in all joining tails. (no stitch count change)
Info :
If you prefer a sturdier join, after initial seaming, work a single round of sc through both motif edges where they meet to create a banded seam. This makes a stronger runner useful for heavier centerpieces.
— Final Edging (All-around scalloped trim) :
Round 1 :
With Vine Green, join at any outermost stitch; ch1, sc evenly around entire runner edge (including connectors and motif outer edges). Aim for 1 sc every 4-5 mm to create an even edge. (st count varies with runner size)
Round 2 :
*Ch3, 5 dc in next sc, ch3, sl st in next sc, skip 1 sc* repeat around to create scallops. Adjust dc numbers to suit your preferred scallop size. Fasten off and weave ends. (decorative; no global stitch count change)
Info :
The final scalloped trim ties the runner together visually. If you want a neater finish, work a preliminary round of BLO sc before scallops to create a slightly raised border that the scallops sit on.
— Optional Decorative Raised Ribs (Alternate technique) :
Round 1 :
If using fpdc to create raised pumpkin ribs: after round 20 on the motif, work fpdc around the post of the stitch indicated by each marker for 3 rounds (work all fpdc in continuous rounds without turning). Each round will keep the same stitch count (56) but add texture height. Fasten off when satisfied. (56)
Info :
FPDC ribs are more pronounced and will make the runner slightly thicker. Ensure you maintain the same stitch positions across all motifs for a consistent look. If you alternate between surface slip stitch and fpdc, the visual will vary; choose one texture for uniformity.
— Assembly & Finishing Touches :
Round 1 :
Sew stems at the central topmost point of each pumpkin motif: center the stem over the final center stitches (use the 21-stitch closure area as a guide). Use whip stitch or ladder stitch and secure with several passes. Hide ends inside the motif using a yarn needle. (no global stitch count change)
Round 2 :
Attach leaves in a pleasing cluster around each stem: use the long tail leftover from leaf to stitch through the motif top and fasten. Add the curled tendril by sewing the chain spiral to the seam of the stem and leaf cluster so it curls naturally across the pumpkin surface. (no global stitch count change)
Info :
After all pieces are sewn and the runner is laid out, press lightly and block flat. If you used cotton yarn, a light spray with fabric starch will give a crisp edge and help the runner hold its shape on the table.
Round 3 :
Weave in all ends using yarn needle. Trim tails close to the fabric. Inspect the runner for any loose attachments and reinforce if needed. The runner is now complete and ready to display.
Info :
To clean, spot-wash gently and lay flat to dry. Cotton runners may soften after washing; re-block when dry if necessary. Avoid heavy wetting if stems were wired or starch-treated tendrils were used.
Completing this pumpkin patch runner is such a satisfying seasonal project. Each motif stacks together like a little harvest parade down your table and the leafy vines soften the edges for a vintage look. Whether you make a short centerpiece runner or a long table covering, it brings cozy charm to your home. 🧶🍂 Enjoy arranging the pumpkins, and don't forget to share your finished runner! 🎃