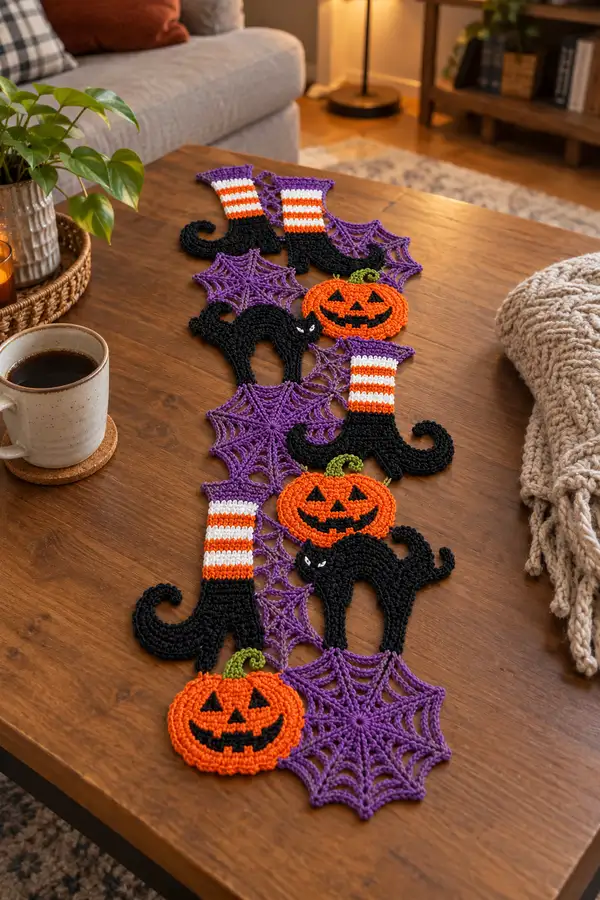
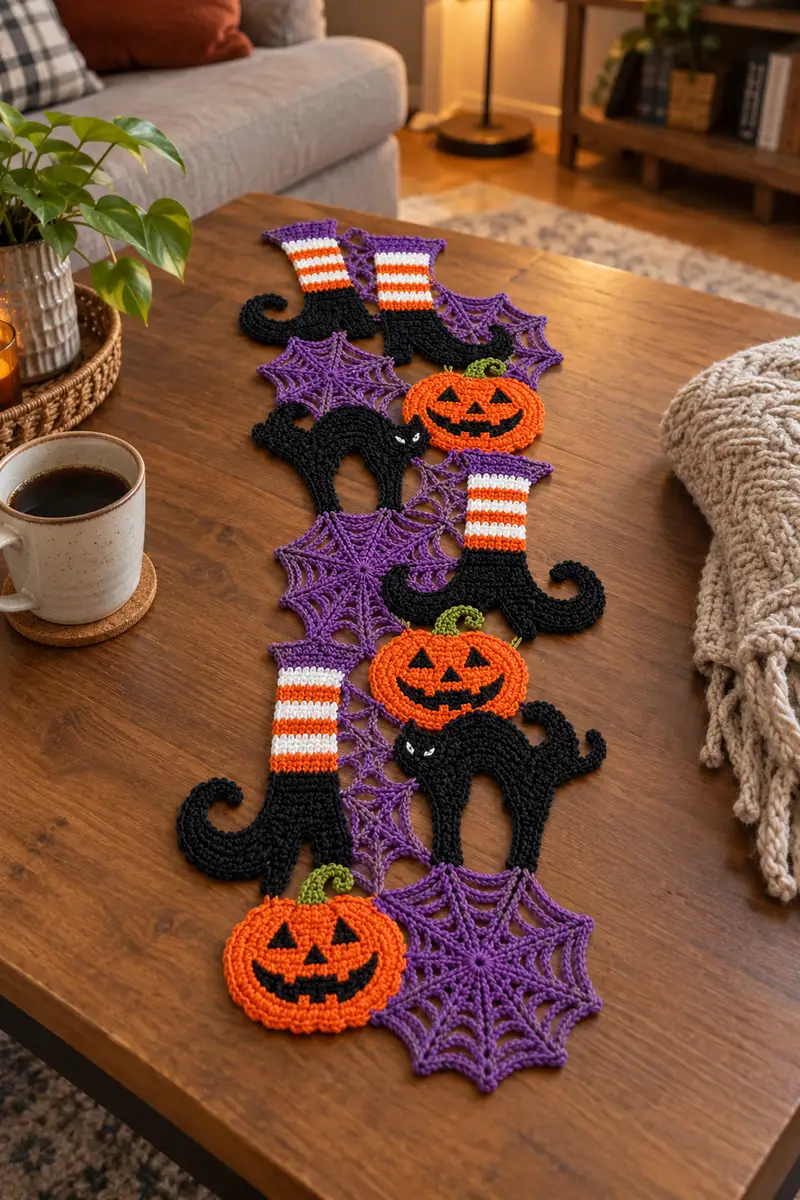
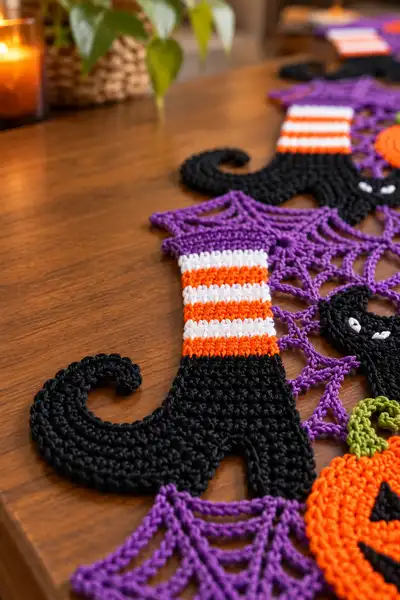
A playful Halloween table runner featuring whimsical witch boots, smiling jack-o-lanterns, curious black cats and linked purple spiderwebs. This flat, motif-based pattern is worked in bright orange, purple, black, white and a touch of green for stems. Perfect for adding instant seasonal charm to a coffee table or sideboard.
Progress Tracker
0% Complete
— Spiderweb Motif (Make 8-12 for a runner) :
Round 1 :
mr, ch1, 8 sc in magic ring (8)
Round 2 :
2 sc in each st around (16)
Round 3 :
(1 sc, 1 inc) x 8 (24)
Info :
Change to purple yarn if not already. This small disc will be the center that the radiating spokes will attach to. Keep tension even so the center lies flat.
Round 4 :
1 sc in each st around (24)
Round 5 :
*Ch6, sl st in next st of disc; rep from * 12 times completing 12 ch6 spokes; join with sl st to first sl st
Info :
Count spokes as you make them to ensure exactly 12 radiating chains. These chains form the arms of the web. Keep the chains uniform length and tension.
Round 6 :
Work around each spoke: *(sl st into base of spoke, ch3, 3 dc into next ch of spoke, ch3, sl st into same spoke base) x around to create a small shell on each spoke (12 shells)
Round 7 :
Ch1, *in space between spoke shells make (sc, ch4, sc) to create first web ring, skip to next space; rep around (24 sc, 12 ch4 loops total)
Round 8 :
Ch1, work into each ch4 loop: (sc, ch5, sc) to enlarge ring; rep around (24 sc, 12 ch5 loops)
Info :
At this stage the web starts to open. Keep loops consistent; you can block each web flat before joining to help keep shape. Crochet tightly where webs will connect to other motifs so joins are secure.
Round 9 :
Ch1, slip into first ch5 space, *(sc, ch6, sc) in each ch5 space; rep around (24 sc, 12 ch6 loops)
Round 10 :
Ch1, work a decorative picot edge: into each ch6 loop do (sc, ch3, sc, picot) to produce a pointed web edge; rep around
Round 11 :
1 sc in each sc around to tidy the ring edges (24)
Info :
Fasten off leaving a 6 inch tail to use when slip-stitch joining webs together later. Make as many spiderwebs as your runner will require; the sample runner uses six large and three small webs alternating.
Round 12 :
Optional: If you want a slightly larger web, restart at ch7 spokes instead of ch6 and repeat the enlargement rounds once more to produce a larger motif (counts will scale accordingly)
— Witch Boot Motif (Make 4-6 boots) :
Round 1 :
With black, ch10, join with sl st to form a ring (10 ch ring)
Round 2 :
Ch1, work 10 sc evenly around ring (10)
Round 3 :
Inc in each st around (20)
Round 4 :
(1 sc, 1 inc) x10 (30)
Info :
This creates the heel/sole base. We are working in rows around this base to shape the curled toe later. Keep a stitch marker at the leftmost stitch to mark the outside edge for shaping guidance.
Round 5 :
1 sc in each st around (30)
Round 6 :
1 sc in first 20 sts, dec 2, 1 sc in last 8 sts (28)
Round 7 :
1 sc in first 18 sts, dec 2, 1 sc in last 8 sts (26)
Info :
These decreases begin to set the front of the boot and slimming toward the toe. Work tightly on the toe shaping for a firm curl later.
Round 8 :
1 sc in first 16 sts, dec 2, 1 sc in last 8 sts (24)
Round 9 :
1 sc in first 14 sts, dec 2, 1 sc in last 8 sts (22)
Round 10 :
1 sc in first 12 sts, dec 2, 1 sc in last 8 sts (20)
Info :
Now we will form the toe and curl. To create the curl, we will build an offset spiral of sc rounds over the toe area and then work skirt rows for the upper leg.
Round 11 :
Sc around to maintain 20 sts (20)
Round 12 :
Working only into first 12 sts (toe area): (2 sc in next st, sc in next 2 sts) repeat across 12 sts to create a tapered curve (increase pattern creates 16 within toe area); then 1 sc in remaining 8 sts (24)
Round 13 :
BLO for next round. 1 sc in each st BLO around (24)
Round 14 :
Fold toe inward slightly; working in rounds to shape curl: in the first 10 sts of the toe area do (sc2tog, sc, sc) across to gradually narrow curl then sc around remaining boot front and heel (22)
Info :
At this point the toe should begin to curl naturally due to the increase/decrease pattern. Use a small amount of stuffing into the heel area if you want a slightly raised sole; keep toe mostly flat/firm but not overstuffed—this motif is flat overall.
Round 15 :
1 sc in each st around (22)
Round 16 :
Work 2 rounds of sc in FLO to create a ridge where the shoe meets the sock (22)
Round 17 :
Change to orange. Ch1, 1 sc in each st around for 1 round (22)
Round 18 :
Change to white. 1 sc in each st around (22)
Round 19 :
Change to orange. 1 sc in each st around (22)
Round 20 :
Change to white. 1 sc in each st around (22)
Info :
These rounds create the striped sock section. Carry unused color across the back inside of the sock or break yarn at each stripe and weave ends later. Keep stripes even and count stitches each stripe to maintain alignment.
Round 21 :
Change to purple for top of sock: 1 sc in each st around for 2 rounds (22)
Round 22 :
1 sc in each st around (22)
Round 23 :
Work an edging: *ch2, skip 1 st, sc in next st; rep around to create a decorative scalloped top; join with sl st to first sc
Round 24 :
Fasten off leaving long tail for seaming. Weave in ends later. Optionally block flat to shape toe curl more pronounced.
Info :
Make as many boots as desired. Boots are worked flat in nominal thickness with no stuffing. If you prefer a slightly padded boot, work with a single layer and add a thin craft felt backing or embroider a sole later.
— Pumpkin Motif (Make 3-4 pumpkins) :
Round 1 :
mr, ch1, 6 sc in magic ring (6)
Round 3 :
(1 sc, 1 inc) x6 (18)
Round 4 :
(2 sc, 1 inc) x6 (24)
Round 5 :
(3 sc, 1 inc) x6 (30)
Info :
Switch to orange yarn at the start and keep tension even. This forms the base of the pumpkin. For a slightly larger pumpkin, add another increase round (4 sc, inc) x6 to reach 36 sts.
Round 6-9 :
1 sc in each st (30) for 4 rounds to build height (30)
Round 10 :
(3 sc, 1 dec) x6 (24)
Round 11 :
(2 sc, 1 dec) x6 (18)
Round 12 :
(1 sc, 1 dec) x6 (12)
Info :
Stuff pumpkin lightly with fiberfill to give it shallow dimension—this runner's pumpkins are intentionally flat but slightly raised. Do not overstuff or it will not lay flat on the table.
Round 13 :
6 dec (6) - close central hole and finish with a neat invisible close; fasten off leaving a long tail for weaving
Round 14 :
Using orange yarn and working flat, surface crochet 6 'ribs' by dividing pumpkin into 6 segments: with tapestry needle and slip-stitches, stitch a line from center outwards in evenly spaced intervals (visual guide: place lines at every alternate stitch on round 6)
Round 15 :
Face: With black yarn, embroider or crochet small triangular eyes and nose. For mouth, embroider a wide jagged smile. Alternatively, make small black crochet appliques: mr, 6 sc (6) - flatten triangle and sew. Position eyes at round 4 height, spaced about 6-8 sts apart depending on pumpkin size.
Info :
Use the long tail from the pumpkin finish to sew a small, coiled stem. Use green yarn to chain 8, sl st back along the chain to create a spiral stem and attach to top center. Make small leaves by ch4, sl st in 2nd ch from hook, sc in next and sl st to base.
Round 16 :
Sew the pumpkin flat with a little gather at the back if desired to emphasize roundness. Fasten off and weave in ends thoroughly.
— Black Cat Silhouette Motif (Make 3-4 cats) :
Round 1 :
With black yarn, ch6, join with sl st to form a ring (6 ch)
Round 2 :
Ch1, 6 sc into ring (6)
Round 3 :
Inc in each st around (12)
Round 4 :
(1 sc, inc) x6 (18)
Info :
These first rounds form the cat head area which will later be flattened and shaped into a stylized head and pointed ears. Keep stitches tight to hold silhouette edges clearly.
Round 5 :
1 sc in each st around (18)
Round 6 :
Start body: ch1, work 18 sc in back loop only (BLO) to create a slight ridge (18)
Round 7 :
Continue in BLO: 1 sc in each st (18)
Round 8 :
Form neck: dec 2 evenly spaced (16)
Round 9 :
Work outwards in flat shaping for torso: increase on each side to make cat arch: at positions across back make (inc, 3 sc) to widen back (20)
Round 10 :
Work chain extension for tail base: ch8 from back midline and join back with sl st to create tail foundation; then continue 1 sc around body edges (20)
Info :
The cat motif is largely flat so the tail and legs are formed by working chains and connecting them into the body silhouette with sc. If you prefer a more raised tail, add a second layer of stitches around the chain by working sc around the tail chain.
Round 11 :
Shape hind legs: working on underside of body, leave a small gap and create two short arcs by ch6, sl st back to create leg openings; sc around entire motif to tidy edges (20)
Round 12 :
Shape curled tail: working into tail chain, 1 sc in each ch, then do 2 sc in last ch to turn and spiral back along tail foundation creating a curled tail that lies flat; join and 1 sc around rest of body (24 including tail stitches)
Round 13 :
Make ears: on top of head mark two adjacent stitches, ch3, 2 tr into same st, sl st to next marked st, ch3, 2 tr into same marked st; fasten off small ear tips and flatten with a few stitches to hold point
Round 14 :
Eyes: With white yarn embroider small almond shapes at head level; add tiny black dot or stitch to center for pupils. Use hiding stitches to anchor yarn firmly.
Info :
Make the cat entirely flat. If you prefer, work two mirrored halves and seam them together for slightly thicker silhouette. Use stitch markers to maintain symmetry across both sides of the cat.
Round 15 :
Edging: 1 sc in each st around the entire motif to create a consistent border and tidy outward-facing edges; fasten off and leave long tail for joining
— Boot Stripe & Decorative Toe Curl Detail :
Round 1 :
For toe curl embellishment, rejoin black yarn at the curled toe lip: ch4, then sc evenly into the toe lip edge to form a decorated rim (approx 8 sc)
Round 2 :
Working around the rim, make 1 sc in each st for two rounds to build thickness and allow the curl to hold shape (8)
Info :
If you want a sharper curl, add a small internal wire (optional) wrapped in yarn and slip-stitch it into position before closing the rim. Heat wire ends or fold them into a loop so they are not sharp.
Round 3 :
Fasten off and weave in ends. Repeat on all boot toes to make them uniform in shape and thickness.
— Joining Webs and Motifs Together (Assembly Chain Technique) :
Round 1 :
Lay out motifs in desired sequence (sample: boot - web - pumpkin - cat - web - boot - web - pumpkin). Pin in place on a blocking board to ensure alignment
Round 2 :
With purple yarn, position at an intersection point where two motifs meet. Sl st into the edge st of motif A, ch6, sl st into a corresponding edge point in motif B to create a connecting loop. Repeat between all touching points to create lacy connectors (use 4-6 connectors per junction depending on motif size)
Info :
Work connectors in a consistent pattern so the runner remains flat. The connector chains form a decorative open lace; make connectors at the outer points of spiderwebs to tie in boots and pumpkins neatly.
Round 3 :
After connecting all major motifs, work single crochet around the entire outer edge of the runner to tidy the border. In curved areas, use (sc, ch1, sc) in 1 st to maintain shape and avoid distortion
Round 4 :
Make a decorative outer scalloped edge: *skip 2 sts, in next st work (5 dc), sk 2, sl st in next; rep around the outer edge for a classic scallop. Fasten off and weave in all ends
Round 5 :
Optional: Use contrasting thread to sew a narrow backing felt to the underside of the runner to provide table protection and prevent slippage; sew by hand with small neat whip stitches around motifs only where necessary
Info :
Blocking the assembled runner lightly with steam or wet blocking helps flatten any ripples caused by connecting motifs. Pin into position and allow to dry completely before use.
— Small Details: Stem, Leaf and Eye Embellishments :
Round 1 :
Stem: With green yarn ch6, sl st back along chain to form a spiral stem. Sew to pumpkin center using tail yarn
Round 2 :
Leaf: Ch4, sl st in 2nd ch from hook, sc in next ch, sl st to base. Make two leaves and sew beside stem for natural look
Round 3 :
Cat Eyes Detail: With white yarn make two small oval french knots or small satin-stitched ovals; add a tiny black stitch for pupil; anchor firmly under rows to keep eyes flat
Info :
Use spare black yarn to tidy and fill in black spaces on jack-o-lantern faces. Embroidery adds a handmade touch and lets you customize expressions.
— Optional Edging Variation (Lacy Border) :
Round 1 :
With purple yarn, join at any outside edge, ch3 (counts as dc), *skip 2 sts, (3 dc, ch2, 3 dc) in next st (shell), sk 2, dc in next; rep around
Round 2 :
Ch1, *in ch2 space work (sc, ch3, sc) to create picot arches between shells; rep around and fasten off
Info :
This lacy border is decorative and helps the runner sit flat on a tabletop. If your table runner must be more robust, use a tighter sc-only border instead.
— Finishing Touches & Blocking :
Round 1 :
Pin the assembled runner flat on a blocking board and lightly spritz with water or steam. Shape toes, pumpkins and webs so they lie flat and symmetrical
Round 2 :
Allow to dry completely; recheck seam connections and weave in any remaining tails securely into the body of motifs
Info :
For a more durable runner, top-stitch a lightweight contrasting thread through the junction points to lock motifs together without being visible from the top side.
This Halloween runner brings bright, whimsical charm to your table with handcrafted spiderwebs, witchy boots, jack-o-lanterns and playful cats. Each motif is designed to be quick to crochet yet detailed enough to feel special. The modular format makes it easy to customize the length and color palette to suit your holiday decor. I hope this project fills your home with cozy, spooky vibes and gives you lots of creative joy. 🧶🎃✨