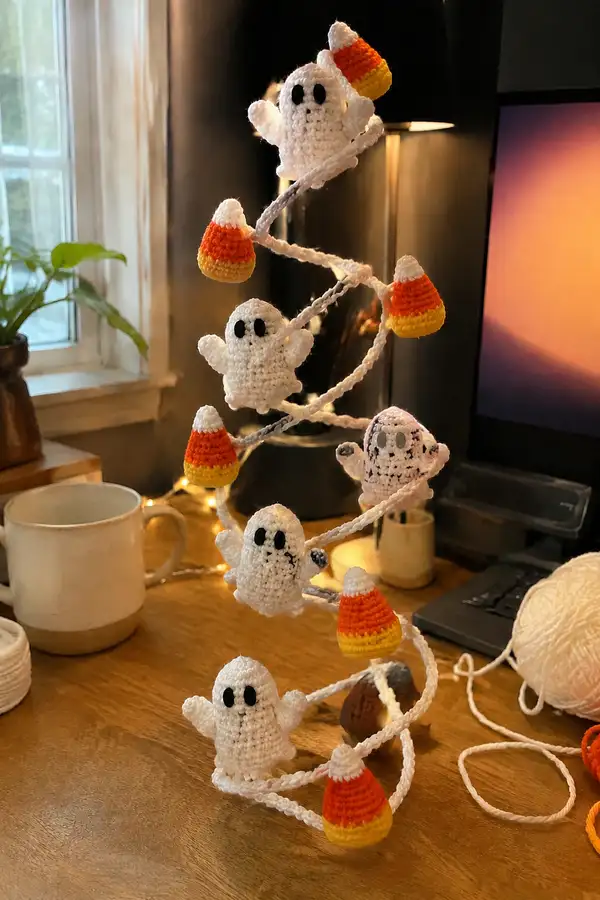
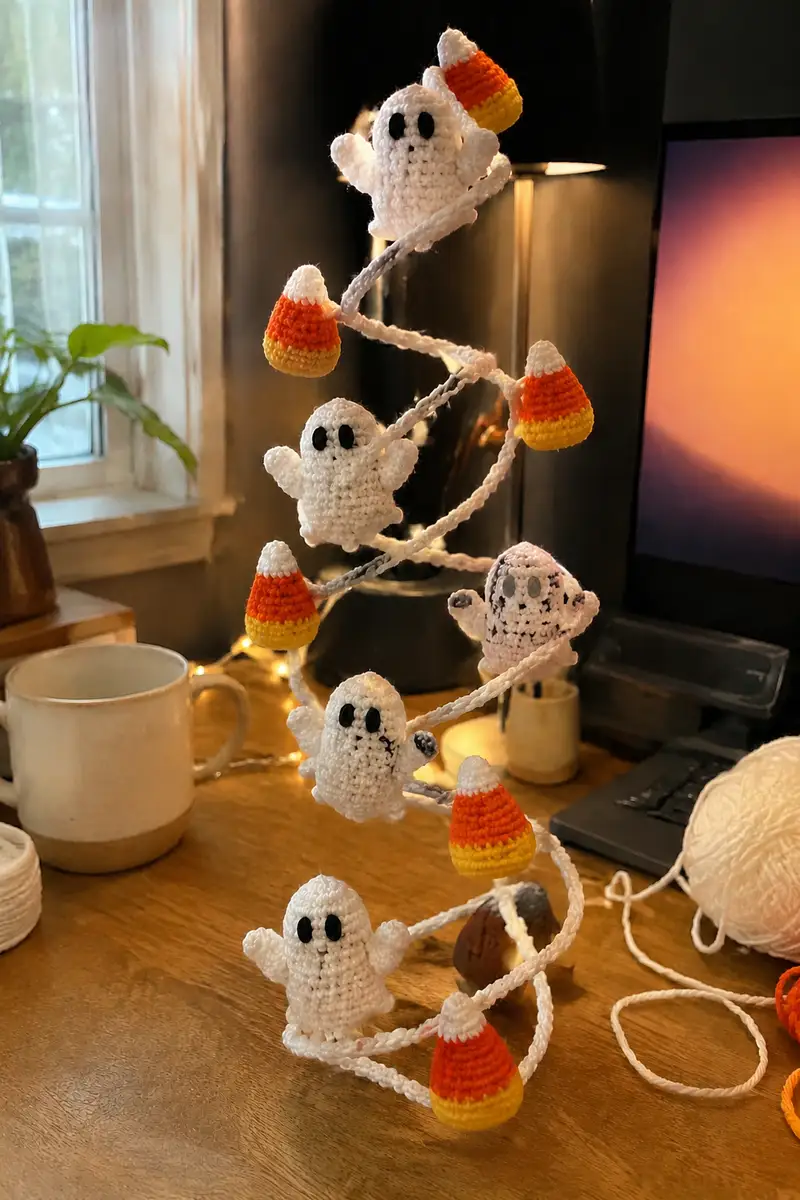
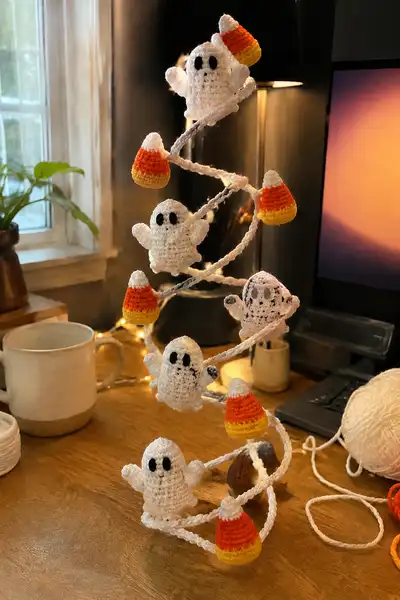
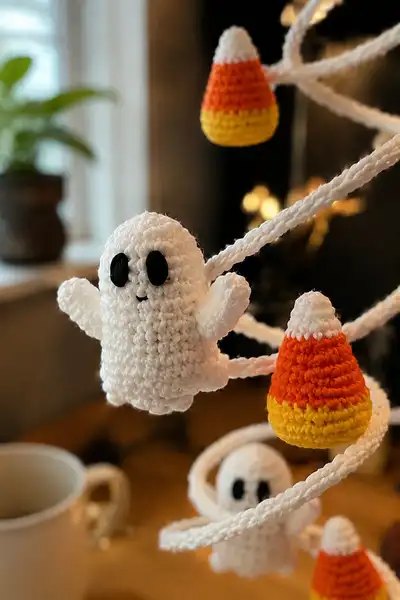
Create a whimsical spiral Halloween garland studded with tiny crocheted ghost 'boo' phantoms and bright candy corn charms. This pattern uses small amigurumi techniques to make five cuddly white ghosts with waving arms, plus multiple layered candy-corn cones, all strung on a twisted spiral rope for a playful, floating display. Perfect for mantel, desk, or doorway decoration, the finished garland is lightweight, portable, and irresistibly cute.
Progress Tracker
0% Complete
— Notes & Gauge :
Info :
This pattern is written in standard US crochet terms. Make tension tight enough to prevent stuffing from showing through (use a slightly smaller hook than recommended if needed). Each small ghost measures approximately 2.5"–3" (6–8cm) tall when worked with worsted yarn and a 3.25mm hook. Candy corn charms measure roughly 1.25"–1.5" (3–4cm) tall. The spiral cord length and wire gauge are flexible; adjust number of chains to fit your intended display height.
— Ghost (Head + Body combined) : Make 5
Round 1 :
6 sc in magic ring (6)
Round 3 :
(1 sc, 1 inc) x 6 (18)
Round 4 :
(2 sc, 1 inc) x 6 (24)
Round 5 :
(3 sc, 1 inc) x 6 (30)
Info :
At this point the sphere is forming. Use a stitch marker to mark the first stitch of each round; this helps keep eye placement consistent across multiple ghosts.
Round 6 :
(4 sc, 1 inc) x 6 (36)
Round 7 :
(5 sc, 1 inc) x 6 (42)
Round 8 :
(6 sc, 1 inc) x 6 (48)
Info :
Continue increasing until you reach a comfortable circumference. If you prefer a slightly chunkier ghost, increase by one extra round of (7 sc, inc) to reach 54 sts; otherwise 48 is a nice, balanced size for tiny ghosts.
Round 9-14 :
1 sc in each st (48) (6 rounds total) - rounds 9,10,11,12,13,14
Info :
Place eyes between rounds 11 and 12. Measure 6-8 stitches apart center-to-center depending on the expression you prefer. For felt eyes, cut small ovals approximately 6–7mm tall. If using safety eyes, insert and fasten backing before stuffing.
Round 15 :
(6 sc, 1 dec) x 6 (42)
Round 16 :
(5 sc, 1 dec) x 6 (36)
Info :
Begin stuffing the head firmly but with gentle pressure so the body below will join without distorting the face. Use small tufts of fiberfill and press them evenly into the dome shape.
Round 17 :
(4 sc, 1 dec) x 6 (30)
Round 18 :
(3 sc, 1 dec) x 6 (24)
Round 19 :
1 sc in each st (24)
Info :
Rounds 17-19 form a neck/narrowing that visually separates head from body. Continue stuffing through round 19 so the upper torso is lightly filled but not overpacked. Leave an opening for shaping bottom ruffles.
Round 20 :
(2 sc, 1 inc) x 6 (30)
Round 21 :
1 sc in each st (30)
Round 22 :
(3 sc, 1 inc) x 6 (36)
Info :
We are widening slightly to create the belly and the beginning of the skirt. Work evenly here to give the ghost a soft rounded torso before adding scalloped skirt details.
Round 23-26 :
1 sc in each st (36) (4 rounds total)
Round 27 :
(4 sc, 1 inc) x 6 (42)
Round 28 :
1 sc in each st (42)
Info :
Prepare for scalloped hem: the ghost's bottom will be created with alternating single crochet rows and small picot or shell edging to emulate a wavy fringe. If you prefer a flat hem, work straight even rounds and finish with a final decrease as below.
Round 29 :
(2 sc, 1 dec) x 10 + 2 sc (36) - math: (2 sc, dec) x10 = 30 sts + 2 sc = 32? Correction: for 42 sts: (2 sc,1 dec)x10 = (3*10)=30 then remaining 12? To keep math consistent do (3 sc,1 dec)x8 + (2 sc) = (4*8=32)+2=34 - safer approach. We'll use precise even decreases:
Round 29 :
(3 sc, 1 dec) x 8 + 2 sc = (4*8=32)+2 = 34 (34)
Info :
Note: We intentionally decrease slowly to form a gentle curve toward the hem. If you want a more gathered look, increase number of decs this round to reach 30 sts instead of 34.
Round 30 :
(2 sc, 1 dec) x 8 + 2 sc = (3*8=24)+2 = 26 (26)
Info :
At 26 sts the body is narrowing to allow the scallop to have defined lobes. Stuff bottom lightly; because we will add ruffles we want a slightly softer fill here so the skirt flutters.
Round 31 :
1 sc in each st (26)
Round 32 :
(1 sc, 1 dec) x 8 + 1 sc = (2*8=16)+1 = 17 ??? We need consistent math. For 26 sts, (1 sc, 1 dec) x8 + 2 sc = (2*8=16)+2 = 18 (18)
Round 32 :
(1 sc, 1 dec) x 8 + 2 sc (18)
Info :
Final narrowing before hem shaping. If your counts differ slightly because of tension, adjust to reach 18-20 sts here for stable hem scallops.
Round 33 :
1 sc in each st (18)
Round 34 :
'Shell' edge around: *skip next st, 5 dc in next st, skip next st, sl st in next* around; repeat 6 shells (works on 18 sts) (creates 6 shells)
Info :
The shell edge is worked into the remaining 18 stitches; each shell uses a single anchor stitch so shells will be evenly spaced, forming 6 scallops. If you prefer a smaller frill, substitute picots (ch3, sl st) repeated around.
Round 35 :
Fasten off leaving a long tail. Weave tail through remaining loop holes, gather slightly if needed, secure and hide end. Finish stuffing so the ghost has a soft, plump torso and a light, fluttery hem.
Info :
Repeat complete Ghost section 5 times. For variety, you may add tiny grey 'speckles' by embroidering small dots or use a light stitch count change in different ghosts to create slightly different expressions. Use felt or embroidered ovals for eyes: place eyes approximately on round 11-12, 6 stitches apart (center to center) for a wide-eyed look. Embroider a small 'smile' with black yarn using a tapestry needle between rounds 12-14, centered under the eyes.
— Ghost Arms (Make 10 total — 2 per ghost) :
Round 1 :
6 sc in magic ring (6)
Round 3 :
(1 sc, 1 inc) x 6 (18)
Info :
Arms are small puffed cylinders that will be sewn into the side of the ghost's torso. Work tightly so they remain a firm nubbin. Stuff lightly but firmly so the arm retains shape when sewn.
Round 4-7 :
1 sc in each st (18) (4 rounds)
Round 8 :
(1 sc, 1 dec) x 6 (12)
Round 9 :
1 sc in each st (12)
Info :
Fasten off leaving a long tail for sewing. Sew the arm to the side of the body at approximately rounds 17-20 on the main ghost body. Position the arms slightly forward as if waving. Make small adjustments so both arms on each ghost sit symmetrically.
— Candy Corn Charm : Make 6 (or to taste)
Info :
Each candy corn is worked bottom-up in three color bands: yellow (base), orange (middle), white (tip). Work with color changes at the end of rounds; carry yarn lightly inside or fasten off and weave ends. The charm is a small cone shaped amigurumi with the wider yellow base at the bottom and white tip at the top.
Round 1 :
6 sc in magic ring with yellow (6)
Round 2 :
6 inc (12) (yellow)
Round 3 :
(1 sc, 1 inc) x 6 (18) (yellow)
Round 4 :
(2 sc, 1 inc) x 6 (24) (yellow)
Round 5 :
1 sc in each st (24) (yellow)
Info :
Change to orange at the end of round 5. Fasten color change by completing the last pull-through with the new color so the band is neat. Carry the yellow tail inside if you prefer not to weave many ends.
Round 6 :
1 sc in each st (24) (orange)
Round 7 :
(3 sc, 1 dec) x 6 (18) (orange)
Round 8 :
1 sc in each st (18) (orange)
Round 9 :
Change to white; 1 sc in each st (18) (white)
Round 10 :
(1 sc, 1 dec) x 6 (12) (white)
Round 11 :
6 dec (6) (white)
Round 12 :
Fasten off leaving long tail. Weave tail through remaining loops and close small opening. Stiffen lightly with craft glue if you want candy corn to hold a sharper cone shape.
Info :
Stuff sparingly: candy corn charms should be lightly stuffed — a small pinch of fiberfill inside will suffice. Try to keep the base flat so it sits well on the spiral cord; you can flatten the bottom slightly by pressing while glue is drying or by sewing a small flat circle of felt inside the base.
— Eyes & Facial Details :
Round 1 :
Cut 10 small black felt ovals approx 6mm tall for eyes, or embroider eyes using black yarn onto the head between rounds 11-12. If using safety eyes insert 6mm eyes between rounds 11-12 spaced 6-8 sts apart and secure backing.
Info :
To embroider eyes, use satin stitch or a small buttonhole stitch and pad the eye slightly with a tiny bit of stuffing behind the felt for a dimensional look. Mouth: use black yarn and a tapestry needle to stitch a tiny curved smile centered two rounds below the eyes (between rounds 13-14) — 3-4 embroidery stitches enough.
— Spiral Cord (Wire-core Crocheted Rope) :
Info :
The spiral cord is the structural backbone: a flexible craft wire wrapped and covered in crochet to form a sculptable spiral. Use one continuous wire about 1m long, or combine shorter lengths and twist/cover joints securely. The cord is worked as a tubular single crochet rope by crocheting around the wire using the 'crochet around an object' technique. The number of rounds below represent rows of single crochet that wrap the wire and are continued until the rope reaches desired length.
Round 1 :
Measure and cut wire to desired length (approx 60-80cm for pictured spiral). Fold the yarn end over the wire and work a small loop to anchor. With white yarn and 3.25mm hook, work 6 sc around the wire (6)
Round 2 :
1 sc in each st (6)
Round 3 :
Inc evenly to create a thicker rope: (1 sc, 1 inc) x 3 = 9 (9)
Round 4 :
1 sc in each st (9)
Round 5 :
(2 sc, 1 inc) x 3 = 12 (12)
Round 6-28 :
1 sc in each st (12) - continue crocheting in continuous rounds around the wire until rope length is your desired spiral length. For the pictured spiral use roughly 22 more rounds of 12 sc to make a thick, sculptable cord (Rounds 6–28 = 23 rounds)
Info :
To create a neat spiral when arranging, leave wire ends uncut until after attaching motifs. Cover the entire wire with crochet, ensuring the ends are wrapped and the wire is fully enclosed. The thicker the rope (more rounds/increases), the stiffer the spiral will be; for a delicate look use fewer rounds and a thinner wire core.
Round 29 :
When you reach the end of the wire, decrease to close the tube if desired: (1 sc, 1 dec) x 3 = 9 (9)
Round 30 :
1 sc in each st (9). Fasten off, weave in ends. Leave long tails at regular intervals where you will attach ghosts and candy corn (weave these tails through the rope so they are hidden).
Info :
Spacing: arrange attachments at five or six roughly even intervals along the spiral. Use pins to mark attachment points before sewing. For a more dramatic spiral you can wrap the rope around a cone-shaped object (paper towel roll, tin can) and shape it, then leave it in place to set the curve.
— Small Base Ring (Optional Weighted Base) :
Round 1 :
Make a small solid disk to sit under the spiral to help it stand: 8 sc in magic ring (8)
Round 3 :
(1 sc, 1 inc) x 8 (24)
Round 4 :
1 sc in each st (24)
Info :
Stiffen and add weight: sew a small, flat washer or pebble inside the disk and close. This weighted base will stabilize the spiral if you plan to display it upright. Fasten the end of the spiral cord into the center of this disk and sew firmly through the base for stability.
— Assembly :
Info :
Before assembly, pin all motifs along the spiral at your preferred spacing. The sample garland places a ghost at roughly every 10–12cm of vertical distance, alternating with candy corns. Adjust spacing to taste.
Step 1 :
Position the ghosts: choose the spots where arms will sit facing forward. Typically attach ghosts so their back seam will be hidden against the spiral rope. Use the long sewing tails left from each ghost's base to stitch through the rope and back into the ghost body several times for a secure joint.
Step 2 :
Sew the candy corn charms by inserting the tail from the top tip down through the rope and securing with a few tidy stitches at the base; this makes them appear to hang on the spiral. Alternatively, sew from the base up into the rope to anchor them from the bottom so they dangle slightly.
Step 3 :
Attach arms: use the arm tails to sew each arm to the side of the ghost. Use a ladder stitch or whip stitch to make a near-invisible seam and position arms so they appear waving outward. For a symmetrical look, offset arms by the same number of rounds on each side (approx rounds 18-20 of ghost body).
Step 4 :
Secure wire ends: tuck and fold wire ends into the crocheted rope core. If necessary, bend ends around and wrap with a short section of yarn, sewing it in place so ends cannot protrude and cause sharp points. For extra security, glue the ends with a small dab of hot glue after bending over and wrapping with yarn.
Step 5 :
Shape spiral: with all motifs attached, shape the spiral by wrapping it around a cylindrical object or gently forming the coil by hand. The wire core will hold the shape; make final adjustments to motif orientation so ghosts face forward and candy corn tips point outwards.
Step 6 :
Final touches: hide all tails by weaving them into motif seams, trim flush, and secure any felt eyes with craft glue if used. Optionally add a hanging loop to the top of the spiral by leaving a 5–10cm tail of yarn at the top and knotting into a loop.
Info :
Test balance: if the spiral tips forward or leans, adjust motif placement or add a small weight in the base disk. Alternatively, remove one candy corn or re-space motifs to even weight distribution.
— Variations & Finishing Options :
Info :
Variation ideas: make ghosts in various sizes by changing hook size or adding an extra increase round before the even sections. Use different facial expressions by changing eye spacing or embroidering surprised 'O' mouths. Add tiny black arms, bows, or tiny hats for more personality. For a string-light effect, thread micro fairy lights along the spiral before attaching motifs, securing lights with tiny stitches behind the rope wrapping.
Info :
Care: spot clean with a damp cloth; avoid heavy soaking. If handmade for a child, sew or embroider eyes instead of using small safety parts unless properly rated for safety.
Finishing this spiral garland is such a delight — your tiny ghosts and candy corns come together to create a playful, floating Halloween display that's perfect for small spaces. Each carefully sewn attachment and embroidered smile adds character and charm to your handmade decoration. Share it with friends or keep it for your coziest corner — either way, it's a delightful seasonal accent you'll enjoy every year. 🎃🧶✨