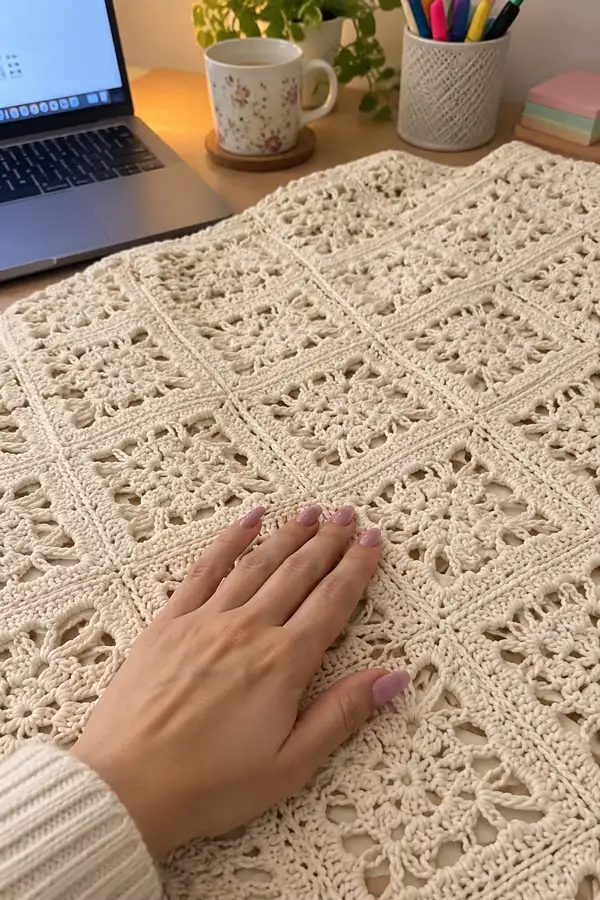
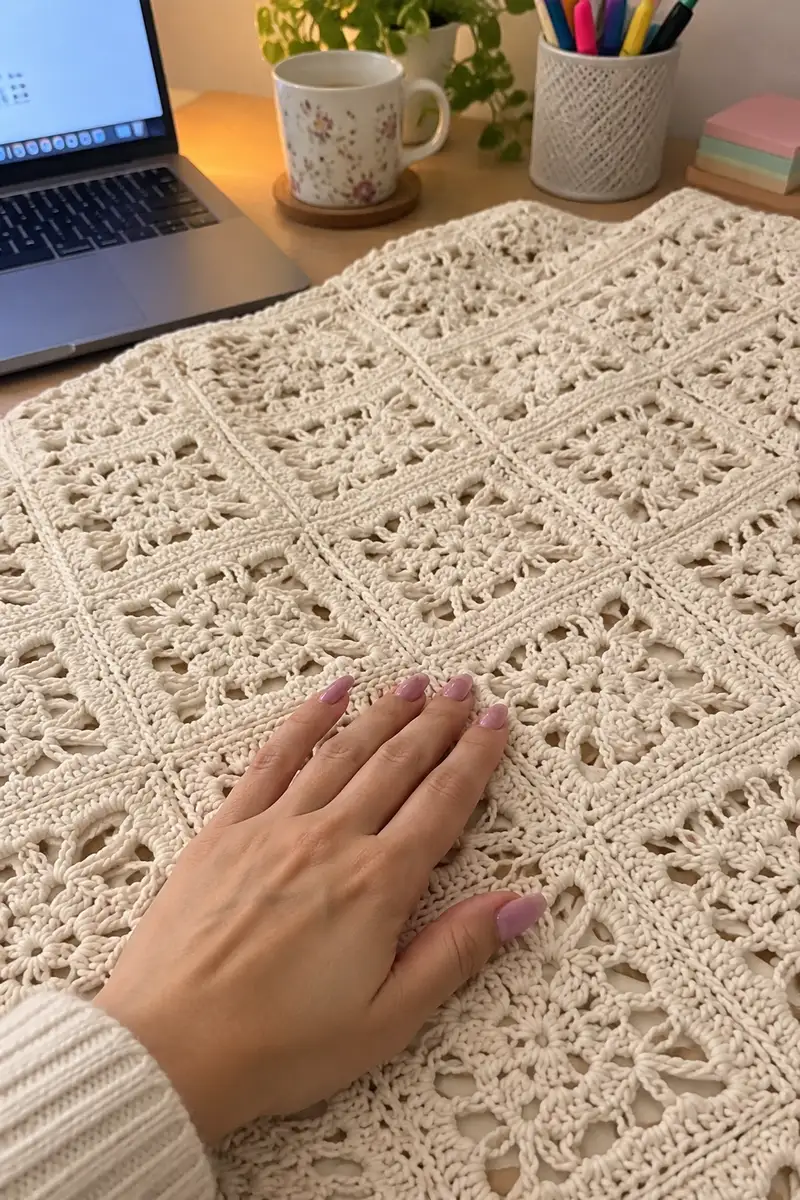
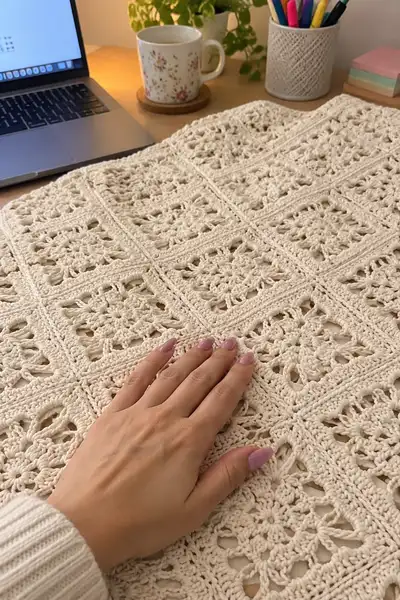
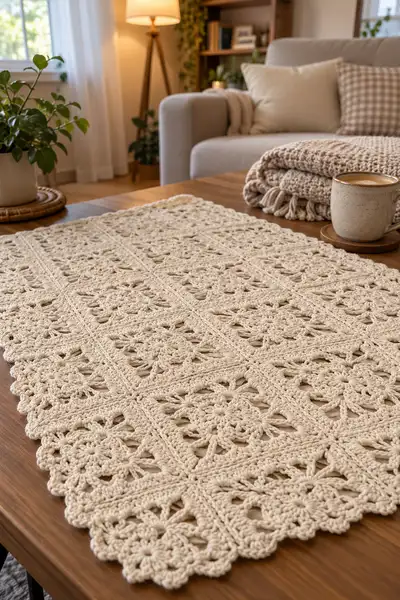
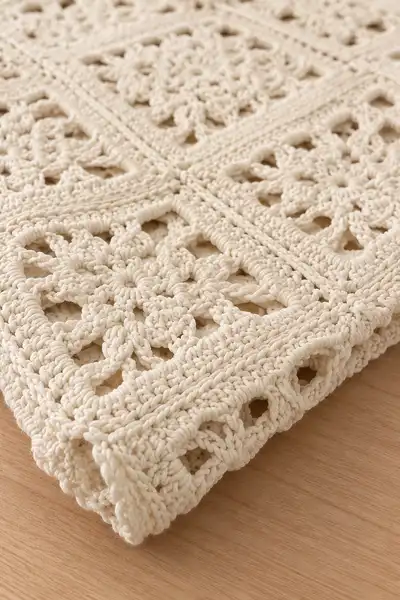
A delicate, vintage-inspired lace bedspread worked from square floral motifs joined into a large bedcover. This pattern recreates the soft, openwork squares, picot scalloped edge and raised join lines seen in the photos. Worked in a soft natural-white cotton rope, it gives a bridal-elegant, timeless look — perfect for a bed, throw or layered decorative cover.
Progress Tracker
0% Complete
— Notes Before You Begin :
Info :
This pattern recreates a thick-lace square motif repeated in a grid and joined with raised rails. The sample blanket uses 10 x 12 motifs for a large bedspread — adapt the layout to your size. Work motifs with a consistent tension; block each motif flat before joining. Puff stitch used here is created by pulling loops through the stitch multiple times to form a cluster - specifics are given where used.
Info :
Abbreviations use US terms. Work tightly enough with bulky cotton so that puff clusters are defined and open chain arches remain structured. For neater joins you can use a 4.0 mm hook; main work uses 5.5 mm.
— Motif (Make as many as needed) :
Round 1 :
Make a magic ring. Ch 3 (counts as dc), 15 dc into ring. Join with sl st to top of ch-3. (16 dc)
Round 2 :
Ch 1, sc in same st, *ch 4, sk next dc, sc in next dc* repeat from * to * around to form 8 ch-4 loops. Join with sl st to first sc. (8 sc, 8 ch-4 loops)
Round 3 :
Into each ch-4 loop: (ch 2, 3 tr, ch 3, 3 tr, ch 2) all into loop, sl st into next sc to anchor petal. Repeat in every loop to create 8 raised petals. Join. (8 large petals)
Info :
Petal clusters create the central floral look. Keep tension even and allow petals to puff out; they will be tacked later by rounds that encase them.
Round 4 :
Ch 1, sc in same st, *ch 5, sc between petal groups (in sl st that anchored petal)* repeat around creating 8 ch-5 arches. Join with sl st. (8 sc, 8 ch-5 loops)
Round 5 :
Into each ch-5 arch: sl st, ch 3 (counts as dc), 7 dc into same ch-5, ch 1, sl st into next sc to anchor. Repeat around to create 8 rounded puff arches (8 groups of 8 dc). Join. (64 dc in 8 groups)
Round 6 :
Ch 2, *2 hdc in next 4 sts across petal group (work evenly across the group), ch 2, skip ch-1 anchor, 2 hdc in chain space between adjacent petals* repeat around, joining to first ch-2. Count will vary by tension but aim for a tidy circular casing around petals (approx 64 hdc total).
Info :
This round builds a base that evens out the flower to begin the square shaping. Work hdc into petals where the fabric is dense, and into chain spaces to keep edges even. Use stitch markers to mark cardinal points (top/bottom/left/right) to help later square shaping.
Round 7 :
Ch 1, sc in same st, *ch 3, sk 6 hdc, (sc, ch 3, sc) into next 2 hdc cluster to create a small chain arch, sk 6 hdc* repeat to form 8 larger chain spaces aligned between petals. Join. (8 small sc anchors, 8 ch-3 arches)
Round 8 :
Into each of the 8 ch-3 arches: (ch 2, 3 tr, ch 2) all into arch, sl st to next sc anchor. This creates secondary petals between main petals. Join. (8 clusters)
Round 9 :
Ch 1, sc in same st, *work 3 sc evenly across the previous 3-tr cluster, ch 4, 3 sc into next cluster*, repeat around. Join to first sc. (Approx 48 sc and 8 ch-4 loops)
Info :
From this point we begin squaring the motif. Use stitch markers at the four corners (every second cluster) to establish corner points for later square rounds. Keep the motif flat; if it curls, block gently and adjust tension.
Round 10 :
Ch 1, sc in same st, *sc in next 6 sts, (2 dc, ch 2, 2 dc) into ch-4 loop to form corner group, sc in next 6 sts* repeat for four sides. Join. You should have 4 corner clusters and even sc along edges. (Stitch count varies; track corner placements)
Round 11 :
Ch 1, sc in same st, *sc across edge 12 sc evenly, ch 3, skip 2 sc, sc into space to form small openwork, sc across to corner, (ch 1, (sc, ch 3, sc) into ch-2 corner, ch 1)* repeat to shape square. Join.
Round 12 :
Ch 3 (counts as dc), (2 dc, ch 2, 3 dc) into each corner ch-3 space to enlarge corners. Along each side work: *skip the small ch-3 openwork, 1 dc in each of next 6-8 sc, ch 1 between clusters* repeat across. Join. This starts building the straight edges of the square.
Info :
From Round 12 onward the motif becomes more geometric. Keep careful counts across each side to ensure each side has identical stitch counts so squares join evenly. If one side has an extra dc reduce or increase evenly before progressing.
Round 13 :
Ch 1, sc in same st, *sc across side evenly (aim for 18 sc per side), (sc, ch 2, sc) into corner ch-2* repeat around. Join. (Approx 72 sc total)
Round 14 :
Ch 2, hdc in same st, hdc across side sc (18 hdc), into corner (3 hdc, ch 2, 3 hdc), repeat around. Join. (Approx 72 hdc)
Round 15 :
Ch 1, sc in same st, *sc across 18 hdc, ch 3, sk 2, sc into next* repeat around to create small lacy windows at side centers. Join. (72 sc)
Round 16 :
Into each ch-3 side window: (ch 2, 3 tr, ch 2) into the ch-3 to create petal-like arches across sides; sc between arches around. Join. (Side arches x 8)
Info :
At this stage the motif forms a clear square outline with lacy internal arches. Use this point to measure motif width — it should be consistent across motifs for easy joining. Block now if necessary.
Round 17 :
Ch 1, sc in same st, *sc evenly across side (24 sc), (sc, ch 2, sc) in corner* repeat around. Join. (Approx 96 sc)
Round 18 :
Ch 2, dc in same st, 1 dc in each sc across side (24 dc), (2 dc, ch 2, 2 dc) in corner; repeat around. Join. (Approx 96 dc)
Round 19 :
Ch 1, sc in same st, *sc across (24 sc), ch 1 between small groups across side for texture*, (sc, ch 2, sc) in corner; join. (96 sc)
Round 20 :
Ch 3 (counts as dc), *2 dc in next st, ch 1, sk 1, 2 dc in next; repeat across each side to create a ridged band; (2 dc, ch 2, 2 dc) in corners. Join. (Approximately 120 dc grouped)
Info :
Rnds 17-20 add solidity to the square, making the square easier to join with rails later. Ensure each side retains the same stitch counts; if necessary adjust by adding a small number of evenly spaced dc along the side before proceeding.
Round 21 :
Ch 1, sc in same st, *1 sc in each dc across side (approx 30 sc), (sc, ch 2, sc) in corner* repeat around. Join. (Approx 120 sc)
Round 22 :
Ch 1, sc in same st, *BLO sc in next 30 sts along side (work in back loops only to create a raised rail), (sc, ch 2, sc) in corner* repeat around. Join. (Creates a subtle rail along motif edges)
Info :
Work BLO on Round 22 to create the raised join-rail that is visible between motifs in the photos. This raised line gives the bedspread its framed look. Mark corners clearly for square alignment.
Round 23 :
Ch 1, sc in same st, *sc across all loops (approx 120 sc), slip stitch to corner to keep square shape* join. This evens the surface and finishes motif. Fasten off leaving ~20 cm tail for joining. Block motif to square measurement (example motif blocked to 18 cm square; adjust to desired gauge).
Info :
Make a sample motif and block to target measurement. For a bedspread layout count how many motifs you will need across and down (sample used here: 10 across x12 down = 120 motifs). Keep consistent motif measurements to avoid mismatch when joining.
— Corner Motif Variation (for border corners) :
Round 24 :
Work Rounds 1-22 for a corner motif but stop after Round 20. On Round 21 modify corners: instead of full (sc, ch 2, sc) make (sc, ch 1, 5 tr, ch 1, sc) to create a larger corner scallop that will sit neatly into outer border scallops. Finish with Round 22 BLO rail, fasten off leaving long tail for joining. Block to same size as other motifs.
Info :
Use corner motif variation in the four outer corners of the full bedspread to give the scalloped border a more symmetric finish. If making a square spread you may also place this on all outer corner motifs.
— Joining Motifs into Rows and Panels :
Info :
Join motifs using a single crochet rail join method so the raised BLO rails on motifs align and form a continuous raised seam. You can join as-you-go or join after making several motifs. This pattern describes an as-you-go join when placing motif B adjacent to finished motif A.
Round 25 :
Place motif A (finished, blocked) face up. Using 4.0 mm hook and matching yarn, join at a side: attach with sl st to first corner BLO rail stitch, ch 1, sc in next BLO st across the side of motif A until corner. Do not fasten off.
Round 26 :
Position motif B next to motif A so right sides face up and BLO rails match. With hook through corresponding BLO stitch on motif B and the working loop on motif A, sc through both motifs together (one sc joining both layers) across the side — sc through both BLO stitches of motifs A and B until corner. Finish with sl st to secure. This creates a firm single-crochet seam visible as a raised rail on both motifs. Repeat for each adjacent side when assembling rows. (Seam length equals the number of BLO stitches on a side, approx 30-36 sc)
Info :
When joining, keep tension uniform; do not over-tighten joining sc or fabric will pucker. Use pins to align BLO rails perfectly before joining. Join motifs horizontally across to form a row before joining rows vertically to keep alignment easy.
Round 27 :
To join a second motif along the same side: sc through both motifs across the join as before. For interior joins (motifs with joins on two sides) start by joining motifs left to right across a row, then join rows top to bottom by matching seam intersections. When joining rows, at intersections make one sc through three layers (motif above, motif below, and connecting rail) to secure a neat grid intersection.
Info :
If you prefer an invisible join, you can use mattress stitch with yarn needle. The single crochet rail join is recommended for the raised seam effect visible in the photos.
Round 28 :
After joining each motif horizontally to form full width rows, join rows into panels: align the top row with the next row below and sc through the adjoining BLO rails as described until the full spread is assembled. Press joins flat by pinning and lightly spraying with water or steam-blocking to set.
Info :
Use a consistent join direction to keep the rail lines all running the same way. Periodically lay the assembly flat and measure diagonals to ensure the spread remains square. Adjust tension at joins where necessary.
— Center Rail and Longitudinal Reinforcement :
Round 29 :
To reinforce long runs of seams (for large bedspreads), after joining each row add a reinforcement rail: attach yarn at the center back of the seam and work 1 round of sc along the seam into both motifs, working into the backs of the sc join to create a flat double rail. Fasten off and weave tails. This creates the narrow raised line seen between motif columns.
Info :
This reinforcement is optional but recommended for a bedspread that will be handled frequently. It stabilizes the join and accentuates the framed grid look.
— Filling Small Gaps and Stabilizing Openwork :
Round 30 :
If small open gaps appear at motif intersections or along sides, use a slip-stitch or sc to close them. For larger gaps: use a 1-row mesh fill — join yarn at the gap and work *sc, ch 3, sk 3* to recreate matching lace spacing into the gap, then secure and tuck tail.
Info :
Adjustments like these are common when working with hand-made motifs. Treat each gap individually and keep the adjustments invisible on the right side when possible.
— Outer Scalloped Border (worked after all motifs joined) :
Round 31 :
With the assembled spread laid flat, attach yarn at a corner on the outer edge. Ch 1, sc evenly around the entire outer edge of the spread, working 1 sc in each motif edge sc and 3 sc into each corner. Work slowly and keep counts even; sl st to first sc when round is complete. (Count will match edge perimeter.)
Round 32 :
Ch 3 (counts as dc), *dc in next sc across edge until you reach a corner group, (2 dc, ch 2, 2 dc) into corner group* repeat around. Join with sl st. This creates a framed band for the scallops to attach to. (Perimeter dc count varies by size)
Info :
Work smoothly around the perimeter; if an edge feels tight, add an extra dc in a less visible location to relieve tension. The band will be the base for the scalloped shell edge.
Round 33 :
Ch 1, sc in same st, *ch 3, sk 2 dc, (5 dc) into next dc (shell), ch 3, sc into next dc to anchor* repeat around, making shells of 5 dc spaced by ch-3 loops. At corners, work (sc, ch 4, 5 dc, ch 4, sc) to emphasize corner shells. Join and fasten off. (Shell pattern repeats around; count shells to ensure even spacing.)
Round 34 :
Attach yarn at the back of a shell, ch 1, sc into same st, *work (sc, picot, sc) into center of next shell to create a picot detail, (sc, ch 3, sc) into ch-3 spaces between shells* repeat around. This adds the delicate picot and air loop detail evident in the photos. Join and fasten off.
Info :
Picots are optional if you prefer a simpler scallop. Work a few practice shells to get the look consistent and adjust shell size (5 dc) to better match your motif scale if needed.
— Decorative Final Round (scallop height and finishing) :
Round 35 :
Re-attach yarn at the back of each shell and work a finishing shell cluster: *ch 2, (2 tr, ch 2, 2 tr) into shell center, sl st into next shell center* repeat across all shells to accentuate scallop height. Join and weave in ends. This gives the pronounced scalloped border visible in the close-up photos.
Info :
Choose the finishing round depth to suit your bedspread: larger shells give a deeper scallop, subtle shells give a neat edge. If your spread will be laundered, make sure all tails are woven in securely and that the cotton is washed gently before use to avoid distortion.
— Optional Narrow Rail Edging (for visual frame between motifs and border) :
Round 36 :
To emphasize the rectangular rails between motif groups, work 1-2 rounds of sc around each seam line between motifs (work into back loops of the seam sc to create a neat raised cord). This gives the crisp, narrow framed lines seen between motif blocks on the bedspread.
Info :
This is especially effective on very large spreads where rails visually break up the surface and add stability.
— Blocking and Final Press :
Round 37 :
After all joins and border rounds are complete, block the entire bedspread: pin the spread flat on a blocking surface to the measured dimensions, pin scallops to even spacing, and steam lightly from a short distance or spray with water and allow to dry. This sets the shape and evens seams. Remove pins only when fully dry.
Info :
Blocking is the most important finishing step — unblocked motifs and joins will look messy compared to the crisp, open lace in the images. Take time to block carefully, working one section at a time if the piece is large.
— Troubleshooting and Adjustments (Rounds for Finetune) :
Round 38 :
If any areas appear too loose after blocking, unpick the few joining rows and re-join with slightly firmer tension. If edges scallops are irregular, remove the last shell round and re-space shells by measuring equal distances along the edge between corner shells.
Round 39 :
To make a smaller version (throw/table runner) remove motif rows and columns equally from both sides. Re-work the border with fewer shells to maintain proportion.
Info :
When scaling, always maintain the ratio between motif size and shell size - a bulky motif with tiny shells looks unbalanced. Adjust shell dc count (3 or 7 dc) if necessary to keep proportions correct.
— Quick Reference Summary of Rounds (motif and finishing) :
Round 40 :
Motif core: Rounds 1-6 = flower and arches; Rounds 7-16 = square shaping and side arches; Rounds 17-23 = rails and final sc band. Join motifs: Rounds 25-29 = single crochet BLO rail joining and reinforcement. Border: Rounds 31-35 = perimeter sc, band, shells and final picot/shell accents. Blocking: Round 37.
Info :
There are many micro-steps within rounds to create the lace effect; refer to the detailed motif rounds above when working each square. Expect to repeat the motif rounds many times — this repeatability is ideal for meditative crocheting and for producing uniform motifs once tension is consistent.
You’ve created a beautiful, heirloom-quality bedspread — every motif is a small moment of calm and creativity stitched together. The framed rails and scalloped edge bring a satisfyingly finished, bridal-elegant look to your bedroom or living space. Enjoy the texture and the slow, meditative rhythm of working repeating motifs, then relish the big reveal after blocking and joining. 🧶✨ This piece will be treasured for years and is a perfect keepsake or thoughtful handmade gift. 😊