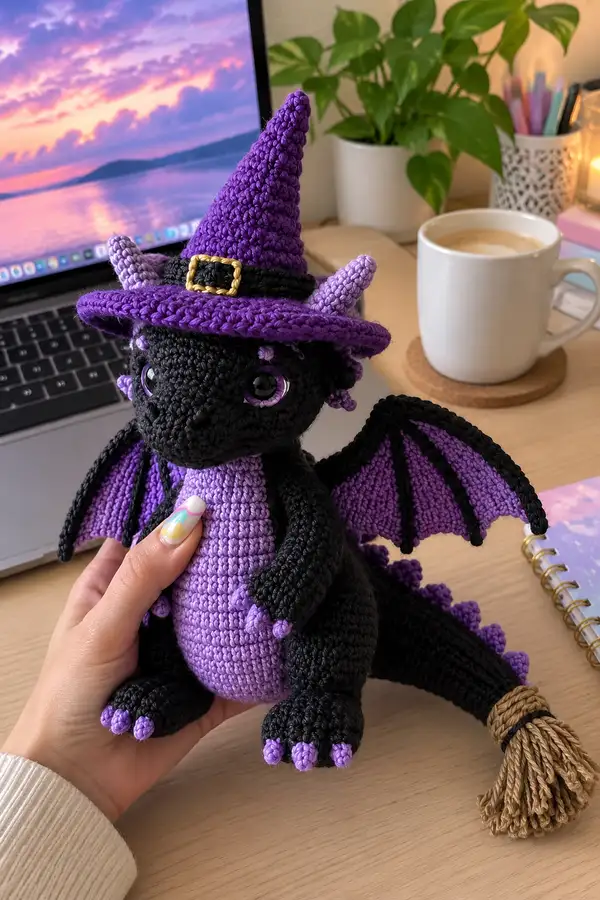
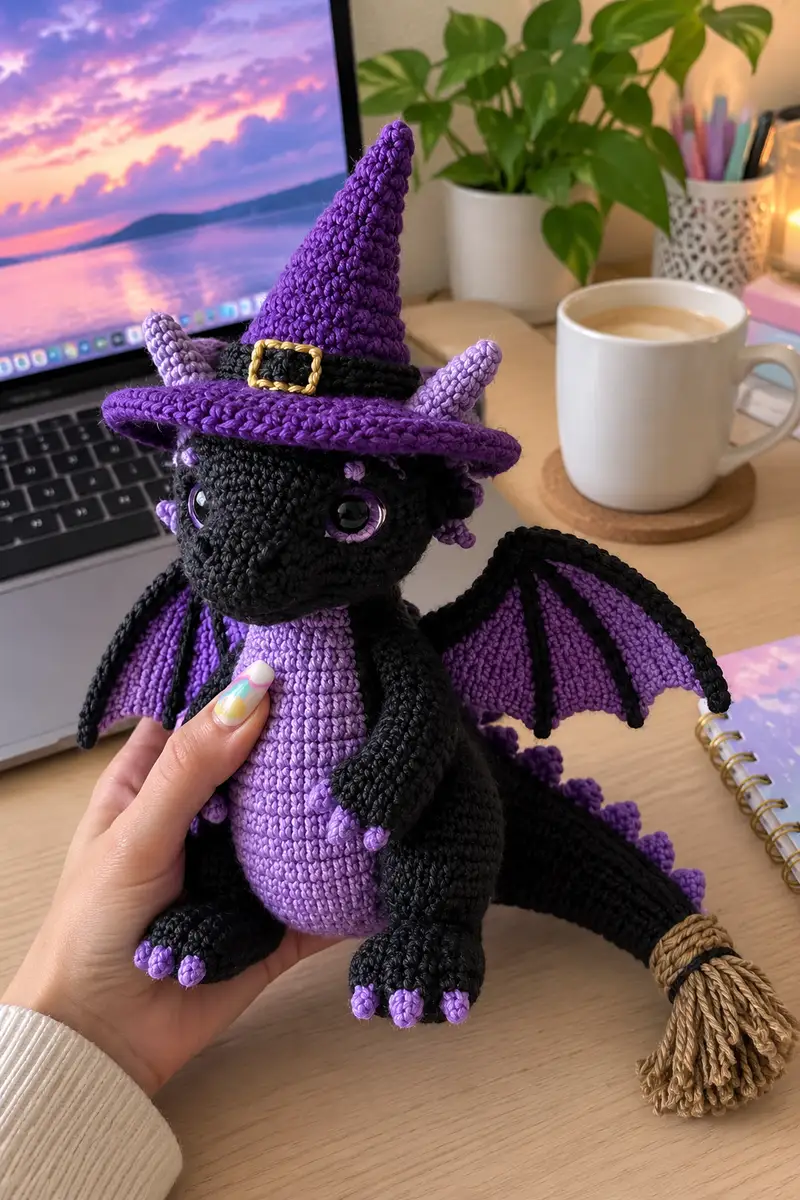
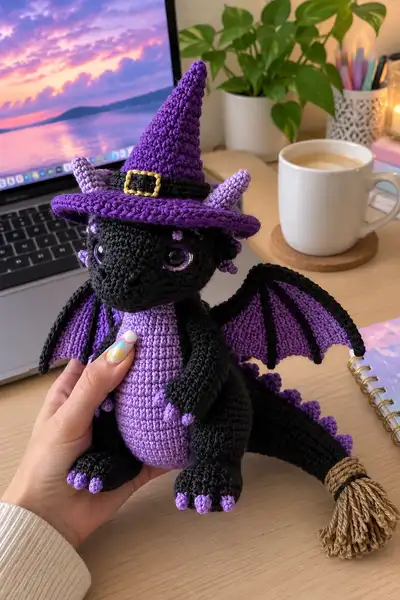
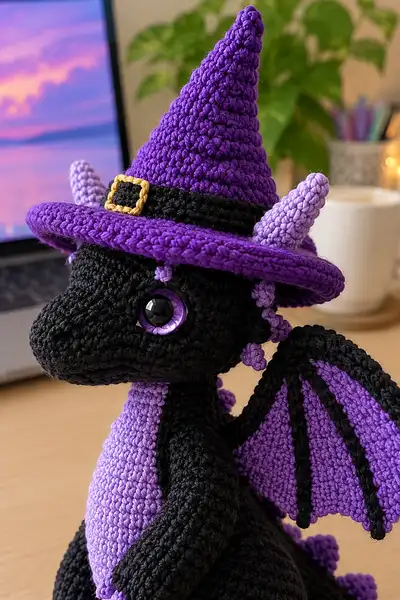
Bring a little magic to your crochet basket with this adorable Purple Witch Dragon amigurumi. This cuddly dragon features a tall purple witch hat, black body with a lavender belly, spiky tail, and articulated wings with black ribbing. Detailed shaping creates a rounded snout, expressive safety eyes framed with purple eyelids, and tiny lavender horns and claws for a cute, whimsical finish. Perfect for seasonal decor or a charming handmade gift.
Progress Tracker
0% Complete
— Head :
Round 1 :
6 sc in magic ring (6)
Round 3 :
(1 sc, inc) x 6 (18)
Round 4 :
(2 sc, inc) x 6 (24)
Round 5 :
(3 sc, inc) x 6 (30)
Round 6 :
(4 sc, inc) x 6 (36)
Round 7 :
(5 sc, inc) x 6 (42)
Round 8 :
(6 sc, inc) x 6 (48)
Round 9-12 :
1 sc in each st around (48)
Info :
Place safety eyes between rounds 12-13 approximately 10-12 sts apart (measuring from center front) depending on desired expression. For the look shown, place eyes around 14-16 stitches apart measured across the front curve. Insert eyes now before further shaping so they sit evenly and secure backs.
Round 13-16 :
1 sc in each st around (48)
Info :
If you want the purple eyelid accent, stitch a small ring of color B (lavender) around each eye: 6 sc into the rounds surrounding the eye opening and fasten off, or embroider a thin rim later. Keep tension consistent so the eye sits flush.
Round 17 :
(6 sc, dec) x 6 (42)
Round 18 :
(5 sc, dec) x 6 (36)
Round 19 :
(4 sc, dec) x 6 (30)
Info :
Begin stuffing head firmly but not overstuffed; use small amounts at a time to shape the snout and forehead. Stuff to create a rounded forehead and slightly elongated snout shape; pinch slightly at the lower central face area to form the mouth line if desired.
Round 20 :
(3 sc, dec) x 6 (24)
Round 21 :
(2 sc, dec) x 6 (18)
Round 22 :
(1 sc, dec) x 6 (12)
Round 24 :
Finish closing with invisible decrease and leave long tail for sewing to neck (if attaching now) or fasten off and leave long tail. (This completes the top-molded head sphere.)
Info :
For the elongated muzzle in the photo, instead of closing at round 23, work 4 additional rounds extending the snout forward: R23-R26 1 sc in each st (6) lengthening tube, then begin decreasing R27-R30 to taper and close. If you extend, stuff firmly along the tube before decreasing.
Round 25 :
Rejoin and work neck tube (if not joined to body immediately): 1 sc in each st around for 6 rounds to create a short neck (6)
Round 26 :
1 sc in each st around (6)
Info :
If you plan to sew head to body, leave long tail and stop stuffing when neck opening is still slightly open so you can position over body and continue stuffing through the opening for a seamless attach. If using a safety joint, prepare the neck ring accordingly.
— Snout shaping (optional elongated muzzle) :
Round 1 :
From the centre front, pick up stitches to create muzzle extension: ch 6, join to form short tube and 1 sc in each ch around for 6 stitches circumference. Work 5 rounds even (6)
Round 2 :
(1 sc, inc) x 3 at the base to blend into face (9)
Round 3 :
1 sc in each st around for 3 rounds (9)
Round 4 :
(2 sc, dec) x 3 (6)
Info :
Stuff muzzle lightly and sew securely into the head opening so the snout sits flush with the face; adjust placement before final sewing to match the photographed profile.
— Neck join and front frill :
Round 1 :
After head and neck are prepared, align neck opening with the top of the body opening. Use a whip stitch or ladder stitch around 6-8 attachment points to secure head. Do not over-tighten to avoid puckering.
Info :
For the decorative little frill under the hat brim (small purple knobs), crochet 6 mini bobbles around the upper crown: bobble = (hdc decrease cluster) x 3, attach at even intervals around crown edge when sewing hat in place.
— Body :
Round 1 :
6 sc in magic ring (6)
Round 3 :
(1 sc, inc) x 6 (18)
Round 4 :
(2 sc, inc) x 6 (24)
Round 5 :
(3 sc, inc) x 6 (30)
Round 6 :
(4 sc, inc) x 6 (36)
Round 7-8 :
1 sc in each st around (36)
Info :
Change to accent color B (lavender) for belly panel starting on Round 9. You will work the body in joined rounds with the belly panel crocheted in rows attached to the front; carry unused yarn inside the body or fasten off and rejoin later.
Round 9 :
Change to lavender. Work 1 sc in each of next 10 sts (these form the center front belly panel base) then continue 1 sc in remaining sts (36)
Round 10-14 :
Work in lavender on the 10-st belly panel by sc in the 10 belly sts each round and sc in the rest in black; keep belly panel centered at front. Continue shaping by maintaining 36 sts total.
Info :
To create a flat belly look, you can work the belly panel in FLO for a subtle ridge or continue regular sc for even texture. Stuff body starting at round 12 moderately—enough so the body holds form but still soft for sewing head.
Round 15 :
(5 sc, inc) x 6 (42)
Round 16-20 :
1 sc in each st around (42)
Round 21 :
(5 sc, dec) x 6 (36)
Round 22 :
(4 sc, dec) x 6 (30)
Round 23 :
(3 sc, dec) x 6 (24)
Info :
Continue stuffing body firmly now to shape hips and chest. Check head placement and how it will sit on the body; you can add more stuffing near the back for balance so the dragon sits upright without tipping forward.
Round 24 :
(2 sc, dec) x 6 (18)
Round 25 :
(1 sc, dec) x 6 (12)
Round 27 :
Fasten off leaving long tail for attaching tail and legs; or do not fasten if you will crochet tail directly from body. (If increasing body height is desired, add 4-6 rounds of 1 sc in each stitch before decreasing.)
Info :
For the belly panel finishing, when you fasten off, weave the lavender tail inside along the edge and use a ladder stitch to neaten the junction between belly and black body so no gap shows when stuffed.
— Tail :
Round 1 :
Join black to bottom back of body opening and ch 1. Work 1 sc in same st and around to form tail base; start with 6 sc in magic ring or pick up 6 sts from body seam (6)
Round 3 :
(1 sc, inc) x 6 (18)
Round 4-12 :
1 sc in each st around (18) lengthen tail for approximately 9 rounds for a long tail similar to photo
Round 13 :
(1 sc, dec) x 6 (12)
Round 14-15 :
1 sc in each st around (12)
Round 16 :
(2 sc, dec) x 3 (9)
Round 17 :
1 sc in each st around (9)
Round 18 :
Work small triangular tail tip: (1 sc, dec) x 3 (6)
Round 19 :
Fasten off leaving long tail to sew a broom tassel to tail tip or to attach a yarn tassel. If adding broom tassel, do not fasten and proceed to attach tassel instructions.
Info :
To create the row of back spikes: crochet 12 small cone-shaped spikes in lavender and sew them along the top of tail and down the spine. Space them evenly and sew through the base of spikes ensuring they are secure; stuff each spike lightly to remain firm.
— Back Spikes (Make 12) :
Round 1 :
5 sc in magic ring (5)
Round 2 :
(1 sc, inc) x 5 (10)
Round 3 :
1 sc in each st around (10)
Round 4 :
(2 sc, dec) x 2 + 2 sc (8)
Round 5 :
1 sc in each st around and fasten off, leaving tail for sewing (8)
Info :
Make 12 spikes; alternate sizes slightly if you want a tapered look near the tail tip. Sew spikes centered along the top spine and tail at regular intervals about every 6-8 stitches depending on tail length.
— Arms (Make 2) :
Round 1 :
6 sc in magic ring (6)
Round 3 :
(1 sc, inc) x 6 (18)
Round 4-5 :
1 sc in each st around (18)
Round 6 :
(2 sc, dec) x 4 + 2 sc (14)
Info :
Stuff the hand/paw area firmly for solid fingertip shaping. For claws, use light purple to make three small toe bumps at the end of each arm (see claw rounds below).
Round 7-11 :
1 sc in each st around (14) for wrist and lower arm, stuff lightly
Round 12 :
(3 sc, dec) x 3 + 2 sc (12)
Round 13-16 :
1 sc in each st around (12)
Round 17 :
(1 sc, dec) x 4 (8)
Round 18 :
Fasten off leaving long tail for sewing. Insert wire if making poseable limbs before stuffing and close opening loosely to allow sewing to body.
Claw details :
Using lavender, make 3 tiny bobbles or 3 sc in a mini magic ring and attach to the front of each hand: 3 sc into a ring, pull tight and sew at the finger tips. Repeat for each arm.
Info :
Sew arms to body at the sides between rounds 12-16 of the body, aiming for a natural seated arm position. Use pins to check placement before sewing.
— Legs (Make 2) :
Round 1 :
6 sc in magic ring (6)
Round 3 :
(1 sc, inc) x 6 (18)
Round 4 :
(2 sc, inc) x 6 (24)
Round 5-7 :
1 sc in each st around (24)
Info :
Create a wide foot by working two extra rounds of increases at the front if you want a flat-soled foot: add (3 sc, inc) x 6 to widen (30), then return to even rounds for shaping ankle.
Round 8-12 :
1 sc in each st around (24)
Round 13 :
(2 sc, dec) x 6 (18)
Round 14-17 :
1 sc in each st around (18)
Round 18 :
(1 sc, dec) x 6 (12)
Round 19 :
1 sc in each st around (12)
Round 20-22 :
Fasten off leaving long tail for sewing to the body. Stuff feet firmly: the feet should be solid so the dragon can sit upright. Add three small lavender claws on each foot by stitching 3 tiny bumps of color B across front edge.
Info :
Sew legs to bottom of body between rounds 1-4 of the body base. Position feet slightly outward for seated stability. Use extra stitches through feet and body for a reinforced mount so the legs won't flop loose.
— Wings (Make 2) :
Wing Base Round 1 :
Using purple (accent), ch 21, sc in 2nd ch from hook and across (20)
Wing Base Round 2 :
Ch 1, turn, sc across (20)
Wing Base Round 3 :
Ch 1, turn, (sc, inc) across to create slight flare: (1 sc, inc) x 10 (30)
Wing Shaping Rounds 4-7 :
1 sc in each st around (30) keeping wing flat. These rounds build the membrane height and give a soft curve.
Info :
To replicate the black ribbing look, make three black ridges on top of each purple membrane: using black yarn, work surface slip stitches or single crochet ridges across the membrane lines and along the leading edge as described in Ribbing Rounds below.
Wing Edge Round 8 :
Switch to black: 1 sc in each st around adding a slightly firmer edge; (30)
Ribbing (Make 3 ribs per wing) :
With black, from the top base of the wing, ch 12 and attach back to wing edge with sl st forming a corded rib; work row of sc across this cord on the top making it look like a bat wing rib. Repeat for 2 more ribs spaced evenly across the membrane.
Info :
The ribs should be sewn or slip-stitched to the purple membrane in slightly raised loops so they form dark veins. Pin them before stitching to ensure symmetry between wings.
Wing Finishing Round 9 :
Work sc around entire wing edge in black making the edge crisp and slightly turned (30). Fasten off leaving long tail for sewing to back of body.
Info :
Attach wings to the back between body rounds 12-18, spaced so they peek out behind the arms and line up with the hips. Sew through the wing base and body for stability and add a few reinforcing stitches across the anchor to keep wings upright.
— Horns (Make 2) :
Round 1 :
4 sc in magic ring (4)
Round 2 :
(1 sc, inc) x 2 (6)
Round 3-6 :
1 sc in each st around (6) working 4 rounds to lengthen horn
Round 7 :
(1 sc, dec) x 2 (4)
Round 8 :
1 sc in each st around (4)
Round 9 :
Fasten off leaving long tail for sewing. Stuff horns lightly to keep them rigid and pointy.
Info :
Attach horns to top sides of head under the hat in the position shown: slightly angled backward and outwards. Use several stitches and a firm anchor so horns remain upright.
— Small Ear Frills and Cheek Knobs (Make pairs) :
Round 1 :
6 sc in magic ring (6)
Round 2 :
1 sc in each st around (6)
Round 3 :
Fasten off leaving tail for sewing. These small knobs are sewn near the cheek and behind the horns for detail.
Info :
Sew these knobs symmetrically around rounds 11-13 of the head to match the decorative bumps visible under the hat brim in the photo.
— Witch Hat (Brim + Cone) :
Brim Round 1 :
With purple, ch 36, join to form ring carefully so it lays flat (36)
Brim Round 2 :
Ch 1, sc in each ch around (36)
Brim Round 3 :
(3 sc, inc) x 9 (45)
Brim Round 4 :
1 sc in each st around (45)
Info :
To create the rolled brim effect, work two more rounds in BLO so the outer edge turns upward slightly: R5 ch1, 1 sc in each st BLO (45). This creates the lifted rim as seen in the photograph.
Cone Round 1 :
Join purple to inner ring of brim and make a small magic ring cone start: 6 sc in magic ring (6)
Cone Round 3 :
(1 sc, inc) x 6 (18)
Cone Round 4 :
(2 sc, inc) x 6 (24)
Cone Round 5-14 :
1 sc in each st around to build height (24) for a tall witch hat similar to photo; stuff lightly if you want the cone to keep shape, but typically leave unstuffed and allow it to be stiff from tight stitches
Info :
To get the spiral, slightly tighten tension as you go up. Use a small amount of stuffing near the tip to give a rounded top or leave empty for a floppy point. The photographed hat has a slightly stiff cone with visible spiral rounds.
Hat Belt :
With black yarn, ch 36 to create a band, join and sc 1 round around forming a neat belt. Attach a small gold buckle made from chain stitch cord or crocheted rectangle: ch 10, turn, sc 8 in row, fold and join with a contrasting gold scrap sewn as a narrow rectangular loop.
Info :
Sew additional decorative little purple knobs and horns to the hat brim (small 6-st knobs) so the hat appears integrated with the dragon crown. Place buckle at front center of brim and stitch securely.
— Broom Tassel Tail (Optional) :
Step 1 :
Cut multiple lengths of brown yarn approximately 12 cm each. Fold them in half and attach to tail tip loop using a crochet hook to create a tassel bundle.
Step 2 :
Use a short piece of black yarn to wrap and bind tassel about 1.5 cm from the folded ends to form broom handle tie. Trim tassel ends neatly and sew tassel to the tail tip using the long tail left on tail.
Info :
Make the broom look full by adding several layers of yarn before wrapping; the sample shows a thick tassel with a neat black tie and a decorative band near the tail base for a witchy vibe.
— Assembly and Finishing Details :
Info :
Before final sewing, pin all pieces in place: head to body, arms to sides, legs to base, wings to back, horns on crown, hat on head. Check balance and adjust stuffing if needed so the dragon sits upright. Use long tails for neater seams.
Facial Embroidery :
Use black or dark purple yarn to embroider nostrils and mouth line with small tight stitches; a few single yarn stitches create a subtle mouth. Add small white embroidered highlights on eyes if desired for extra sparkle.
Info :
Weave in all ends by threading yarn needle and weaving through 6-8 stitches before trimming. Optionally add small dots of fabric glue behind buckle or hat embellishments for extra security. If using safety eyes for a child’s toy, ensure backs are locked and consider adding a dab of glue for safety.
This purple witch dragon is a charming blend of spooky and sweet, perfect for Halloween decor or year-round cuddles. Each section comes together to create a character with personality: a tall witch hat, expressive eyes, and a broom-tail accent that sparkles with handmade love. Stitch by stitch you build a little friend that’s ready to sit on your shelf or be given as a magical gift. Happy crocheting and don’t forget to display your finished dragon proudly! 🧶🪄