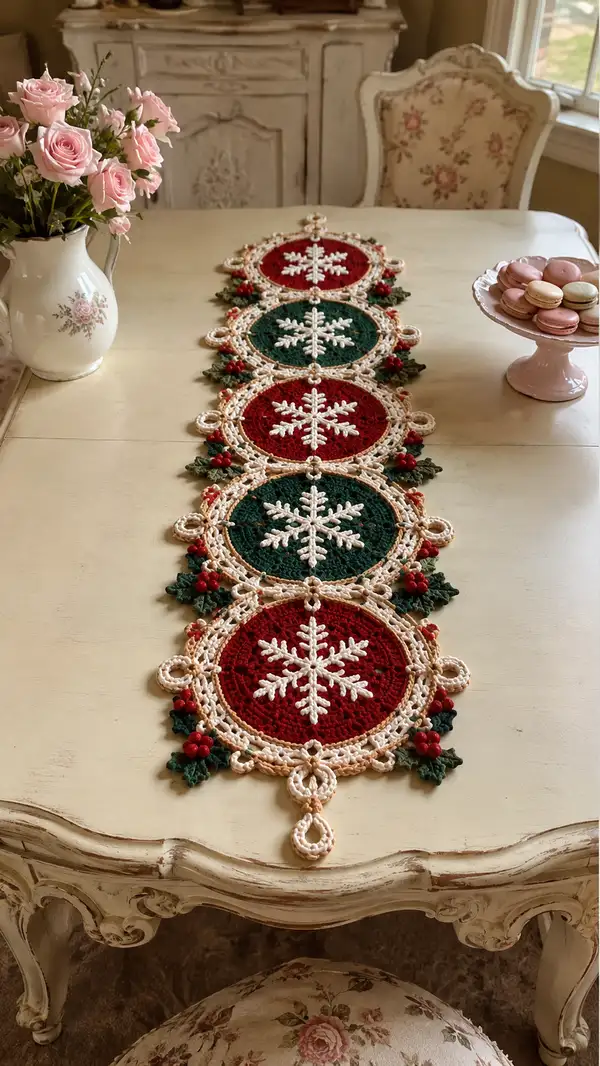
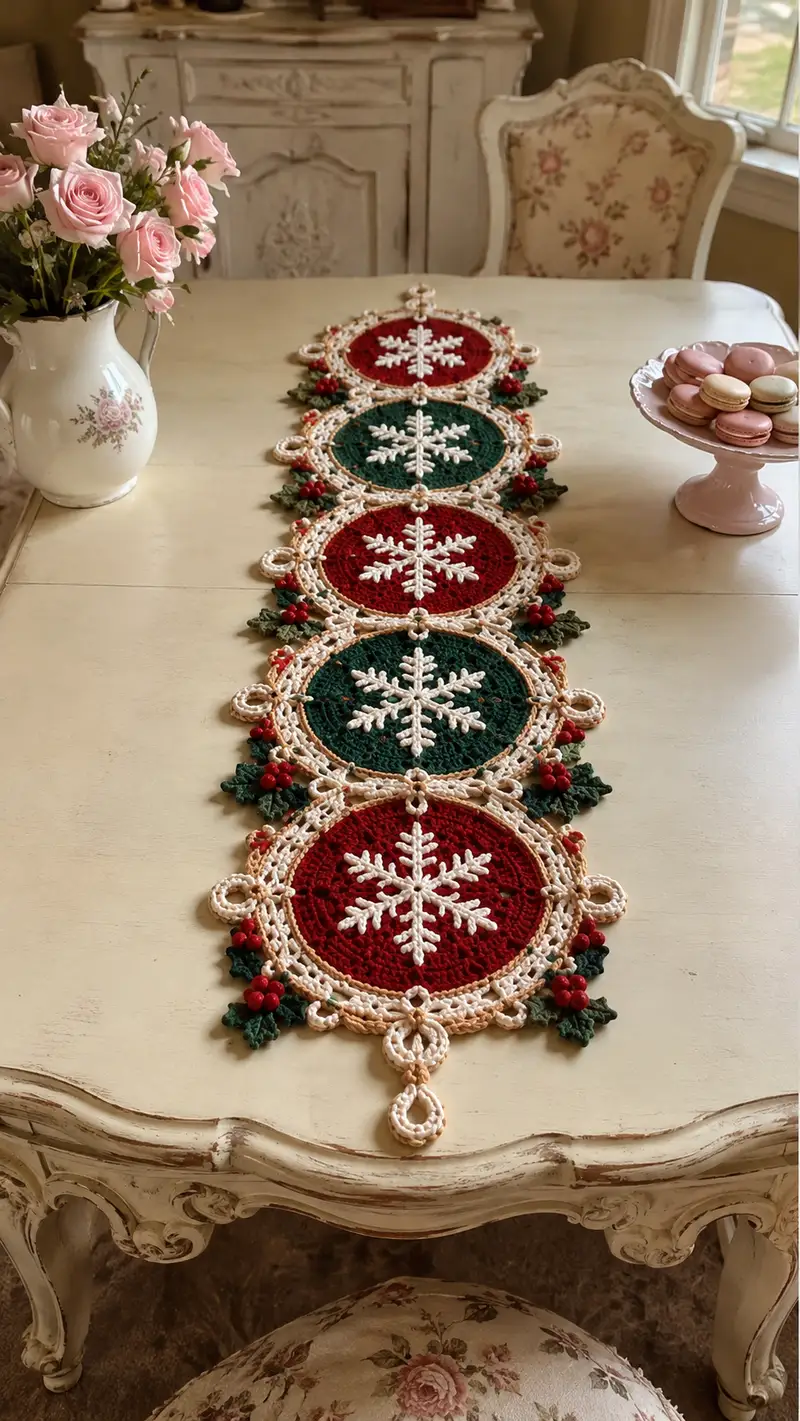
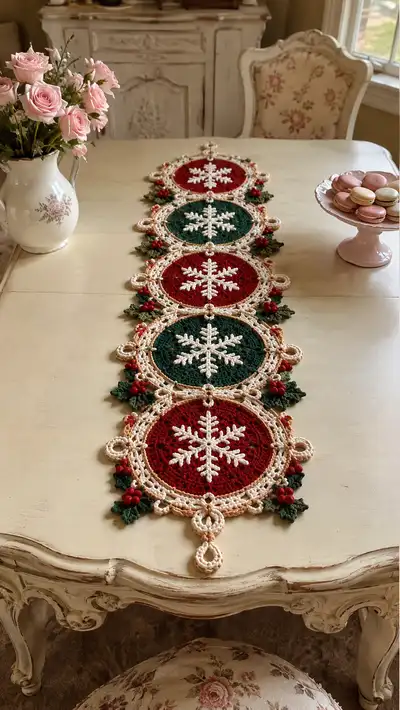
Create a festive red-and-green table runner composed of connected circular snowflake motifs framed with vintage lace, holly leaves and berry clusters. This elegant runner features alternating deep red and forest green centers, creamy lace rings, raised white snowflake appliques and textured holly accents. Perfect for holiday tables, mantel displays or as a seasonal centerpiece that layers beautifully with your home decor.
Progress Tracker
0% Complete
— Central Circle Motif :
Round 1 :
With color of your choosing for center (red or green). mr, ch 1, 8 sc into magic ring, tighten ring (8)
Round 2 :
Inc in each stitch around (2 sc in each st) (16)
Round 3 :
(1 sc, inc) x 8 (24)
Round 4 :
(2 sc, inc) x 8 (32)
Info :
Keep tension even. If your circle cups up, try switching to a slightly larger hook for subsequent rounds to keep fabric flat
Round 5 :
(3 sc, inc) x 8 (40)
Round 6 :
(4 sc, inc) x 8 (48)
Round 7 :
1 sc in each st around (48)
Round 8 :
1 sc in each st around (48)
Info :
Check diameter: by round 8 your circle should be approximately 12.5 to 14 cm across depending on yarn/hook. Adjust number of rounds if needed to match gauge.
Round 9 :
(5 sc, inc) x 8 (56)
Round 10 :
1 sc in each st around (56)
Round 11 :
1 sc in each st around (56)
Round 12 :
Switch to cream/ecru now for the lacy frame. Info: Fasten off center color leaving a long tail to weave; join cream with a sl st in any st
Round 13 :
Ch 3 (counts as dc), (dc in next 2 sts), ch 2, sk 2, (dc 3 in next 3 sts), ch 2, sk 2 — create pattern of shells and spaces to begin decorative round. Continue evenly around creating 14 shell sets (56)
Round 14 :
Sl st to join shell peaks, ch 4 (counts as tr), tr in each of next 2 sts, ch 3, sl st into ch-2 sp from previous round, ch 3, (tr 3 in next shell peak), ch 3, sl st into next ch-2 sp. Repeat around to create open lacy frame (14 sets)
Round 15 :
Work picot and loop points: *sl st to center of tr group, ch 6, sl st into 2nd ch from hook to create small hanging loop, sl st back to join point*, continue around inserting loops between shell peaks. You should end with 14 small loops equally spaced.
Info :
These loops will later be used to connect motifs and form decorative hanging loops at the runner ends. Make sure loops are consistent — block them later to even length.
Round 16 :
Work a round of slip stitches around the inner edge of the cream frame into the stitches on the colored center to tidy the join and create a stable place for snowflake applique attachment (56)
Info :
Fasten off and weave ends for this motif before moving to snowflake. Block flat using steam or wet blocking to set shape for easier appliqué
— Snowflake Applique (Raised) :
Round 1 :
With white yarn. mr, ch 1, 6 sc into magic ring, tighten (6)
Round 2 :
Inc in each st around (12)
Round 3 :
(1 sc, inc) x 6 (18)
Round 4 :
1 sc in each st around (18)
Info :
These first rounds form a small disc that will become the snowflake center. Work tightly to maintain definition for the raised stitch directions.
Round 5 :
Begin first arm: ch 6, sl st into base to create a short picot chain. Move to opposite side: sk 3 sts, attach with sl st into st opposite the arm base. Repeat to create six radiating anchor points evenly by working: *ch 6, sl st into base center, rotate and count 3 sts*, until six ch arms are anchored. After completing, you will have 6 ch arms attached to small center.
Round 6 :
Work raised post stitches on each arm: On each ch-6 arm, sc in 2nd ch from hook, hdc in next, dc in next, tr in next (or adjust to create tapered arm), then return to center and secure with sl st. Complete for all 6 arms.
Round 7 :
Embellish arms with small branches: On each arm, ch 3 from midpoint and create tiny picot branches by (sl st, ch 3, sl st) into designated chain spaces; three per arm spaced evenly. After finishing, fasten off leaving long tail for sewing.
Info :
Placement accuracy matters. Position the snowflake so the center sits at the very center of the colored round. Use a removable stitch marker at the motif center to align snowflake arms with the motif's round 12-14 stitches.
Round 8 :
If you prefer a smoother raised look, go back and work surface slip stitches or single crochet posts along the arms to increase height. Work around all arms consistently.
Round 9 :
Sew snowflake to center of colored round: Using long tail, mattress stitch the snowflake center onto the motif's center disc (rounds 1-6 of center). Secure tightly and weave tail through backside several times. Repeat if stitching appears loose.
Info :
If you want the snowflake detachable for washing, sew only with a few long running stitches and secure with button at back, or stitch with small snaps hidden under lace frame.
— Lacy Joining Ring and Ornamental Connectors :
Round 1 :
With cream yarn joined at one loop point previously made on motif. Ch 1, sc into loop point, ch 5, sl st into next loop point on same motif to create a decorative chain linking the loop to the frame. Repeat to reinforce all 14 loops (counts variable per motif).
Round 2 :
Create connector rings between motifs: At the four cardinal loop points that will connect adjacent motifs, work: *in loop, ch 10, sl st to form large connecting loop, ch 2, sc back into loop base*, making sure the loop is large enough to connect to the next motif's loop. Make 4 connector loops per side as shown in photo (count and spacing follow motif loop positions).
Info :
These larger loops form the decorative hanging loops visible along the sides of the runner and also allow motifs to be joined later with neat visible rings. Keep loop sizes consistent by measuring chain length between motifs before fastening.
Round 3 :
Work a scalloped edging around outer rim: *sl st into next space, ch 3, 3 dc in same space, ch 3, sl st into next space*. Repeat around entire frame to add vintage scallop detail and give an attractive border for sewing leaves and berries onto.
Round 4 :
Reinforce connection points by working an extra round of single crochet around each large connector loop and the adjoining frame stitches. This ensures the runner remains stable when handled.
Info :
Fasten off and weave ends neatly on the back of the motif. Each motif should now sport a central colored disc, a cream lace frame with even loops and connector rings ready for joining.
— Holly Leaves (Make clusters) :
Round 1 :
With dark green. ch 6, sc in 2nd ch from hook, hdc, dc, hdc, sc — forming a tapered leaf base (5 sts across chain)
Round 2 :
Turn leaf and work along other side of chain: sc in first st, (hdc, dc, hdc, sc) to mirror the opposite side, join with sl st at base. You should have a small leaf shape. Fasten off leaving long tail to sew.
Round 3 :
For deeper veining and more realistic shape, with a contrasting slightly lighter green, work surface slip stitches along the center of leaf: Insert yarn at point, bring to center and stitch small veins by working sl st lines from center to tip and sides.
Info :
Alternate leaf sizes: To create larger leaves, increase ch foundation to 8 or 10 and add an extra dc in the center of each side. Leaves are grouped in clusters of two or three near berry clusters.
Round 4 :
Make at least three leaves for each motif join point (you will need many leaves: plan on 3 leaves x 4 joins x number of motifs). Block leaves flat to flatten joins.
— Berry Clusters (Make multiple) :
Round 1 :
With bright red. mr, ch 1, 6 sc into ring, tighten (6)
Round 2 :
Inc in each st (12); do not fasten off. Info: For a small, round bead-like berry, stop here; for slightly larger berry do 1 sc around to round out.
Round 3 :
Sew berries in clusters of three by aligning three berries close together and using the tail to stitch them together through centers. Secure cluster to frame at the base of leaf clusters using long tail and several passes through frame and berry cluster.
Info :
Use a small dab of fabric glue inside berry if you want an extra glossy, secure finish. Leave tails long for sewing and weave through several times on backside.
— Edge Loop Finish / End Drops :
Round 1 :
At the two ends of your runner, create elongated teardrop drops by chaining 20, sl st back along chain into every chain to produce a thick cord, then attach cord loop to motif end base with sc and secure. Repeat for decorative drop points as in photo (usually one large drop at each runner end).
Round 2 :
Work a covering round of single crochet or half double crochet around the cord to thicken it and make it look polished. Fasten off and weave in ends.
Info :
These long loops enhance the vintage look and can be used as small hanging points if desired. Make sure ends are secure by stitching through several stitches on both the cord and the motif frame.
— Joining Motifs into a Runner :
Info :
Make the desired number of motifs (five in the pictured runner). Block each motif strictly flat and pin out loops and connectors to match spacing. Block snowflake appliques slightly raised by pinning drying supports underneath the arms so they retain lift.
Round 1 :
Place two motifs right sides together aligning their large connector loops at the planned joining points. Using cream yarn and a tapestry needle, whip stitch through the outermost loop on each motif joining both loops with 10-12 passes to create a neat, visible joint. Repeat for all connection loops where motifs meet (4-6 joins per connection depending on motif spacing).
Round 2 :
Reinforce joins from the front by sewing a small decorative button-like knot of cream yarn across the joint or by working 3 sc into the rim on either side and sewing through them to lock the seams. This creates the circular ornamental knot seen at junctions.
Info :
Sewing tip: Use a blunt tapestry needle to pass through multiple yarn loops and to keep the front surface looking neat. Do not pull too tight or the frame will distort; tension should match the surrounding lace.
Round 3 :
After joining all motifs in a straight line, attach leaf clusters and berry clusters at each join: Position three leaves slightly overlapping at base and tuck berry cluster into the leaves, then sew securely through motif frame stitches in round 15-16 thereby anchoring cluster to both motifs at the join point.
Round 4 :
Check runner on a flat surface, re-pin any loose loops and add additional reinforcement stitches on connector loops or scallop edges as needed. Fasten off and weave all tails through the back side of the runner, trimming close.
Info :
For a continuous runner longer than five motifs, continue to make motifs and join in the same manner. You can also create a circular piece by arranging motifs into an oval or ring and joining accordingly.
— Finishing and Blocking :
Info :
Lay the completed runner on a blocking mat or a towel on a flat surface. Pin each motif edge and loops into place, using rust-proof pins. Mist lightly with water and allow to dry fully. For a more permanent set, use a gentle steam iron at a safe distance (do not press down directly on yarn) to relax and fix fibers.
Round 1 :
Trim and weave any remaining tails through several reverse stitches on the backside so they will not come loose with time. Optionally, use a drop of fabric glue on trimmed ends to lock them if you will launder the runner frequently.
Round 2 :
Final inspection: check all snowflake arms are sewn securely and not catching on tabletop items. If necessary, re-sew any arm base points to keep them flat and to prevent undue movement.
Info :
Care: Hand wash gently or spot clean. Lay flat to dry. Do not wring. If storing, wrap in acid-free tissue to preserve yarn colors and prevent dust collection on white snowflakes.
This festive table runner brings classic holiday charm to any table with layered snowflakes, lacy cream frames and realistic holly details. Each motif is a small piece of holiday art that you assemble into a gorgeous heirloom runner. Whether you make one row or extend it into a long dining table piece, the pattern allows for personalization and creativity. Enjoy the relaxing rhythm of crochet and the joy of seeing your table come alive! 🎄✨🧶