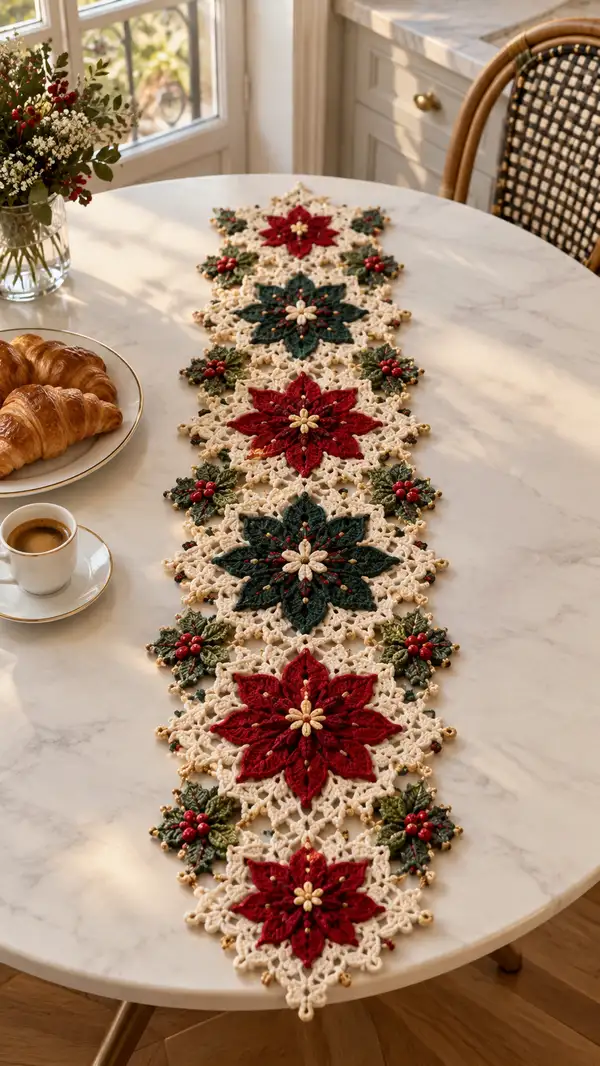
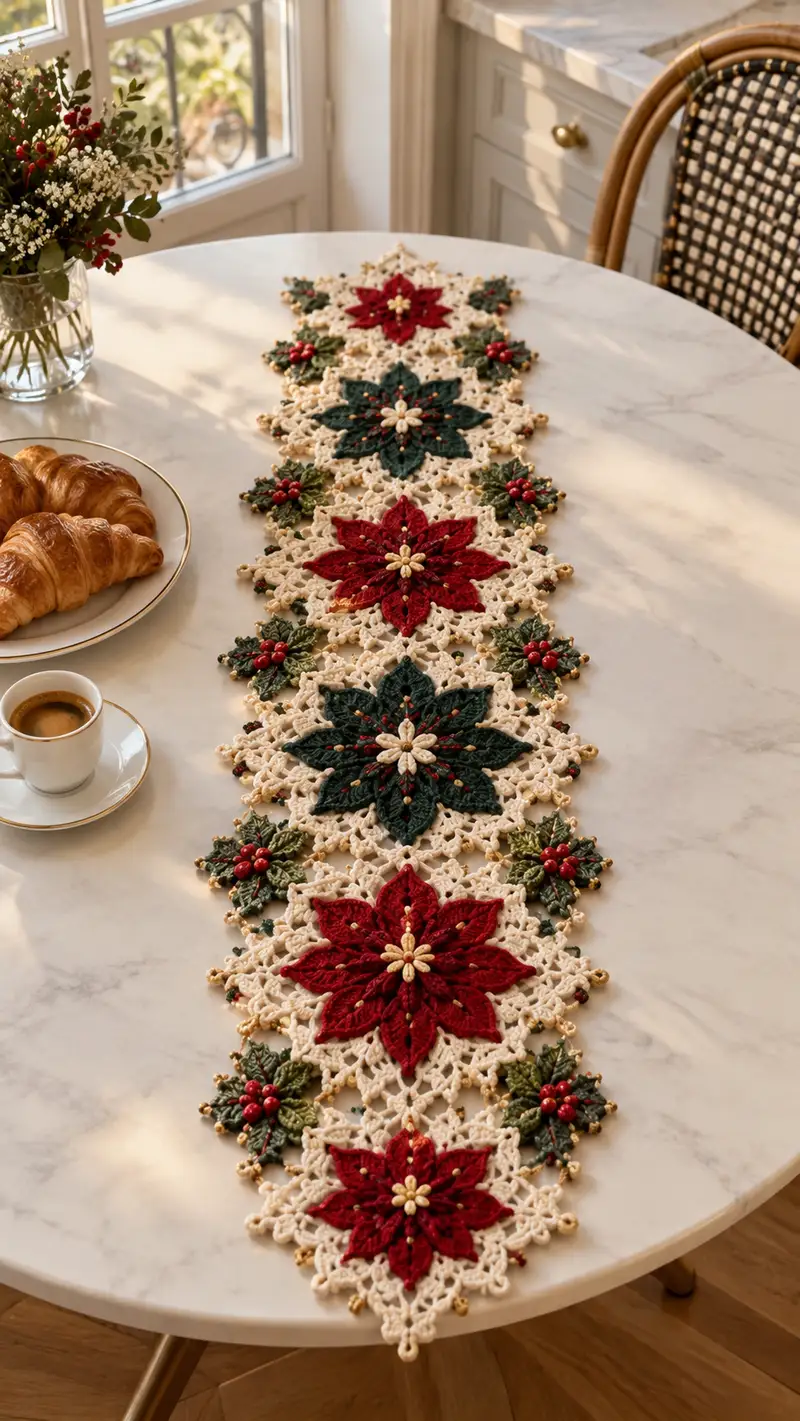
A festive table runner made from linked poinsettia motifs in deep red, forest green and cream with gold bead accents. Each motif features layered petals, a beaded center and lacy cream connectors to form an elegant runner. Perfect for holiday tables, this design alternates red and green stars for visual rhythm and includes small holly clusters along the edges for extra detail. The finished runner is decorative, flat-laying, and richly textured with picots and surface details.
Progress Tracker
0% Complete
— Materials & Gauge :
Info :
Gauge is not critical for a runner but consistent tension is. With worsted yarn and 3.5mm hook, one full poinsettia motif measures approximately 14-15 cm (5.5-6") across after blocking. Make a test motif and block it before committing to the full runner to check size and yarn usage.
— Abbreviations & Notes :
Info :
Work in continuous rounds unless otherwise specified. Use stitch markers to mark the first stitch of each round. When changing colors, carry lightly or use the invisible join at the start of a round. Beads are optional but recommended for the gold centers and red berries. Block each motif flat before joining.
— Poinsettia Center (Inner Button & Raised Cluster) :
Round 3 :
(1 sc, 1 inc) x 6 (18)
Round 4 :
(2 sc, 1 inc) x 6 (24)
Round 5 :
1 sc in each st (24)
Info :
If you prefer a slightly raised center use a contrasting off-white or gold worsted yarn for rounds 1-5. After this round you may decide whether to lightly stuff center for a dimensional bead-like look; very small pinch of stuffing only if desired.
Round 6 :
(3 sc, 1 inc) x 6 (30)
Round 7 :
1 sc in each st (30)
Round 8 :
(4 sc, 1 inc) x 6 (36)
Info :
Place 8 small gold beads evenly spaced on this round later using beading needle, or secure decorative seed beads after joining the petal layer. This center is the anchor for the eight petals; mark the top of six or eight petal base points as you will later skip specific stitches to begin petals.
— Petal Base Round (Prepare 8 Petal Foundations) :
Round 9 :
*Ch4, skip 3 sts, sl st in next st* around to create 8 chain loops; adjust spacing to create 8 equal loops (36 base sts yields loops that align every 4-5 sts). After you finish, join with sl st to first sl st.
Info :
We will work petals into each ch-4 loop. If your loops are too big/small, re-count and change to ch3 or ch5 as needed to fit eight petals evenly; consistent spacing is essential for symmetry.
— Petal Layer 1 (Inner Petal Shell) :
Round 10 :
Working into each ch-4 loop: (sc, hdc, 3 dc, hdc, sc) in loop — repeat for all 8 loops (shells formed). After the 8th shell, sl st to join. The stitch count around returns to alignment with previous round shells; count by shells rather than single stitches.
Round 11 :
Ch2 (does not count as st), 1 hdc in first shell top, (1 dc, ch2, 1 dc) across the top of each shell to create a small arch; repeat for all 8 shells, join with sl st (16 arches total across both sides of each petal if counting)
Info :
Work these rounds in your main poinsettia color (red or green). For depth, you can work Round 10 in a slightly darker shade and Round 11 in main color to create shadow. Keep petal counts consistent: 8 petals per motif.
— Petal Sculpting Rounds (Layered Shaping) :
Round 12 :
In each arch from Round 11 work the petal 'spine' and outer shaping: ch1, sc in arch, (hdc, dc, tr, dtr) across, then (dc, hdc) back toward base, sl st into base of arch. Repeat for all 8 petals. Each petal now has an inner ridge of taller stitches providing height.
Round 13 :
Work 3 sc evenly around petal edge to tidy the outside of each petal, sl st to join. Repeat for each of the 8 petals. (This is shaping only; stitch count varies by petal pattern but remains symmetrical)
Info :
Check petals are uniform in height. Block a single petal if necessary to test how it will lie after steam or wet blocking. If your petals curl too much, add an extra sc round to flatten before proceeding.
Round 14 :
Optional surface detail: Using slip stitches in contrasting or main color, embroider a central vein by working a short line of sl st up the center of each petal (approx 6-8 sl st per petal) - this is decorative and optional.
Info :
If embroidering the vein use a yarn needle and a length of yarn and couch it down to avoid gaps. Alternatively, use a contrasting color seed bead line sewn along the vein for sparkle.
— Outer Petal Layer (Second Petal Row for Full Poinsettia) :
Round 15 :
Change to same poinsettia color continuing at base between petals. Ch5 into spaces between each inner petal to create 8 outer loops (these will shape the second row of petals). Join with sl st.
Round 16 :
Into each ch-5 loop work (sc, hdc, 5 dc, hdc, sc) to form larger outer petals. Repeat for all 8 loops. After finishing, sl st to join.
Round 17 :
Ch2, 1 hdc in base of each outer petal, then around the crown of each petal work (hdc, dc, ch2, dc, hdc) to create a pointed top and small arch at petal tips. Join with sl st.
Info :
Outer petals should extend beyond inner petals and overlap the lacy frame to come later. Adjust outer petal size (use 4 dc or 6 dc in the fan) to match your motif spacing if your motifs appear too large or small.
Round 18 :
Work 1 sc evenly around each outer petal to tidy edges; slip stitch to join. If you want a subtle ridge at the petal edge, work this round in BLO to create a shadowed edge.
— Beaded Center & Small Inner Petals :
Round 19 :
Switch to off-white or light gold yarn. In the small center area between inner petals, make 8 tiny petal butterflies: ch3, (3 dc in next sc), sl st to base — repeat 8 times to create star-like small petals. Join and fasten off, leaving a length for sewing.
Info :
Sew small gold beads into the very center of each tiny petal; arrange 8 small beads in a circle using a beading needle and thread. Secure beads to the center and knot on the wrong side to hide ends. This yields a central rosette that catches light.
— Lacy Square Frame (Cream Background) :
Round 21 :
Change to cream yarn. Join with sl st to a base stitch of the motif between two outer petals, ch3 (counts as dc), 2 dc in same stitch, *ch3, skip to next outer petal base, 3 dc in base stitch* around forming 8 small groups. Join with sl st. (This creates 8 small clusters framing the star)
Round 22 :
Ch4 (counts as tr), tr in same stitch, ch5, *skip cluster, 3 tr in next base, ch5* around forming airy arches; join with sl st. This round begins the lacy square expansion - the ch5 loops will be used to produce corner points and connecting lacy mesh.
Round 23 :
Ch1, sc in top of first tr, *ch4, skip ch5, sc into next space between tr groups*, repeat around to create small chain arches (eight major arches). Join.
Info :
At this point the motif is transitioning into a square; ensure that you are increasing evenly so the lacy border will eventually create four corner points aligning roughly at cardinals. Count and adjust chains so portions are symmetrical.
Round 24 :
Into each ch4 arch: (sc, hdc, 5 dc, hdc, sc) — these form outer lacy petals that will be drawn into points. Join.
Round 25 :
Ch3, *dc in each of the 5 dc across the petal top, ch3, skip to next petal*, repeat around. This evens the top of each petal/arch. Join.
Round 26 :
To start shaping corners: locate four evenly spaced groups of adjacent arches (every second arch pair). Into each corner group work: ch6, sl st into the base between the pair to form a prominent corner loop. Repeat 4 times placing corners at north, east, south, west.
Round 27 :
Ch1, sc around each arch and corner loop: sc 3 into each ch6 corner, sc 5 across each small arch space, producing a square outline with four defined points. Join.
Info :
From rounds 21-27 you create the square-like lacy frame that allows motifs to be linked. Keep corners consistent in size because they will align when joining motifs together.
Round 28 :
Decorative picot edging: *sc in next 3 sts, (ch3, sl st into first of the 3 sts) picot, sc in next 3 sts* repeat around each motif creating tiny loops along the lace that will take small gold beads later. Join and fasten off leaving tail for sewing.
— Holly Cluster (Make multiples for edges) :
Info :
Each motif in the photo has holly clusters at the sides comprised of three small pointed leaves and three red beads. Make 2-4 holly clusters per motif depending on desired density.
Round 1 :
Using olive green, ch6, sc in 2nd ch from hook, hdc, dc, hdc, sc to create a small leaf; leave tail and fasten off. Make 3 leaves per cluster. (This creates a small, slightly cupped leaf roughly 2-3 cm long)
Round 2 :
In a second leaf, extend by adding one extra dc in the center for a slightly larger leaf to give a layered look. Fasten off leaving long tail for sewing. Repeat to make 3 leaves: two small and one slightly larger.
Round 3 :
Assemble cluster: arrange three leaves with the larger leaf at the bottom, stitch centers together with matching yarn, then secure with a few sc stitches through base to a small cream lacy connector point on the motif. Add three red beads as berries—sew beads in an equilateral triangle at cluster center and secure thread on wrong side.
Info :
Leaves may be stiffened slightly with spray starch if desired to hold shape; test on a scrap leaf first. For a little sheen, use a mercerized cotton in olive for leaf making; this contrasts nicely with worsted acrylic petals.
— Side Starlets (Tiny Accent Stars between Motifs) :
Round 1 :
Using cream, ch4, sl st to make small ring. Round 1: 8 sc in ring (8). Join and fasten off leaving tail for sewing. These small 8-sc starlets sit between larger motif connections to fill gaps.
Info :
After making the runner length you can insert these small starlets between motifs for extra texture; they attach with a single sl st sewn into the motif join points.
— Joining Motifs (Method A: Continuous Join-As-You-Go) :
Info :
We recommend joining motifs with a cream joining round that connects the lacy corners and side points. You may either make each motif fully and then join, or work the final lacy round of each new motif through corresponding loops of an already-blocked motif (join-as-you-go).
Round 1 :
Lay two completed motifs right sides up, align cream lacy corners. Working into the ch6 corner loop of new motif, ch1, sc in corner loop, sc to the point where it meets the first motif, sl st through corresponding stitch on first motif to join, sc in next loop of new motif; repeat across three joining points per side to secure motifs together.
Round 2 :
Continue joining across the entire runner: each motif will be joined to the next motif at four main spots (two along the long sides and two corners). For a neat seam use mattress stitch with leftover tails after blocking if you prefer invisible joins.
Info :
When joining, pin motifs in place and ensure they lie flat before the final securing step. Slight shifting while joining will cause uneven edges over a long runner.
— Outer Decorative Border & Beading :
Round 1 :
Once motifs are all joined into a runner of desired length, work one continuous round around the outermost edge in cream: sc evenly in every visible stitch or around each picot. Count to ensure even coverage; if needed add extra sc to maintain a flat border.
Round 2 :
Work (ch5, sc in next stitch) around creating small loops for bead placement. Space loops evenly to echo picots along motif edges and corners. Join with sl st at end and fasten off.
Round 3 :
Using a beading needle, string gold beads and sew one onto the tip of each ch5 loop. For added richness, alternate with tiny red seed beads at every second loop to mirror holly berries. Secure thread on wrong side and weave ends under several stitches before trimming.
Info :
Do not overload beads or too many large beads near joins — they can pull the border out of shape. Use small seed beads (size 6/0 or 8/0) for best drape and light reflection.
— Finishing Rounds (Stabilizing & Blocking) :
Round 1 :
Steam-block the runner gently or wet-block to shape motifs. Pin each motif to measurement lines on your blocking board to square the lace and allow to dry completely before bead attachment and final sewing.
Info :
Blocking is critical to achieve the elegant lacy spaces you see in the photograph. Without blocking the motifs will crumple or lie unevenly when joined, especially across a long table runner.
Round 2 :
After blocking and bead attachment, weave all loose ends to the wrong side, trim close. If any motifs want additional anchoring, add a few discreet slip stitches through join seams with cream yarn to prevent shifting when used on table.
Info :
For a non-slip finish under plates, consider a thin felt strip or runner underlay to protect the crochet from spills and to prevent sliding.
— Optional Embellishment: Tiny Gold Loops Around Petals :
Round 1 :
With gold yarn and 3.0mm hook, work tiny chain loops and join at each petal tip: (ch4, sl st at petal tip) repeat around motif. Sew a single gold bead onto each loop for sparkle.
Info :
Gold accents are visible in the photograph and give a luxurious glow; use them sparingly on outermost points and center for best effect.
— Making Runner Length Decision :
Info :
The photographed runner shows five central motifs alternating red and green. For a table of similar size make 5 motifs joined end to end. For a longer table make 7-9 motifs. Each motif adds about 14-15 cm to length; plan accordingly for your table.
— Final Quality Check :
Info :
Lay runner flat and check symmetry of petals, evenness of joins and bead placement. Re-block small sections if necessary to tidy any waves or distortions. Securely fasten any loose beads and weave tails into seams.
— Care & Storage :
Info :
Hand wash in cold water with gentle detergent if needed. Reshape and dry flat. For long-term storage keep clean and folded with acid-free tissue between folds to protect beads and avoid crushing petals.
Completing this Red Forest Poinsettia table runner is so rewarding — each star-shaped motif is like a little piece of holiday jewelry, and together they form an elegant centerpiece. The layered petals, soft cream lace and tiny gold beads create a luxurious seasonal accent that will brighten your table for years. I hope you enjoy blocking, joining and admiring every carefully placed stitch. Happy crocheting and may your holidays be cozy and handmade! 🎁✨