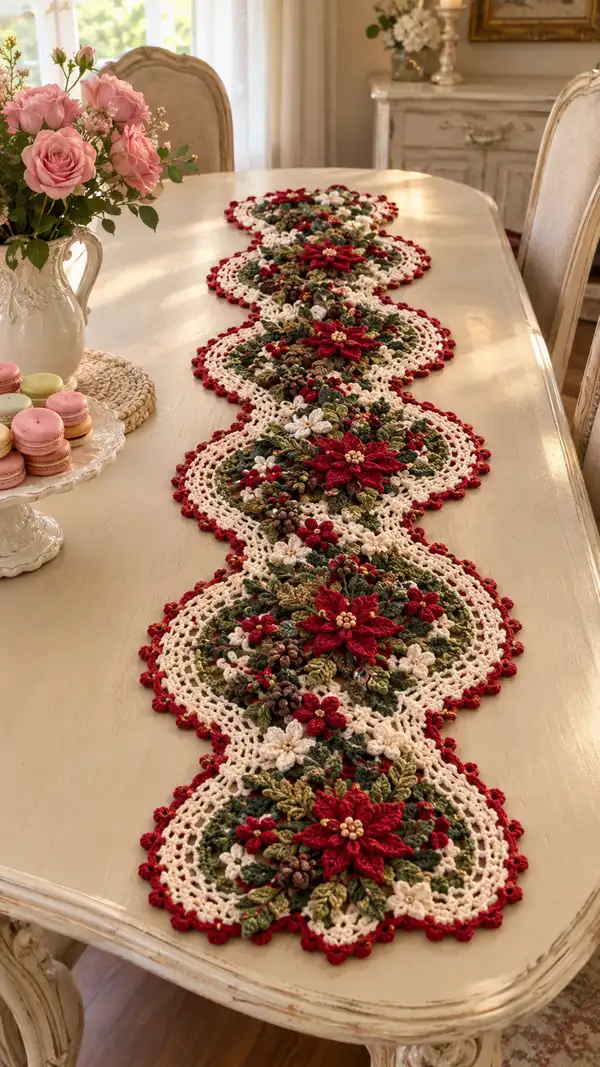
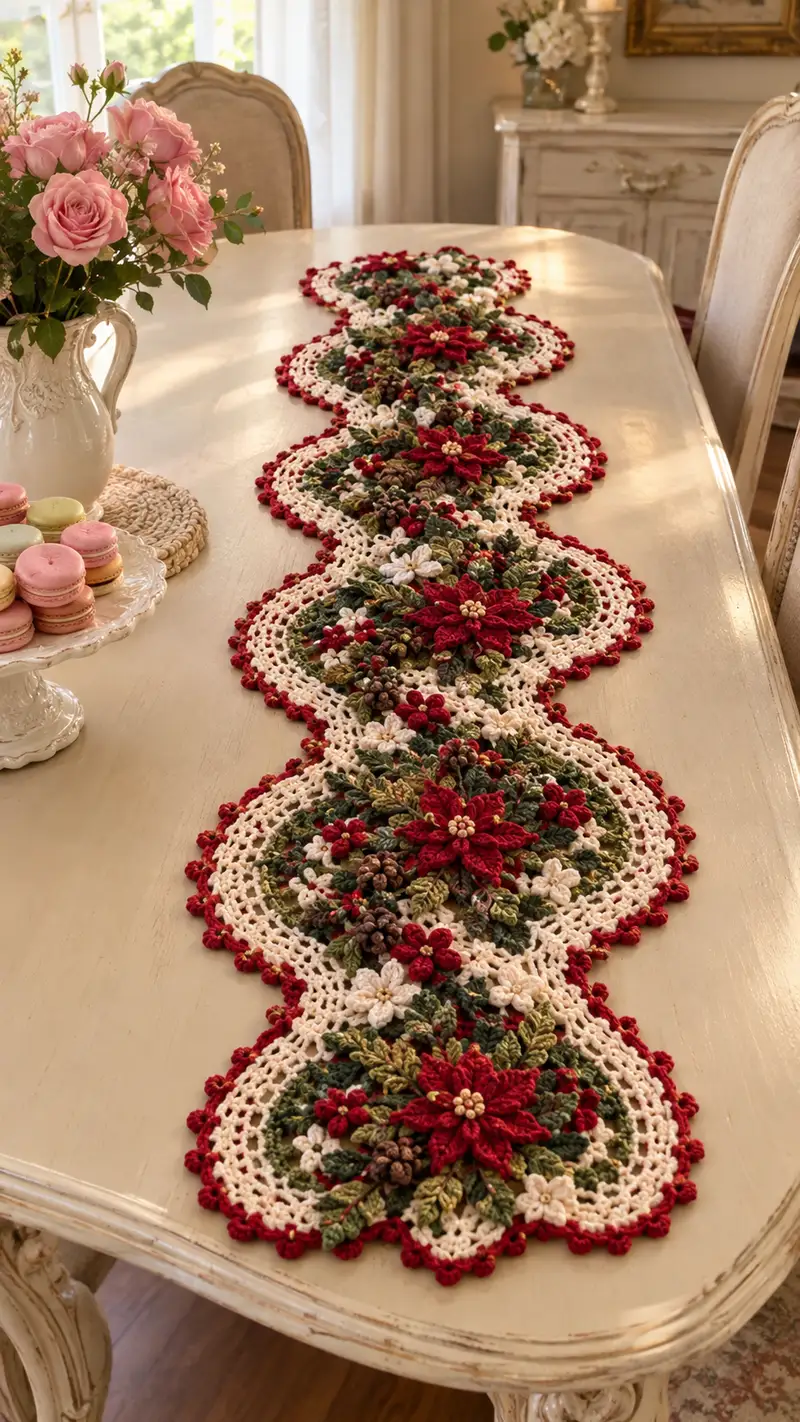
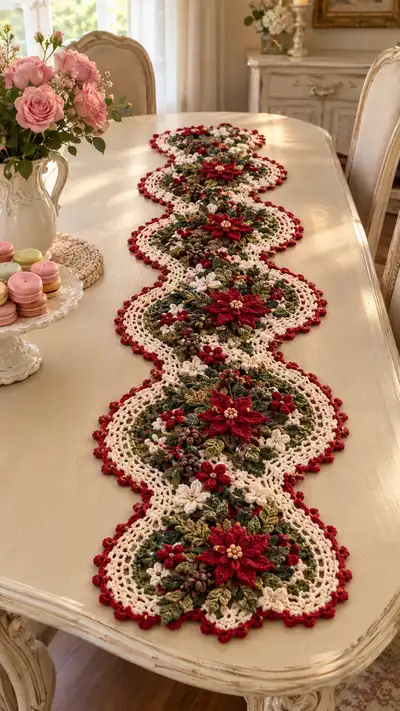
A festive, heirloom-style table runner featuring rich red poinsettias, textured cream lace, pinecone clusters, and leafy greenery. This elegant runner is worked as repeated floral medallions joined into a scalloped, serpentine centerpiece. Intricate layering, 3D petals and textured pinecones give beautiful depth—perfect for holiday tabletops or as a special seasonal gift.
Progress Tracker
0% Complete
— Poinsettia Motif (Make 6 medallions for runner) :
Round 1 :
With deep red, mr, 6 sc into mr (6)
Round 2 :
Inc in each st around (12)
Round 3 :
(1 sc, inc) x 6 (18)
Round 4 :
(2 sc, inc) x 6 (24)
Info :
These initial rounds form a small, dense circle that becomes the poinsettia base. Keep stitches tight to support the 3D petal work.
Round 5 :
1 sc in each st (24)
Round 6 :
Change to a slightly smaller hook (optional 3.0mm) for petal foundation. *(ch 2, skip 1 st, sl st in next) repeat 12 times around to create 12 small ch-2 loops (foundation for petals)
Info :
When changing to ch-2 loops, keep last stitch of previous round secure. The ch-2 loops are where petals will be anchored with puff or layered petal stitches.
Round 7 (Petal base) :
Working in each ch-2 loop: sc, ch 1, sc in loop (creates small picot base) x 12 (24 small posts)
Round 8 (Petal row 1) :
Change to deep red held double if you want very full petals: In each petal base ch-1, work (hdc, 2 dc, hdc) all in same base to create a small petal x 12 (12 petals)
Round 9 :
Sl st to base between petals, ch 1, 1 sc in same sp to tidy (12 sc)
Info :
Shape each petal with fingers as you go; pinch and block lightly later for more pronounced petals. If you prefer more volume, use puff stitches instead of dc cluster.
Round 10 (Layer 2 petal foundation) :
Behind each petal: ch 4, sl st behind petal into same base between petals to form 12 ch-4 loops (12)
Round 11 (Layer 2 petals) :
Into each ch-4 loop: (sc, hdc, 3 dc, hdc, sc) to form large layered petal x 12 (12 petals)
Round 12 :
Sl st around petals to anchor, 1 sc in each st across base to tidy (24)
Round 13 (Outer petal definition) :
Working behind layer 2 petals, ch 6, sl st in base behind petal to create 12 ch-6 loops for dramatic outer petals (12)
Round 14 :
In each ch-6 loop: (sc, (hdc, 5 dc, hdc) in same loop, sc) x 12 forming 12 large sculpted petals
Info :
If petals become wavy, gently steam block with a damp cloth and shape petals by hand. Optionally add a tiny amount of fiberfill under center before adding bead centers for dimension.
Round 15 (Center bead cluster) :
Change to gold/beige. With yarn carried or attached, sl st to center, ch 2, work 6 sc in center in a small ring (6)
Round 16 :
Fasten off gold and use small seed beads (6) sewn into center or embroider small clustered French knots using embroidery thread for realistic pollen center. Weave and secure tail.
Info :
For a polished finish, use seeded beads: stitch them in a circular cluster and secure thoroughly; glue optional for extra security on display pieces.
Round 17 (Back tidy and join place) :
Turn the piece over; tidy the back by weaving ends beneath petals, then with cream yarn, sl st evenly in round around base to prepare for green leaf layers (24)
Info :
Make 6 identical poinsettia medallions. Keep tension and hook size consistent so all medallions are uniform in diameter and layer height.
— Leaf Unit (Make 6 large leaves and multiple small filler leaves per medallion) :
Round 1 :
With olive green, ch 8, sc in 2nd ch from hook, hdc in next, dc in next, tr in next (center point), dc in next, hdc in next, sc in next, sl st to last chain to form leaf base (7 sts across)
Round 2 :
Turn, working along opposite side of chain foundation: sc, hdc, dc, tr, dc, hdc, sc to form symmetrical leaf (16 total around including base seams)
Round 3 :
Edge: *ch 1, (sc, ch 1) in each st around to create picot-like scalloped edge; sl st to join (approx. 16 picots)
Info :
Work leaves in two shades: olive as main and forest green on surface slip stitch veins. Make 6 large leaves and 12 smaller leaves per medallion as shown in photo (arrange layered under poinsettia).
Round 4 (Vein detail) :
With contrasting darker green held by surface slip stitch, embroider or slip-stitch a central vein along leaf center: insert hook at base, sl st in center of leaf to tip and back. Fasten off
Info :
Slight blocking will help leaves curve naturally. Pin leaf over a rounded surface and spritz lightly, allow to dry to retain gentle cupping under the flower.
— Small White Flowers (Make 12 small blossoms per medallion) :
Round 1 :
With cream, mr, 6 sc in mr (6)
Round 2 :
Inc in each st around (12)
Round 3 (Petals) :
*In next st: (ch 2, 3 dc, ch 2, sl st in same st) This makes a single rounded petal; repeat 6 times around (6 petals)
Round 4 :
Fasten off leaving tail for sewing. Optionally add a small bead or French knot center.
Info :
These small flowers fill negative space around the larger poinsettia. Make them in cream and occasionally in very pale ivory for variation.
— Berry Clusters (Make multiple small clusters per medallion) :
Round 1 :
With bright red, ch 2, 6 sc in second ch from hook (6)
Round 2 :
1 sc in each st (6) — do not fasten off
Round 3 (Puff berry) :
*Make 3 times into three adjacent stitches: yarn over, insert hook, pull up loop, repeat 3 times leaving multiple loops on hook, yarn over and pull through all loops, ch 1, sl st to secure; this forms tiny puff berries. Fasten off and leave tail for sewing
Info :
Sew clusters of 3-5 berries together with brown/green mini stems (thin embroidery thread) and anchor under leaves for realistic look.
— Pinecone Cluster (Textured, Make 3-4 small clusters per medallion) :
Round 1 :
With brown, mr, 6 sc into mr (6)
Round 2 :
Inc in each (12)
Round 3 :
(1 sc, inc) x 6 (18)
Round 4 (Scale foundation) :
Ch 3, skip 1, sl st in next, repeat around to form 9 ch-3 loops that will receive scale clusters
Round 5 (Scale clusters) :
Into each ch-3 loop work: (5 dc cluster or pop stitch), sl st in base to secure x 9 (9 textured scales)
Round 6 :
Round of 1 sc between scales to tidy (18 sc)
Info :
Work the scales tightly so pinecone clusters sit raised. Add light gold/beige highlights with a tiny surface crochet or embroidery stitch to mimic dried pinecone tips.
— Ground Filler: Olive & Forest Green Textured Base :
Round 1 :
With olive green, mr, 8 sc into mr (8)
Round 3 :
(1 sc, inc) x 8 (24)
Round 4 :
1 sc in each st (24)
Round 5 (Texture row) :
Change to forest green; *1 sc BLO in each st to create shallow ridges that mimic undergrowth (24)
Round 6 :
1 sc in each st with olive to tidy (24)
Info :
Work a small oval of ground filler for each medallion; arrange leaves, berries and pinecones on top when assembling to create a natural layered look.
— Motif Background Mesh (Cream lace frame for each medallion) :
Round 1 :
With cream, mr, 10 sc into mr (10)
Round 2 :
Inc in each st (20)
Round 3 :
(1 sc, inc) x 10 (30)
Round 4 :
(2 sc, inc) x 10 (40)
Round 5 :
1 sc in each st (40)
Info :
These rounds create a stable circle large enough to hold the layered floral center. Work loosely enough to allow the medallion to sit on the mesh without bunching.
Round 6 (Mesh creation) :
*ch 4, skip 2, sl st in next; repeat around. This produces a regular chain-loop mesh. Approximately 10 ch-4 loops around depending on gauge.
Round 7 :
Into each ch-4 loop: (sc, ch 3, sc) to form openwork petal-like loops (20 loops total)
Round 8 :
Work a second mesh round: sl st between loops, ch 3, sl st to form a lofted mesh. This adds height so the flower layers can overlap.
Round 9 (Shaping scallop troughs) :
To create the scalloped runner shape, work: (ch 2, 2 dc, ch 2, sl st) in every 4th mesh loop and 1 sc in others to form gentle undulations. Count so each medallion will have 6 scallop points when joined.
Info :
Measure the finished mesh circle — it should be slightly larger than your layered center so that petals overlap the cream border by 0.5-1 cm for a cohesive look.
— Joining Motifs and Runner Body (Join-as-you-go approach) :
Info :
Pin medallions in the layout seen in photo: an alternating serpentine row where each medallion overlaps the next on one scalloped point. Work join-as-you-go on the mesh round to secure them in a continuous runner. Plan for 6 medallions to match the pictured length (adjust for table length).
Round 1 (Join point) :
Lay two finished motifs side by side. In the outer mesh round of motif A, when you reach the loop that will meet motif B, ch 3, insert hook into corresponding loop of motif B and sl st to join, ch 3, continue mesh on motif A. Continue to join at 4-6 points per adjoining edge to create a stable seam.
Round 2 :
Continue joining medallions across the entire runner, maintaining the same number of join points for each seam. Where medallions overlap in the serpentine curve, join more densely (every mesh loop) to keep the curve firm (approx 8 joins per overlap).
Info :
Use pins to hold motifs in position before joining. Join with the background cream yarn to make the seam subtle. When connecting three or more medallions at a junction, weave the joining yarn through both meshes in sequential stitches to prevent gaps.
Round 3 (Reinforcing runner body) :
Once all medallions are joined, work an even round of 1 sc in each stitch around the entire length of runner to reinforce seams and create a uniform base for the scalloped edge (st count varies by number of mesh loops — approx 240-320 sts for 6 medallions)
Info :
If the runner feels floppy after joining, work an extra reinforcement round using BLO to create a subtle ridge that strengthens the join line.
— Scalloped Edge (Ruby Red Picot Border) :
Round 1 :
With bright red, attach at a seam point, ch 1, 1 sc in same st, *skip 2, (5 dc, ch 2, sl st to top of 5th dc) in next st for a scallop, skip 2, 1 sc in next st; repeat around to form pronounced scallops. Adjust repeats to end neatly at junction points (approx 40 scallops around 6 medallions)
Info :
Scallops accentuate the runner outline and give the image's dotted red edge. Count to ensure scallops repeat evenly; if needed, adjust with single crochet spacers to end rounds cleanly at seams.
Round 2 (Red bead picots) :
In each scallop top: ch 3, 1 sc in same top to create small bead-like picot; sl st to next sc space between scallops to tidy. This creates the dotted edge effect seen in the photo.
Info :
For stronger definition, use a smaller hook on the final border to make the edges crisp. Optionally add tiny red beads at each picot's center for sparkle.
— Final Surface Embellishment and Securement :
Round 1 :
Use leftover green to surface slip stitch tiny veins on leaves and olive to add small hooked stitches around the base of the pinecone to imply twig attachment. Use cream to tidy any open mesh loops with a neat slip stitch.
Round 2 :
Sew the poinsettias to the mesh background at 8-10 points around their inner base using cream or matching deep red so attachment points are hidden beneath leaves. Sew leaves, berries, and pinecones next so they overlap naturally.
Info :
Use small stitches and weave yarn tails back under adjacent rounds to prevent any loose ends. If using beads, stitch them through twice and secure with a dab of fabric glue if desired for long-term display stability.
Round 3 (Blocking) :
Lay runner flat on a blocking board, pin each scallop and petal into desired shape, spray lightly with water and allow to dry completely. This step significantly improves final appearance and evens scallops.
Info :
If you will launder the runner, test a corner: many cotton blends tolerate gentle hand wash and reshaping while delicate yarns may need spot cleaning only.
— Notes & Tips for Making Repeated Medallions :
Info :
Make one full medallion completely and block it before using it as a template. Use it to count mesh loops and scallop points so each subsequent medallion matches properly. Keep yarn tension consistent and use same hook for body unless otherwise noted for detail rounds.
Info :
Store finished components flat and stacked separated by tissue to maintain shape until assembly. When joining, begin at center medallion and work outward so edges stay symmetrical along the runner length.
Completing this Red Poinsettia and Cream Pinecone Table Runner is so satisfying — every medallion layered with petals, leaves, tiny berries and pinecones comes together into a nostalgic, elegant centerpiece. The scalloped ruby edge frames each medallion beautifully and gives a festive finishing touch. Display it proudly on your holiday table or give it as a treasured handmade gift. 🧶🌺🎁