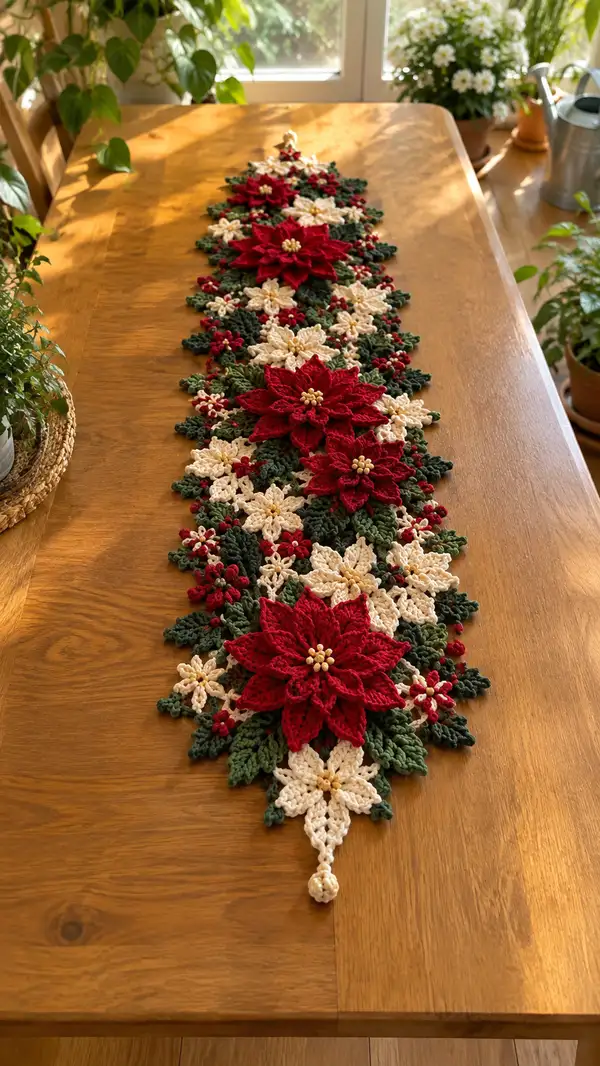
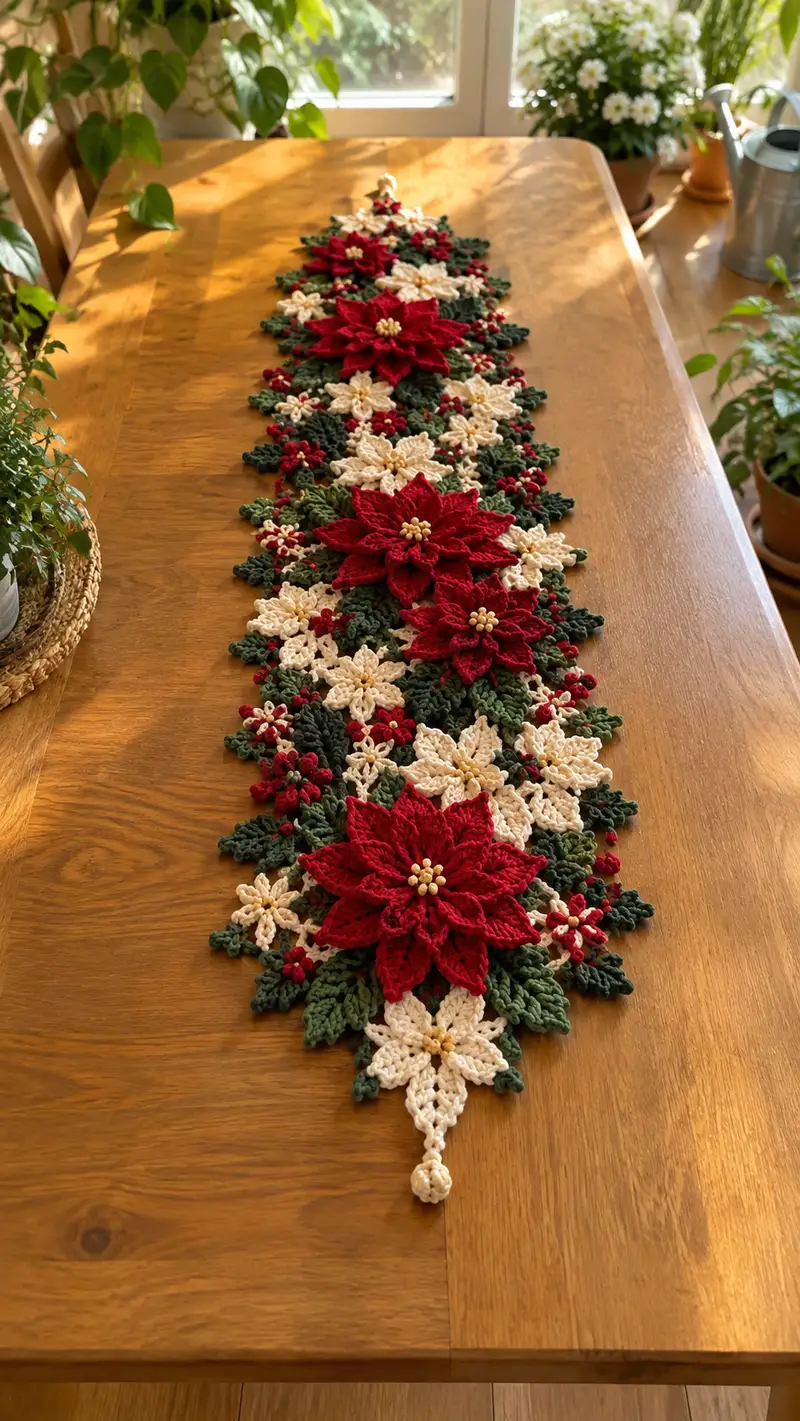
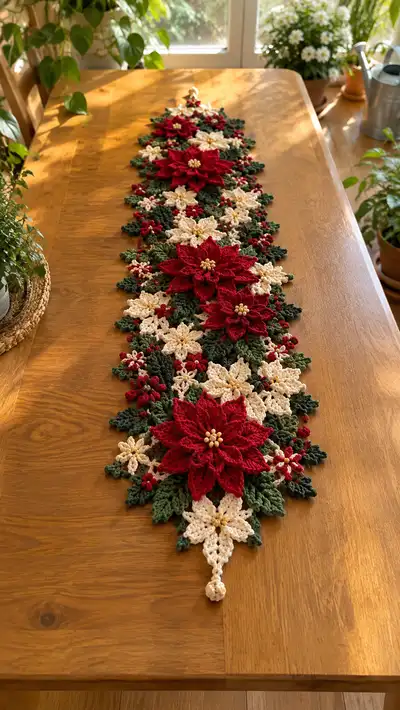
A festive, richly textured table runner featuring layered red poinsettias, cream snowflake motifs, deep green leaves, and tiny berry clusters. This pattern teaches modular motif construction, layered petals, and thoughtful joining techniques so you can create a long, elegant runner for holiday and winter décor. Detailed step-by-step instructions and blocking tips make assembly clean and satisfying for an heirloom-quality finish.
Progress Tracker
0% Complete
— General Notes :
Info :
This runner is made modularly: large poinsettias, medium poinsettias, snowflake stars, leaves and berry clusters are made separately and sewn together. Use worsted-weight yarn and a firm tension so motifs hold their shape. Make a sample motif and block it to confirm size before committing to the full runner.
Info :
Each motif uses a magic ring to start round work. When joining motifs, weave tails into the back rather than carrying yarn across openwork. Block each motif individually before assembly for crisp edges and clean joins.
— Large Poinsettia (Make 4–6 depending on runner length) :
Round 1 :
6 sc in magic ring; tighten ring (6)
Round 2 :
inc in each st around (12)
Round 3 :
(1 sc, inc) x6 (18)
Round 4 :
(2 sc, inc) x6 (24)
Round 5 :
(3 sc, inc) x6 (30)
Info :
This creates a compact center disc for the layered petals. Leave a 10–12cm tail for sewing or attaching beads later.
Round 6 :
1 sc in each st around (30)
Round 7 :
Start petal anchors: *(ch4, skip 2 sts, sc in next) repeat from * around to form 10 anchor loops (10 loops)
Info :
Count anchors carefully — we are creating 10 petal anchor points for a fuller large poinsettia (10 anchors created by ch4 loops). Use stitch marker at one anchor to mark round start.
Round 8 (Petal 1 setup) :
Work around first anchor: join with sl st into ch4 loop, ch1, (sc, hdc, dc, tr, dc, hdc, sc) into the loop, sl st to base—petal formed. Repeat for all 10 anchors (base disc remains 30 sts)
Round 9 :
Second petal layer anchors: *behind each petal, sl st at base, ch5, sl st into same base* — create 10 ch5 anchors (10)
Round 10 (Layered petal 2) :
Into each ch5 anchor: join, ch2, (hdc, dc, tr, tr, dc, hdc) sl st to base — this forms larger secondary petals. Repeat around (10 larger petals)
Info :
Work petals gently; do not pull too tight so petals can lay slightly cupped for realistic shape. Block petals curved upward for a natural poinsettia look.
Round 11 :
Third petal layer anchors: working behind second layer, create ch6 anchors at each petal base for outermost petals (10 anchors)
Round 12 :
Outermost petal shaping: into each ch6 anchor join, ch2, (dc, tr, dtr, tr, dc) sl st to base — form dramatic outer petals (10)
Round 13 :
Surface texture round: sl st into base stitch between petals, *ch3, sc into next base, ch3, sl st* around to add subtle points for realism (30 small points)
Info :
Add a few extra surface loops or picots if you prefer more texture; these are optional and purely decorative.
Round 14 :
Finishing round: 1 sc around the original base disc and between petals to tidy joins (30)
Round 15 :
Optional edging: 1 sc in each st BLO around petal edges to create a defined rim; work carefully around longer petal stitches counting 30 edging points (30)
Info :
For each large poinsettia sew a cluster of 6–8 golden seed beads into the center using a short length of strong thread. Secure knot and weave tail through the back of the disc.
Round 16 :
Fasten off and weave in ends; leave long tail if you prefer sewing the whole flower down rather than attaching with needle and thread (no stitch count)
Info :
Block each large poinsettia flat but allow petals to cup slightly. Pin outer petals so points are evenly spaced and symmetrical.
— Medium Poinsettia (Make 6–10) :
Round 1 :
6 sc in magic ring (6)
Round 2 :
inc in each st (12)
Round 3 :
(1 sc, inc) x6 (18)
Round 4 :
(2 sc, inc) x6 (24)
Round 5 :
1 sc in each st (24)
Round 6 :
Create 8 petal anchors: *(ch4, sc in next) x8 (8 anchors)
Round 7 :
Into each ch4 anchor: join, ch1, (sc, hdc, dc, tr, dc, hdc, sc) sl st — form 8 petals (base disc still 24)
Info :
Medium poinsettias use 8 petals for a slightly less full look than large flowers. These are great for alternating rows and filling space between larger flowers.
Round 8 :
Second layer anchors: behind each first petal make a ch5 anchor (8)
Round 9 :
Second layer petals: ch2, (hdc, dc, tr, dc, hdc) into each ch5 anchor, sl st to base (8 larger petals)
Round 10 :
Trim and fasten off; add 4–6 golden beads in center or small French knot centers using embroidery thread (no stitch count)
Info :
Block medium poinsettias to match large ones so layered petals sit with consistent proportions across the runner.
— Small Snowflake Star (Cream) (Make many to fill gaps) :
Round 1 :
6 sc in magic ring (6)
Round 2 :
inc in each st (12)
Round 3 :
(1 sc, inc) x6 (18)
Round 4 :
*ch5, sl st into next base st* around to create 6 ch5 loops or arms (6 arms)
Round 5 :
Into each ch5 loop: join, ch1, (sc, hdc, dc, hdc, sc), sl st to center — form star point (6 points)
Info :
These snowflake stars are delicate and lacy. Work with slightly smaller tension if possible so motifs are crisp. Select a bright cream yarn for contrast.
Round 6 :
Edge each point with picots: *sl st to tip, (ch3, sl st at base of ch3)* around to add small picot highlights (6 picot tips)
Round 7 :
Fasten off; add small seed bead or French knot center with gold or cream thread (no stitch count)
Info :
Make many small stars to nestle among leaves and form a continuous snowflake effect; adjust the number by runner length and desired density.
— Small 6-Petal Star (Cream, secondary filler) :
Round 1 :
6 sc in magic ring (6)
Round 2 :
*ch4, sl st in next base st* around to make 6 loops (6)
Round 3 :
Into each loop make (sc, dc, sc) join—six small petals (no base stitch change)
Round 4 :
Fasten off; add tiny bead centers or contrasting small embroidery knots for depth (no numeric stitch count)
Info :
These small stars are excellent to visually link larger motifs and create a balanced layout across the runner.
— Leaf Motif (Make 30–40 varying sizes) :
Round 1 :
ch9, sc in 2nd ch from hook, hdc in next, dc in next, tr in next, dtr in next, tr in next, dc in next, hdc in last ch, sc in last (leaf worked flat) — 9 stitches along leaf spine
Round 2 :
Turn and work other side symmetrically: sc in first, hdc, dc, tr, dtr at tip (2 dc cluster), tr, dc, hdc, sc — finish leaf (count equal to 9 along opposite side)
Round 3 :
Edge shaping: 1 sc around entire leaf edge working in FLO on outermost side to create a slightly curved edge — final leaf edge approx 20 sc around (20)
Info :
Make leaves in two sizes: standard ch9 and a smaller ch7 variant for gaps. Block leaves with slight curl near the tip for a natural look.
Round 4 :
Optional central rib: with contrast yarn, use surface slip stitch down center to add visible vein (no stitch count)
Info :
Make several leaf shapes in both dark and slightly lighter green for dimensional foliage. Mix and match sizes when assembling the runner.
— Berry Cluster (Make many small clusters) :
Round 1 :
With Bright Red, make magic ring and 6 sc into ring; tighten (6)
Round 2 :
Work (sl st, ch2, sl st) into each sc around to create tiny bud bumps — 6 little loops
Round 3 :
Fasten off leaving 10cm tail to sew; group 3–5 of these tiny berries and sew cluster tightly together for realistic berry effect (no numeric count)
Info :
Sew clusters into crevices between leaves and snowflakes. Use small stitches and hide seams on the underside so clusters look organic.
— Connector Lace Motif (Make many to link motifs into runner) :
Round 1 :
6 sc in magic ring (6)
Round 2 :
*(ch6, sc in next base st) x6 — create 6 loops (6 loops)
Round 3 :
Into alternate loops work: ch1, (sc, hdc, dc, hdc, sc) sl st into next base — form bridging petals to connect larger motifs (6 mini petals)
Round 4 :
Edge round: 1 sc around base and around mini petals to tidy (12–18 depending on loops)
Info :
Connector motifs are the 'glue' between primary flowers. Make many and arrange them so edges overlap slightly when pinned for sewing.
— Joining and Layout (Long section with many steps) :
Info :
Plan your layout on a flat surface such as a blocking mat or large table. Alternate one large poinsettia with a grouping of two medium poinsettias and several snowflake stars for balanced composition. Leave approximately 6–9cm between the centers of the main large flowers for a continuous runner look. Pin every motif in place before sewing.
Step 1 :
Place motifs in desired order along the runner length. Use small pins to hold motifs together where edges overlap. Aim for symmetry: central feature then mirrored repeats to each end.
Step 2 :
Start sewing with a yarn needle and matching yarn tails. Use whip stitch or mattress stitch for flat seams connecting motifs at overlapping points. Pick up approximately 3–4 stitches on each motif at each join to keep connection secure and invisible from the top.
Info :
Always sew from the underside of the runner to keep the top neat. Use a fine yarn needle and work slowly; frequent checking and repositioning ensures motifs don't skew as they are secured.
Step 3 :
Attach leaves in clusters using whip stitch at the leaf base. Tuck leaf tips slightly under petals as you sew to create layered depth. Add berries last, sewing them into gaps between leaves and pointed petals for a natural cluster effect.
Step 4 :
Use connector lace motifs to fill wider gaps. Sew connectors so chains and small petals overlap edges of adjacent motifs to create visual continuity.
Info :
When sewing, consistently refer to pinned layout: unpin and adjust as needed. Keep the runner flat and do not pull seams tight; allow motifs to sit naturally for a gentle, organic surface.
— Edge Finishing and Tassel Tips :
Round 1 :
Once all motifs are joined, work a 1-row sc edging around the entire runner: attach yarn at one end, 1 sc evenly around outer edges and gaps to tidy (estimate 160–220 sc depending on number of motifs)
Round 2 :
Optional decorative picot round: *sc, ch3, sl st into base of ch3 (picot) repeat around for delicate points — place picots at outermost points only (count varies)
Info :
Edge counts vary by runner length; measure as you go and space sts evenly to avoid ripples. Use smaller hook (3.0mm) for edging if you prefer a firmer border.
Round 3 :
Create tassel or pointed closure: at each runner end make a small triangular motif of 3 chain petals and top with a small bead. Attach securely and weave ends into back.
Info :
Make final secure weave-in of all ends—at least 6–8cm into fabrics—and trim close. If desired, add a small dab of fabric glue under knot for extra security for beads.
— Blocking and Final Finishing :
Info :
Block each motif as you complete it using a steam or spray-and-pin method; pin petals and points into the desired shape and allow to dry completely. For the assembled runner, re-block gently pinned on a flat surface to even edges and encourage motifs to sit flush.
Step :
Lightly starch or fabric-size spray can help motifs hold shape on a table. Test on a scrap motif to ensure the finish is not too stiff for your taste.
Info :
Final weighing and pressing of beads: sew bead centers last after blocking to avoid distorting petals. Use a sharp-eyed needle and small knots to anchor beads securely.
— Sizing, Scaling and Customization :
Info :
This pattern is modular—make more or fewer repeats to fit your table. Use thinner yarn and a smaller hook for a delicate runner, or bulk yarn and a larger hook for a dramatic, oversized centerpiece. Swap colors for a different seasonal look.
Info :
If your tension differs from the pattern sample, make a motif gauge (one medium poinsettia) and measure width to calculate number of repeats needed for your table length. Adjust spacing between main motifs proportionally.
This elegant table runner turns simple yarn into a festive showpiece full of texture and depth. Layered poinsettias and lacy snowflakes create a beautiful seasonal focal point, and the modular design means you can adapt the length and density to suit any table. Pin, stitch and block with care — the results are worth it: an heirloom-quality decoration that invites compliments all season long. 🧶🌟🎁