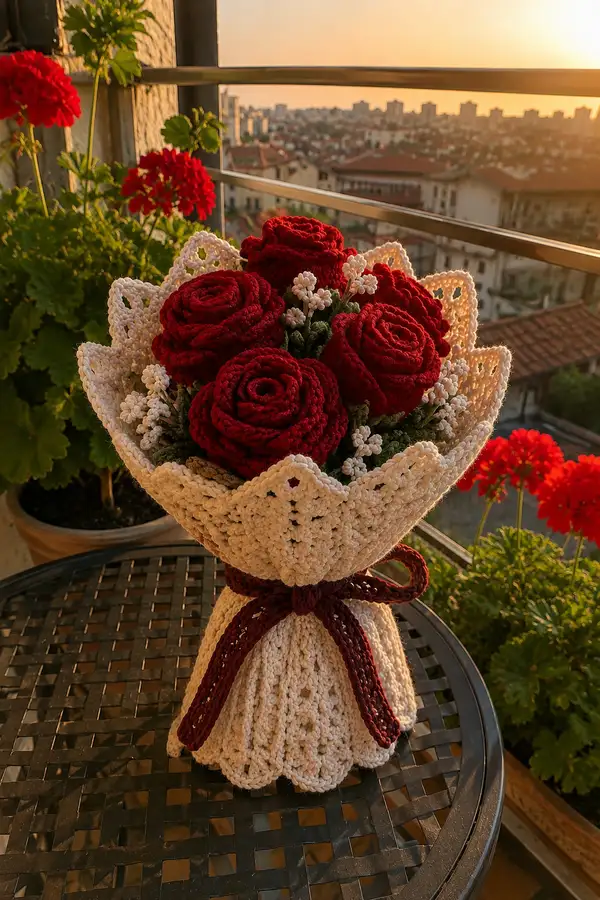
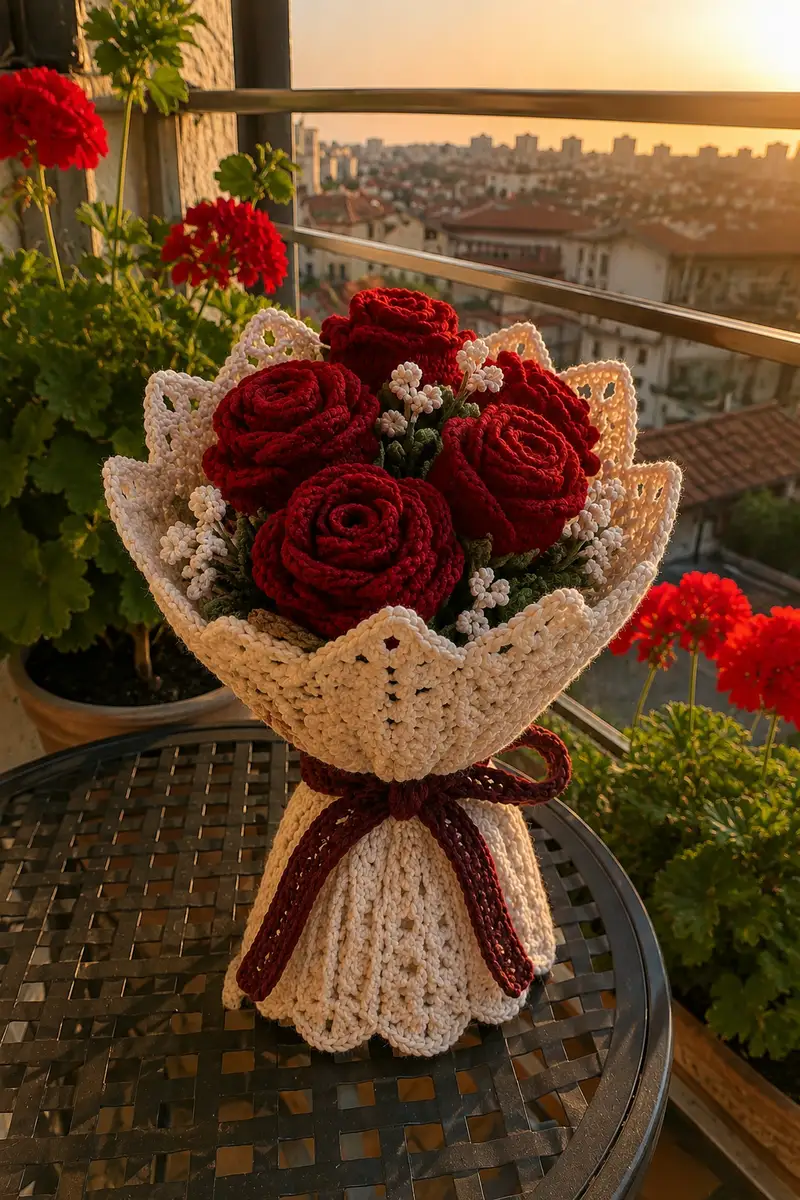
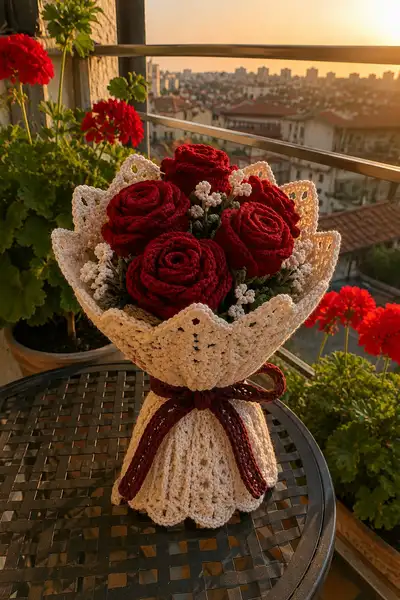
Create a timeless crochet bouquet of deep red roses wrapped in a delicate cream lace collar and tied with a burgundy bow. This pattern includes fully worked rose blooms, textured leaves, tiny baby�s-breath clusters, sturdy stems, and an elegant crocheted bouquet wrapper. The finished arrangement is perfect as a lasting gift or table centerpiece with realistic shapes and layered petals.
Progress Tracker
0% Complete
— Overview :
Info :
This pattern breaks the bouquet into the following main components: Rose spiral petal strips (make 7), Rose base cones (make 7), Stems (make 7), Leaves (make 10-14), Baby's-breath clusters (make 6-10), Bouquet wrap (1 large cup), Lace edging (worked as part of wrapper), and Bow (1). Use the recommended yarn and hooks for a similar scale to the photos; modify hook size to adjust finished scale. All roses are constructed by crocheting a flat spiral petal strip that is rolled and stitched into a bloom; the base cone secures to the stem for a stable attachment.
Info :
Throughout the pattern, rounds are given for circular pieces and rows for strip/spiral pieces. Keep stitch markers at the beginning of rounds when working in joined rounds. When making spirals for petals, do not join at the end of rows; work in continuous spiral or long strip with consistent increases to create the length needed for rolling into petals. Use Info sections regularly for tips and stuffing guidance.
— Rose Petal Spiral (Make 7 identical spirals) :
Row 1 :
ch 31, 1 sc in 2nd ch from hook, 1 sc in each ch across (30)
Row 2 :
ch 1, turn, 1 sc in BLO across (30)
Row 3 :
ch 1, turn, 1 sc in each st (30)
Row 4 :
ch 1, turn, (4 sc, inc) x 5 (35)
Info :
We are shaping a tapered spiral strip. The increases create a subtle curve which helps petals overlap when rolled. Work evenly and keep the strip flat by maintaining consistent tension. If you prefer a larger rose, increase the starting chain by multiples of 4 and continue increases proportionally.
Row 5 :
ch 1, turn, 1 sc in each st (35)
Row 6 :
ch 1, turn, (5 sc, inc) x 5 (40)
Row 7 :
ch 1, turn, 1 sc in each st (40)
Row 8 :
ch 1, turn, (6 sc, inc) x 5 (45)
Info :
These intermittent increase rows broaden the strip gradually, producing petals that open and overlap. Keep the strip flat; if the strip starts to ruffle excessively, skip one increase round or reduce increase frequency to every 8 rows.
Row 9 :
ch 1, turn, 1 sc in each st (45)
Row 10 :
ch 1, turn, (7 sc, inc) x 5 (50)
Row 11 :
ch 1, turn, 1 sc in each st (50)
Row 12 :
ch 1, turn, FLO: 1 sc in each st (50)
Info :
Working the FLO on Row 12 creates a subtle ridge along the top of many petals; this helps petals hold shape and makes the spiral read like layered petals. If you want a softer edge, work both loops instead.
Row 13 :
ch 1, turn, 1 sc in each st (50)
Row 14 :
ch 1, turn, (8 sc, inc) x 5 (55)
Row 15 :
ch 1, turn, 1 sc in each st (55)
Row 16 :
ch 1, turn, BLO: 1 sc in each st (55)
Info :
Alternate FLO/BLO rows occasionally to make ridges that catch light and add definition. If your yarn is thick, consider reducing increases to keep the final spiral manageable to roll.
Row 17 :
ch 1, turn, 1 sc in each st (55)
Row 18 :
ch 1, turn, (9 sc, inc) x 5 (60)
Row 19 :
ch 1, turn, 1 sc in each st (60)
Row 20 :
ch 1, turn, 1 sc in BLO 5 sts, *hdc in next 3 sts, 1 sc in next 2 sts* rep to end (60)
Info :
Row 20 introduces alternate stitch heights to create petal scallops. You can substitute dc in place of hdc for taller, more dramatic petals or use smaller hook for compact petals.
Row 21 :
ch 1, turn, 1 sc in each st (60)
Row 22 :
ch 1, turn, (10 sc, inc) x 5 (65)
Row 23 :
ch 1, turn, 1 sc in each st (65)
Row 24 :
ch 1, turn, FLO: (1 sc, ch 1, sk next st) repeat across to create tiny loops for petal edges (65)
Info :
The ch-1 loop edge on Row 24 helps the outermost petals look frilled. If you want a simpler outer edge, skip the ch-1 loop pattern and work 1 sc across instead.
Row 25 :
ch 1, turn, 1 sc in each st (65)
Row 26 :
ch 1, turn, (11 sc, inc) x 5 (70)
Row 27 :
ch 1, turn, 1 sc in each st (70)
Row 28 :
ch 1, turn, *1 sc in next 3, hdc in next 3, dc in next 2* rep to end (70)
Info :
Rows 26-28 add volume at the outer strip to create larger outer petals similar to the photo. If your petals begin to lift too much, reduce dc sections or use a smaller hook.
Row 29 :
ch 1, turn, 1 sc in each st (70)
Row 30 :
ch 1, turn, (12 sc, inc) x 5 (75)
Row 31 :
ch 1, turn, 1 sc in each st (75)
Row 32 :
ch 1, turn, FLO: 1 sc in each st (75)
Info :
At this length, you should have a broad spiral strip that when rolled creates several layers of petals similar to the roses pictured. Fasten off leaving a 25-35 cm tail for sewing and tacking as you roll. If you want a taller bloom, extend the pattern by repeating Rows 26-31 for additional width.
Row 33 :
Leave strip flat. Using the tail, start rolling the strip from one narrow end into a tight core. After the first 2-3 turns, insert a few whip stitches using the tail every 6-8 stitches to secure layers. Continue rolling and securing until entire strip is rolled into a bloom. When finished sewing, weave tail through the bottom layers and secure firmly.
Info :
When rolling, stagger stitches so petals look natural. Pull outer petal edges slightly outwards to create the rounded profile. Pin the spiral on a foam board or to a towel to assess general shape before sewing the final seam.
— Rose Base Cone (Make 7) :
Round 1 :
mr, 6 sc in ring (6)
Round 3 :
(1 sc, inc) x 6 (18)
Round 4 :
(2 sc, inc) x 6 (24)
Info :
The base cone acts as the structural cap that fits behind the rolled spiral and secures to the stem. It also hides the joining stitches of the spiral strip. Work the cone in continuous rounds and place a stitch marker at the start of each round.
Round 5 :
(3 sc, inc) x 6 (30)
Round 6 :
1 sc in each st (30)
Round 7 :
(4 sc, inc) x 6 (36)
Round 8 :
1 sc in each st (36)
Info :
To create a shallow cone shape, work several rounds of even stitches after increasing, then start working occasional decreases or shortened rounds depending on desired cone height. The cone should be slightly smaller than the base of the rolled spiral so the spiral sits comfortably on top.
Round 9 :
1 sc in next 6 sts, (dec, 1 sc) x 6 (30)
Round 10 :
1 sc in each st (30)
Round 11 :
(3 sc, dec) x 6 (24)
Info :
These shaping rounds help the cone cradle the spiral. Leave a long tail at the end of Round 11 for sewing the cone to the rose spiral and for attaching the stem. Fasten off and weave tail through the bottom center to create a sturdy base if needed.
Round 12 :
Attach stem: fold the end of your stem wiring or wrapped wire and insert into the center of the cone. Using the tail, whip through cone base and around wire 6-8 times, anchoring firmly. Continue to sew the cone to the underside of the rolled spiral bloom, distributing stitches around the base so the flower sits evenly.
Info :
If you are not using wire, crochet a small tight cylinder for the stem and sew it into the cone opening, then stuff lightly to create a firm core for attachment. Always ensure the connection is firm so flowers do not wobble in the final bouquet.
— Stem (Make 7) :
Round 1 :
Using olive/fern yarn, ch 2, 6 sc in 2nd ch from hook (6) - work in continuous spiral
Round 4 :
1 sc in each st BLO for 6 rounds to create slight ridge (6)
Info :
At this point insert florist wire or pipe cleaner inside the crocheted tube for a poseable stem. Fold the wire end back on itself to avoid sharp points, and wrap the exposed wire in yarn before crocheting over it if desired. For a no-metal option, make a tightly crocheted tube and stuff with fiberfill for structure.
Round 5-20 :
1 sc in each st (6) - continue until stem measures desired length (approx. 20-25 cm). For a thicker stem, after round 8: work (1 sc, inc) x 3 (9) then continue even rounds at 9 sts. For pictured bouquet keep stems 6 sts wide for a slim natural look.
Info :
Stuff stems lightly as you go to keep them flexible but stable. If adding floral tape later, leave wire exposed a couple of cm at base to anchor to bouquet holder or foam. Use a smaller hook if you prefer no visible stuffing.
Round 21 :
Decrease slightly at top to fit cone if necessary: (1 sc, dec) x 2 (4)
Round 22 :
1 sc in each st (4)
Round 23 :
Fasten off leaving long tail. If you used wire, fold the wire end and secure through the cone base with several stitches; if you used crocheted tube, sew tube into the cone center and secure with whip stitch.
Info :
Trim and hide tails inside the stem using a yarn needle. For extra stability, wrap a few stitches of a contrasting green yarn at the cone top to emulate calyx sepals and help secure the bloom to the stem.
— Leaves (Make 10-14) :
Round 1 :
ch 12, sc in 2nd ch from hook, sc 4, hdc 2, dc 3, tr 2, work down opposite side of ch: dc 3, hdc 2, sc 4, sl st to base. (Leaf shape completed)
Info :
Leaves are worked flat as an oval with increasing stitch heights toward the tip. Use FLO on one side for a ribbed central vein if you prefer. Make leaves in varying sizes for a natural bouquet look by varying the starting chain length (10-16).
Round 2 :
Attach to stem: position leaf on stem by wrapping a long tail around stem and back through base stitches; tack three points along the leaf base to secure and hide the tail inside the stem or wrap in floral tape.
Info :
Stiffen leaves lightly by wetting and pinning to shape while drying or by mixing a small amount of fabric stiffener. For the textured curled leaves pictured, fold leaf slightly and sew a running stitch along the center vein, gather lightly to create a natural curl before securing to stem.
— Baby's-Breath Clusters (Make 6-10 small clusters) :
Round 1 :
With white yarn, ch 6, sl st into first ch to form small loop (flower bud). Repeat to make 5-7 small loops on the same short base stem by working ch 6, sl st into first ch for each bud.
Round 2 :
For each bud, work 6 sc into loop, sl st to join, fasten off leaving tail. Make 4-6 buds per cluster and arrange them on a short stout stem (wrap-wire or crocheted tube) using whip stitch to secure.
Info :
Baby's-breath clusters are tiny and numerous; make a few extra to fill gaps between roses. If you want more volume, make more buds or use a finer yarn and smaller hook to create denser clusters that mimic the delicate white flowers in the photo.
Round 3 :
Assemble cluster: attach each bud to a single short stem about 3-4 cm long, then wrap cluster base around the main rose stems when arranging. Use floral tape or yarn to hold clusters in place. For pictured clusters, use 5-7 buds per cluster and space clusters among the roses.
Info :
Be sure to stagger clusters in height so small white sprigs peek between petals and add contrast. Secure clusters firmly to avoid them shifting during handling.
— Bouquet Wrap Body (Make 1 cup) :
Round 1 :
With cream yarn, mr, 6 sc in ring (6)
Round 3 :
(1 sc, inc) x 6 (18)
Round 4 :
(2 sc, inc) x 6 (24)
Info :
We will build a shallow bowl that cups the bouquet. Increase rounds create a base wide enough to hold all stems. Use continuous rounds for a seamless appearance; place a stitch marker at start of each round.
Round 5 :
(3 sc, inc) x 6 (30)
Round 6 :
1 sc in each st (30)
Round 7 :
(4 sc, inc) x 6 (36)
Round 8 :
1 sc in each st (36)
Info :
Continue increasing until the base diameter is roughly the width of the arranged flower heads; in the pictured bouquet the base cup is broad to allow flowers to be placed inside without crowding. For a sturdier cup, consider adding an inner circle of cardboard or plastic disc covered and stitched in place after crocheting the base rounds.
Round 9 :
(5 sc, inc) x 6 (42)
Round 10 :
1 sc in each st (42)
Round 11 :
(6 sc, inc) x 6 (48)
Round 12 :
1 sc in each st (48)
Info :
After Round 12 you should have a broad flat disk. From here we will turn up the sides to form the cup. To begin the walls, work a few rounds of even sc without increases.
Round 13-18 :
1 sc in each st (48)
Info :
These even rounds lift the fabric vertically to create a slight wall. If you want a taller cup, work additional even rounds. The pictured cup has a tall wall to show the scalloped lace edge; you will need approx. 8-10 even rounds to reach similar height.
Round 19 :
BLO: 1 sc in each st (48)
Round 20 :
1 sc in each st (48)
Round 21 :
(3 sc, ch 3, skip 1, sl st in next) repeat around to create lace pattern (48)
Info :
Round 21 begins the decorative lace motif that forms the scalloped crown visible in the photo. The ch-3 loops create points when followed by the next shaping rounds. Adjust ch length to alter point size.
Round 22 :
Into each ch-3 space: (sc, hdc, 3 dc, hdc, sc) to form a petal-shaped scallop (48 petals)
Round 23 :
1 sc in each st (48)
Info :
This classic pineapple-like scallop forms the peaked crown. Block the scallops by pinning them out after completing Round 22 to ensure crisp points; steam lightly or wet-block for best results with cotton yarn.
Round 24 :
Optionally repeat Round 22 further out for larger scallops, or fasten off and weave in ends if you prefer a single crown row. If extending, add (sc, ch 4, sc) between scallops to space them further.
Info :
To achieve the tall scalloped collar pictured, work a second round of larger scallops, increasing the dc count in the petal panels (5-7 dc) and blocking again. The wrap should open wide and cup the roses elegantly.
— Wrapper Skirt (Lower part to cover stems) :
Round 1 :
With same cream yarn, join at bottom edge of cup, chain 1, 1 sc evenly around the base edge, placing increase points to maintain even drape (approx. 60 sc)
Round 2 :
(3 sc, inc) repeat around (75)
Round 3-6 :
1 sc in each st (75)
Info :
The skirt flares out from the cup and then is cinched with the decorative bow. Work the skirt long enough to hide stems (approx. 12-18 cm). Use even rounds for a smooth fabric and BLO for slight ribbing if desired.
Round 7 :
(4 sc, inc) x 15 (90)
Round 8-12 :
1 sc in each st (90)
Round 13 :
Begin scalloped bottom edge: *sk 2, 5 dc in next, sk 2, sl st in next* repeat around to create rippled hem.
Info :
Finish the skirt with a narrow hem or scallop to match the cup crown. Leave an opening at the back or side if you want to insert stems later; otherwise sew the skirt seam and slide over bundled stems when assembling.
— Lace Edging Detail :
Round 1 :
Join cream yarn at top rim, ch 3 (counts as dc), *skip 2, 5 dc in next, skip 2, sl st* repeat around for a decorative open lace repeat (matches cup crown)
Round 2 :
Into each 5 dc shell: sl st, ch 3, (2 dc, tr, 2 dc), sl st to anchor (produces sharp points)
Info :
Block each scallop to point outward and match the lace look in the image. If your scallops curl inward, steam or wet-block while pinned to achieve outward cups.
— Decorative Bow (Make 1) :
Row 1 :
With deep burgundy yarn, ch 40, 1 sc in 2nd ch from hook and across (39)
Row 2 :
ch 1, turn, BLO: 1 sc in each st (39)
Row 3 :
ch 1, turn, 1 sc in each st (39)
Row 4 :
Fold strip to form looped bow shape and sew center with long tail to cinch. Wrap a narrow 8-10 ch band around center and sew to back to secure.
Info :
Make the bow wide or narrow depending on personal preference. For the long tails pictured, make two long strips and attach as trailing ribbons. You can braid three strips together for textured decorative ties if desired.
— Finishing & Assembly Notes :
Info :
Prepare all components: 7 rolled roses with cones and stems, 10-14 leaves, 6-10 baby's-breath clusters, 1 cup with skirt, and 1 bow. Pin and arrange flowers on a flat surface matching the photograph, adjusting heights so blooms are roughly level with slight variance for natural effect. Use floral tape or yarn to bind stems in a bouquet bundle before sliding into the wrapper cup.
Info :
When inserting stems into the cup, place the tallest central flower first and work outward. Tuck baby's breath clusters in gaps to create airy accents. Pin leaves around the perimeter and between blooms for natural foliage peeking out beneath petals.
Info :
After arranging, cinch the wrapper skirt around stems and secure with the burgundy bow. Sew a few hidden stitches from the inside of the skirt to the bundle to prevent slipping when displayed. Block wrapper and bow again after assembly if needed to ensure crisp edges and neat presentation.
Info :
Optional: glue a small round of foam or cardboard at the bottom inside the cup before arranging stems to help center and hold stems upright. Cover the disc with a crocheted circle or felt so it is not visible. Lightly weight the base if using the arrangement as a table centerpiece to prevent tipping.
Completing this romantic crochet bouquet is such a satisfying project — from spiraling each petal strip to shaping the lace collar and tying the final bow. The finished arrangement is a lasting keepsake that feels equally beautiful on a windowsill or as a heartfelt gift. I love how the scalloped wrapper and deep red petals create a vintage, elegant presentation. 🧶🌹💕