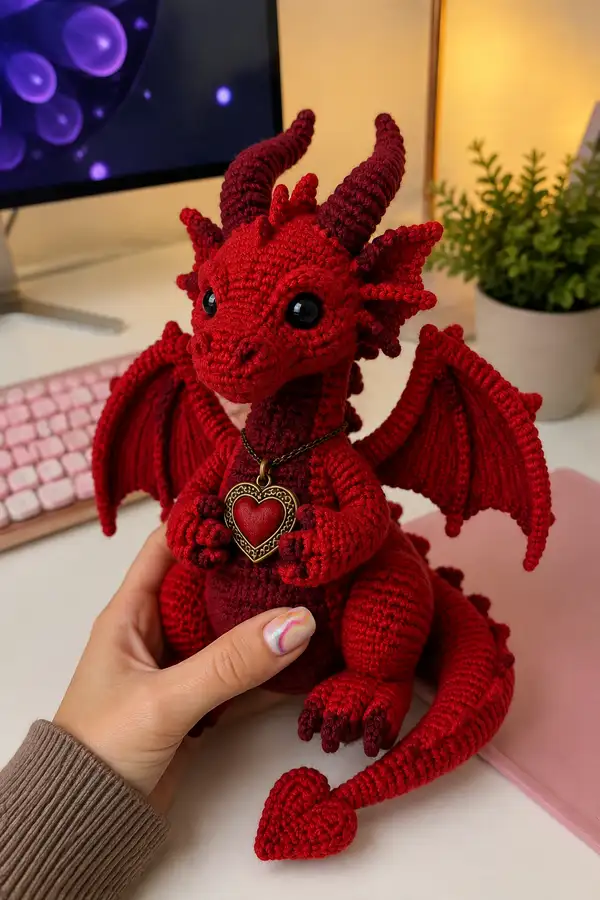
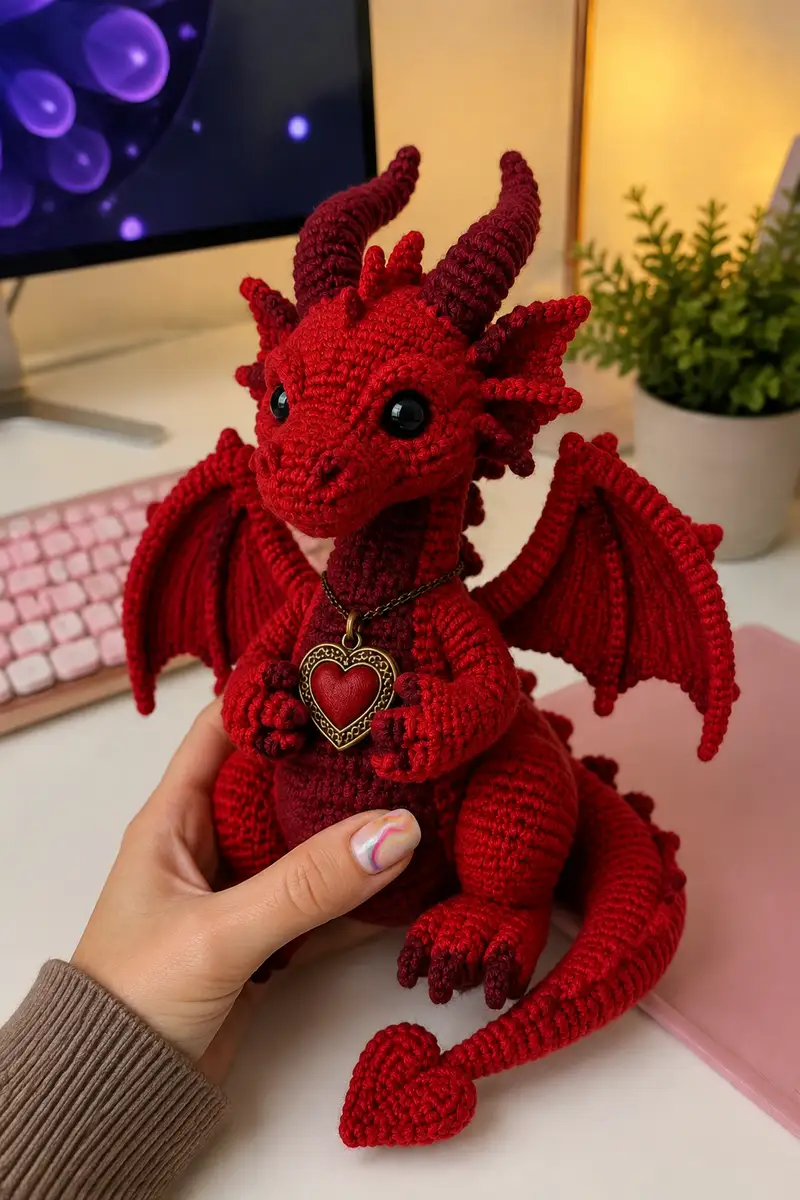
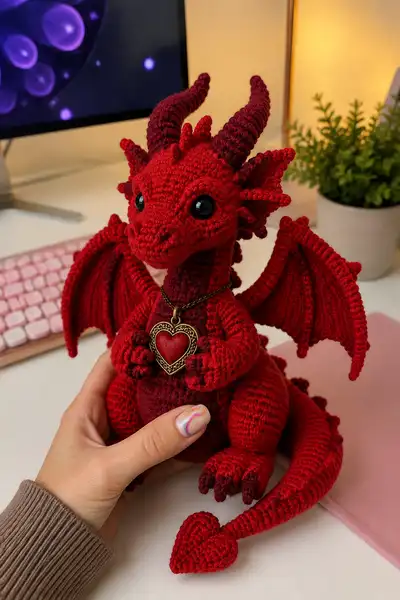
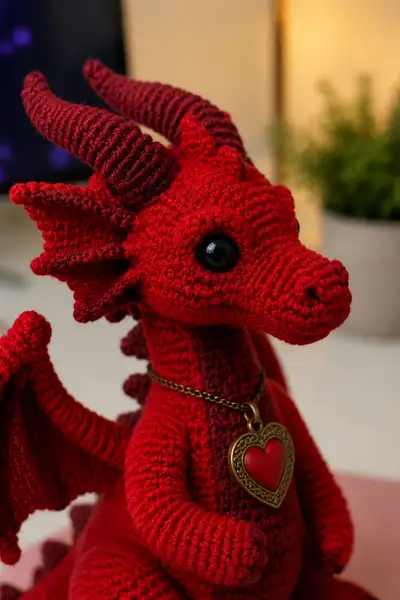
Create a charming deep-red dragon plush with elegant curled horns, sculpted snout, layered ear frills, articulated wings, and a heart locket accessory. This pattern features rich details: textured claws, a darker burgundy belly stripe and horn accents, and a heart-tipped tail. Designed to be cuddly yet display-ready, it combines round shaping, small parts, and flat panel work for lifelike character.
Progress Tracker
0% Complete
— Notes :
Info :
All parts are worked in continuous rounds unless otherwise noted. Use stitch marker at first stitch of each round and move marker up each round. Work tightly to avoid stuffing showing. Colors: 'scarlet red' is main color, 'burgundy' is darker accent used for horns, claws, belly stripe and tail heart tip.
— Head (Cap) :
Round 1 :
6 sc in magic ring (6)
Round 3 :
(1 sc, inc) x 6 (18)
Round 4 :
(2 sc, inc) x 6 (24)
Round 5 :
(3 sc, inc) x 6 (30)
Round 6 :
(4 sc, inc) x 6 (36)
Round 7 :
(5 sc, inc) x 6 (42)
Round 8 :
(6 sc, inc) x 6 (48)
Round 9 :
(7 sc, inc) x 6 (54)
Round 10-15 :
1 sc in each st (54)
Info :
Place safety eyes between rounds 12-13, approximately 10-12 stitches apart depending on desired look. For this dragon place eyes high on the head, leaving 6-8 rounds above. Use 12mm safety eyes for similar scale.
Round 16 :
1 sc in each st BLO (54)
Round 17-20 :
1 sc in each st (54)
Info :
This section creates the skull height. Do not stuff the head yet; you will attach the muzzle and then stuff both pieces together for smoother finishing.
Round 21 :
(7 sc, dec) x 6 (48)
Round 22 :
(6 sc, dec) x 6 (42)
Round 23 :
(5 sc, dec) x 6 (36)
Round 24 :
(4 sc, dec) x 6 (30)
Round 25 :
(3 sc, dec) x 6 (24)
Info :
Leave opening for neck and placement of snout. Fasten off leaving long tail for sewing muzzle once muzzle is complete. If you prefer to finish the head as a single piece, skip muzzle section and sculpt the nose in place.
— Muzzle / Snout (Make 1) :
Round 1 :
6 sc in magic ring (6)
Round 3 :
(1 sc, inc) x 6 (18)
Round 4 :
(2 sc, inc) x 6 (24)
Round 5-6 :
1 sc in each st (24)
Round 7 :
(2 sc, dec) x 6 (18)
Round 8-11 :
1 sc in each st (18)
Info :
These rounds create the long snout. Add subtle shaping by making one or two extra decreases centered at the tip in later rounds. Stuff lightly now, leaving larger stuffing to be added after joining to head.
Round 12 :
(1 sc, dec) x 6 (12)
Info :
Fasten off leaving a long tail for sewing. Stuff snout firmly but not overstuffed to allow shaping when sewn to head. Sew snout to the front of the head with ladder stitch, aligning center lines and ensuring eyes remain level on either side.
— Head Frills, Ear Spikes (Make 8 medium frills + 6 small spikes) :
Info :
These frills sit around the sides of the head and behind the ears. Make sets in main scarlet color; add burgundy edging by working a round of slip stitches in darker yarn after finishing each frill.
Frill Pattern (Make 8) Round 1 :
6 sc in magic ring (6)
Round 3 :
(1 sc, inc) x 6 (18)
Round 4 :
ch1, turn, hdc in first 6 sts (work flat) OR continue in rounds: (2 sc, inc) x 6 (24)
Round 5 :
1 sc in each st (24)
Round 6 :
Work 1 sc in next 2 sts, sl st 3 times to create point, 1 sc in remaining sts. Fasten off leaving tail for sewing (24)
Small Spike Pattern (Make 6) Round 1 :
4 sc in magic ring (4)
Round 3 :
1 sc in each st (8)
Round 4 :
(1 sc, dec) x 2 (6)
Info :
Sew frills around head starting behind each eye and curving toward the neck. Place 8 medium frills evenly between rounds 6-16 of the head cap. Sew 6 small spikes down the centerline from forehead to back of neck spaced 2-3 stitches apart.
— Neck (Make 1 tube) :
Round 1 :
6 sc in magic ring (6)
Round 3 :
(1 sc, inc) x 6 (18)
Round 4-12 :
1 sc in each st (18)
Info :
Work neck as a slightly narrower tube than the head opening. Stuff lightly and leave a long tail to sew to head and body openings. Add a subtle belly stripe in burgundy by switching to burgundy yarn at the lower half of the neck: see color-change Info below.
Info :
Color change (optional) : Change to burgundy at round 9 of the neck to create the darker belly stripe running down the center front. Carry yarn inside the tube or fasten off and reattach for a clean stripe.
— Body :
Round 1 :
6 sc in magic ring (6)
Round 3 :
(1 sc, inc) x 6 (18)
Round 4 :
(2 sc, inc) x 6 (24)
Round 5 :
(3 sc, inc) x 6 (30)
Round 6 :
(4 sc, inc) x 6 (36)
Round 7 :
(5 sc, inc) x 6 (42)
Round 8 :
(6 sc, inc) x 6 (48)
Round 9 :
(7 sc, inc) x 6 (54)
Round 10 :
(8 sc, inc) x 6 (60)
Round 11-20 :
1 sc in each st (60)
Info :
At rounds 12-14 mark positions for leg and arm attachment: legs will be attached opposite each other on the lower front, arms attached to upper sides. Use stitch markers to note exact stitch numbers for symmetry (see Assembly instructions).
Round 21 :
(8 sc, dec) x 6 (54)
Round 22 :
(7 sc, dec) x 6 (48)
Round 23 :
(6 sc, dec) x 6 (42)
Round 24 :
(5 sc, dec) x 6 (36)
Round 25 :
(4 sc, dec) x 6 (30)
Round 26 :
1 sc in each st (30)
Round 27 :
(3 sc, dec) x 6 (24)
Round 28 :
(2 sc, dec) x 6 (18)
Round 29 :
(1 sc, dec) x 6 (12)
Round 30 :
6 sc (6) - leave opening for neck insertion
Info :
Stuff the body firmly but leave cavity open for neck insertion. When sewing neck into body use ladder stitch and adjust stuffing to create a natural neck curve. If using a poseable wire for spine, insert thin wire rod down center before final stuffing and closing.
— Arms (Make 2) :
Round 1 :
6 sc in magic ring (6)
Round 3 :
(1 sc, inc) x 6 (18)
Round 4 :
(2 sc, inc) x 6 (24)
Round 5-8 :
1 sc in each st (24)
Info :
Start shaping paw now. For a three-toed paw, identify three clusters of 6 sts each at the end and leave them slightly separate to later form claws by sewing and shaping into toe bumps.
Round 9 :
(2 sc, dec) x 6 (18)
Round 10 :
1 sc in each st (18)
Round 11 :
(1 sc, dec) x 6 (12)
Round 12 :
1 sc in each st (12)
Round 13 :
(1 sc, inc) x 4 (16)
Round 14-16 :
1 sc in each st (16)
Round 17 :
(3 sc, dec) x 4 (12)
Round 18 :
1 sc in each st (12)
Round 19 :
(1 sc, dec) x 4 (8)
Round 20 :
Fasten off leaving long tail for sewing and shaping claws. Stuff hands lightly but allow flexibility at shoulder join.
Info :
Claws: Using burgundy yarn embroider or crochet tiny claws (3 per hand) by making 3 small slips: ch2, 3 sc in 2nd ch or make 3 little 4-sc tubes and sew in place at the end of paw. Alternatively, embroider curls with surface crochet.
— Legs / Feet (Make 2) :
Round 1 :
6 sc in magic ring (6)
Round 3 :
(1 sc, inc) x 6 (18)
Round 4 :
(2 sc, inc) x 6 (24)
Round 5 :
(3 sc, inc) x 6 (30)
Round 6-9 :
1 sc in each st (30)
Info :
These first rounds form the foot base. Stuff foot firmly to create a stable base for the dragon to sit. You can add a small disk of felt inside the sole for rigidity if desired.
Round 10 :
(3 sc, dec) x 6 (24)
Round 11 :
(2 sc, dec) x 6 (18)
Round 12 :
1 sc in each st (18)
Round 13 :
(1 sc, inc) x 6 (24)
Round 14-18 :
1 sc in each st (24) - work leg tube length here
Round 19 :
(3 sc, dec) x 6 (18)
Round 20 :
(2 sc, dec) x 6 (12)
Round 21 :
(1 sc, dec) x 4 (8)
Round 22 :
Fasten off leaving long tail for sewing. Stuff legs firmly at the foot and more lightly up the leg to the hip to make sewing easier and allow the dragon to sit naturally.
Info :
Sew legs to body at lower front: place legs so when seated the knees rest just below the belly curve. Use whip stitch or ladder stitch and add extra reinforcement stitches through body core to anchor legs securely.
— Horns (Make 2, burgundy) :
Info :
Horns are worked in burgundy in a spiral textured style: work in rounds, increasing to midsection then decreasing to taper. Use BLO on alternating rounds to create pronounced ridges. If you want them poseable, insert thin wire core before finishing and close top around wire.
Round 1 :
6 sc in magic ring (6) using burgundy (6)
Round 3 :
(1 sc, inc) x 6 (18)
Round 4 :
1 sc in each st BLO (18) - creates first ridge
Round 5 :
(2 sc, inc) x 6 (24)
Round 6 :
1 sc in each st BLO (24)
Round 7 :
(3 sc, inc) x 6 (30)
Round 8 :
1 sc in each st BLO (30)
Round 9 :
(3 sc, dec) x 6 (24)
Round 10 :
1 sc in each st BLO (24)
Round 11 :
(2 sc, dec) x 6 (18)
Round 12 :
1 sc in each st BLO (18)
Round 13 :
(1 sc, dec) x 6 (12)
Round 14 :
1 sc in each st (12)
Round 15 :
dec around to 6, leave long tail for sewing (6)
Info :
Sew horns to top of head angled back and slightly outward. Use extra stitches at the base to shape a seamless join. If inserting wire core, run wire down through the horn and into the head body for secure anchoring.
— Dorsal Spikes (Make 6 small spikes, burgundy tips optionally) :
Round 1 :
4 sc in magic ring (4)
Round 3 :
1 sc in each st (8)
Round 4 :
(1 sc, dec) x 2 (6)
Round 5 :
Fasten off leaving tail for sewing
Info :
Sew spikes along back from neck to tail base evenly spaced. Use burgundy for tips by adding a round of burgundy sl st at points if desired.
— Wings (Make 2: Wing Bone Tube + Membrane Panel) :
Info :
Each wing consists of a curved tube (the wing 'arm' or bone) and a flat membrane that is worked in rows and then joined around the tube. Membrane worked in scarlet with a round of burgundy at the inner edge and small picot-like border across the outer edge for spikes.
Wing Bone Tube Round 1 :
6 sc in magic ring (6)
Round 3-20 :
1 sc in each st (12) - work tube length and shape curve by stuffing more at one side and using slight FLO on some rounds to flatten slightly
Info :
To create curvature, work 2-3 rounds with 1 sc in next 6 sts, ch1, turn and hdc back across (working shallow rows) then rejoin; this will bias the tube. Insert optional wire for poseability down center of tube.
Wing Membrane (worked flat in rows) Row 1 :
ch 31, sc in 2nd ch from hook and across (30)
Row 2 :
ch1, turn, sc across (30)
Row 3 :
ch1, turn, BLO sc across (30) - creates slight ridge for wing rib
Row 4-18 :
ch1, turn, sc across (30) - repeat until panel reaches desired size, typically 15 rows for a medium wing
Info :
Create curvature and scallop edge by decreasing 1-2 sts at the outer rows to create tapered tip: at rows 10, 13, 16 dec 2 sts at the outer edge only to make pointy tips. After panel complete, join membrane to wing bone tube by single crocheting around tube edge into the foundation row making sure to shape the membrane so it flares naturally.
Row 19 :
Fasten off and work a round of slip stitches in burgundy along the inner edge to give darker contrast. Add picot details along outer edge by: *ch3, sl st in 3rd ch from hook*, repeat every 6-8 sts as desired.
Info :
Sew wings symmetrically to upper back at approx body rounds 12-16; angle them slightly outward and forward so they frame the head when seated. Reinforce attachment with extra stitches through the body core for stability.
— Tail (Tapered Tube with Heart Tip) :
Round 1 :
6 sc in magic ring (6)
Round 3 :
(1 sc, inc) x 6 (18)
Round 4-24 :
1 sc in each st (18) - work tube length, stuffing as you go. For a longer tail, work more rounds in increments of 2-4.
Round 25 :
(1 sc, dec) x 6 (12)
Round 26 :
1 sc in each st (12)
Round 27 :
(1 sc, dec) x 4 (8)
Round 28 :
Fasten off leaving long tail to join heart tip (8)
Heart Tip (Make 1, burgundy accent) Round 1 :
6 sc in magic ring (6)
Round 3 :
(1 sc, inc) x 6 (18)
Round 4 :
Work a flat heart shaping row: ch 3, sl st in next 2 sts, return to center and sc across a section to form indentation. (This pattern depends on preferred heart shape; see Info)
Round 5 :
Sew heart flat piece to closed end of tail. Fasten off and weave in ends.
Info :
Alternatively you can crochet two small flat heart halves and sew them together around stuffing for a plush heart tip. Use burgundy or a slightly darker yarn for contrast. Ensure tail heart is securely sewn and stabilized inside tail with extra stitches through tail core.
— Belly Stripe (Worked on Neck & Body) :
Info :
To create a central belly stripe, change to burgundy yarn at lower neck rounds and continue working 6-8 stitches centered along the front of the body. This can be achieved by carrying the color and crocheting the center 6-10 stitches of each round in burgundy while the remainder is in scarlet. Use tapestry/carrying technique or cut and rejoin yarn for cleaner edges.
— Claw Tips (Make 6 small claws per foot/hand clustering) :
Claw Round 1 :
ch2, 3 sc in 2nd ch from hook (3)
Claw Round 2 :
sl st into base and fasten off leaving tail to sew. Make 3 claws per paw and 4 claws per foot if desired. Use burgundy for tips and sew onto paw/foot ends forming distinct toes.
Info :
Arrange claws in slight arc and tack them down with a few visible stitches for definition. You can also embroider small lines to suggest paw pads if desired.
— Assembly / Sewing Details :
Info :
Block all pieces gently if needed to even stitches. Use pins to position each piece prior to sewing. Weave long tails through a yarn needle and use ladder stitch or whip stitch to join pieces for an invisible seam. Reinforce places that will receive stress (legs, wings) with extra anchoring stitches.
Info :
Eye embroidery and eyelids : To add subtle eyelids, work a few sc bumps around the eye with scarlet to create a socket; you may also stitch a single row of darker yarn above the eye to simulate brows and expression.
Info :
Face embroidery: optional nostrils can be embroidered with 2-3 small satin stitches on snout tip for definition. Mouth line: stitch with darker yarn in 3-4 tiny backstitches to create a subtle smile.
Info :
Finishing: Weave in all ends at least 5 cm into the body, trim excess. For extra security on small parts, add a dot of clear-drying glue to the knot before weaving. If adding a locket, use a small chain or ribbon; attach to neck by slipping under stitches or sewing a small loop of yarn to the back of the pendant.
— Optional Details & Texture Techniques :
Info :
Ridges: Use alternation of BLO and full rounds to create ridges on horns and tail. Surface crochet: add lines across the snout and neck by working slip stitches over the surface or by sewing thin lines with contrasting color to simulate scales.
Info :
Wiring: For poseable wings and tail, insert floral wire or a thin craft wire into the wing bone tube and twist ends flat inside body to hide them. Cover wire ends with a little stuffing and seal with a few stitches to avoid poking through stitches.
Info :
Scale suggestion: to make scales you can work small overlapping semi-circles along the back: ch4, sl st in 2nd ch from hook, 2 sc in next ch, sl st along to attach as a row of small petals; repeat and stagger rows to create overlap.
— Final Touches :
Info :
Place heart locket on a short chain or ribbon and hang around neck. Adjust positioning so it sits centered on the belly stripe. Add a few tiny embroidered highlights on the eyes using white thread for a subtle sparkle. Brush gently to soften any hard ridges if using acrylic yarn.
This Big Scarlet Romance Dragon brings together sculpted shaping, textured ridges and a sweet heart locket to create a lovable keepsake. Each detailed piece—from curled horns to layered frills—adds character and charm as you assemble it. The process is meditative and rewarding, and the finished dragon makes a heartfelt gift or a whimsical home display. 🧶❤️ Display with pride and share your finished creature with fellow crochet lovers! ✨