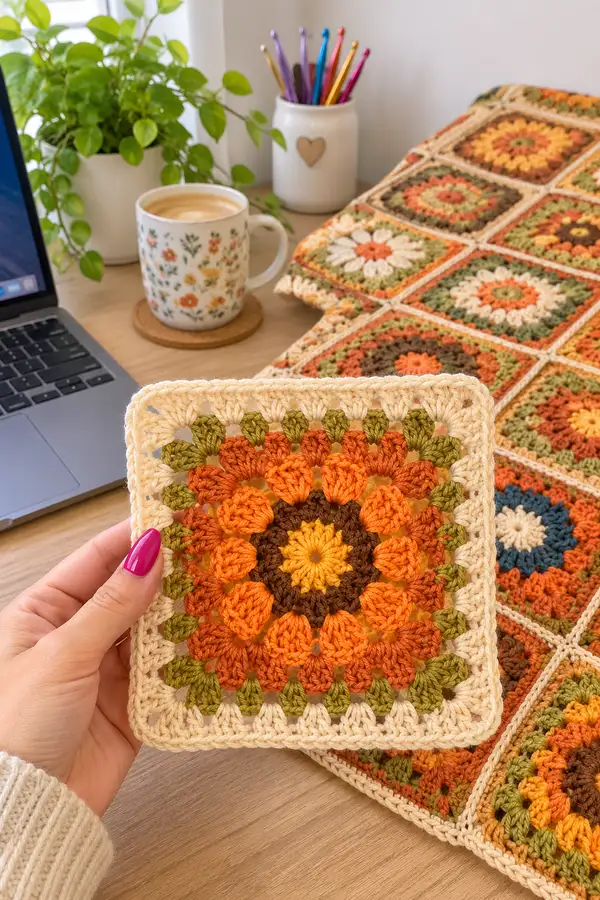
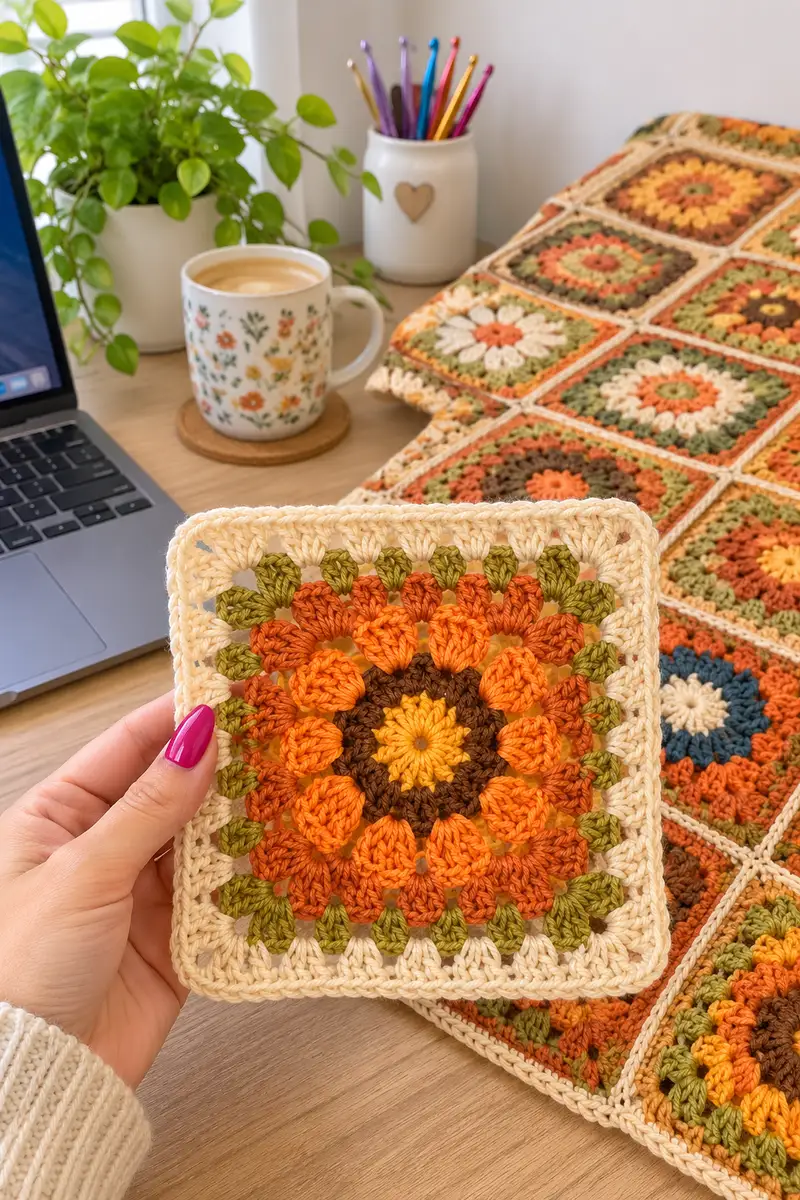
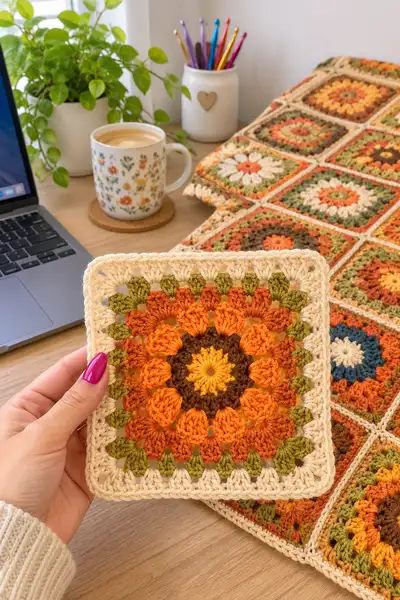
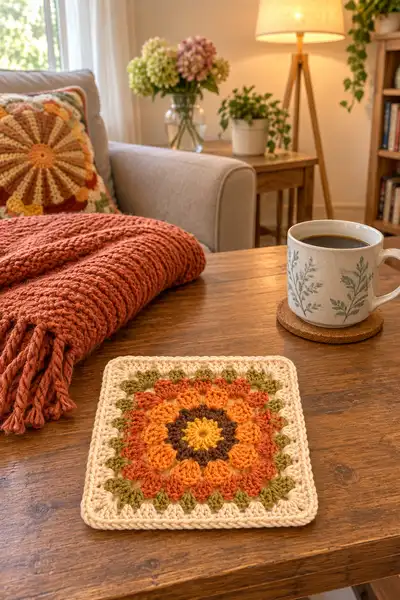
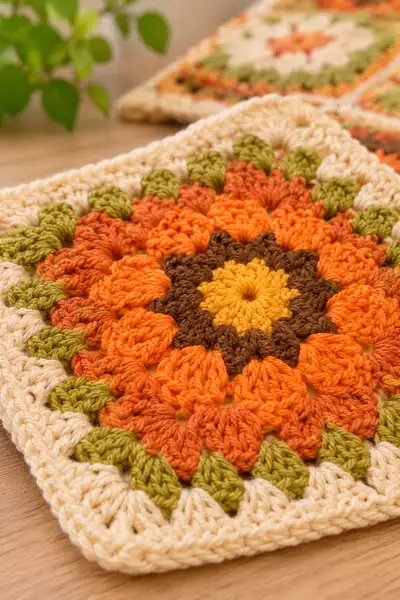
A warm, vintage-inspired bedspread made from sunburst and daisy granny squares in retro autumn hues. This pattern shows how to crochet the 12-petal sunburst square, join them into a bedspread and finish with a sculpted border. Perfect for adding cozy, nostalgic charm to a bedroom, the design uses layered puff and shell stitches for lovely texture and a soft framed edge.
Progress Tracker
0% Complete
— Notes & Gauge :
Info :
Gauge: One finished motif measures approximately 5.5" (14 cm) square after blocking when worked with worsted weight yarn and a 4.0 mm hook. Gauge is not critical but will change the number of squares needed. Make a swatch square and block to confirm size.
Info :
Techniques used: puff stitch (yarn over, insert hook, yarn over, pull up to same height; repeat to create multiple loops then yarn over and pull through all loops and chain 1 to secure), shell (3 dc in same st), join-as-you-go (JAYG) method for joining squares on the final motif round, and optional seam join (mattress stitch or whip stitch).
— Sunburst Daisy Motif (Make one to sample then repeat) :
Round 1 :
Using mustard yellow. Make a magic ring, ch3 (counts as dc), work 11 dc into ring. Join with sl st to top of ch3. (12 dc)
Round 2 :
Change to chocolate brown. Ch3 (counts as dc), 1 dc in same st, *2 dc in next dc* repeat around. Join with sl st to top of ch3. (24 dc)
Info :
Center ring establishes 12 petal anchors. The next rounds create textured petals. Keep tension steady; using a small hook for puff rounds can tighten texture and create definition.
Round 3 :
Change to burnt orange (darker). Ch1, sc in same st, *ch2, (puff stitch in next dc) ch1, sc in next dc* repeat around so you make 12 puff spaces separated by sc anchors. Join with sl st to first sc. (12 puffs, 12 sc)
Round 4 :
Stay burnt orange (lighter shade if you want gradient). Work in each puff: join with sl st into the top of the puff, ch2 (counts as hdc), 3 dc cluster into puff (see technique), ch1, sl st into next sc anchor. Repeat around. Join with sl st to first st. (12 clusters)
Info :
When working into puff stitches, slip into the top of the puff and treat the puff like a single stitch space. Puff stitch loops can be snug; use a small crochet hook if you need help pulling loops through.
Round 5 :
Change to mid burnt orange. Ch3, 2 dc into same cluster top, *ch1, skip next sl st, (3 dc, ch1, 3 dc) in next cluster top (creates a shell between petals)* repeat around to create 12 shell groups, join with sl st to top of ch3. (12 shell groups, 72 dc approximately counted as clusters)
Round 6 :
Change to moss green. Ch1, sc in same st, *ch3, sc in top of next shell between clusters* repeat creating 12 ch3 corner spaces around petals. Join with sl st. (12 ch3 spaces, 12 sc)
Info :
This green round creates small leaf-like chain spaces. Keep ch spaces even; if ch3 feels large, use ch2 for a tighter look. These chain spaces will be used as corner placement points for the next square rounds.
Round 7 :
Change to cream. Ch3 (counts as dc), in the same ch3-space: work (2 dc, ch2, 3 dc) to form a first corner shell - this begins the square shaping. *In next ch3 leaf space: work (3 dc) in same space (creating edge cluster), in the next ch3 leaf space: work (3 dc) in same, in the next leaf space: work (3 dc, ch2, 3 dc)* Repeat around creating four corner shells separated by 3-dc clusters along the sides. Join. (Count: 4 corners of (6 dc+ch2), side clusters variable total approximately 48-60 dc depending on spacing)
Round 8 :
Ch1, sc in same st, *ch3, sc in next space between clusters along side; at each ch2 corner work sc, ch3, sc into the ch2 space* repeat around to square off edges. Join. (12 ch3 spaces along sides and 4 ch3 corners)
Info :
By round 8 the motif has transitioned from circle to square. Count side clusters and corners to ensure symmetry. Blocking at this stage will help squares lie flat when joined.
Round 9 :
Change to cream. Ch3 (counts as dc), work 2 dc into same sp, *work 3 dc into each side gap (between sc anchors) until you reach corner ch3 space; in corner ch3 space work (3 dc, ch2, 3 dc)* Repeat around. Join to top of ch3. (This round increases the side length; count total dc per side to be consistent: aim for 12 dc per side between corners.)
Round 10 :
Ch1, sc in same st, *ch1, skip 1, sc in next st across side; at corners work (sc, ch3, sc) into ch2 corner space* repeat around. Join. (Evenly spaced sc row creates a crisp edge for the final border)
Info :
Check square measurement now. If motif is slightly smaller or larger than your target gauge, adjust hook size for following squares. Make 1 sample and block to determine number of squares needed for your bed size.
Round 11 :
Switch to cream for final framed round. Ch2 (counts as hdc), hdc in each stitch around working 3 hdc into corner ch3 spaces (hdc, ch1, hdc) to maintain 90-degree corners. Join with sl st. (Square frame established; count should be consistent on all four sides.)
Round 12 :
Ch1, sc in each st around working (sc, ch2, sc) in each corner ch1 space from previous round to accent corner; sl st to join. Fasten off and weave in ends or leave tail for JAYG if joining now. (Square complete: approximately 14-16 sts per side depending on gauge.)
Info :
Optional: for a daisy center variation, replace Rounds 2-6 with a daisy petal sequence: after a small center, create 12 elongated petals using tr clusters and then proceed to square rounds 7-12. The rest of the join and border work remains identical.
— Making Multiple Squares :
Info :
Make as many squares as you need to reach desired dimensions. For a twin bedspread you might need ~63-72 squares (9x7 or 8x9 depending on motif size); for a double/queen estimate 110-132 (11x10 or 12x11); for a king, adjust accordingly. Keep a consistent color rotation so the layout reads as a cohesive retro palette rather than random placement.
Info :
Organize squares into rows before joining. Block each square lightly, pinning to a square template if necessary, to ensure even edges for joining. Label squares with sticky notes to keep color patterns consistent if following a planned layout.
— Join-as-you-go (JAYG) Method (preferred) :
Info :
JAYG joins squares to the previous assembled panels during the final round. Use your final round (Round 12 in motif) to join: when you reach the side where a neighbor exists, replace the sc into that neighbor's corresponding stitch with sl st into neighbor rather than working a separate sc; this creates an invisible seam. Work one square at time across a row and then up rows, first making the full first row, then joining subsequent rows to the completed panel.
Round 13 :
If joining: On final framed round, when you come to the side that meets an existing square, work sc into your square for two stitches, then insert hook into corresponding stitch on neighbor square and sl st to join; continue across each side. At corners, join both sides by sl st into neighbor's corner then continue. Finish square and weave tail through seam for security. (Seam acts as one stitch replacement per join point.)
Info :
Maintain tension while joining so the seam lays flat. If fabric pulls inward, loosen tension slightly for the joining round. If it sags, tighten. Always pin edges if unsure before finalizing the join.
— Alternative: Seam Join (Make all squares then join) :
Info :
To seam after completing all squares, block and stack squares in the desired layout. Use mattress stitch with cream yarn for an almost invisible join. Sew through loops on the back side of squares, matching stitch for stitch. For a decorative exposed seam, use slip stitch join on the right side with contrasting cream for a ridge look.
Round 14 :
To whip stitch: place two squares right sides up and whip stitch through front loops only with cream yarn for a tidy raised ridge. Repeat down all columns then join rows. This join adds a subtle ridge that echoes the frame.
Info :
Weave in ends as you go when making seams; leaving many tails can be overwhelming. Use a second smaller needle to help tuck tails into puff stitches so they are invisible from the right side.
— Assembling the Full Bedspread (Border & Rounds) :
Info :
After joining to desired size, the assembled blanket will have visible seam lines and a framed edge. The border unifies the look and builds out to bedspread dimensions. These border rounds are numbered sequentially from R1 to R60 to allow a very structured, layered border with texture and depth. Follow them exactly or reduce rounds for a smaller border.
Round 1 :
Using cream on assembled blanket edge: join cream at any corner. Ch1, sc evenly around entire blanket working (sc, ch2, sc) in each corner to keep corners supple. Join with sl st. (Even number of sc around depending on blanket size)
Round 2 :
Ch3 (counts as dc), dc in each sc around; at each corner work (2 dc, ch2, 2 dc). Join. (This creates a soft raised band.)
Round 3 :
Ch1, sc in each dc around; at corner ch2 spaces work (sc, ch2, sc). Join.
Info :
These first rounds even out the join lines and create a uniform border baseline. Block again if edges ripple; these first three rounds will help stabilize edges.
Round 4 :
Change to moss green for a narrow contrast. Ch2, hdc in each st around; at corners work (hdc, ch2, hdc). Join.
Round 5 :
Stay moss green. Ch1, sc in each st around; at corners (sc, ch3, sc). Join.
Round 6 :
Change to a burnt orange contrasting round. Ch3, dc in next stitch, *skip 1 st, (2 dc, ch1, 2 dc) in next st* repeat to create a scalloped band around the blanket; at corners keep (2 dc, ch2, 2 dc). Join. (This creates a subtle scallop.)
Info :
Scalloped rounds add interest and bulk; if you prefer a flatter edge for bed sheets, omit this and proceed with cream rounds instead.
Round 7 :
Change to cream. Ch1, sc evenly in each stitch around working sc in each ch1 center of scallop; at corners (sc, ch3, sc). Join.
Round 8 :
Change to mustard yellow for a narrow accent. Ch2, hdc in each st around; at corners (hdc, ch2, hdc). Join.
Round 9 :
Switch to cream. Ch2, 1 hdc in next 2 sts, *(shell: 3 dc in next st) skip 1 st; 1 hdc in next 2 sts* repeat across each side, at corners work (3 dc, ch2, 3 dc). Join.
Info :
Shell placement every few stitches gives a gentle ebb-and-flow texture. Work shells into spaces, not into corner ch2s (except as instructed) to keep corners square.
Round 10 :
Ch1, sc in each st around; at corner ch2 spaces work (sc, ch3, sc). Join.
Round 11 :
Change to olive/moss green. Ch3 (counts as dc), dc in next st, *(fpdc cluster in next 4 sts: front post dc over next 2 sts, then fpdc over next 2 sts) ch1* repeat to create a vertical rib texture around the blanket. At corners maintain 3 dc, ch2, 3 dc. Join.
Info :
Front post work makes a raised vertical line that picks up the green leaf accents from squares. If unfamiliar with fpdc, practice on scrap: yarn over, insert hook from front around post of stitch below, yarn over and pull through, finish as dc.
Round 12 :
Ch1, sc in each st around; at corners (sc, ch3, sc). Join.
Round 13 :
Change to burnt orange. Ch2, hdc in each st around; at corners work (hdc, ch2, hdc). Join.
Round 14 :
Change to cream. Ch3, dc into next 2 sts, *(skip 1 st, 5 dc cluster in next st) repeat creating a deep popcorn-like cluster separated by 2 dc, at corners keep (3 dc, ch2, 3 dc).* Join. (Clusters spaced to create large texture nodes)
Info :
Popcorn/cluster rounds add bulk and warmth − great for a bedspread. Work clusters consistently: 5 dc into same st, remove hook, insert hook into first dc of the 5, pull loop through to close popcorn, ch1 to secure or follow your preferred cluster finish.
Round 15 :
Ch1, sc around, working sc into the tops of clusters and ch1 spaces; at corners (sc, ch3, sc). Join.
Round 16 :
Switch to moss green. Ch2, hdc in each st around; at corners (hdc, ch2, hdc). Join.
Round 17 :
Change to cream. Ch3, dc in each of next 3 sts, *(skip 1, shell in next) repeat around; at corners work shell into corner space as (3 dc, ch2, 3 dc). Join.
Info :
At this point you can measure blanket. For a full, framed look continue through the next elaborate edging rounds Rounds 18-60; if you prefer a shorter border, stop at Round 20 or 24 and finish with a final sc round.
Round 18 :
Ch1, sc in each st around; at corners (sc, ch3, sc). Join.
Round 19 :
Change to mustard. Ch2, hdc in each st around; at corners (hdc, ch2, hdc). Join.
Round 20 :
Change to cream. Work a textured ridge round: *1 sc in next st BLO, 1 hdc in next FLO* repeat around to create alternating rib texture. At corners (sc, ch2, sc) into corner spaces. Join.
Info :
Alternating BLO/FLO stitches create a subtle rib that complements the puff petals in the squares. Use this technique every 8-10 rounds for consistent texture.
Round 21 :
Ch1, sc in each st around. Join.
Round 22 :
Change to burnt orange. Ch3, dc in each st around; at corners 2 dc, ch2, 2 dc. Join.
Round 23 :
Ch1, sc in each st around; at corners (sc, ch3, sc). Join.
Round 24 :
Switch to moss green. Ch2, hdc in each st around; at corners (hdc, ch2, hdc). Join.
Round 25 :
Change to cream. Work a decorative picot-like edge: *sc in next st, ch3, sl st into first ch (creates small picot), sc in next 3 sts* repeat around. At corners make larger picot grouping (sc, ch5, sl st to 3rd ch, sc). Join.
Info :
Picots soften the final edge. If you prefer a simple finish, skip this and finish with two rounds of sc in cream instead.
Round 26 :
Ch1, sc in each st around; at corners (sc, ch3, sc). Join.
Round 27 :
Change to mustard. Ch2, hdc in each st around; at corners (hdc, ch2, hdc). Join.
Round 28 :
Change to cream. Ch3, dc in each st around; at corners (3 dc, ch2, 3 dc). Join.
Round 29 :
Ch1, sc in each st around; at corners (sc, ch3, sc). Join.
Info :
These alternating textured and plain rounds build a layered, cozy border that suits the retro look. Continue repeating texture cycles (BLO/FLO ribs, shell bands, cluster bands) until desired width is achieved—the pattern lists up to Round 60 to offer a deep border similar to images.
Round 30 :
Burnt orange shell band: Ch3, *skip 2, (5 dc shell) in next st, skip 2, dc in next 2 sts* repeat; at corners ensure shell gets centered; join.
Round 31 :
Ch1, sc in each st around; at corners (sc, ch3, sc). Join.
Round 32 :
Moss green hdc round: Ch2, hdc each st; at corners (hdc, ch2, hdc). Join.
Round 33 :
Cream single crochet tidy row: Ch1, sc each st; at corners (sc, ch3, sc). Join.
Round 34 :
Mustard cable-look round: work front-post back-post ribbing: *fpdc around next st, bpdc around next st* repeat; at corners maintain 3 fpdc/bpdc sequence and ch2 corner. Join. This creates a subtle braided texture.
Round 35 :
Ch1 sc around to balance the ribbing, sl st to join.
Info :
Continue alternating decorative bands and grounding sc/hdc rounds. Each pair of decorative + grounding rounds counts as two rounds; repeat cycles until the border reaches the desired visual weight. For the sample look work to Round 40 or Round 48 depending on blanket size.
Round 36 :
Burnt orange popcorn cluster band: Ch3, *dc next 3 sts, popcorn in next, dc next 3 sts* repeat; at corners place popcorn in center of corner group and work (dc, popcorn, dc) with ch2 between corner groups. Join.
Round 37 :
Cream sc round to unify: Ch1, sc each st around; at corners (sc, ch3, sc). Join.
Round 38 :
Moss green hdc round. Ch2, hdc each st around; corners (hdc, ch2, hdc). Join.
Round 39 :
Ch1, sc around, sl st to join.
Round 40 :
Final framing rounds begin: change to cream. Ch3, dc in each st around; at corners (3 dc, ch2, 3 dc). Join.
Round 41 :
Ch1, sc each st around; in corners (sc, ch3, sc). Join.
Round 42 :
Ch2, hdc in each st around for a slightly firmer edge; corners (hdc, ch2, hdc). Join.
Round 43 :
Ch1, sc in each st around. Join.
Round 44 :
Cream final embellishment: work (sc, ch2, sc) in each corner and even sc along sides. Join and finish off leaving long tail for final finishing weave. Block entire blanket to square and smooth any waves.
Info :
Blocking tips: wet block or steam block on a flat surface, pin using a square template to ensure 90-degree corners. Allow to dry fully before final finishing to keep shape.
Round 45 :
Optional braided cord finish: with cream yarn, create a twisted cord (chain 6, fold and single crochet along chain to form cord) and sew along inner edge of border for a vintage rope look. Fasten securely at intervals (every 6-8 inches).
Round 46 :
Optional: embroider small floral accents with mustard and green through the centers of selected squares using surface slip stitch or chain stitch. This adds more daisy detail like shown in some squares of the sample blanket.
Info :
Weave ends by threading yarn needle and following seams or bars back through previous stitches; trim close. For long bedspreads, weave tails under several rounds to ensure they don't work free with washing.
Round 47 :
Care instructions: hand wash or delicate warm machine wash in mesh bag, reshape while damp and lay flat to dry. Use cool iron or steam to refresh after washing if needed.
Info :
Final inspection: Check all joins for loose spots, reinforce with extra passes of yarn if needed, and retension corners if they have pulled. The finished bedspread should be square and lie flat on the bed without puckering seams.
Completing this retro granny square bedspread will be a truly rewarding, cozy project! Each square is a small burst of vintage charm that comes together to create a stunning full-size bedspread. The texture from puffs and clusters makes it tactile and inviting, while the cream framing unifies the colorful retro palette. Wrap yourself in the warm hues you created and enjoy the satisfaction of a long, well-crafted project. 🧶🍂