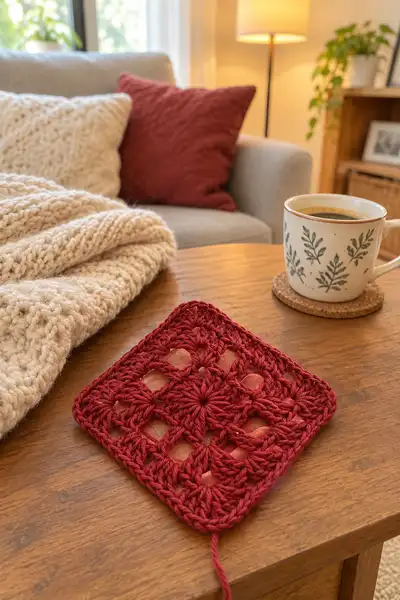
🧶 Beautiful ✨ Detailed 💝 Adorable

Deep Red Textured Granny Square Pattern

Deep Red Textured Granny Square Pattern
4.1★ Rating
5-7 Hours Time Needed
3.5K Made This
✂️

Intermediate Level

Ideal for those with basic crochet experience, featuring slightly more advanced stitches and techniques to expand your skills.

⏱️

Weekend Treat

Takes 5-7 hours, making it an enjoyable project to finish over a couple of days.

🏡

Cozy Accent

A warm touch for your space that transforms ordinary corners into inviting nooks filled with handmade charm.

🧶 Jump to Pattern ↓

About This Deep Red Textured Granny Square Pattern

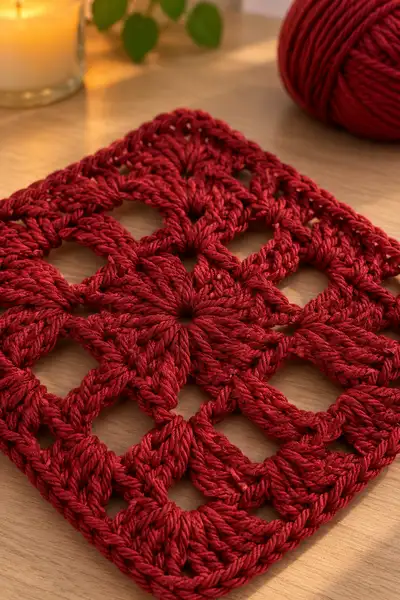
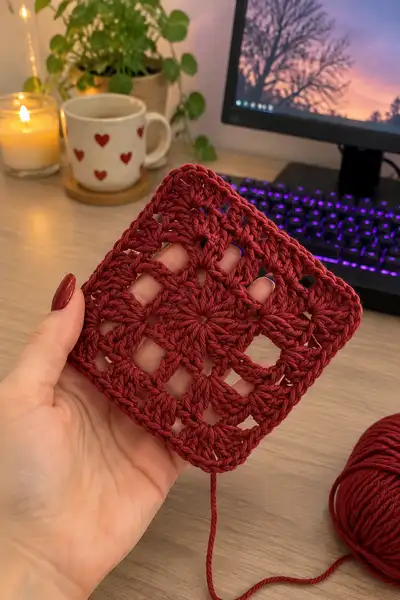
This pattern recreates the deep red, highly textured granny square pictured: a floral star center that radiates into open chain spaces and generous 3-dc cluster groups for a modern, lacy look. It is designed for bulky/aran weight yarn and a large hook to create the sculpted rows you see. The square finishes slightly rounded at the corners with a dense yet soft border that keeps the square flat and tidy. Use it alone as a coaster/placemat, join multiples for throws, or scale up the border for a bed-covering motif.
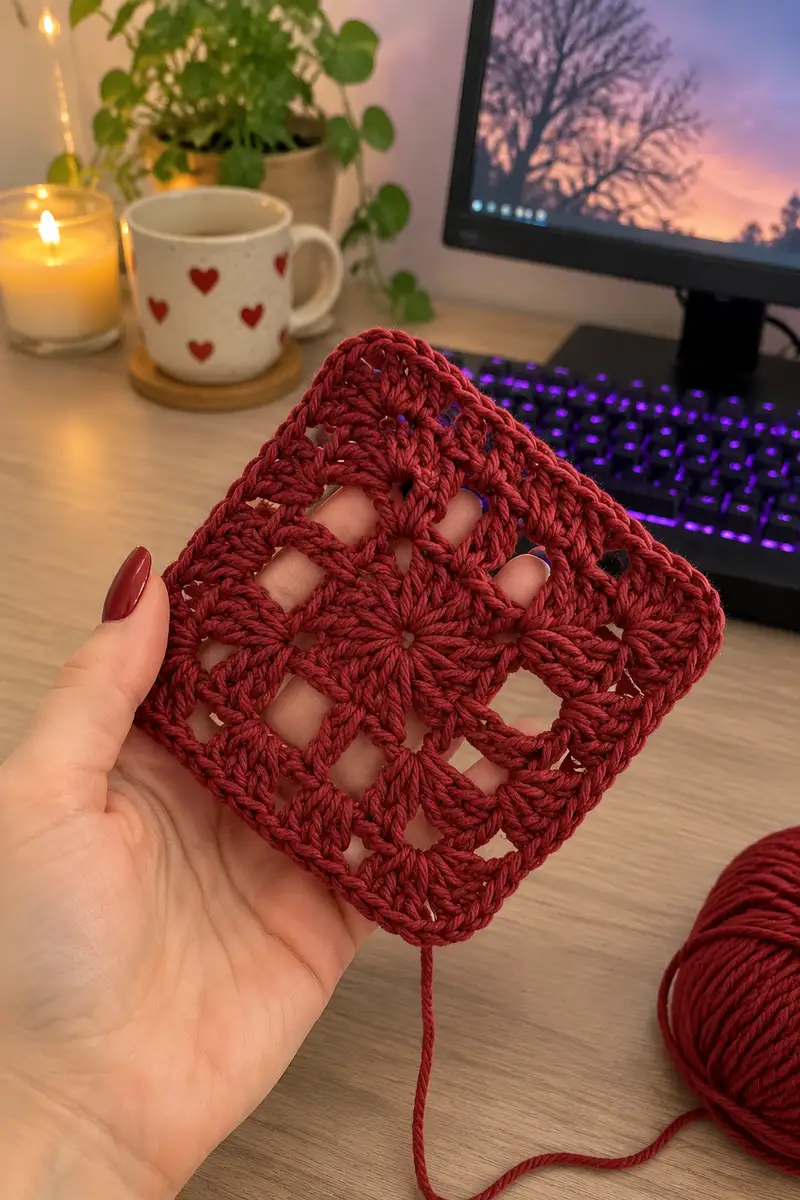
Deep Red Textured Granny Square Pattern crochet pattern - detailed view of completed project

The design emphasizes texture and negative space — the dramatic open squares and puff-like clusters contrast beautifully with the solid star center. The pattern includes extended border options and multiple edging rounds so you can size the square to your project.

Why You'll Love This Deep Red Textured Granny Square Pattern

I love this pattern because it balances bold structure with delicate holes — the star center pulls your eye in while the lacy chain spaces soften the look. The chunky yarn gives every stitch a hand-sculpted, cozy appeal that looks luxurious on a bed or couch. I also adore how versatile the square is: a small change in borders or yarn weight transforms it into a cushion, lapghan or full blanket.

Deep Red Textured Granny Square Pattern step 1 - construction progress Deep Red Textured Granny Square Pattern step 2 - assembly progress Deep Red Textured Granny Square Pattern step 3 - details and accessories Deep Red Textured Granny Square Pattern step 4 - final assembly and finishing

Switch Things Up

I love how this square lets you play with scale: use thicker yarn and a larger hook for a cozy, sculptural look, or choose a finer yarn and smaller hook to create delicate, heirloom squares. Changing just the border width dramatically alters the final size and feel.

I also enjoy switching up color placement — keep the star center in a contrast color for a two-tone motif, or make each round a different shade to get an ombré blanket. You can convert this flat motif into appliques by omitting outer rounds and sewing them onto cushions or tote bags.

If you want a more structured throw, add 3–5 rounds of BLO single crochet around the outside to create a ridge, or add a firm crab-stitch edge in contrasting yarn for a framed look. Have fun experimenting with joins and borders to make the pattern your own.

Common Mistakes & How to Fix Them

✗ Skipping stitch markers at round starts can cause misaligned corners and uneven square shape; mark each corner chain or first stitch to keep symmetry. ✗ Working too loosely with bulky yarn makes the star center collapse; maintain a steady, slightly firm tension for crisp petals and neat holes. ✗ Not counting or tracking cluster stitches will shift pattern repeats; write down cluster counts each round to verify increases are correct. ✗ Changing hook sizes mid-square will change gauge and may curve corners; if you must change tension, do so for the whole project, not partway through a square. ✗ Adding the border too tightly will curl the square; pick up a larger hook for the final rounds if your edges pull in. ✗ Carrying yarn across large open spaces without securing can create snag points; weave tails neatly and bury ends into adjacent stitches to secure them.
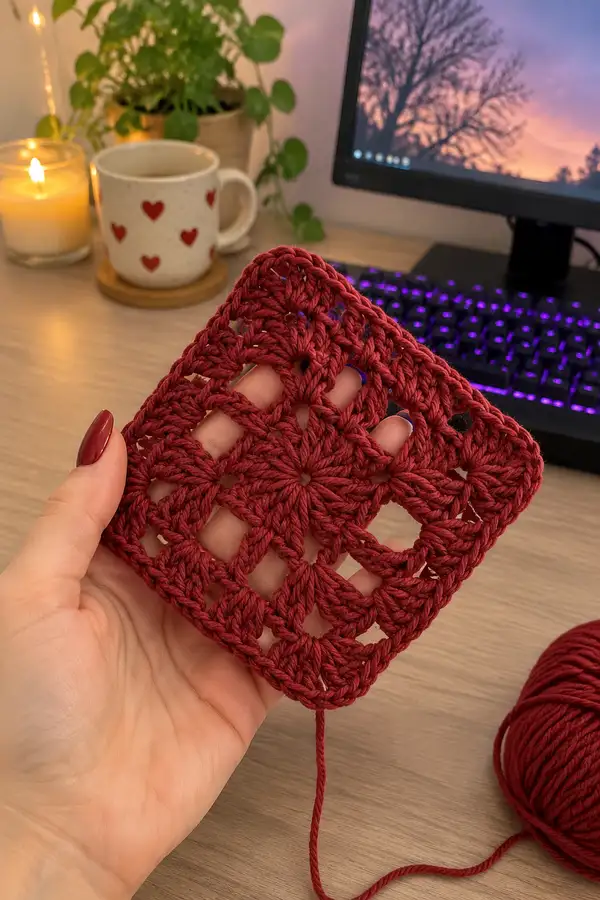
Deep Red Textured Granny Square Pattern

A bold, structured granny square worked in a deep blood-red bulky yarn, featuring a floral star center, large openwork chain spaces and raised cluster stitches for a cozy, dimensional look. This pattern walks you through creating one square and extensive borders so you can make a blanket, cushion cover or accent square. The heavy, lustrous yarn and generous hook give each stitch a sculptural quality that reads beautifully in photographic close-ups and on the bedspread in the background.

Intermediate 5-7 Hours

Materials Needed for Deep Red Textured Granny Square Pattern

— Main Fabric

  • 01
    Bulky/Aran weight yarn (#5) approximately 120-150 g (deep blood red - main color shown) per 20cm square; for a throw of 25 squares you will need ~3.5–4 kg
  • 02
    Optional: 50-100 g in coordinating neutral for joining and inner border (e.g., deep burgundy neutral)
  • 03
    Small amounts (25-40 g) in contrast color for decorative outer border or corner picots (if desired)
  • 04
    If using worsted (#4) to achieve smaller squares, adjust hook size to 5.0–5.5 mm and yarn requirement will vary

— Tools Required

  • 01
    6.0 mm (J) crochet hook for main work (adjust if your tension is loose or tight)
  • 02
    Optional 5.5 mm hook for a slightly tighter fabric or 6.5 mm for airier fabric
  • 03
    Yarn needle for weaving in ends and sewing joins
  • 04
    Scissors
  • 05
    Stitch markers (at least 4) to mark corners and round starts
  • 06
    Tape measure or ruler to check gauge
  • 07
    Blocking mat and pins (optional) to square up final motifs
  • 08
    Optional: blocking spray or light steam iron on low setting
  • 09
    Optional: row counter or notepad to track rounds

Progress Tracker

0% Complete

— Overview and Gauge :

Info :

Gauge for motif: one finished motif (after Rounds 1-18 baseline) measures approximately 11.5–12 cm (4.5") square blocked using bulky weight yarn and 6.0 mm hook. Adjust hook if your motif is smaller/larger. Pattern written in US terms. Work in continuous rounds unless otherwise indicated; join rounds with sl st where noted.

— Special Stitches and Stitch Notes :

Info :

Cluster (cl) = yarn over, insert hook, yarn over, pull up loop (repeat 2 more times), yarn over, pull through all loops on hook (3-dc cluster). Puff (puff) = yarn over, insert, pull up loop; repeat until 6 loops on hook total (for bulky puff), yarn over and pull through all loops; ch1 to close. Ch-1 corner method used when building square corners. All chain spaces counted as separate spaces for repeat calculations. Use stitch markers to mark each corner ch-3 space after you make them each round.

— Center Star (Rounds 1-6) :

Round 1 :

Make a magic ring. ch2 (counts as first dc), work 7 dc into ring; pull ring tight and join with sl st to top of ch2. (8 dc total)

Round 2 :

ch3 (counts as dc), *skip next st, in next st work puff stitch (bulky puff: yarn over, insert, pull up loop; yarn over, pull up loop two more times so you have 6 loops on hook; yarn over and pull through all loops), ch1; repeat from * around finishing with ch1, join with sl st to top of ch3. You should have 8 puffs separated by ch1 spaces. (8 puffs)

Info :

Place a stitch marker in the ch1 after each puff to mark 8 evenly spaced petals which form the floral center; these marks help align the next round's clusters so that petals sit between cluster groups.

Round 3 :

Join in any ch1 space. ch3 (counts as dc), (2 dc, ch2, 3 dc) all worked in same ch1 space to make a corner petal shell; *in next ch1 space work 3 dc, ch2, 3 dc; rep from * across to make 8 shells; join with sl st to top of ch3. (8 corner shells)

Round 4 :

Turn square so seams orient, ch3, 2 dc in same ch2 corner space, ch1, *in next ch2 corner space work (3 dc, ch2, 3 dc), ch1; rep from * around, ending with ch1 and join. This round builds stronger petals and establishes four corner points by grouping every two petals into a corner shell pair. (8 shells grouped into 4 corners)

Info :

Check that petals remain centered and not twisted; flatten center with your palm and lightly steam if necessary to set petal shape before continuing.

Round 5 :

Join in any ch1 between shells, ch3 (counts as dc), work 2 dc in same ch1 space, *skip next shell, in next ch1 space work (3 dc, ch1), rep around so you place small 3-dc groups between petals and strengthen the grid for later chain spaces; join with sl st. (16 small 3-dc groups total)

Round 6 :

ch3, dc in each of next 2 sts, *in next ch1 space work (2 dc, ch2, 2 dc) to create 4 small corner chain spaces; continue placing 3 dc clusters in each existing dc space; join with sl st. This round begins the transition from round floral to square geometry. (count: clusters plus corner shells = variable; mark 4 corner ch-2 spaces)

Info :

At the end of Round 6 you should see a slight square starting to form with 4 corner ch-2 spaces. Place stitch markers at these 4 corner ch-2 spaces; they will be used in every subsequent round.

— Building the Square (Rounds 7-18) :

Assembly Instructions

  • For a single decorative square: finish the outer border rounds (through Round 30) and weave in ends. Block gently to square up edges
  • To join squares into a blanket: make N squares (calculate desired blanket size), block each square, and join by slip-stitch join or mattress stitch. Join squares along edges with right sides facing (whipstitch or slip stitch through both front loops only)
  • Attach yarn at a corner of the square and sew/head to body by working through the corner ch-2 space and securing with 6–8 tight stitches
  • When placing arms/legs (if used as appliques or toy parts) sew them to the square by picking stitches on both pieces, using mattress stitch for invisible seam
  • If creating a large bedspread like in the background, make continuous join-as-you-go rows: work 3 rounds of join-as-you-go on one square, aligning corner ch-2 spaces with adjacent squares before fastening off
  • For outer border, work 3–5 rounds of dc/blo combination evenly around panel to create a stable edge. Add decorative picot or crab stitch on final round if desired
  • Always pin multiple squares together before final sewing to verify placement, especially if using a directional pattern

Important Notes

  • 💡Use stitch markers consistently at the beginning of each round and to mark corner ch-2 spaces to maintain square symmetry
  • 💡Work puff and cluster stitches with steady rhythm to keep their size consistent; practice a sample puff to dial in the number of loops held before drawing through
  • 💡Block squares lightly to realign any pull caused by chain spaces; bulky yarn will soften with steam, but avoid over-wetting
  • 💡Stuffing is not used in flat squares; however, if you convert this into an applique or toy, stuff slowly and check seams to avoid lumps
  • 💡When joining many squares, make a test join of 3x3 squares to see how your join method affects drape and size per square
  • 💡For the outer border, if the square pulls in, use a hook one size larger for the final 2 rounds to relax the edge
  • 💡Keep a small crochet gauge swatch and measure after Rounds 10 and 18 to predict final size before making dozens of squares

This deep red granny square is a joy to make and even more rewarding to see multiplied across a blanket or used as a single accent. The pattern balances bold raised clusters and open grid spaces for a cozy, modern result you will love displaying. Enjoy the rhythmic repeats and the way the yarn’s texture highlights every petal and cluster — it's a wonderful way to add handmade warmth to your home. 🧶❤️✨

You ask,

we answer.

FAQs

What is the finished size of this motif?

Using bulky/aran yarn and a 6.0 mm hook, one motif (after Rounds 1-18 baseline) measures approximately 11.5–12 cm (4.5"–4.7") square. Blocking and border rounds will slightly increase final dimensions.

Can I use different yarn weights for this pattern?

Yes. If you use a lighter weight yarn such as worsted (#4), reduce hook size to 5.0–5.5 mm. Your motif will be smaller; adjust the number of border rounds to achieve the dimensions you want.

Do I need to join motifs with a specific method?

You can join motifs with slip-stitch, whipstitch, mattress stitch, or join-as-you-go (JAYG). Each join affects drape differently; JAYG creates a seamless look and is recommended for blankets shown in photos.

How many squares for a bedspread like in the background?

A queen-size bedspread photographed would typically use around 100–120 squares depending on intended overlap and border width. Calculate by measuring your finished square size after blocking and dividing mattress dimensions by square dimensions.

How should I block bulky motifs?

Lightly steam-block or pin to size on a blocking board. Because bulky yarn has memory, avoid over-wetting; steam from a distance and allow to dry fully before removing pins.

How much yarn will I need for a large blanket?

Estimate per square first: ~120–150 g per 20 cm square; for a throw (approx 12 x 12 squares), you'll need roughly 1.5–2.0 kg. For a bedspread (25 x 25 squares), expect ~3.5–4.5 kg depending on border rounds.

Can I make this square reversible?

Because of the puff/cluster texture, the front and back will look slightly different. If you want a more reversible square, use puff stitches worked with tighter tension and minimize surface joins; choose a joining method that faces seam to back (mattress stitch).

How to avoid holes when joining?

When joining with yarn, pick up equivalent loops on both motifs (front loop only) and use even tension. Test a small join; if holes appear, add a slip-stitch row across the seam or make a tighter join with smaller hook.