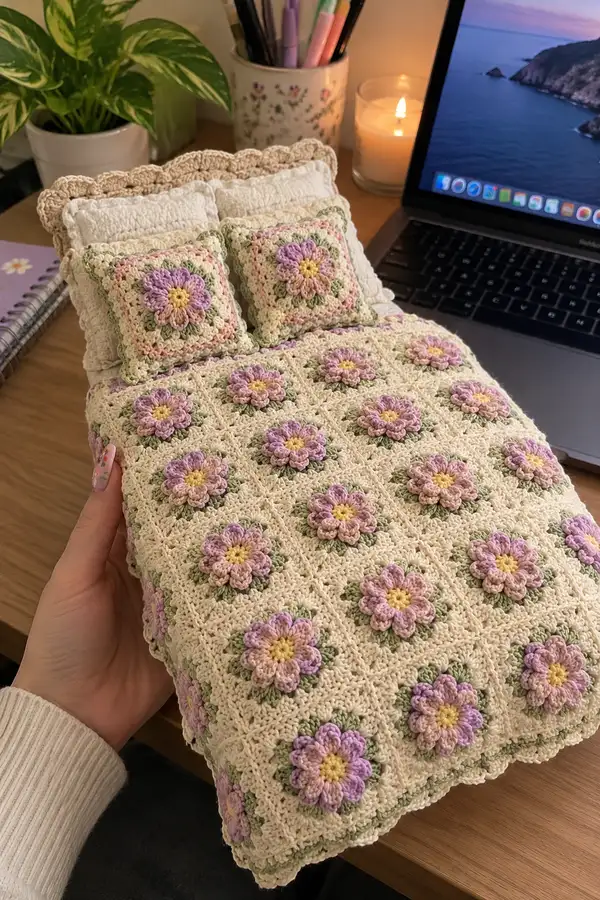
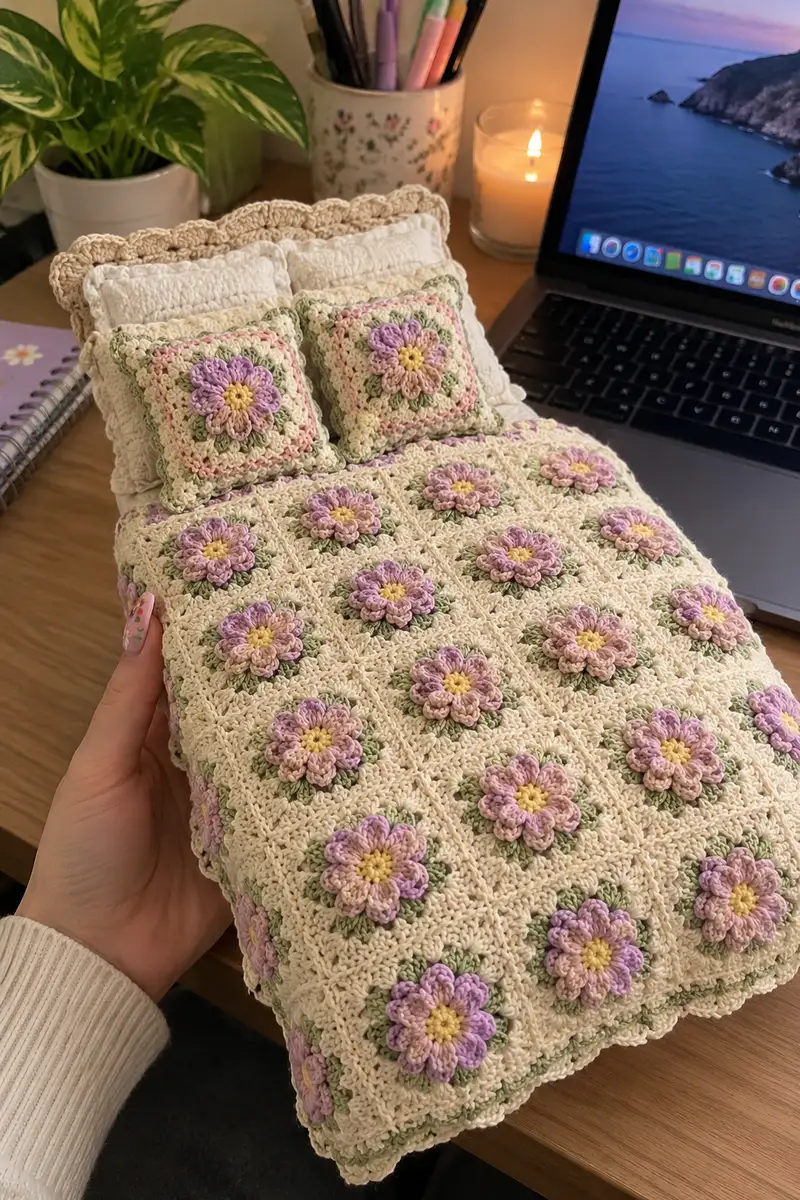
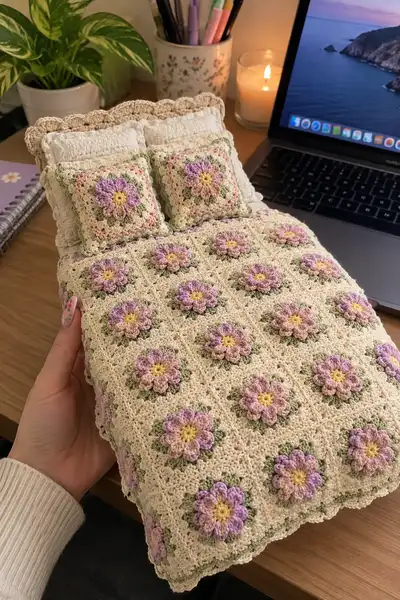
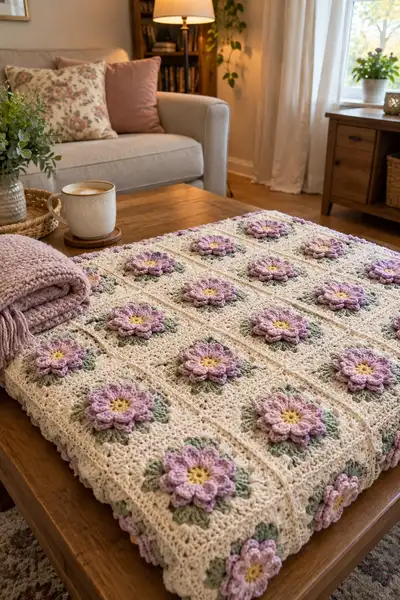
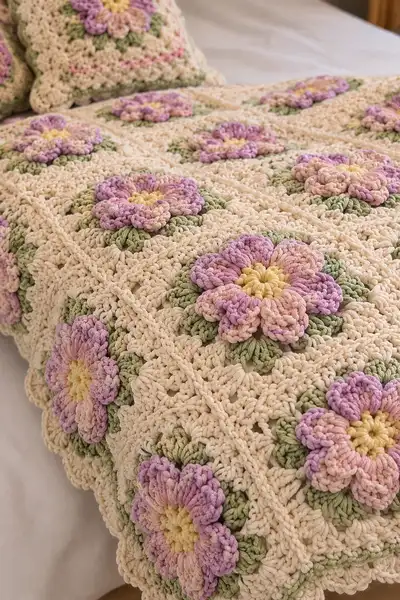
Create a vintage-inspired romantic floral bedspread composed of textured 3D flower granny squares. This pattern uses layered petals, leafy bases, and a soft scalloped border in creamy neutrals with pastel lavender, blush and pistachio accents. The finished spread is made of repeatable squares that can be scaled to any bed size and includes instructions for pillow covers to match. Perfect for adding a soft, feminine, cottage-style accent to a bedroom.
Progress Tracker
0% Complete
— Notes & Gauge :
Info :
Gauge is flexible for this project: one finished floral square measures approximately 12 cm (4.75 in) when using worsted cotton and a 4.0 mm hook. Adjust hook size to match your preferred drape. Squares are worked flat in rounds and joined using a join-as-you-go method that preserves the 3D petal texture.
Info :
Terminology uses US crochet terms. Puff stitch used in this pattern: yarn over, insert hook into indicated stitch, yarn over, pull up a loop, repeat 3 more times in same stitch (5 loops on hook), yarn over and pull through all loops, ch 1 to close puff, or as described in specific rounds.
— Flower Granny Square (Make X) :
Round 1 :
With soft yellow, 6 sc in magic ring (6)
Round 3 :
(1 sc, 1 inc) x 6 (18)
Round 4 :
(2 sc, 1 inc) x 6 (24)
Info :
Fasten off yellow. This small circle forms a sturdy center that the layered petals will build around. Keep tail for weaving into back to secure center if needed.
Round 5 :
Join pistachio in any st. *ch 2 (counts as first hdc), hdc in next 2 sts, ch 2, sl st in next st* repeat around to create 6 leaf spaces; end sl st to first hdc (24 worked but appearance forms 6 leaf points)
Info :
Leaves are built as small 3-st hdc clusters separated by chain-2 spaces. Work tension slightly tight to make leaves sit under the petals cleanly.
Round 6 :
Work around to place leaves: in each chain-2 space: (sl st, ch 3, 3 dc, ch 3, sl st) to form small leaf arc - repeat 6 times; join with sl st. (no stitch count change; foundation round remains 24)
Info :
These small arcs create the green base that peeks out beneath the petals. Make sure arcs are evenly spaced around center by counting earlier cluster divisions.
Round 7 :
Change to pastel lavender (petal color A). Work petals into spaces between leaf arcs: *sl st into space, ch 1, puff stitch in next st, ch 1, sl st in same sp; ch 2* repeat around 6 petals; join (24)
Info :
Puff stitch for this round: yo, insert, yo pull up, repeat 3 times (5 loops), yo pull through all loops, ch 1 to secure. Keep puffs plump but not overstuffed with yarn so they maintain shape.
Round 8 :
With petal color A, in front of round 7 puffs, work a second puff layer: *in same st as puff, make 2 puff stitches separated by ch 1 to form a petal cluster; sl st into next base st to anchor; ch 1* around (24) - petals will overlap to create a double-layered flower
Info :
This round creates the 3D layered look—work puffs close to the previous round so petals sit on top. If petals feel bulky, use slightly smaller hook for these rounds (3.5 mm) to keep definition.
Round 9 :
Switch to blush/pale pink (petal color B). Work a decorative round behind the second petal layer to add soft color variation: *ch 3, sl st into top of puff from Round 7 to secure, ch 1* around; join. This creates a subtle looped halo. (24)
Info :
When switching colors, leave a 6-8 cm tail to weave in later or carry the yarn behind petals and catch it in the square rounds so it is hidden.
Round 10 :
Join cream (main color) in any st. ch 3 (counts as dc), dc in next 5 sts, ch 2, (dc in next 6 sts, ch 2) x 5, join with sl st to top of ch-3 (48 dc total counted as 6 groups separated by ch-2 corners)
Info :
This round starts forming the square frame. The 6 groups establish the sides that will be shaped into a square on subsequent rounds. Keep corners as ch-2 spaces.
Round 11 :
ch 3, dc in same st, *dc in each dc across to corner ch-2 space, (2 dc, ch 2, 2 dc) in corner ch-2, dc in each dc across next side* repeat around; join (stitch count increases logically per side)
Info :
After this round your square sides will begin to straighten. Count dcs per side to track symmetry. Use stitch markers at corners for easier counting on future rounds.
Round 12 :
ch 1, sc in same st, *ch 3, skip 2 dc, sc in next dc across to corner, (sc, ch 3, sc) in corner; repeat around to form lacy chain spaces on each side; join (lace effect)
Info :
The lacy chain spaces create an airy texture that contrasts the raised petals. This is purely aesthetic and helps reduce overall weight for larger spreads.
Round 13 :
ch 3, dc in same st, dc in each sc and ch-3 space across to corner, (2 dc, ch 2, 2 dc) in each corner; join (maintain smooth square edge)
Info :
We are alternating lacy and solid rounds to stabilize the square and keep petal definition clear. From here forward, count per side should be even — record your per-side dc count (for example, 12 dc per side) to ensure consistent size across squares.
Round 14 :
Repeat Round 12 (ch 1, sc, ch 3 spaces over sides, sc in corner pattern). This is an even decorative round. (no change in gross stitch count)
Round 15 :
Repeat Round 13 to reinforce edges: ch 3, dc across sides and corners (solidifying 12 dc per side target). Join.
Info :
If you prefer a larger square, continue alternating a solid dc round and a lacy ch-3 round until you reach the desired square dimension. Each pair of rounds adds approximately 1 cm to square size with worsted cotton.
Round 16 :
ch 1, sc across around the square, placing (sc, ch 1) evenly in corners to keep square flat; join (neaten edge)
Round 17 :
Work a final scallop base to prep for join-as-you-go: *skip 2 sc, 5 dc in next sc, skip 2 sc, sl st in next sc* around; join. This forms a gently scalloped outer edge to complement the border. (scallop count dependent on prior side counts)
Info :
Fasten off and weave ends through the back of the square. Make as many squares as required for your bedspread layout. For a small throw, plan 24 squares (6x4); for a twin or full, calculate squares to fit the bed dimensions using the finished square measurement.
— Square Repeat & Petal Variation Notes :
Info :
You can vary petal colors between Round 7 and Round 9 for ombre or alternating palettes. When changing color every square, secure starting tails neatly in the back. For a consistent look, alternate shade A and shade B in a checkerboard pattern across the bedspread.
Info :
Tip: Block each square lightly to standardize dimensions before joining. Place damp squares on blocking mat and pin into a perfect square, allowing them to dry completely.
— Join-As-You-Go (JAYG) Method for Assembling Squares :
Info :
We recommend joining on the final sc border round (Round 16) using join-as-you-go so petals remain undisturbed. Lay two squares RS up, align edges, and work the joining round onto the live square by replacing one side's scs with sl st or sc into the adjacent square's scs as directed below.
Round 18 :
With RS facing, join cream in corner of first square, ch 1, sc in corner; sc across edge to meet next square, *insert hook in corresponding stitch of adjacent square and pull up a loop, then complete sc into current square st to join*; repeat across edge; finish corner with (sc, ch 1, sc) into corner to secure. Join to next edges in same manner. Repeat for full spread joining pattern. (stitch count per joined edge matches single-square edge count)
Info :
JAYG requires spacing consistency — place matched stitch markers on opposing square edges if necessary so that stitches align exactly. Use gentle tension while joining so seam is flat but not tight.
Round 19 :
Once all interior joins are completed for a row, work a single sc round around the entire assembled panels to tidy joins: sc in each st, sc 3 in each external corner. This evens out join tension. (stitch count equals overall perimeter stitches)
Info :
Work this tidy round after finishing a block of 4-6 squares so it is manageable. This round hides join tails and creates a uniform edge for later border rounds.
— Border: Transitioning from Squares to Scalloped Bedspread Edge :
Round 20 :
With cream, ch 3 (counts as dc), dc evenly across entire perimeter in each sc and ch-space, placing (2 dc, ch 2, 2 dc) in each corner to maintain square corners. Join. (perimeter dc count depends on assembled size)
Round 21 :
ch 1, sc in each dc across to corner, (sc, ch 3, sc) in each corner; join. This creates a neat foundation for the scalloped edge.
Round 22 :
Scallop round 1: *skip 2 sc, 7 dc in next sc, skip 2 sc, sl st in next sc* repeat around to create large scallops. Join.
Info :
Check scallop spacing around the bedspread; if scallops bunch at corners, adjust by adding or removing single sc between scallops on the previous round to even them out.
Round 23 :
Edging round: Switch to pastel lavender and work *sl st into center of scallop, ch 2, 3 dc into center, ch 2, sl st into center* to create a small decorative loop inside each scallop. Join. This gives color tie-in with floral petals.
Round 24 :
Final border neatness: With cream, ch 1, sc around entire scalloped edge working (sc, ch 1, sc) across each scallop point to stabilize; weave in ends. Fasten off.
Info :
For a heavier border, repeat Rounds 22-24 for an additional layer to add drape and weight. Add pale pink picot rows between scallops for an extra feminine edge if desired.
— Pillow Covers (Make 2 Standard Cushion Covers) :
Round 1 :
Follow Flower Granny Square Rounds 1-16 to make 4 motif squares for each pillow cover (total 8 squares for two pillows). Block squares for shape.
Info :
Pillow covers in photos display two motif squares joined side-by-side with a scalloped border. For a single square pillow, work one motif and add rounds to create a 16-18 cm square before making back panel.
Round 2 :
Join squares for pillow front using JAYG across two squares to form a 2x2 or 1x2 layout depending on pillow size. After joining, sc around the entire pillow front with (sc, ch 1) in corners. (counts per pillow based on assembly)
Round 3 :
Create back panel by working a solid square in cream matching front dimensions: ch foundation to match side length and work HDC rounds for a dense back, finishing with a 3-4 round scallop to match front edge. Join back and front with slip stitches or invisible mattress stitch leaving a small opening for stuffing if making a decorative cushion insert.
Info :
Alternatively, make a removable pillow cover by leaving one side open and adding buttons or an envelope closure. Match scallops on the edge for continuity with bedspread.
— Alternative Assembly: Sewn Seams Instead of JAYG :
Info :
If you prefer sewing squares together, block them and whip stitch with matching cream yarn through the back loops only of each square to minimize visibility. Use pins to align motifs and ensure petal orientation stays consistent across squares.
— Optional Petal Accent Rounds and Extra Texture :
Round 25 :
To accent petals further, slip stitch an outline in pale pink around each puff on the right side: with pale pink, sl st around each puff's center two to three times to define petal shape. No global stitch count change.
Info :
This small outlining step gives the petals an embroidered look and catches light differently for a subtle ombre effect. Use a smaller hook (3.5 mm) for neat sl sts.
— Finishing Touches :
Round 26 :
Weave in all ends on the WS, trim close. For extra security on join points, weave ends back through 3-4 stitches before trimming.
Info :
Light steam-block your finished bedspread to relax yarn and even out joins. Do not directly iron—use a steamer or steam from a distance to prevent flattening the petals.
— Sizing and Scaling Guidance :
Info :
To determine number of squares: measure finished square size (A). Table top throw example in photos uses a 4 x 6 layout (24 squares) for a small lapghan. For a twin bed layout approximate 10 x 16 squares (160 squares) at 12 cm each. Multiply squares by yarn per square to extrapolate yardage.
Info :
Smaller yarn weight or hook reduces square size; adjust counts and rounds for the square frame to create consistent geometry. If using a bulky yarn, reduce round count or hook size to keep scale of petals matching square.
— Troubleshooting & Tips :
Info :
If your petals twist or lay flat, rework the puff tension with a slightly smaller hook or shorten the ch-1 securing chains. To make petals pop more, use a 3.5 mm hook for puff rounds while using 4.0 mm for the body rounds.
Info :
For color changes, always switch colors on the last yarn-over of the previous stitch to create a clean transition. Hide ends by weaving them into the back of the petal cluster where they will be covered by the square frame.
This Romantic Floral Bedspread is a beautiful blend of texture and pastel color that brings a soft, vintage garden feel to any bedroom. Each square is a tiny bouquet, hand-crafted and joined with love, turning simple yarn into a cherished home accent. Enjoy the meditative rhythm of making petals and the satisfying reveal when the first row becomes a spread. 🧶🌸 Wrap yourself in the cozy result and delight in the compliments that follow! 😊