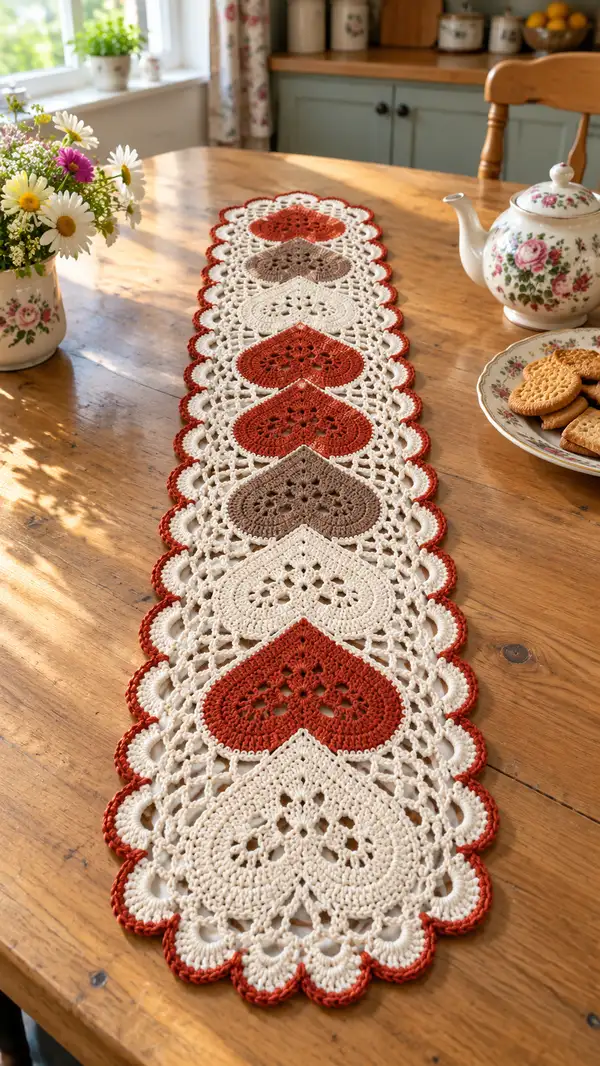
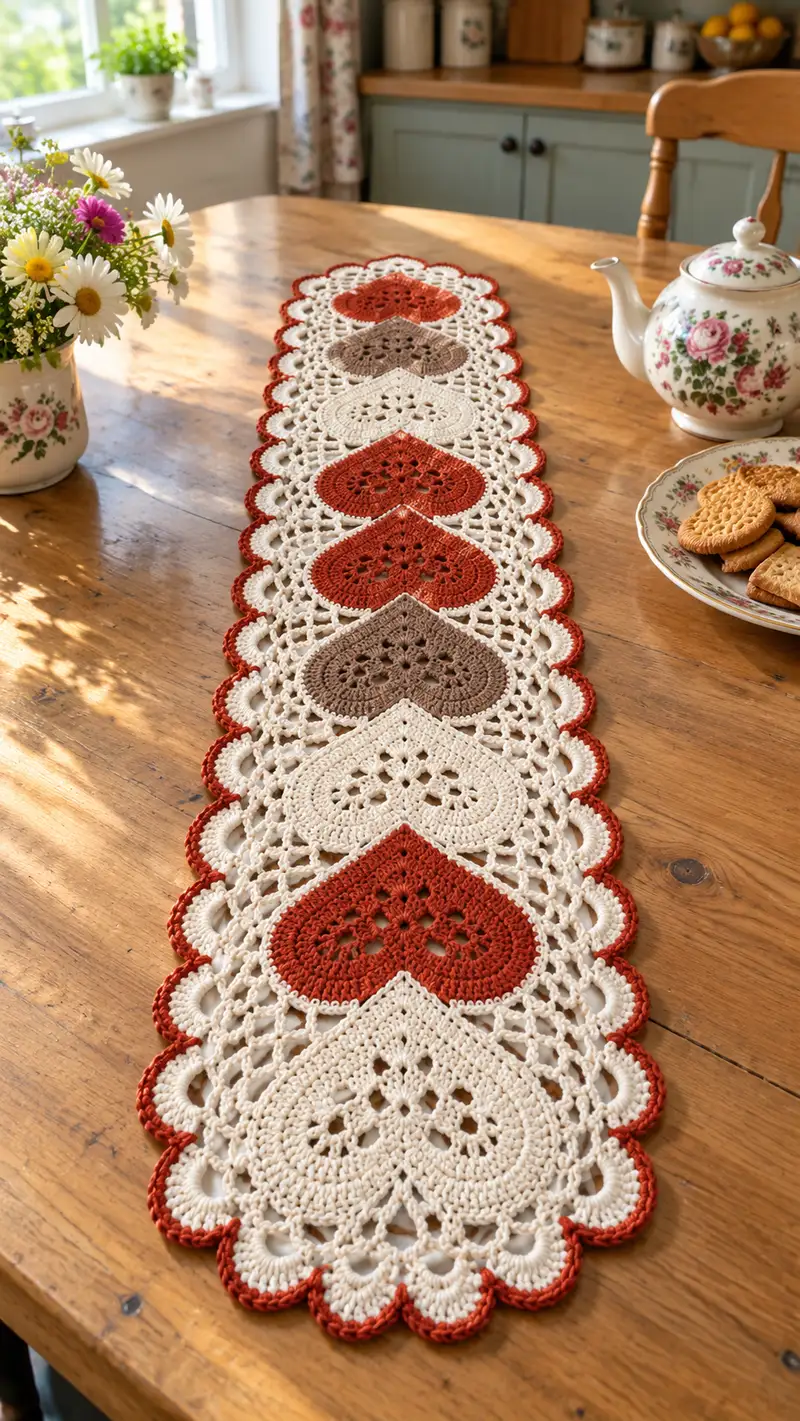
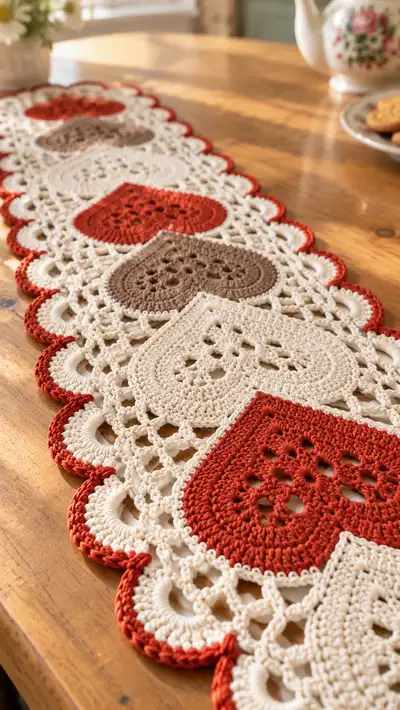
A long, romantic hearts-and-lace table runner worked in warm rust, soft beige and mocha tones. This delicate yet sturdy runner features repeating heart motifs linked with an open lattice and finished with a scalloped edge. The pattern is ideal for seasonal decor or as a charming everyday accent that brightens a wooden table. Clear rounds, assembly notes and blocking tips included to help recreate the textured lace look shown.
Progress Tracker
0% Complete
— Overview :
Info :
This runner is constructed from individual heart motifs worked flat in rounds, joined together with a lacy mesh connector and finished with a multi-row scalloped border. The sample photographed uses alternating color sequence: rust, cream, mocha, cream, rust, cream (adjust repeat for your table length). Work hearts first (make as many as needed), then create connector rows around them and add the scalloped edging. Work tension consistently and block motifs before joining for best results.
— Heart Motif (make X to desired length) :
Info :
Heart motif shown measures approximately 13cm wide by 13cm tall (5" x 5") when worked in DK cotton using a 3.5mm hook. Stitch counts below are written for one heart in continuous rounds. Each round count in parentheses refers to the number of stitch anchors (excluding chain spaces unless otherwise noted).
Round 1 :
Make a magic ring, ch1, 6 sc in ring (6)
Round 2 :
Inc around (6 inc) (12)
Round 3 :
(1 sc, inc) x6 (18)
Round 4 :
(2 sc, inc) x6 (24)
Round 5 :
(3 sc, inc) x6 (30)
Round 6 :
(4 sc, inc) x6 (36)
Round 7 :
1 sc in each st around (36)
Info :
Rounds 1-7 build a compact disc that will become the central floral/lace panel. Keep your rounds neat and tension consistent; this center is visible as the small cluster of holes in each heart.
Round 8 :
(5 sc, inc) x6 (42)
Round 9 :
1 sc in each st around (42)
Round 10 :
*Sc 6, ch3, sk 1* repeat around anchoring with sc in last ch space (42sc anchors, 14 ch-3 loops)
Info :
Round 10 introduces open chain loops that will form the lacy interior of the heart. The number of sc anchors remains 42; count the sc posts to ensure consistency.
Round 11 :
*In each ch-3 space: (sc, ch2, 3 dc, ch2, sc) to create a shell fan; between shells work sc into each sc anchor as placed* (42 sc anchors + shell clusters)
Round 12 :
1 sc in each anchor stitch and sc in each shell edge stitch to tidy the edges (42 + shell edge anchors equivalent)
Round 13 :
Work around entire heart: *sc 4, (2 dc, ch1, 2 dc) in same st to begin a lobe, sc 4, dec sequence across the bottom point area* This round shapes the heart lobes and begins the outer outline (exact placement: place the lobe cluster at two laterally opposed positions relative to the center) (approx 42 sc anchors plus 2 lobe clusters)
Info :
Visual placement: the two lobe clusters form the top curves of the heart. Keep these clusters symmetric – count stitches between them (approx 10-12 sc between clusters depending on gauge).
Round 14 :
1 sc in each stitch around including working evenly into shell and lobe clusters to smooth shape (count aim: 48 sc anchors overall – two shell increases account for extra anchors)
Round 15 :
(4 sc, inc) x8 (64)
Round 16 :
1 sc in each st around to create a firm outline for the heart face (64)
Info :
Round 15-16 widen the heart to its final shape. If your motif becomes too large, reduce increases in Round 15 to (5 sc, inc)x? to match desired size; keep a symmetrical increase distribution across the round.
Round 17 :
Work decorative row: *sk 1, ch3, tr3 in next stitch, ch3, sk1, sc in next 3 stitches* repeat around. This creates the small decorative holes evident near the center of each heart (count of sc anchors remains 64 equivalent)
Round 18 :
1 sc in each st around working into the tops of the trs and ch spaces to stabilize the round (64)
Round 19 :
Edging round to prepare for joining: *sc 2, ch2, sc 2* at top lobes and along sides; at the bottom point: sc 1, dec, sc 1 to create a subtle point (64)
Info :
Fasten off leaving a 30-40cm tail for joining later if you plan to sew motifs. If you prefer to join by crochet, leave the tail shorter and create slip-stitch joins as you assemble. Block each heart motif flat to open the lace and square the shape before joining.
— Mesh Connector & Lattice (worked after hearts, one long strip) :
Info :
The mesh connector attaches hearts in a continuous open lattice. You will work around the hearts in rows to form the vertical openwork seen between each heart. Each connector section runs between a pair of hearts and along the sides to create a continuous runner. Work this section using the background color (cream).
Round 1 :
Join cream yarn to a side ch-space of a heart with a sl st, ch4 (counts as tr+ch1), tr in same sp, *ch3, sk small section on heart edging, tr in next sp* repeat to form a row of vertical tr posts around heart (this is a foundation row; anchor posts should align with existing ch-spaces) (anchors: variable, aim for even spacing matching heart width)
Round 2 :
Turn and work into back of tr posts: ch4, tr in each tr around creating tall posts to lift the mesh above hearts, ch2 between groups to create chain arches (counts roughly equal to number of tr posts)
Round 3 :
*Sk 2 posts, 5 dc in next ch arch, sk 2 posts, ch3, sc in next post* repeat to create arches and small shells; keep stitches even so the mesh lays flat
Info :
Measure the mesh width against the heart width; the mesh should be slightly narrower than the heart to allow scalloped edge to sit around the combined unit. Adjust chs and skirt of shells for a neat fit. Pin motifs and mesh together to ensure alignment.
Round 4 :
Turn and work row of chain arches: *sc in each dc group edge, ch5, sc in next group* This builds the lattice holes seen between hearts in the photos (anchors remain consistent with previous row)
Round 5 :
*In each ch-5 arch work (sc, ch3, 3 dc, ch3, sc)* to form a decorative open fan linking the two sides of the runner (counts: sc anchors equal to number of arches)
Round 6 :
Repeat Round 4 to stabilize fans: sc in each group and form ch-4 loops between fans, ensuring symmetry (anchor count unchanged)
Info :
If connecting two hearts side-by-side, work the mesh as a continuous strip and join at pattern points with sc or whip stitch. Leave long tails on initial hearts to help secure joins neatly.
Round 7 :
Work a row of elongated posts across the mesh center: ch4, tr in top of each fan cluster to create raised ribs down the middle (visual count will align with number of fans)
Round 8 :
Return row: sc in each tr/panel top, ch2 between ribs to form delicate netting (anchors equal to number of ribs)
Round 9 :
Stabilizing round: work around heart-mesh junctions with sc around the edge of the heart and into mesh posts to make the connection firm (count will match circumference of joined edge)
Info :
Work connector rows to the full runner length, repeating mesh pattern between each heart. If you prefer a longer runner, add extra mesh repeats between hearts. Keep spacing consistent so scalloped border matches along the length.
— Joining Hearts and Mesh (continuous assembly) :
Info :
Lay out hearts in the desired order on a flat surface. Use pins to secure hearts spaced evenly (approx 2-3 cm between heart crowns depending on mesh density). Join hearts using the mesh connector by crocheting directly into join tails or by whipstitching with tapestry needle. Below is a crocheted join technique that gives a visible stitched seam matching the motifs.
Round 1 :
With cream yarn, join to the top right ch-space of the first heart, ch1, sc evenly around the heart edge for 1 round to create a uniform anchor (stitch count equal to heart circumference approx 64)
Round 2 :
Work sc around heart then when you reach the side where next heart will attach, ch6 (for spacing) then sl st into corresponding sc on next heart; continue sc around second heart. This creates a crochet-joined bridge between motifs (maintain even sc counts around each heart)
Round 3 :
Once two hearts are bridged by a ch-6 arch, work into arch: (sc, ch3, sc) then continue sc along sides to next arch. Repeat between every pair of hearts (anchors: counts variable depending on number of pairs)
Info :
When slip-stitching motifs together, ensure that the top-centers align. Pin strongly before joining. For neater joins, use the tapestry needle to sew through the loops behind the motifs rather than through surface stitches.
— Scalloped Border (worked in background/cream with rust accent picot) :
Info :
Border frames the entire runner with large scallops visible around each heart edge and around the outer perimeter of the mesh. Work the border after joining all motifs and mesh pieces and after blocking the whole runner flat for consistent scallops. Border consists of multiple rounds: foundation sc, shell rounds to create large scallops, and final picot/contrast round in rust to highlight the edges.
Round 1 :
Join cream yarn to any outer edge st, sc evenly around the entire runner (including heart outer edges and mesh outer edges). Work sc across scallop anchors and into mesh loops to prepare a solid foundation (total sc anchors will equal the perimeter stitch count; expect approx 700-900 sc for a runner of photographed length)
Round 2 :
*sc 3, skip 1, 7 dc in next stitch (shell), skip 1, sc 3* repeat around to create pronounced scallops; at the base of each heart lobe place shell centered for symmetry (result: number of shells equals number of scallops along perimeter)
Round 3 :
Work into each shell: sl st in shell center, ch1, (sc, hdc, 5 dc, hdc, sc) in same shell to bulk shell and smooth curve (shells become fuller and counts per shell increase by design)
Info :
Check scallop spacing frequently; if shells bunch or stretch, adjust by adding or subtracting an sc in the foundation round between shells. The scallops on the photo show a double-layered shell that is plump and regular—aim for uniformity.
Round 4 :
Stabilizing row around perimeter: sc in each stitch and sc 3 in each shell peak to solidify curve (anchor count will reflect number of shells times three at peaks)
Round 5 :
Change to rust yarn for contrast edging. Join with sl st and work: *picot (ch3, sl st into 3rd ch), sc 2, picot* along the shell peaks to create the small rust points visible in photo (work two or three picots per scallop peak as pictured) (count equals number of shell peaks)
Info :
Fasten off and weave in ends; the rust picot edge gives a crisp finished look and ties the rust heart color into the border. If you prefer a subtler look, work the final round in cream only.
— Repeats & Runner Length Adjustment :
Info :
The photographed runner uses 7 heart motifs alternating colors (rust, cream, mocha pattern). For a shorter runner, work fewer hearts; for a longer runner add more hearts and corresponding mesh repeats. Keep the layout symmetrical by using an odd number of hearts if you want a central heart marker.
Round 1 :
To lengthen: after finishing the end heart and mesh, continue the mesh repeat unit: *fan row, rib row, arch row* until desired length. Each repeat between hearts uses approx 6-8 connector rows as described above to achieve the open lace column seen in the photo.
Info :
Count motif widths before joining to estimate the final runner length. If you want a runner to sit across a table with overhang, add one or two extra heart units accordingly. Keep edge scallops evenly spaced when adding or removing units.
— Finishing & Blocking :
Round 1 :
Weave in all tails using a tapestry needle. Secure loose ends by weaving through at least 6-8 stitches in the wrong side and trimming closely.
Round 2 :
Block the runner: dampen lightly or spray with water, pin to blocking board or foam in the exact shape, and pin scallops in symmetric spacing. For a crisper finish use a light spray starch and press gently with a steam iron held above the fabric (do not press directly on delicate cotton without a cloth cover).
Info :
Allow runner to dry completely before removing pins. This step will open the lace and ensure scallops retain their shape during use. If you need a stiffer runner for a tray, use a craft stiffener following manufacturer instructions after blocking.
— Optional Decorative Variations :
Info :
Add beads to the centers of heart shells before final round for a sparkly accent. To make placemat-sized pieces, work a single heart and border instead of joining. You can also substitute a lighter fingering cotton and smaller hook for a more delicate look or a heavier cotton for a sturdier runner.
Completing this runner is such a satisfying finish—each heart and lace arch comes together like a row of tiny treasures. The contrast edging brings a beautiful vintage warmth to the overall design, and blocking transforms the piece into crisp, elegant lace. Whether you place it on a dining table or a sideboard, it will add charm to any room. 🧶❤️✨