🧶 Beautiful ✨ Detailed 💝 Adorable

Romantic Rose Table Runner Pattern

Romantic Rose Table Runner Pattern
4.5★ Rating
10-12 Hours Time Needed
1.2K Made This
✂️

Advanced Level

Designed for experienced crocheters, these patterns involve intricate designs and complex techniques to challenge and inspire.

⏱️

Slow & Steady

A 10+ hour project—great for savoring the process over several sessions.

🏡

Cozy Accent

A warm touch for your space that transforms ordinary corners into inviting nooks filled with handmade charm.

🧶 Jump to Pattern ↓

About This Romantic Rose Table Runner Pattern

This pattern recreates a long rectangular table runner worked in a dense textured stitch for a solid background, edged with a delicate scallop. The surface is embellished with sculpted layered roses in soft pink, buttery yellow centers and deep olive-green leaves and spiraled tendrils. Roses are three-dimensional, built from layered petal motifs and sewn onto the runner for a raised floral bouquet effect. The runner balances vintage charm and modern clarity—perfect for special occasions or everyday elegance.
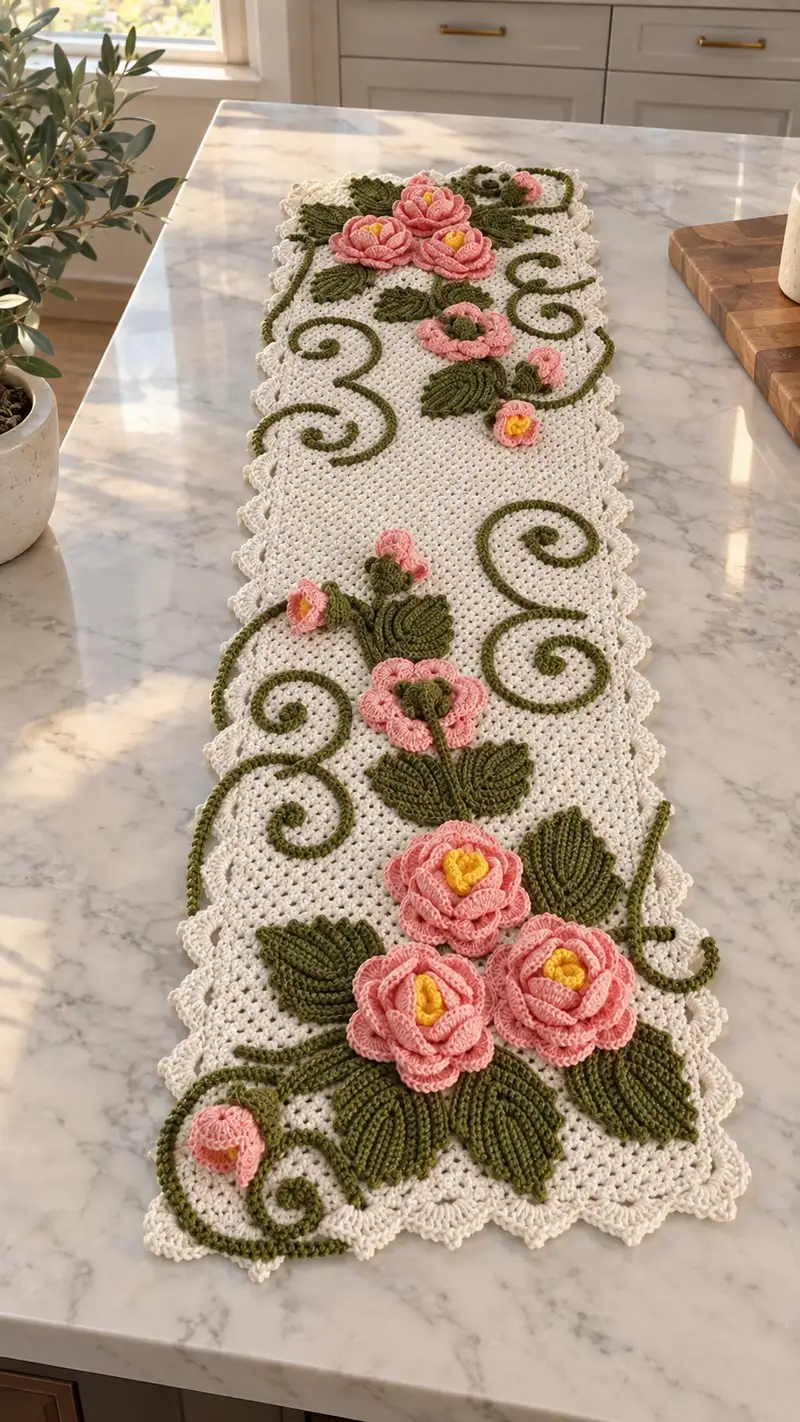
Romantic Rose Table Runner Pattern crochet pattern - detailed view of completed project

The construction separates into a worked flat base, a lacy scalloped border, and multiple appliqued elements (flowers, buds, leaves, vines) sewn on afterward. Each floral element is designed to be crocheted individually and arranged for a custom composition.

Why You'll Love This Romantic Rose Table Runner Pattern

I love this pattern because the 3D roses feel like tiny sculptures that breathe life into a simple runner. The contrast between the crisp white base and the warm pink and olive appliques creates a romantic but fresh look. I enjoy how each piece is made separately — it lets you play with placement until the arrangement feels just right.

Romantic Rose Table Runner Pattern step 1 - construction progress Romantic Rose Table Runner Pattern step 2 - assembly progress Romantic Rose Table Runner Pattern step 3 - details and accessories Romantic Rose Table Runner Pattern step 4 - final assembly and finishing

Switch Things Up

I absolutely love how this runner design invites personalization — you can change the rose color palette to match seasons (white and silver for winter, corals for summer), or scale the runner wider or narrower by adjusting the foundation chain. The method of making layered petal strips is forgiving so you can make fuller or flatter roses depending on how many strips you stack.

I also recommend experimenting with leaf textures: work more front-post ribs to make pronounced veins, or use a lighter green for a softer look. For a modern twist, try a monochrome version where roses and leaves are shades of the same color against a neutral base; it’s surprisingly elegant.

Finally, I like to mix cord styles for vines — a few I-cord tubes, a couple of slender slip-stitch ropes, and some loosely coiled chains produce a natural, organic feel when sewn together. Don’t hesitate to mix and match techniques to make this design truly yours.

Common Mistakes & How to Fix Them

✗ Skipping stitch markers at row/round starts can make edges uneven and scallops misaligned; always mark your first stitch ✗ Using a hook that is too large will make the base loose and let stuffing (if used for petals) show through; maintain a tight fabric ✗ Joining pieces before blocking can lead to puckering; block the base and appliques lightly for a flat finish first ✗ Not counting foundation chain repeats carefully causes the runner width to change; recount multiple times before starting edges ✗ Attaching roses without securing inner petals well will allow layers to shift; tack each layer with small stitches as you assemble ✗ Carrying yarn for vines across the back creates lumps; make separate cords for curved tendrils and sew them on instead ✗ Overstuffing petal layers or stuffing with large clumps will create hard lumps; use small bits of fiberfill and shape gradually
Romantic Rose Table Runner Pattern

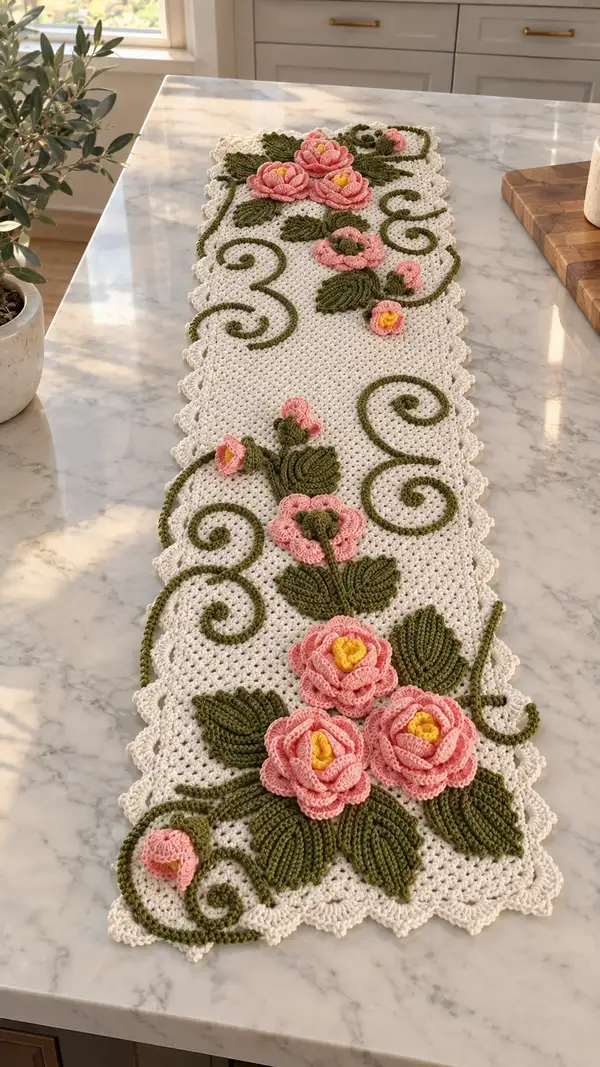
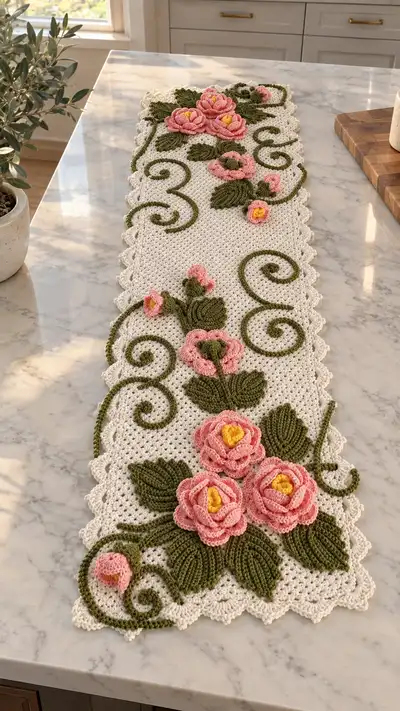
A delicate vintage-inspired table runner featuring a creamy white textured base, scalloped edges and lush 3D roses with leafy vines. Soft pink layered petals and sunny yellow centers sit atop mossy green leaves and spiraled tendrils. This pattern creates a dramatic, handmade centerpiece perfect for a dining table or mantle.

Advanced 10-12 Hours

Materials Needed for Romantic Rose Table Runner Pattern

— Main Fabric

  • 01
    Worsted weight cotton yarn (#4), approximately 250-300g in main color (Cream/Off-white seen in the image)
  • 02
    100-120g in leaf color (Olive/Deep green)
  • 03
    120-150g in rose color (Soft pink)
  • 04
    30-40g in center detail color (Golden yellow)
  • 05
    Small amounts (10-20g each) of contrast or backing colors if desired

— Tools Required

  • 01
    4.0mm (G) crochet hook for main work
  • 02
    3.25mm (D) hook for tighter appliques and petal detail (optional)
  • 03
    Yarn needle for sewing pieces and weaving ends
  • 04
    Stitch markers (at least 6-8)
  • 05
    Scissors
  • 06
    Polyester fiberfill for rose centers (small amount)
  • 07
    Pins for assembly and blocking
  • 08
    Blocking mats and rust-proof T-pins
  • 09
    Optional: fabric glue for securing tiny ends
  • 10
    Optional: narrow florist wire to stiffen vines if you want poseable tendrils

Progress Tracker

0% Complete

— Base Panel (work flat in rows) :

Round 1 :

Foundation chain 120 + 1 turning ch (counts as turning ch throughout). This width creates an approximate runner width of 10.5" (27 cm) with worsted cotton. (120)

Round 2 :

Row 1: RS: 1 sc in 2nd ch from hook, 1 sc in each ch across to end, turn. (120)

Round 3 :

Row 2: ch 1, 1 sc in each st across, turn. (120)

Round 4 :

Row 3: Repeat Row 2. (120)

Info :

Work the base in single crochet for a dense, sturdy fabric. Maintain same tension all the way to keep edges straight. Use stitch markers at each end if needed to mark row turning points.

Round 5-12 :

Rows 4-11: Repeat Row 2 (1 sc in each st) for eight rows to establish a firm foundation. (120)

Round 13 :

Row 12: ch1, *sc 1, ch1, sk 1* across to create a subtle decorative mesh row if you prefer slight texture. Alternatively, continue straight sc. (if using sc, keep 120)

Info :

If you prefer a small v-texture similar to the sample photo, after 12 rows in sc work a repeating 'hdc shell' row: ch2, *(hdc, ch1, hdc) in next st, sk 2* to end, turn. This creates a fine texture without increasing width.

Round 14-30 :

Rows 13-29: Continue 1 sc in each st (or chosen texture pattern) maintaining even edges. Work 17 more rows to make the central field long enough. (120)

Info :

Measure as you go; the sample runner has a central panel of approximately 46-50 rows before beginning a border. Adjust to desired final length (this pattern describes a long runner about 36"-40" / 92-102 cm excluding scallops).

Round 31-40 :

Rows 30-39: Continue in sc (120). At Row 36 check center to place large rose groupings later. Mark positions with removable stitch markers placed at the beginning of rows to denote where roses/leaves will be attached (approx every 12-14 rows along the length).

Info :

Pin the panel on a blocking board and lightly steam or wet-block to flatten and square the fabric before edging. Blocking makes scallops and appliques sit cleanly.

Round 41-50 :

Rows 40-49: Continue in sc across until you reach the length you want minus room for two scallop border rows (aim to stop about 4 rows shy of final desired length before scallops). (120)

Info :

At this point the base panel should measure the desired runner length. Count and confirm stitch counts. If necessary add or remove rows in multiples of the scallop repeat (5 sts) to maintain scallop symmetry.

Round 51 :

Begin Border Prep Row: ch 1, 1 sc in each st across the short ends and long sides for one row, placing 3 sc in each corner st to prepare for working in-the-round scallop edging. (120 + corner stitches)

Info :

Use markers at each short end center to define scallop repeats. The border repeat uses 5-st scallops; confirm the number of repeats fits evenly across the long edges. If not even, adjust by adding one sc every 10-12 rows earlier.

Round 52-60 :

Scallop edging (work continuously around): Round A: *skip 2 sc, 5 dc in next sc (scallop made), skip 2 sc, sl st in next sc* repeat across edge. In corners, work 3 dc clusters separated by sl st to round corner smoothly. Continue around all four sides. Fasten off and weave ends. (scallop repeat)

Info :

If your scallops pull the fabric, switch to hdc shell (5 hdc) instead of 5 dc to reduce stretch. Block scallops gently into shape with pins while damp.

— Rose Center (Make 5 small centers and 4 large centers as needed) :

Round 1 :

Using yellow yarn: MR, 6 sc in magic ring (6)

Round 2 :

Inc in each st around (6 inc) (12)

Round 3 :

(1 sc, inc) x 6 (18)

Info :

This creates a small plump center. For larger centers continue rounds to 24 sts using (2 sc, inc) x 6 then fasten off leaving a long tail to stitch into petal layer. Lightly stuff with a pinch of fiberfill if you want a rounded center.

Round 4 :

Fasten off for small centers leaving 10" tail for sewing. For large centers: (2 sc, inc) x 6 (24) and stuff lightly, fasten off leaving tail.

Info :

Keep centers small—too large a center will push petals outward unnaturally. Use minimal stuffing and shape shape with fingers.

— Rose Petal Layers (Layered petal instruction used to build each rose) :

Round 1 :

With rose pink yarn: ch 24 (this forms foundation for a petal strip; length may be adjusted to make larger or smaller petals). Join with sl st to form ring, do not twist.

Round 2 :

Round strip: ch1, 1 sc in same join and in each ch around (24). (24)

Round 3 :

Petal row A: *ch3, sk1, sl st into next 3 sts to form a small loop petal, sc in next 2 sts* repeat across entire strip until you have about 6-8 petal loops depending on strip length. (loop petals form textured cups)

Info :

Petal loops can be elongated by ch4 for more dramatic petals. Smaller roses use ch2 loops. Make multiple strips of varying heights to stack into a layered rose.

Round 4 :

Fasten off leaving a long tail. Make 3-5 strips per rose: for a small rose use 3 strips, for a large rose use 5-7 strips. Size variation: shorter strips (ch18) for inner layer, longer (ch28-32) for outer layers.

Round 5 :

Assembly of petal layers: Coil the smallest strip tightly around the yellow center and baste in place with the long tail using whip stitch. Continue adding larger strips outside the previous layer, stitching at the base through the foundation ring every 4-6 stitches so each layer is secured. Shape petals outward as you stitch. Fasten off and weave end to the back of the rose.

Info :

Stitch through the yellow center and the back edge of the petal strips to create a unified flower. Use slightly overlapping layers so no center is visible from above. Pin layers in position before sewing if needed.

Round 6-12 :

Repeat making as many petal strips and stacking them to create the gathered, layered rose look. For the medium rose make four strips: one inner small (ch20), two medium (ch24), one large (ch30). For the largest rose use five or six strips with last strip ch32-36 for full bloom.

— Rose Variation: Raised Petal Method (Alternative for fuller petals) :

Round 1 :

Make foundation circle: ch 12, sl st to first ch to join. Round 2: ch1, 10 sc around, sl st to join. (10)

Round 2 :

Round 3 (petal construction): *ch5, sc in next st* repeated around to create 10 elongated petals. Fasten off and make 2-3 additional rounds of petals staggered and stitch together at the base to form a 3D rose (this method yields structured, petal-like shapes similar to picture).

Info :

Use this method for the largest roses in the image which have pronounced layered petals. Add a dab of craft glue at center stitches for extra hold if using for display rather than washable linens.

— Leaf (Make 10-12 leaves of varying sizes) :

Round 1 :

With green yarn: Ch 16. Row 1: sc in 2nd ch from hook, sc next 6 sts, hdc next 2, dc next 4, then work on opposite side of chain: dc 4, hdc 2, sc 7, sl st to join to first sc. This forms a pointed leaf base with textured midsection. (approx 30-34 sts around)

Round 2 :

Work reverse rows to shape: ch1, sc in same st, (sc 3, hdc 2, dc 4) across the top edge, continue around to create symmetrical edge. Fasten off leaving a long tail for sewing. For medium leaves reduce chain to ch12 and for small leaves ch8-ch10 and adjust stitches proportionally.

Info :

To create the raised rib effect seen in the image, work 3-5 fpdc (front post double crochet) rows down the center of the leaf on the RS before finishing the edging. Work these in FLO or FPDC to create defined ribs.

Round 3 :

Optional ribbing: Rejoin green near leaf center: ch1, work fpdc around post of every other st down center (6-8 fpdc) to create the rib. Fasten off and weave tail to back.

Info :

Block leaves lightly to shape; press with steam or pin into a slight cup for a natural leaf curve. Sew leaves down by the base with a few secure stitches so they tuck slightly under the rose layers.

— Bud (Make 6-8 small buds) :

Round 1 :

With pink yarn: MR, 6 sc in ring (6)

Round 2 :

(inc) x 6 (12)

Round 3 :

1 sc in each st (12)

Round 4 :

Next round: *(ch3, sl st in next st)* repeat around to create tiny folded petals. Fasten off leaving a long tail. Pull center slightly and tack a green calyx (see next section) at base.

Info :

Buds are delicate; make them small (use ch8 or ch10 base for teeny buds). Sew the base of each bud into the stem or directly onto the base to mimic placement in the photo.

— Leaf Calyx (small green base for buds) :

Round 1 :

With green yarn: ch6, sl st in first to make small ring, ch1, 6 sc in ring (6)

Round 2 :

*ch3, sl st into next st* repeat 6 times to create 6 tiny flared points (petiolules). Fasten off leaving a tail to sew under bud base.

— Vine Cord (Make 6 long cords for spirals and tendrils) :

Round 1 :

With green yarn: ch 90 (length variable; make longer for longer tendrils). For thicker cord, make two strands held together.

Round 2 :

Row: 1 sc in 2nd ch from hook and in each ch across (90). This creates a narrow flat cord.

Round 3 :

To make coiled vine: curl the cord around a dowel or pencil and spray with water then allow to dry—this helps it hold a spiral. Alternatively, create a crocheted fern cord by working I-cord: With a smaller hook, ch 30 then work 30 sc back along top loops only to create a tight tube; continue until desired length.

Info :

For the decorative spirals in the photograph, a tightly worked I-cord or tubular sc cord is recommended. If you want wire inside for poseable tendrils, leave a 1-2" tail of yarn at each end and wrap wire in yarn to avoid sharp ends.

— Large Decorative Spiral (Make at least 4) :

Round 1 :

Using previously made vine cord: form a spiral coil by starting at one end and wrapping the cord in an outward spiral. Use tiny whip stitches through the cord every 3-5 mm to hold the coil in place. Continue until coil diameter reaches 2.5-3" (6-7.5 cm) for a large spiral.

Info :

Sew the spiral down to the base panel with small, nearly invisible stitches through the cord and base fabric. Position spirals to frame rose clusters, as in the sample image.

— Assembly Prep :

Round 1 :

Block the base and all appliques (roses, leaves, buds) lightly on a flat surface. Pin roses and leaves to the runner in desired composition and photograph or sketch the layout for reference before sewing. Leave at least 2" margin between alternate cluster centers to mimic balanced layout.

Info :

Place larger rose clusters near both ends and a smaller cluster near the center as in the photo. Vines should flow between clusters and curl into loose spirals. Use removable pins to test arrangement.

— Sewing Appliques to Base :

Round 1 :

Sew roses: Use the long tail from the rose center or a separate strand of thread. Sew through the base panel and the back edge of the rose foundation ring with small slip-stitch-like stitches every 4-6 stitches around the base. Anchor securely with 10-12 stitches for large roses; smaller roses require 6-8 stitches.

Round 2 :

Sew leaves and buds: Position each leaf to tuck slightly under the rose edges. Use ladder stitch or whip stitch from leaf base to the base panel. Sew buds onto vine ends or directly onto panel using the calyx tail for secure attachment.

Info :

Hide knots on the back of the runner and weave tails at least 2" into the fabric before trimming. For washable items, use matching thread and secure knots with a tiny dab of fabric glue on the knot for durability.

— Final Finishing Touches :

Round 1 :

Once all elements are sewn on, lightly steam block the entire runner to settle everything into place and soften stray stitches. Trim any stray ends and check each applique for secure stitching.

Round 2 :

Optional: Using a very thin tapestry needle and green yarn, add tiny embroidered veins to leaves or French knots to rose centers for extra detail. Secure vine ends with a few extra stitches through the cord to keep them from unraveling.

Info :

For machine-washing, it is recommended to hand wash and reshape; repeated machine laundering can flatten 3D petals.

— Suggested Counts & Extras :

Round 1 :

This sample composition uses: 5 large layered roses (one cluster of three at one end, two singles at the other end, one small in the center), 8-10 large leaves, 6 small buds, and 6 long vine cords made into spirals. Adjust counts to suit your length and design preference.

Info :

If you wish to make a shorter runner, reduce the base panel rows and keep the same applique placement proportionally. Alternatively, make a table centerpiece by working the base as a square and using the same appliques.

Assembly Instructions

  • Pin and arrange all appliques on the blocked base panel to match the sample composition before sewing. Photograph or mark positions to maintain symmetry when sewing.
  • Attach roses to the base by stitching through the foundation ring of each rose and the base panel using the long tail from the rose center. Use small, even stitches and secure thoroughly with 10-12 passes for large roses and 6-8 for small roses.
  • Place and sew leaves so that most are slightly tucked under the outer petal layers: stitch at the leaf base with a yarn needle and matching green yarn, making 5-8 secure passes for stability.
  • Position vine cords and spirals, pin in place, then tack them down every 1/2" with small stitches through the cord and base. For a more permanent hold, sew through the cord's underside.
  • Attach buds onto vine ends or directly onto the panel by sewing through the calyx (green base) with a long tail and anchoring with several tight stitches.
  • Weave in all ends to the wrong side using a yarn needle, trim close, and optionally secure knots with a small dab of fabric glue for extra durability.
  • Lightly steam-block the finished runner again to soften and shape petals and spirals; allow to dry flat to preserve shape.
  • If adding wired tendrils, insert florist wire inside the cord (wrapped in yarn) before final placement and sew cord over the wire opening to conceal ends.

Important Notes

  • 💡Use stitch markers consistently at the beginning of each row to avoid counting errors and maintain proper shaping
  • 💡Stuff flower centers very lightly and in small increments to avoid hard lumps—shape with fingers rather than overfilling
  • 💡Block the base and appliques before assembly to ensure a flat, neat finish and easier accurate positioning
  • 💡For a tight fabric and minimal hole visibility, work single crochet one hook size smaller than yarn recommendation
  • 💡Sew pieces securely with small even stitches; loose sewing is the most common cause of appliques coming off after use
  • 💡Test your scallop repeat on a small swatch to verify number of repeats fit evenly along the edge
  • 💡Carry colors only when making very tiny decorative details; otherwise make separate cords and sew them on to avoid lumps
  • 💡Keep a picture of your intended layout nearby while sewing so you can match symmetry and spacing consistently

Finishing this runner is such a joyful moment—watching every layered rose, leaf and spiral come together into an elegant table centerpiece is deeply satisfying. The tactile petals and sculpted vines add a romantic flourish to any room. 🧶 Take your time, enjoy each stitch, and you’ll have a piece to treasure or gift with pride. 🌸✨

You ask,

we answer.

FAQs

What is the finished size of this table runner?

Using the specified foundation (120 chains) and the row counts in this pattern, the finished panel without scallops is approximately 36-40" (92-102 cm) long and 10.5" (27 cm) wide. Adjust foundation chain and row counts to change size proportionally.

Can I use different yarn weights for this pattern?

Yes. Thicker yarn (bulky) will yield a larger, sturdier runner and thicker petals, while finer yarn (DK or thread) will create a more delicate piece. Adjust hook size accordingly and plan for more petals or repeats for the same visual fullness.

How should I care for the finished runner?

Hand wash gently in cool water and reshape while damp. Avoid machine washing and tumbling which may flatten 3D petals. Steam blocking can refresh the form if petals become slightly flattened.

Do I need to block pieces before assembly?

Blocking recommended: it flattens the base for accurate applique placement and helps petals and leaves keep their intended shapes. Light wet-blocking or steam-blocking works well for cotton yarn.

Can safety techniques be used for pieces that will be handled often?

Yes. Sew appliques with multiple secure stitches, weave tails well, and add a dab of fabric glue at hidden knots for extra durability. For table linens expect less handling than toys, so sewn attachments usually hold well.

How much stuffing do I need for the roses?

Very little. For each rose center you only need a pinch of polyester fiberfill (about 1-3 grams). Work in small increments to avoid lumps.

How do I prevent the vines from flattening?

Make vine cords tubular or I-cord style for rigidity, or insert florist wire wrapped in yarn to make them poseable. Sew cords with small stitches to the base to maintain shape.

What if my scallops do not line up evenly?

Undo scallops and add or remove a small number of sc across the base row to make the total stitch count divisible by the scallop repeat (5 sts). Adjust the base by 1-5 stitches as needed to achieve even scallops.
