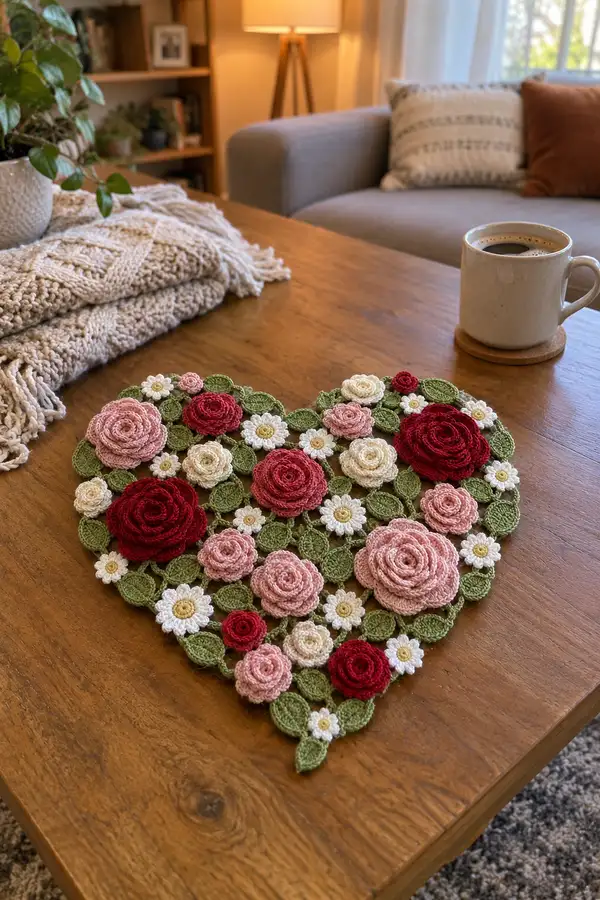
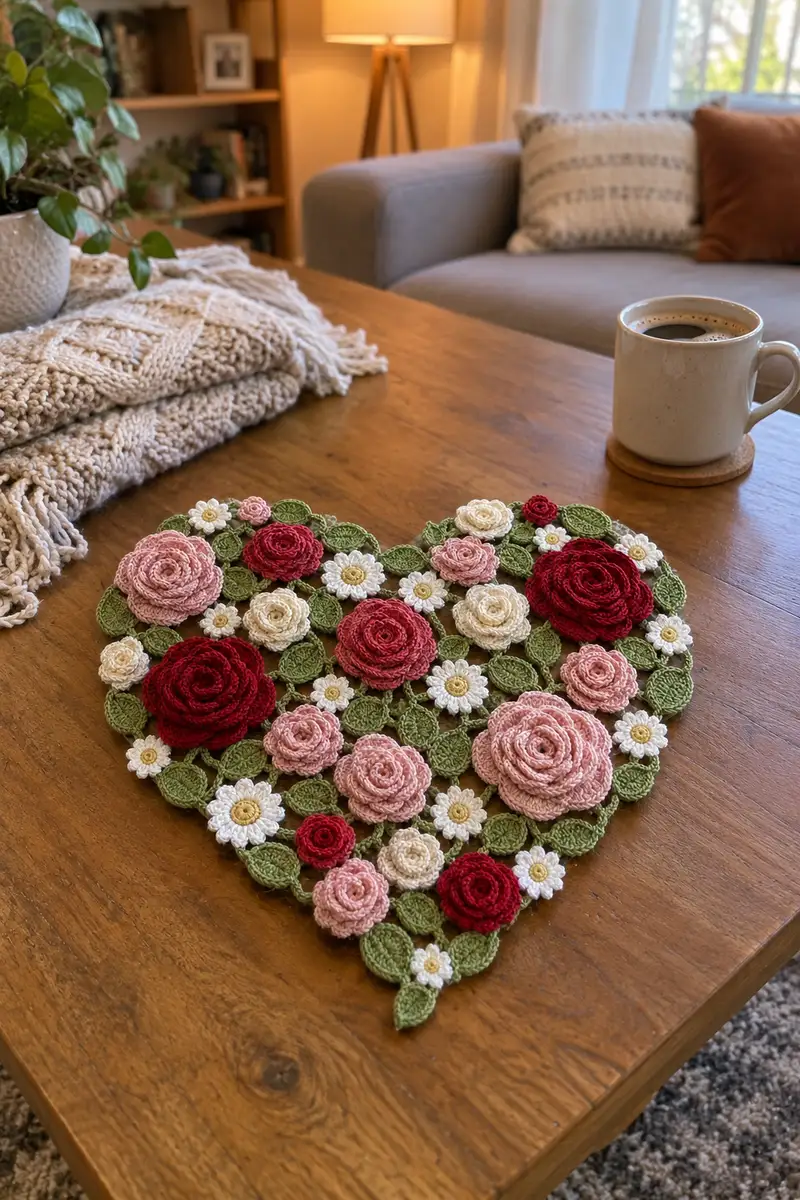
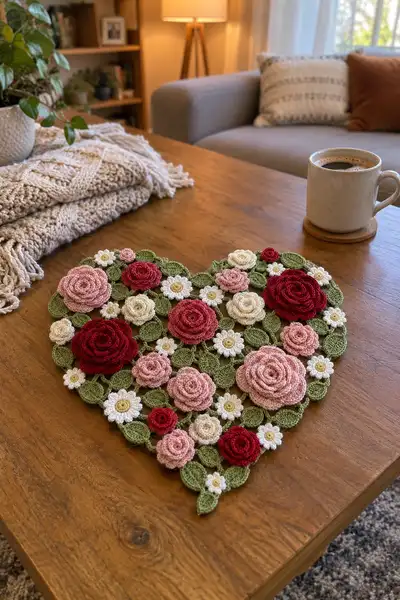
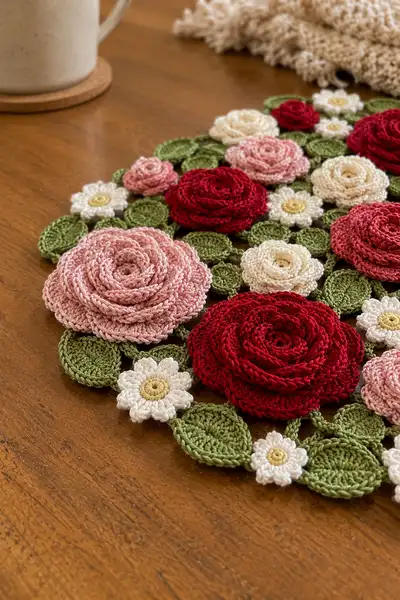
Create a romantic heart-shaped table doily made from layered crochet roses, tiny daisies and leafy connectors. This pattern produces a decorative, lacy heart mat assembled from many small motifs in soft greens, reds, pinks and creams. The finished piece sits flat on a table as a centerpiece or runner accent and showcases textured spiral roses and delicate daisies set into a mosaic of leaves.
Progress Tracker
0% Complete
— Pattern Overview & Gauge :
Info :
This doily is constructed from many small motifs: Large Rose x3, Medium Rose x5, Small Rose x10, Mini Rose x6, Daisies x12, Leaves x55-65 and Small Connector Discs x20. Final heart measures approximately 15-18 inches across depending on yarn/hook and spacing. Gauge is not critical but use recommended hook sizes to maintain crisp motif edges.
Info :
Work each motif tightly with even tension so motifs sit flat. Light blocking with steam or wet-blocking will dramatically improve join accuracy and final lay-flat shape.
— Large Rose (make 3) :
Round 1 :
mr, 6 sc in ring (6)
Round 3 :
(1 sc, inc) x6 (18)
Round 4 :
(2 sc, inc) x6 (24)
Round 5 :
(3 sc, inc) x6 (30)
Info :
These first rounds build a compact rose foundation. Keep stitches tight to avoid a floppy center. Fasten off and weave tail to the back. This center will anchor the spiral petal strip.
Round 6 :
Chain a long foundation strip on the side of the circle: attach yarn to the edge with a sl st, ch 60 (or ch 70 for larger roses) - this creates the spiral strip length for petals (this is worked as an extended strip rather than round increases)
Round 7 :
Row along the chain: 1 sc in 2nd ch from hook, 1 sc in each ch to end (59 sc) — leave remaining tail to sew to center ring
Round 8 :
Working along the strip from the opposite end, create a second row: ch1, turn, 1 sc in each st across (59 sc)
Info :
The strip method builds a long ruffle that will be spiraled around the base disc. The number of chain stitches determines fullness; 60 is recommended for large roses but you may extend for extra fullness.
Round 9 :
Petal ruffle row 1: ch3 (counts as dc), *3 dc in next st, ch1, skip 1 st* across to last 2 sts, 2 dc in last st. Fasten off leaving long tail for sewing spiral to center
Round 10 :
Petal ruffle row 2 (optional for fuller rose): join at base of strip with sl st, ch3, *4 dc in next ch, ch1, skip 1 ch* repeat across strip; fasten off leaving tail
Info :
To create the rose, start at the wider end of the strip and sew the strip in a spiral onto itself and the center disc. Use a tapestry needle and sew through the strip base and center ring with small invisible stitches; adjust tightness as you spiral to make compact center and expanding outer petals.
Round 11 :
Sewing spiral step 1: align one end of strip to center disc, using long tail sew across the base of the strip to the ring; create 4-6 secure stitches attaching the strip.
Round 12 :
Sewing spiral step 2: begin coiling the strip around the center, hold coil tightly and sew base of each coil to the previous coil and to the center disc every 6-8 stitches along the strip to keep spiral tidy.
Round 13 :
Sewing spiral step 3: continue coiling, slightly overlapping rows to create layered petals; make sure petals face outward and the spiral forms a pleasing rosette. Fasten off and weave tail to back when spiral complete.
Info :
For a dimensional look, stagger stitching so outer coils attach at points that tilt petals outward. Block each completed rose lightly with a damp cloth to set petals if needed.
Round 14 :
Optional outer scallop: with same rose color, join at outer disc edge and make 1 sc in each st around center disc edge to hide base and create a neater back (36 sc)
Round 15 :
Finish: Fasten off and weave in ends securely to the back of the rose. Repeat to make 3 large roses.
— Medium Rose (make 5) :
Round 1 :
mr, 6 sc in ring (6)
Round 3 :
(1 sc, inc) x6 (18)
Round 4 :
(2 sc, inc) x6 (24)
Info :
Medium roses use a shorter spiral strip to keep size moderate. Use ch45-50 for the ruffle base depending on desired fullness.
Round 5 :
Attach yarn to edge, ch 50, 1 sc in 2nd ch from hook and across (49 sc)
Round 6 :
ch1, turn, 1 sc in each st across (49 sc)
Round 7 :
Petal row: ch3 (counts as dc), *3 dc in next st, ch1, skip 1 st* across; fasten off leaving tail for sewing
Info :
Sew spiral with tail to center disc similarly to large rose but with tighter coiling. Medium roses need fewer attachment stitches — every 8-10 stitches along the strip is fine.
Round 8 :
Sew spiral to form rose, adjusting coil tightness to yield a medium rosette. Fasten off and weave ends to back.
Round 9 :
Optional: Row of sc around base disc to neaten (24 sc)
Round 10 :
Finish and block slightly. Make 5 medium roses.
— Small Rose (make 10) :
Round 1 :
mr, 6 sc in ring (6)
Round 3 :
ch 30, 1 sc in 2nd ch from hook and across (29 sc) - two short rows form the ruffle
Round 4 :
ch1, turn, 1 sc across (29 sc)
Round 5 :
Petal row: ch3, *2 dc in next st, ch1* across; fasten off leaving tail to sew spiral
Info :
Sew spiral around the small disc with close, tight coils for a rosette about 1-1.25 inches across. These are used as fillers between bigger roses.
Round 6 :
Sew strip to center disc, fasten off and weave in ends. Make 10 small roses.
— Mini Rose / Bud (make 6) :
Round 1 :
mr, 6 sc in ring (6)
Round 2 :
ch 18, 1 sc in 2nd ch and across (17 sc)
Round 3 :
ch1, 1 sc across (17 sc)
Round 4 :
Petal row: ch3, *2 dc in next st* across; fasten off and sew into tiny spiral for small bud
Info :
Mini buds add texture and fill small holes in the composition. Make 6-8 depending on placement preference.
— Daisy (make 12) :
Round 1 :
mr, 6 sc in ring (6)
Round 3 :
Switch to yellow for center: Info: change to pale yellow yarn now for the daisy center. Work next round in yellow.
Round 4 :
1 sc in each st (12) - fasten off yellow leaving tail for sewing to daisy petals
Round 5 :
Join white at back of center, *ch4, sl st into next st of center to form petal base* repeat 10-12 times around to create 10-12 petals; finish with sl st to base and fasten off (10-12 petals)
Info :
Each petal is made of ch-loops and sl sts. For fuller daisies chain 5 per petal and use 12 petals. We suggest 10 petals for a compact look to fit between leaves.
Round 6 :
Optional: Work 1 sc around base of each petal to secure and add definition. Fasten off and weave in ends.
— Leaf (make 55-65) :
Round 1 :
ch8, 1 sc in 2nd ch from hook, 1 hdc, 3 dc in next 2 ch, 1 hdc, 1 sc in next ch - now work down the opposite side of foundation chain mirror: 1 sc, 1 hdc, 3 dc, 1 hdc, 1 sc (total stitches approx 12-14)
Round 2 :
Edge row: ch1, turn, 2 sc in tip, continue around leaf working 1 sc in each st on edges to create sturdy leaf edge (approx 18 sc)
Round 3 :
Vein detail: FLO only, attach yarn at leaf base and work 1 sc in each st along center of leaf up to tip (approx 8 sc), fasten off
Info :
Leaves are worked flat from a short foundation chain with mirrored increases to shape. Make many leaves in green to build the background lattice for the heart. Blocking leaves flat before assembly helps them sit tidy.
Round 4 :
Optional: Add a row of picots around edge for decorative border: *1 sc, ch3, sl st into same st* repeat around as desired. Fasten off.
— Small Connector Disc (make 20) :
Round 1 :
mr, 6 sc in ring (6)
Round 3 :
1 sc in each st (12) - fasten off and weave tail for joining
Info :
These discs are used as small anchors where leaves meet or as tiny filler motifs. They keep joins tidy and add a bit of structure to the doily.
— Assembly & Heart Layout :
Info :
Before joining, layout all motifs on a large flat surface (blocking board, carpet or table) following an approximate heart shape. Use photos for reference — place 3 large roses roughly across the top half of the heart and center, surround with medium and small roses, daisies in gaps, and leaves to build the heart outline. The heart should be symmetric; adjust as needed.
Round 1 :
Start joining from the bottom point of the heart: position a leaf at the tip and join neighbor leaves/discs using slip stitch joins at leaf tips or small sewing stitches through leaf bases. Example join: hold edges of two leaf tips together, sl st through both loops to connect securely (no numerical stitch count)
Round 2 :
Work outward and upward: connect leaves in rows, inserting small connector discs between joints where three or more leaves meet. Secure discs by whip-stitching them to the back of each adjoining leaf using a tapestry needle with a short tail.
Info :
Use small sewing pins to hold motifs in place while joining. Always work joins on the back of the doily so front petals remain uninterrupted. Keep join tension even to avoid puckering.
Round 3 :
Anchor large roses to the layout: place each large rose onto its designated spot, then with yarn tail sew through rose base and several adjacent leaf bases (usually 4-6 leaves around) to secure. Use small, nearly invisible stitches around the rose base circumference. Do not pull too tight or the surrounding leaves will bunch.
Round 4 :
Sew medium and small roses similarly, sewing base to several surrounding leaves or connector discs. Daisies are sewn with a few reinforcing stitches in center only. Tidy each join on the back and weave tails across multiple motifs for security.
Info :
Assembly is iterative: place, pin, sew a few stitches, step back and assess shape, then continue. If you need to adjust spacing, loosen a join and reposition before permanently finishing stitches.
Round 5 :
Edge shaping: once all motifs are joined and heart shape is formed, add extra leaves along the outline to round the heart lobes and create the smooth heart curve. Sew these edge leaves with slip stitch joins or sewing for a flat appearance.
Round 6 :
Back reinforcement (optional): on the back of the doily, use a matching green yarn and single crochet across join seams where multiple pieces meet - work a chain along seams and sc into chain to create a thin backing strip to stabilize the piece without being visible from the front.
Info :
This backing reinforcement is useful if you plan to use the doily functionally on furniture often; it helps prevent motifs from shifting or stretching with use and washing.
— Final Border & Finishing :
Round 1 :
With leaf-green yarn, work a round of 1 sc around the entire outside edge of the heart, working into outer loops, leaf tips and spaces. Count stitches as you go to keep the border even (approx 140-180 sc depending on size).
Round 2 :
Decorative scallop row: *skip 2 sc, 5 dc in next st, skip 2 sc, sl st in next st* repeat around heart edge to produce scallops. Adjust spacing so scallops fall evenly on curves.
Info :
If scallops cluster on rounded lobes, reduce to 3-4 dc per scallop for smaller arcs. Test a few scallops before committing to the full edge to find the best proportion for your heart size.
Round 3 :
Optional picot trim: on each scallop point, *sl st, ch3, sl st into tip (picot)* to add delicate points. Fasten off and weave in all ends neatly to the back of the piece.
Round 4 :
Blocking: wet-block or steam-block the finished doily flat on a blocking board. Pin each outer leaf and petal gently to achieve a smooth heart outline. Allow to dry completely before removing pins.
Info :
Blocking will shape petals to sit properly and ensure a flat, professional finish. Use rust-proof pins and a breathable blocking surface; steam lightly over a towel if using delicate cotton that may distort with heavy wet blocking.
— Alternate Sizes & Color Notes :
Info :
To scale up, increase chain lengths for spiral strips on roses (add 10-20 chains for each size step) and make proportionally larger leaves by starting with a ch10-12 foundation. For a smaller version, reduce chain counts and motif quantities proportionally.
Info :
Color placement: place deeper reds near the heart center for visual weight and pinks/creams toward the outer lobes for a soft gradient. Daisies provide light contrast and break up dense rose clusters visually.
Your finished heart-shaped floral doily will feel like a little garden captured in yarn — full of layered roses, daisy pops, and soft green leaves. Each motif adds texture and depth that rewards the time you spent creating it. Lay it on a wooden table, shelf or dresser to brighten any room and evoke a handmade, cozy vibe. I hope this pattern brings you joy while you stitch and proud satisfaction when you block the final heart. 🌹🧶