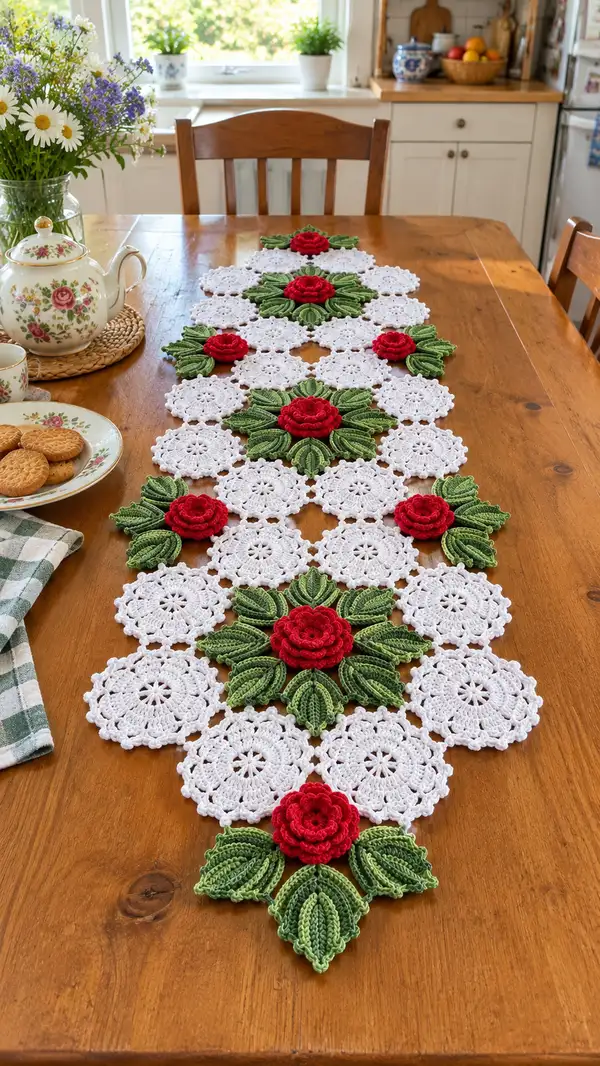
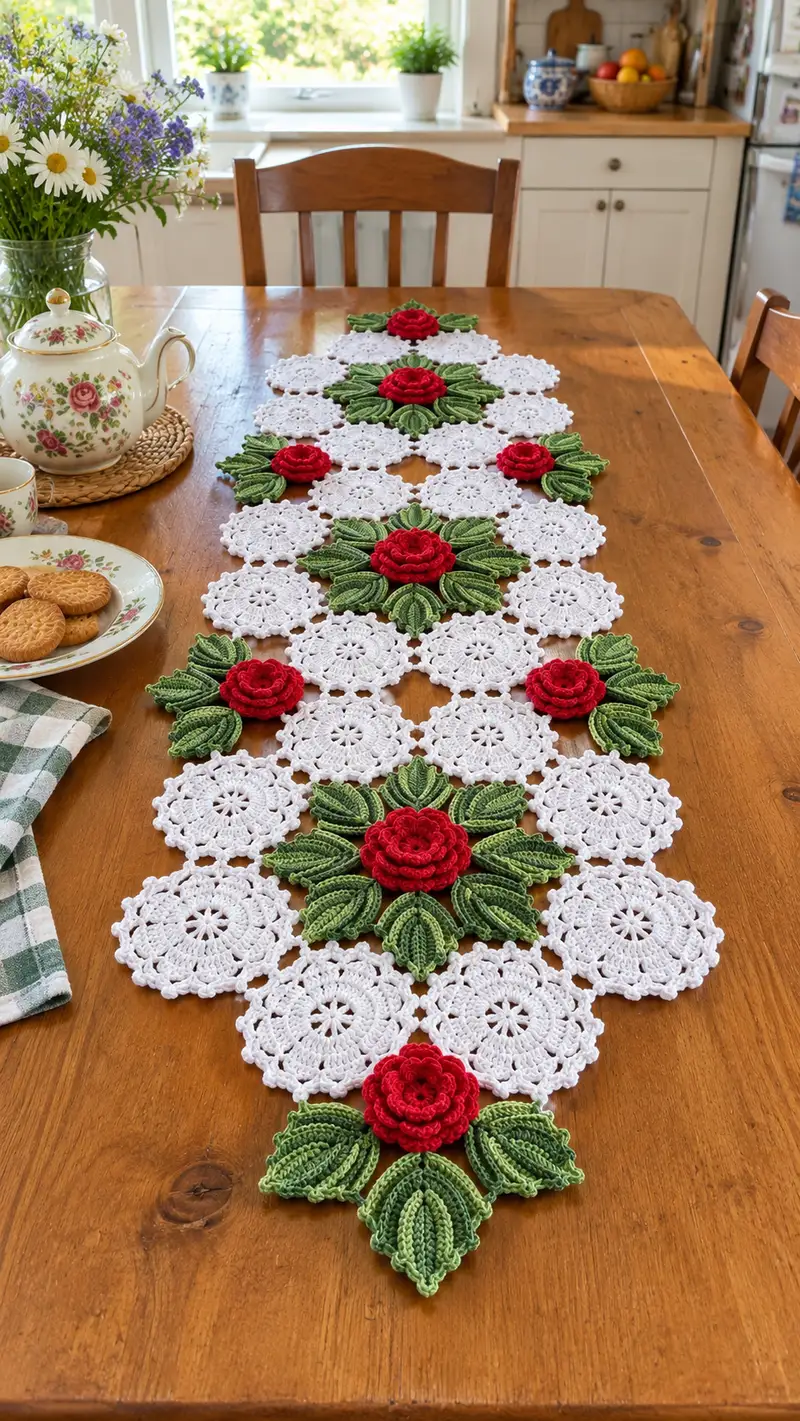
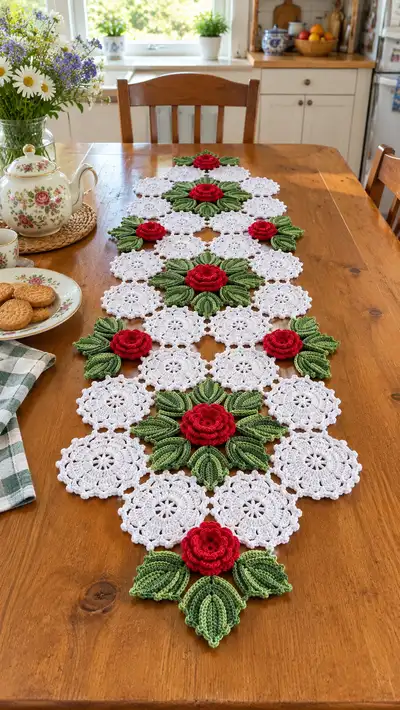
A romantic, vintage-inspired table runner made of interlocking white medallion motifs with sculpted green leaves and layered red roses. This elegant runner features delicate openwork medallions, 3D roses, and textured leaves for a stunning centerpiece. Perfect for dining tables, sideboards or special occasions — the contrasting red and green accents pop against the crisp white background to create a timeless decorative heirloom.
Progress Tracker
0% Complete
— White Medallion Motif (Make 22-28 depending on runner length) :
Round 1 :
Make a magic ring, ch 3 (counts as first dc), 15 dc into ring; join with sl st to top of ch-3 (16)
Round 2 :
Ch 1, sc in same st, *ch 3, sk 1 st, sc in next st* rep around to create 8 chain loops; join with sl st to first sc (8 loops + bases)
Info :
Ensure tension of ch-3 loops is even; these create the petals later. Tighten the magic loop before closing Round 2 for a neat center.
Round 3 :
Sl st into first ch-3 sp, ch 3 (counts as dc), 2 dc in same ch-3 sp, ch 2, 3 dc in next ch-3 sp, *ch 2, 3 dc in next ch-3 sp* rep around; join with sl st to top of ch-3 (8 clusters, 8 ch-2 sps)
Round 4 :
Ch 1, sc in same st, *ch 5, sc into center dc of next 3-dc cluster* rep around creating 8 long loops; join with sl st to first sc (8 long loops)
Info :
Round 4 long loops form the open petal spaces that will be filled later with shell work. If you prefer more open lace, ch 6 instead of ch 5 for larger motifs.
Round 5 :
Sl st into first ch-5 sp, ch 3, (2 dc, ch 2, 3 dc) in same sp (shell), *shell in next ch-5 sp* rep for total 8 shells; join (8 shells)
Round 6 :
Ch 1, sc in same st, *ch 1, sk 2 dc of shell, (3 dc, ch 1, 3 dc) in ch-2 sp of shell, ch 1, sk 2 dc* rep around; join (8 larger shells)
Round 7 :
Ch 3, dc in same st, dc in each st across shell to next ch-1 sp, ch 2, *dc across next shell to ch-1 sp, ch 2* rep around to form a ring of spaced dc; join (approximately 64 dc — see note)
Info :
Count your stitches at the end of Round 7 — your number should be consistent across motifs. If it's off, adjust by adding or removing single dc between shells to maintain symmetry.
Round 8 :
Ch 1, sc in each st around (approx 64 sc). Join with sl st (64)
Round 9 :
Ch 4 (counts as tr), tr in same st, ch 1, *2 tr in next 4th st, ch 1* rep around to create a scallop ridge; join (approx 32 pairs)
Round 10 :
Ch 1, sc in each st and ch-1 space around, placing 3 sc into each ch-1 corner to keep edges flat; join (approx 100 sc — count yours)
Info :
Work evenly and check that your motif lies flat. If it curls, add an extra sc into each scallop base; if it waves, remove an occasional sc from the scallops.
Round 11 :
Switch to a slightly smaller 3.25mm hook if desired. Ch 1, 1 sc in each st for one full round to tidy edge; join (same count)
Round 12 :
Ch 3, 2 dc in next st, ch 2, sk 2, *3 dc in next 3 sts, ch 2, sk 2* rep around creating a lacy openwork outer ring; join
Round 13 :
Ch 1, sc in each dc and ch space around, forming small picot-like points: *sc in each dc, (sc, ch 3, sl st) in ch-2 sp* rep; join
Round 14 :
Ch 1, sc in each st; fasten off leaving tail for joining later. Block flat to specified size — approximately 11-12 cm (4.5-5 in) diameter for me with DK weight and 3.5mm hook (measure your gauge).
Info :
Block each medallion carefully using steam or wet-blocking and pins to make sure edges are identical — consistency is crucial for neat joins later.
— Small Connector Motif (Make a number to use as intermediate joins) :
Round 1 :
Mr, ch 3, 11 dc into ring, join with sl st (12)
Round 2 :
Ch 1, sc in same st, *ch 3, sc in next dc* rep around to make 6 ch-3 sps; join (6)
Round 3 :
Sl st into first ch-3 sp, ch 3, 2 dc, ch 2, 3 dc in same sp, *shell in each ch-3 sp* rep for 6 shells; join (6 shells)
Round 4 :
Ch 1, sc in each dc and ch-2 spaces, finishing with neat edge. Fasten off and block to about 4.5 cm (1.75 in).
Info :
These small connectors are used where medallions meet at corners or to form the staggered pattern. Make plenty — you can always stash extras.
— Leaf (Make many in two shades; assemble as sets of 3-6 around roses) :
Round 1 :
With darker green, ch 8, sc in 2nd ch from hook, sc in next 2, hdc in next, dc in next 2, hdc in last (7 sts across); turn working along other side of foundation chain: sc in last ch, sc in next 2, hdc, dc in next 2, hdc in next, sl st to join to first st; do not join rounds — work continuous to create symmetrical leaf (approx 14 st total)
Round 2 :
Ch 1, rotate to work in round: sc in first 3 sts, *hdc in next, dc in next 2, (ch 2, 3 dc, ch 2) in central tip to form point, dc 2, hdc next, sc 3*; fasten off and leave tail for sewing. Block lightly to shape curve.
Info :
These foundation chain leaves are quick and give a natural shape. Use the lighter green to form inner ridges by working additional surface slip-stitch ridges (instructions follow).
Round 3 :
Surface ridge: with lighter green and 3.0mm hook, start at base and work a line of sl sts up the center of leaf to create vein; fasten off. Repeat with 1-2 extra surface ridges either side using FLO or working in BLO for depth.
Round 4 :
Optional edging: with dark green, sc around leaf edge placing 3 sc in tip to round; this tidies edge and gives a slight scallop.
Info :
Make leaves in two sizes: small (7 cm) and large (10 cm) by varying starting chain to ch 6 or ch 10 respectively. For the runner in photos use mostly medium-large leaves in sets of 5 around big roses.
— Sculpted Textured Leaf Variation (Make many) :
Round 1 :
Mr, ch 4 (counts as tr), 7 tr into ring, join (8 tr)
Round 2 :
Ch 1, sc in same st, *ch 3, sc in next tr* rep around (8 ch-3 sps); join
Round 3 :
In each ch-3 sp work: (sl st, hdc, dc, tr, dtr) to form a raised rib, sl st to base; repeat for all sps to give a radiating ribbed leaf. Fasten off and block. (8 ribs)
Info :
This ribbed leaf looks sculptural when worked in two colors: do the ribs in lighter green and the background sc in darker green for contrast.
Round 4 :
Optional: work an outer sc round in dark green to define shape; fasten off and weave in ends.
— Rose Center (Make X centers to build layered petals) :
Round 1 :
With red, mr, ch 1, 8 sc into ring; join (8)
Round 2 :
Ch 3, dc in same st, 2 dc in each st around; join (16)
Round 3 :
Ch 1, sc in same st, *ch 2, sk 1 dc, sc in next dc* rep around to create 8 ch-2 loops for inner petal anchors; join (8 loops)
Info :
Tighten center to sit slightly cupped. These small loops will anchor the petals worked in the next rounds.
Round 4 :
Into each ch-2 loop: sl st, ch 2, (hdc, dc, tr, dc, hdc) all in loop, sl st to base to form a petal; rep around for 8 petals; fasten off and weave end to back of center.
— Rose Petal Layer 1 (Inner Petals) :
Round 1 :
Join red to base of any petal, ch 3, (dc, ch 1, 2 dc) in base to create a small shell, ch 2, *shell in base of next petal* rep to form 8 shells; join
Round 2 :
Ch 1, sc in each st and ch-1 around, placing 3 sc in each ch-2 gap to keep petals upright; join
Round 3 :
Petal finishing: Into each shell work: sl st, hdc, dc, tr, dc, hdc, sl st to base - this creates a taller petal with curve; finish off and block slightly by shaping with fingers.
Info :
Work petals slightly loosely to let them flare and create layered depth later. Use a 3.0mm hook if you need petals to be more defined than the center.
— Rose Petal Layer 2 (Middle Layer) :
Round 1 :
Make a separate round of petals that will be sewn behind the inner petals: mr, ch 3, 12 dc into ring; join (12)
Round 2 :
Ch 1, sc into same st, *ch 2, sc into next dc* rep around to make 6 loops (6 loops)
Round 3 :
In each loop work: (sl st, hdc, dc, tr, dc, hdc, sl st) to make 6 slightly larger petals; fasten off leaving long tail for sewing.
Info :
Sew this layer behind the inner petals off-center so petals appear staggered and the rose looks full. Make sure petals overlap the inner petals slightly.
— Rose Petal Layer 3 (Outer Layer and Finishing) :
Round 1 :
Create an outer collar for the rose: ch 30 loosely, sl st to form a loose chain ring; in each ch work small shell (sc, hdc, 3 dc, hdc, sc) every 5 chains to produce 6 outer petals; finish and join round as a band.
Round 2 :
Fold the band so petals face up and sew to base of middle layer with slip-stitch or whip stitch, slightly staggered so outer petals peek between middle petals; weave ends and shape petals with fingers.
Round 3 :
Optional: use a fine needle and a thin length of red yarn to run a gathering stitch around the base of the outer band and pull up slightly to cup the outer petals for a realistic bloom.
Info :
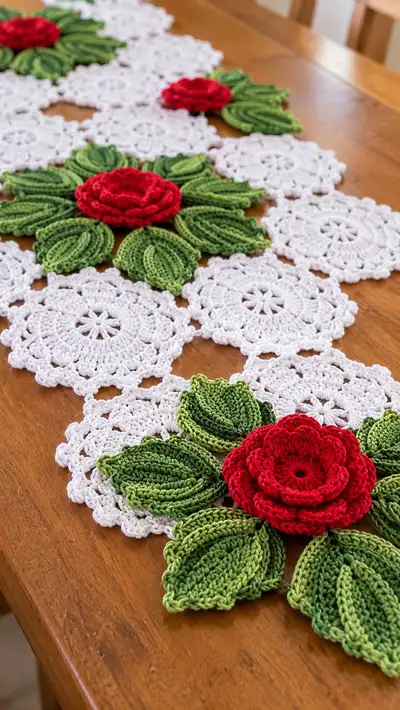
Each rose in the layout has 3 layers: inner small petals (8), middle (6), and outer collar (6-8 broad petals). The combination creates the lush, layered roses seen in the image.
— Rose Assembly (Sewing layers together) :
Round 1 :
Stack inner petal cluster on top of rose center, then middle layer behind, and finally outer collar. Use long tail and whip stitch around base, catching each layer's base securely; tie off and weave in ends.
Round 2 :
Gently shape petals with your fingers and steam lightly from a distance for a soft curve. Pin onto blocking board if you want petals permanently shaped, then let cool.
Info :
Make roses as flat or cupped as you like. A cupped rose shows more depth, while a flatter rose sits better on the runner without rising too far above the leaves.
— Leaf Clusters Around Rose (Arranging & Sewing) :
Round 1 :
Arrange 5-6 leaves around rose base: 3 larger leaves at 120-degree spacing and 2 small leaves filling gaps. Pin each leaf in place following photo guide spacing (~1.5 cm from rose base).
Round 2 :
Sew leaf bases to the back of rose using mattress stitch or whip stitch; ensure stitches are secure but hidden. Fasten off and weave ends into leaf underside.
Info :
If you want removable flowers for washing the runner, sew leaves and rose together with small safety stitches only, and attach the whole unit to the runner with a few hidden whip stitches so you can remove for laundering.
— Joining Motifs (Two Methods: Join-as-you-go or Sew-together) :
Round 1 :
Method A (Join-as-you-go): On final round of each white medallion, when arriving at a corner where another motif meets, instead of ch spacing, sl st into corresponding join st of adjacent blocked motif, then continue; make joins at 3-4 points per motif edge for a secure connection.
Round 2 :
Method B (Sewing): Block all motifs and small connectors. Arrange motifs flat on a table in desired staggered layout (photo shows 5 large rose clusters spaced evenly with medallions between). Use pins to hold and whip stitch edges together from wrong side with white yarn for invisible seam.
Info :
Join-as-you-go yields cleaner-looking joins but requires careful positioning. Sewing gives you more control and is easier for beginners. Practise joining one corner first to set spacing for the rest.
— Edge & Outer Border (Make 1 continuous border after joining) :
Round 1 :
With white yarn and 3.25mm hook, ch 1 and sc evenly around entire runner perimeter, placing 3 sc in each outer curve to keep edge flat; join (count will vary based on number of motifs)
Round 2 :
Ch 3, (2 dc, ch 3, 3 dc) in first sc to create a corner shell where large points fall, *skip 6 sc, (3 dc, ch 3, 3 dc) in next sc* rep around to make scalloped points aligning with motif geometry; join
Round 3 :
Ch 1, sc in each dc and in ch-3 spaces place (sc, ch 3, sc) to form little picot loops; this gives the pretty lacy edge seen in photos; finish off and weave ends.
Info :
If you prefer a more robust edge for frequent use, make an extra sc round before the scalloped shell round and use a slightly larger hook for the scallops for increased drape resistance.
— Decorative Topstitching & Light Stiffen (Optional) :
Round 1 :
Use a matching white fine thread and very small whip stitches in the wrong side joins to further secure seams. This prevents separation after repeated use.
Round 2 :
Optional: If you want leaves slightly firmer, mix a small amount of diluted fabric starch and lightly brush the underside of leaves only; pin to shape and let dry fully.
Info :
Test any stiffening on a scrap leaf first — too much can make the runner feel plasticky. A gentle light spray or starch will keep leaves natural but hold shape.
— Finishing & Blocking Whole Runner :
Round 1 :
Once all motifs are joined and roses/leaves are secured, wet-block the entire runner on a large blocking mat (or board). Pin each medallion so pattern is even and straight, paying special attention to outer border symmetry.
Round 2 :
Allow to dry fully — overnight is best. Remove pins and lightly press any stubborn curls with iron steam at a distance (do not press directly onto petals or leave iron touching yarn).
Info :
After blocking, re-check seams and reinforce any loose joins. A final tidy of ends and trimming stray fibres completes the runner.
— Layout Suggestions (How to place motifs, roses and leaves) :
Round 1 :
For the pictured runner layout: create three large rose clusters evenly distributed along the runner length and a small rose near each end for balance. Surround each large rose with six leaves and position them to overlap three medallions as shown in the photo.
Round 2 :
Use small connector motifs at the triangular points where three medallions meet to form the staggered honeycomb-like grid. This allows roses to sit centered on groups of medallions.
Info :
Take a photo of your layout before sewing to remember placement. This helps if you remove pieces for washing and need to re-attach them later in the same arrangement.
— Tips for Consistency and Troubleshooting :
Round 1 :
Always wash and dry a single motif to see how your yarn behaves — mercerized cotton shrinks less than untreated cotton, but blocking still evens motifs out.
Round 2 :
If your motifs are slightly different sizes, block them to exact measured diameter and add or remove a tidying sc round to match sizes before joining.
Info :
Keep a sample motif as a gauge check. Stitch counts and hook size determine final scale - if your medallion is too large, step down a hook size and rework one motif to confirm fit.
— Variations and Scaling :
Round 1 :
To lengthen the runner, add additional medallions in the central repeating sections and repeat the medallion + rose cluster sequence. To shorten, omit one medallion row and reduce roses accordingly.
Round 2 :
For table placemats, make individual medallion sets with a single rose in the center; scale down the outer border and adjust leaf count to 3-4 per rose for a compact design.
Info :
Changing yarn weight: if you go heavier, expect motifs to be larger and fabric stiffer — adjust hook and counts to maintain lace proportions and spacing for joins.
This elegant Rose Garden table runner is a delightful project that combines lace medallions with bold sculpted roses and textured leaves for a statement centerpiece. Each carefully blocked motif comes together to form a beautifully balanced runner that is both decorative and timeless. Whether you display it for a special meal or as a permanent table accent, the handcrafted roses add a romantic, vintage charm. Enjoy the meditative rhythm of motif-making and the satisfaction of assembly — and don't forget to show off your finished work! 🌹🧶