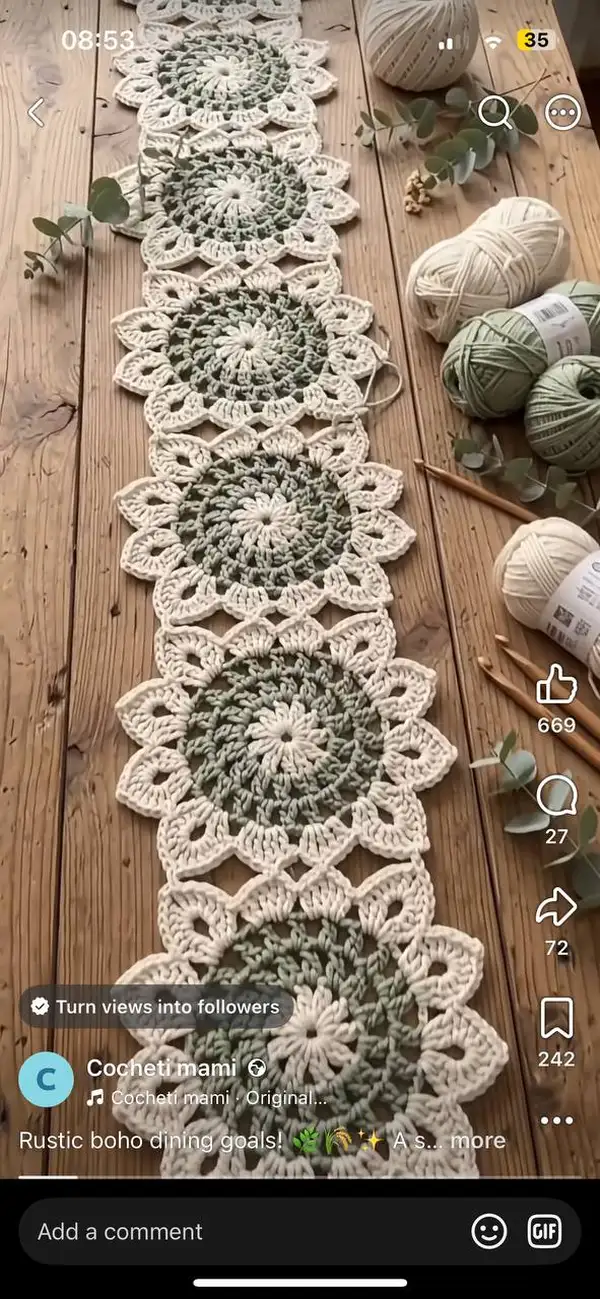
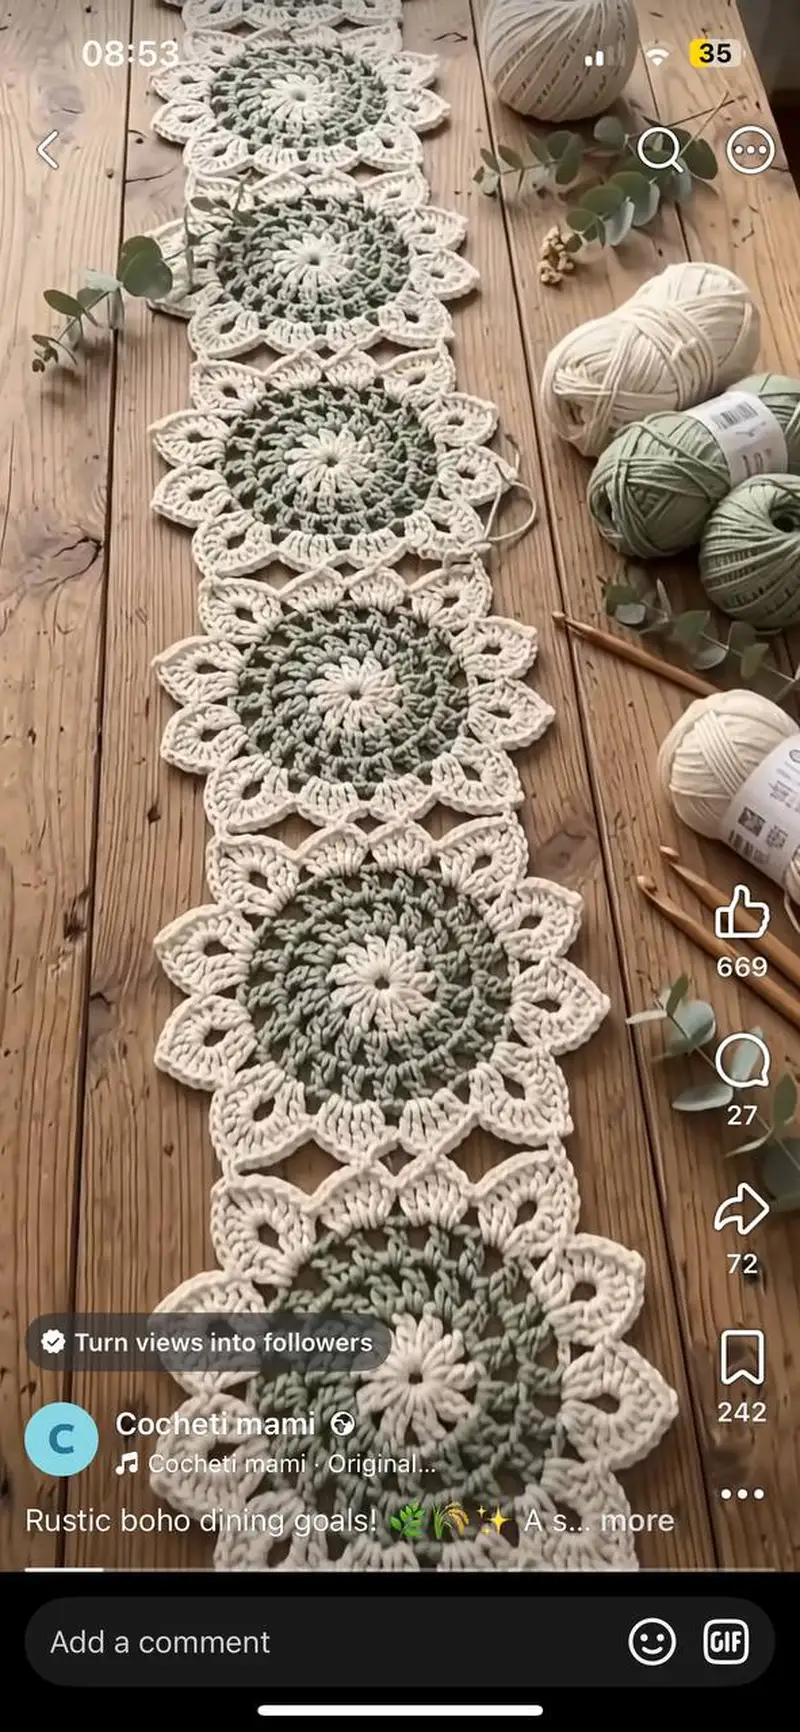
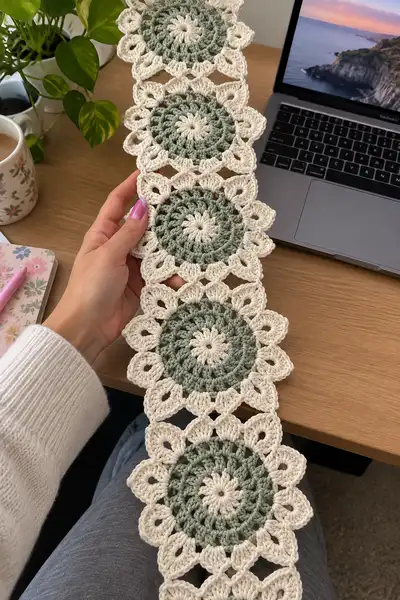
Create a relaxed, rustic boho table runner featuring linked floral medallions in soft sage green and warm cream. Each round medallion is worked in the round with textured stitches and lacy petals, then joined with a diamond-lattice join-as-you-go for a continuous runner. The finished runner has a lightweight, airy drape that lays beautifully on wooden tables, sideboards, or as a dresser scarf. This pattern includes detailed motif, join, and edging instructions so you can make a runner as long as you like.
Progress Tracker
0% Complete
— Notes & Techniques :
Info :
This pattern uses two main colors: Sage Green for central rounds and Cream for petals, connector lattice and edging. Where a color change is indicated, join color with a standing stitch or finish the last stitch of previous round with new color. Work motifs flat in continuous rounds; do not join rounds unless specified. Use stitch marker at round start; move marker each round.
Info :
Abbreviation for puff cluster (pc): Yarn over, insert hook into indicated stitch, yarn over and pull up loop (3 loops on hook); repeat yarn over, insert hook into same stitch, yarn over and pull up loop 3 times (7 loops), yarn over and pull through all loops, ch1 to close puff. Counts as 1 stitch unless otherwise noted.
— Circular Medallion (Make as many as needed) :
Round 1 :
Using Sage Green. Make a magic ring. Ch3 (counts as first dc), work 11 dc into ring. Sl st to top of ch3 to join. (12 dc)
Round 2 :
Ch3, 1 dc in same st, 2 dc in each st around. Sl st to top of ch3. (24 dc)
Round 3 :
Ch3, *1 dc in next st, 2 dc in next st*; rep from * to * around. Sl st to top of ch3. (36 dc)
Round 4 :
Ch3, *1 dc in each of next 2 sts, 2 dc in next st*; rep around. Sl st to join. (48 dc)
Round 5 :
Ch3, *1 dc in each of next 3 sts, 2 dc in next st*; rep around. Sl st to join. (60 dc)
Info :
Check diameter: after Round 5 you should have a tight but slightly domed center approx 6.5-8cm depending on yarn and hook. If your center is too small, work one additional increasing round: (1 dc in next 4, 2 dc in next) x12 to reach 72 dc.
Round 6 :
Ch2 (does not count as dc), hdc in each st around. Sl st to join. (60 hdc) Use BLO if you want a subtle ridge between the center and the textured band.
Round 7 :
Switch to Cream. Info : Join Cream with a standing dc in any stitch. Ch3 (counts as dc), *sk next st, dc in next 2 sts, sk next st, dc in next st*; rep around to create slight openwork pattern. Sl st to top of ch3. (60 sts worked across pattern zones)
Round 8 :
Ch1, sc in same st, *ch3, sk 2 sts, sc in next st*; rep around to create 20 ch3 loops. Sl st to first sc. (20 ch3 loops and 20 sc)
Info :
We will create petals worked around each ch3 loop; keep loops evenly spaced. If your count differs, adjust by varying sk sts in Round 7 so you end Round 8 with 12 or 20 loops depending on your chosen petal count. The sample uses 12 larger petals created from groups of 5 base stitches; here we used 20 smaller loops for a delicate petal. For a look more similar to the picture, you may prefer 12 larger petals — see alternate instructions below.
Alternative Info :
If you prefer 12 large petals (as shown in photos), after Round 6 change to Cream and work Round 7 as: ch3, *sk 4 sts, sc in next st*; rep around to create 12 sc placement points, then Round 8: ch1, sc in same, ch5, sc in next placement to create 12 ch5 loops. The main written instructions follow 20-loop approach for finer lace; you can substitute the 12-petal method.
Round 9 :
Petal formation. Ch3 (counts as dc), into first ch3 loop work (sc, ch1, 7 dc, ch1, sc) all into loop; sl st into next sc on base to anchor petal. *Into next ch3 loop work (sc, ch1, 7 dc, ch1, sc), sl st into next sc*; rep around. You will make 20 petals (or 12 if using the 12-petal method). Keep petals slightly loose so they puff outward. (20 petals)
Info :
When working dc groups across chain loops, keep stitches even but do not pull tightly. Gently shape each petal outward by easing the cluster with your fingers before proceeding.
Round 10 :
Ch1, sc in each petal top (work into the top dc of the 7-dc group), ch3 between petals: *sc in top of petal, ch3, sc in top of next petal*; rep around. Sl st to first sc. This creates small connecting arches between petals. (20 sc and 20 ch3)
Round 11 :
Ch3, dc in same st, *ch2, sk ch3 space, dc, hdc, dc (in same st as last sl st anchor) to create diamond base, ch2*; rep around connecting petal tops with small dc clusters. Sl st to join. (Pattern forms open diamond spaces between petals)
Info :
From this round onwards we will create the lattice connector that allows join-as-you-go to adjacent medallions. If you prefer to work all medallions first and then seam, skip join steps and finish motifs individually.
Round 12 :
Working in Cream. Ch4 (counts as tr), tr in same st, *ch3, skip to next petal top, (tr, ch2, tr) in that anchor st, ch3, sk to next petal top*; rep around to form alternating tr pairs and ch3 arches. Sl st to top of ch4. (20 tr pairs and 20 ch3 spaces)
Round 13 :
Ch1, sc in top of every tr and in each ch3 space work (ch5, sc) to form larger loops; rep around. Slip stitch to first sc. This round will create the external lacy loops used as join points for the diamond lattice. (20 sc plus 20 ch5 loops)
Info :
Count your loops. You will use specific loops for join-as-you-go when placing the next motif adjacent. Keep track of loop numbers clockwise from the top; this ensures even joining and diamond formation between motifs.
Round 14 :
Ch3, dc in same st, *dc in next sc, ch4, sk next sc, dc in next sc, (dc3tog across two tr posts to create small bridge), ch4*; rep around to form small diamond sockets. Sl st to join. (This stabilizes the scallops and prepares points for joining.)
Info :
At the end of Round 14 fasten off long tail only if you plan to sew motifs later. For join-as-you-go, keep working and do not fasten off; instructions below describe join-as-you-go on Round 15 and beyond.
Round 15 :
Optional decorative row: With Cream, ch1, sc in each st around working into every stitch and ch space to tidy up edges; sl st to first. Fasten off and weave in ends if not joining now. (Working stitch count variable depending on petals used.)
Info :
If making a single medallion as a coaster, finish here with a final round of sc and a picot edge: *sc in next 3 sts, picot (ch3 sl st to first ch)* around. For runner assembly, do not finish the outer edge — proceed to join-as-you-go below.
— Join-As-You-Go Lattice & Joining Instructions :
Info :
We will join each new medallion to the previously completed medallion(s) on Round 16 by working into corresponding ch5 loops and diamond sockets to create the open diamond lattice visible between motifs. Work your first medallion completely (Rounds 1-15) and leave it in place. Begin constructing second medallion until you reach the Round that forms outer loops (Round 13 or 14 depending on your chosen instructions) and then join into the first motif.
Round 16 :
Start second medallion as before through Round 12 in Sage Green and switch to Cream for Round 13. When you reach the ch5 loops on Round 13: For the first ch5 loop that corresponds to the adjacent motif's ch5 loop, instead of ch5, work ch2, sl st into corresponding ch5 loop of previous motif, ch2, sc into same loop on your current motif to create a secure join. Continue around, joining at every second ch5 loop to form alternating diamonds. Complete the round by sl st to first sc. (Join every 2nd loop to previous motif.)
Info :
Pin the motifs so both edges lie flat and the join points align. For accurate diamonds, join at the top and bottom loops of each diamond and leave the side loops ch3 or ch2 for the open spaces. Use slip stitches for a clean, flat join.
Round 17 :
Continue working around outer loops of the second medallion: where you joined into the adjacent motif, work an extra sc after slip stitch to secure; where no join is required, work sc as normal. After completing the round, fasten off if desired, weave in ends. Repeat medallions and join-as-you-go to create a vertical chain of motifs. (Repeat for as many medallions as you need for runner length.)
Info :
Always join motif B to motif A using the same loop positions (for example, loops 1,3,5 etc.). This keeps the diamond lattice consistent across the runner. When adding a third motif, join it to the second motif using the same method and also slip-stitch across any available ch2 spaces back into motif A to keep lattice stable (this forms triangular stability points).
Round 18 :
After several motifs are joined in a row, you will add lateral stabilization rows to transform chain into a neat linear runner. Working along one long side of the runner, pick up the outer most ch3 loops and work a row of sc and ch2 loops to create a narrow band. Ch1, sc into each ch3 loop along the edge, ch2 between each sc to create small arches; sl st to join end. Repeat on opposite side. This produces a symmetrical border and evens motif spacing.
Info :
When you reach the junctions where three medallions meet (top/bottom motifs linked on both sides), work extra sc and a small picot to prevent flaring and to keep the runner flat.
— Decorative Diamond Panel (worked as you join to make the boho lattice) :
Round 19 :
With Cream, working into the ch2/ch3 spaces formed between motifs, ch3 (counts as dc), dc in same sp, *ch4, sk next join, (dc3 in next anchor), ch4, sk next join*; rep across the seam line connecting two motifs to form a diamond-length band between medallions. Sl st to join and fasten off or continue to next seam. This row creates the open diamond you see between medallions in the photos.
Round 20 :
Working back across diamond band, ch1, sc in each dc and sc in each ch4 space work (ch3, sc) to create internal small loops within every diamond; this adds stability and a decorative eyelet. Sl st to join. (Count varies with runner layout.)
Info :
Pin diamonds flat and measure across periodic intervals to ensure diamonds are square and even. Adjust tension or add an extra sc in larger spaces if diamonds are too open.
Round 21 :
Repeat the diamond panel on every adjacent seam between motifs. If you are placing motifs side-by-side creating two columns, add the same panels to both seams and cross-join at intersection points with small sc clusters (sc, ch1, sc into both motif loops) to lock them together.
Info :
For a single-column runner (motifs in a straight line), you will have diamonds only between the long edges of each medallion; for a wider runner with 2+ columns add cross-joins to all internal intersections to maintain structure.
— Outer Edging & Scallops :
Round 22 :
After all motifs are joined and diamond panels are working consistently, create a unifying outer edge. With Cream, attach at any outermost sc along the runner edge. Ch1, sc around the entire outer perimeter working 1 sc in each available st and 3 sc in each large loop or ch5 space to even corners and curves; sl st to join. This evens the edge and prepares for scallops. (Stitch count varies with runner length.)
Info :
Place 3 sc in curved petal crowns to reduce wavy edges. Use more sc in particularly open spaces to draw the edge in slightly so scallops look even.
Round 23 :
Scallop round: *ch3, 5 dc in next sc, ch3, sl st in same sc, sk next 3 sts, sl st in next*; rep around entire runner to create defined scallop points. Where motifs meet diamonds, work scallops closely to maintain a continuous silhouette. Fasten off and weave ends.
Info :
Adjust number of dc in scallop depending on yarn thickness: for thicker cotton you may prefer 3-4 dc per scallop; for finer cotton use 6 dc. Keep scallops proportional to motifs.
Round 24 :
Decorative picot finish (optional): Join Cream in the back loop of each scallop base and work *sc, ch3, sl st in 3rd ch (picot), sc in next sc; rep* to embellish scallops with small points. This gives a crisp finish as seen in rustic boho styles.
Info :
Use the picot round only if you want a slightly firmer outer edge. Block after this round for best shaping.
— Optional Central Raised Row for Texture (if you want more height) :
Round 25 :
Before completing join steps, you can add 1-2 rounds of front-post dc (FPdc) around the center zone of each medallion to create raised ridges. With Sage Green, work FPdc around corresponding dc of Round 5, creating a textured sunburst. Ch3, FPdc in next dc, *FPdc in next 4 dcs*; rep as needed. Sl st to join. (Count as many FPdc as original dc count.)
Info :
Use FPdc on either or both sides of the center to create more organic, handcrafted depth. If you add FPdc, make sure petals and outer rounds still align and adjust join positions by one stitch if necessary.
— Joining Many Motifs: Layout & Repeats :
Round 26 :
Make a sample strip of 3 motifs and join-as-you-go so you can measure how many motifs you need for desired runner length. Medallion diameter in sample (with worsted cotton and 4.0mm hook) is approx 12-14 cm including outer petals. Runner pictured uses 8-9 motifs for a dining table runner; adjust to fit your table.
Info :
To calculate number of motifs: measure your table length in cm and divide by diametric width of a single motif including connecting diamonds (approx 14cm in sample). Add 1 motif for overhang or adjust to center your runner on the table.
Round 27 :
When joining a third or fourth motif, alternate which ch5 loops you join to maintain offset diamonds. Every new motif will be joined to the previous motif along its right-side loops; if placing motifs in multiple columns you will also join to the motif above and sometimes to the motif above-left to lock the grid.
Info :
For long runners you may prefer to create motifs individually and seam in sections to avoid working around an increasingly large piece. Join these sections later with the same diamond panel instructions or with a simple sc seam.
— Blocking & Finishing :
Round 28 :
Block each medallion lightly to flatten petals and diamonds. Pin petals to desired shape on a blocking mat and mist with water. Allow to dry completely before final joining or edging. This ensures uniform petal and diamond size across the runner.
Info :
If you want crisper scallops, use a spray starch suitable for cotton after blocking and press gently. Avoid heavy steam blocks as cotton will sag if overstretched.
Round 29 :
Weave in all tails using tapestry needle. When weaving into motifs, follow existing stitch lines and catch multiple strands so ends are secure. Trim excess yarn after weaving in at least 4cm into the work for durability.
Round 30 :
Final inspection: pin runner flat and check the diamonds and scallops for evenness. Add extra sc or a small slip stitch at loose junctions to tidy the silhouette. Give one last light steam if necessary (avoid saturating cotton). Your rustic boho table runner is ready to style and enjoy.
Info :
Storage tip: fold gently along motif lines to preserve scallop shape. For heavy use, hand wash with mild detergent and re-block before reusing.
This rustic boho table runner pattern turns simple medallions into an elegant, handcrafted statement piece perfect for everyday use or special dinners. The linked floral circles and open diamond lattice create a delicate, organic look that flatters natural wood surfaces and vintage settings. Whether you make a short dresser scarf or a long dining table runner, each medallion snaps together with satisfying precision — and the finishing scallops add a lovely handmade flourish. Enjoy creating and styling your new favorite tabletop accent! 🧶🌿✨