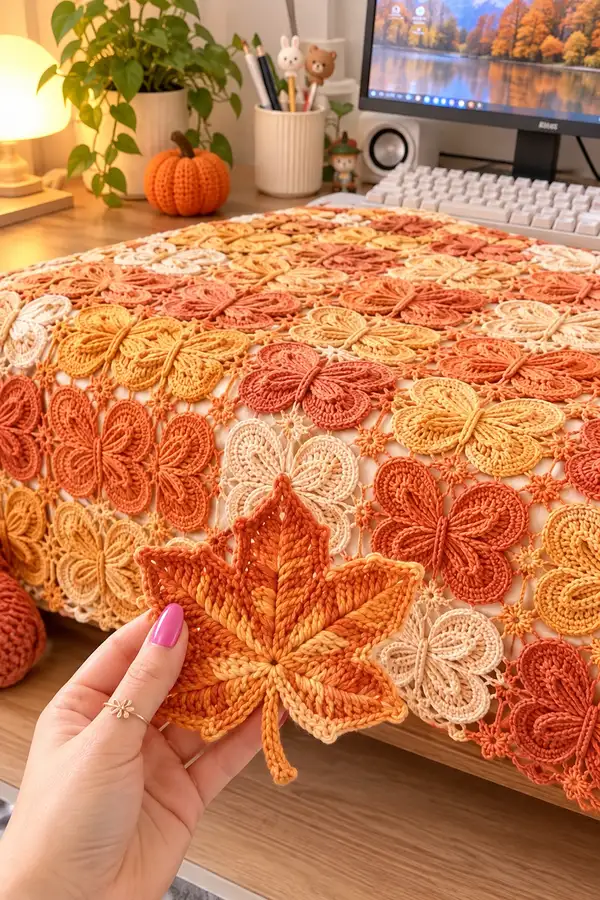
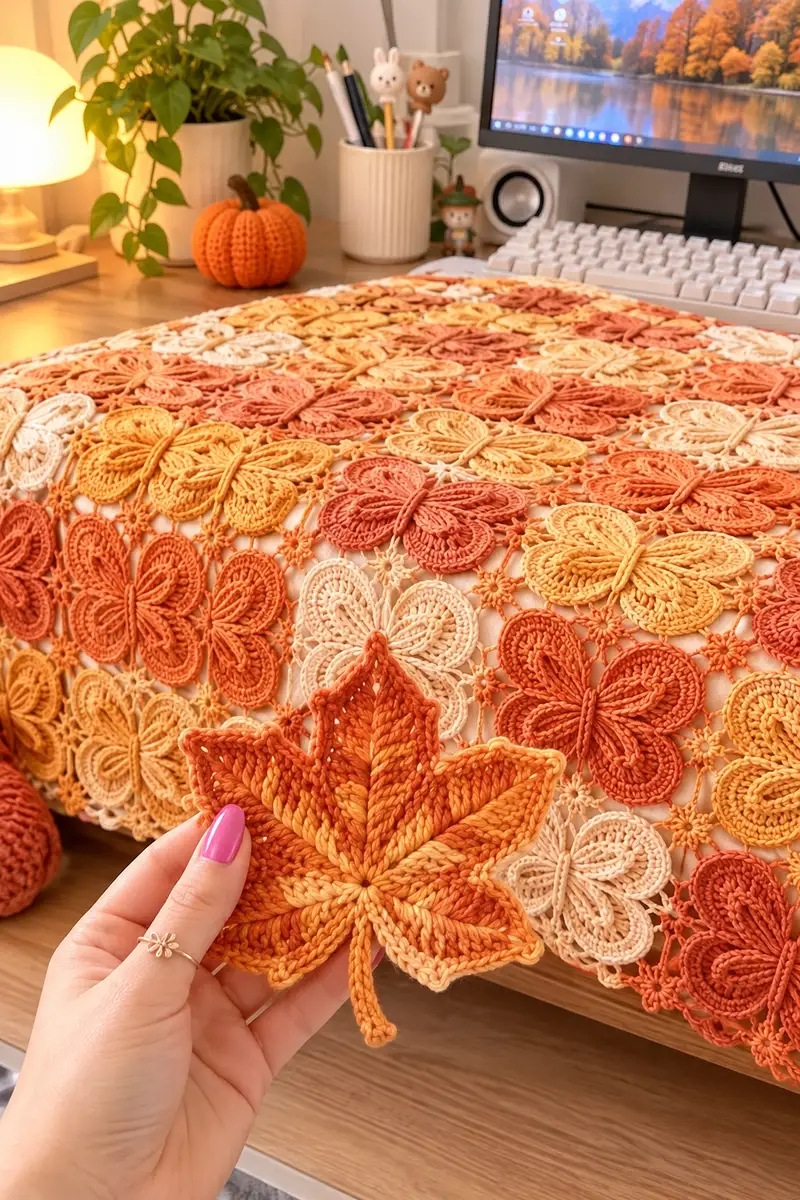
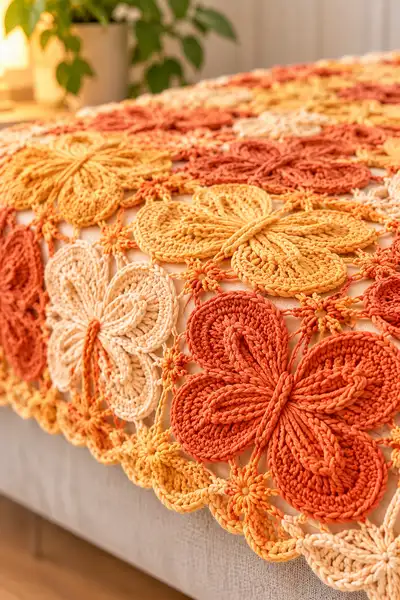
— Butterfly Motif (Make many) :
Round 1 :
With color A (Rust). Make a magic ring. Ch1, 6 sc in magic ring (6)
Round 2 :
2 sc in each st around (12)
Round 3 :
(1 sc, inc) x6 (18)
Round 4 :
(2 sc, inc) x6 (24)
Round 5 :
(3 sc, inc) x6 (30)
Info :
These first rounds create a small solid disc as the butterfly body base. Keep stitches snug to provide a stable center for the lacy wings.
Round 6 :
Ch2 (counts as 1 dc), *sk 1, (dc, ch2, dc) in next st (creates a chain space for wing lobes); rep from * around 10 times finishing with sl st to top of first ch2. You should have 10 small chain-spaces around the center (20dc total including ch2 starts).
Round 7 :
Work into each chain-space to form petal foundations: Sl st into chain-space, ch1, 8 sc in ch-sp, sl st into next st between spaces. Repeat into each ch-sp (10 petals formed; total 80 sc across petals)
Info :
Petals are worked as short, dense arcs that will be split into four wings later. Keep petals uniform; use stitch markers on the first st of each petal while working round 7 if helpful.
Round 8 :
We will build wing lobes. Join yarn at the top of a petal. For first petal: ch3 (counts as dc), 2 dc in same petal foundation, 3 tr in next 3 sts of petal, 2 dc in last petal st, ch1 and sl st to center base (counts as joined lobe). Repeat to make 10 lobes in sequence. This establishes texture to shape into wings.
Round 9 :
Switch to color B (Pumpkin) for a contrast wing row. Info: Change color with last pull-through of previous sl st. Ch2, in same st 2 hdc, *skip 1 st, (3 hdc) in next st, skip 1, sl st around curve to next petal top; rep from * across (approx 40 hdc total).
Round 10 :
Surface ribs: Working from RS, attach same color and ch1, in each lobe work 5 elongated front post treble stitches (FPtr) around the post of the central stitches of each lobe to create raised wing veins. After each group of 5 FPtr, sl st into next joining st. Repeat for all 10 lobes (50 FPtr total)
Info :
To make elongated front post trebles: YO twice, insert hook from front to back around post, YO, pull up a loop to full height of row, YO and complete treble. Keep tension consistent; these ribs form the signature raised wing texture.
Round 11 :
Ch1, sc evenly around each lobe edge working 18 sc around each lobe to shape the wing tips (total 180 sc). Work 3 sc in the small valley between adjacent lobes to anchor lace (approx calculation includes valleys).
Round 12 :
Make wing arches: Ch4 (counts as tr+ch1), *sk 9 sc along lobe edge, (tr, ch1, tr) in next st (creates decorative arch), sk 9 sc, sl st into valley anchor; rep across 5 major arches per side (approx 10 arches total). This creates the rounded outer wing curve.
Round 13 :
Switch to color C (Golden Yellow). Info: Change to color C now to highlight outer wing edge. Ch1, 1 sc into each st and chain space around the entire motif to define edge (approx 220 sc). Fasten off color C and weave ends.
Round 14 :
Return to color A (Rust). Ch10, fold into a small cord and sl st back along its length to create the butterfly 'body cord', fasten off leaving long tail for sewing/anchoring. This cord will be laid on top of the center to simulate the butterfly thorax.
Info :
Embellish center: use yarn tail to couch the body cord across the center, securing with small stitches underneath the motif center; this gives the raised central body effect seen in photos.
Round 15 :
Edge star points for join: With color A, join at one outer arch and ch5, sl st into arch top, ch5, sl st into next valley; repeat evenly around to create 10 small chain loops around outer edge. These loops act as join points for connector stars when joining motifs. (Approx 10 loops)
Round 16 :
Finish: Fasten off leaving long tail for blocking and sewing. Block motif to flatten and shape wings. Info: Pin wings to a lightly damp blocking mat to achieve the rounded shape. Air dry thoroughly.
— Butterfly Motif Notes :
Info :
Each butterfly motif is built from a compact center then expanded with lobes and ribs to give the raised butterfly wings. The numerical stitch totals in the outer rounds are approximate—consistent petal and arch counts matter more than absolute numbers. Aim to have equal petals/lobes on all motifs so that joins line up neatly.
— Maple Leaf Motif (Alternate motif) :
Round 1 :
With color D (Cream) or a gradient yarn for variegation: ch6, join with sl st to form ring. Ch1, 8 sc into ring (8)
Round 2 :
Inc into each st around (16)
Round 3 :
(1 sc, inc) x8 (24)
Info :
Leaf motif diverges from round symmetry soon—we will form seven lobes to simulate a maple leaf shape. Keep counts even to make lobes identical.
Round 4 :
Ch2, (hdc, dc, tr, dtr) into first st to make a tall point, sl st to next st; rep for 7 leaf points around (7 tall points). This forms the raised veins of the leaf.
Round 5 :
Ch1, work 10 sc around each tall point to bulk up each lobe edge, sl st to base between points. (Approx 70 sc across lobes)
Round 6 :
Ch4, *sk 5 sc, (tr, ch2, tr) in next sc, sk 5 sc, sl st into valley between lobes; rep around to create open chains between lobes forming natural valleys (approx 7 arches)
Round 7 :
Switch to color A or an accent. Sl st into each arch top, ch6, sl st back into same top to create small decorative picot cluster; repeat at each arch top (7 clusters)
Round 8 :
Edge round: sc evenly around the leaf shape, working extra sc in valleys to keep the motif flat (approx 120 sc). Add small loop points at 7 symmetrical places for join-as-you-go connectors (make ch4 loops every valley).
Round 9 :
Fasten off and block leaf motif to shape pointed lobes. Info: Use pins and steam-block (if cotton) to create crisp leaf points.
— Small Star Connector Motif (Make many) :
Round 1 :
With a contrast or matching color, ch6, sl st to form loop. Ch1, work 12 sc into loop (12)
Round 2 :
Ch5, *sl st into next sc, ch5; rep around creating 12 chain loops. Join with sl st. (12 loops)
Round 3 :
Into each chain loop: sl st, ch3, (3 dc, ch3, 3 dc) into same loop, sl st into next sc to anchor. This makes 12 tiny star petals (use these as micro-join units)
Info :
Star connectors are used in the spaces between butterflies and leaves to create the lacy grid. You will make one star connector for each three-way meeting point of four motifs or for edge points—see joining section for exact placement counts.
Round 4 :
Fasten off leaving a long tail to sew in place when joining motifs as-you-go.
— Joining Motifs (Join-As-You-Go Method) :
Info :
We use a join-as-you-go (JAYG) technique with the small star connector rounds attached at predetermined loop points on each motif. For each motif, identify four outer loop points (made in butterfly Round 15 or leaf Round 8) that line up with neighboring motifs. When working the final outer edge round of a new motif, slip stitch into corresponding loop of already-blocked adjacent motif instead of making a ch4 loop. This creates the small star connectors directly while forming the edge.
Joining Step 1 :
Work a new motif through to its outer edge round. Info: When you get to the first join point, insert hook into your motif's outer loop, yarn over and pull through, then insert hook into the neighbor motif's corresponding loop, yarn over and pull through both loops, ch4, sl st back into your motif to complete one connector. Continue around joining at each connecting loop.
Joining Step 2 :
At triple meetings where 3 or 4 motifs meet, secure all loops by making a small star connector: sl st in three/four loops sequentially, ch4 and work a small shell (3 dc, ch3, 3 dc) into the ch4 to create the star motif. Fasten off and weave ends through the connector for stability.
Info :
As you join rows of motifs, check alignment by laying out motifs in the final grid before permanently joining. Slight tension changes when joining can distort a row so keep slack minimal but avoid pulling motifs out of shape.
— Joining Round-by-Round Example (for a single butterfly motif joining to four neighbors) :
Round J1 :
Work sc around outer edge until you reach the first prepared loop. Sl st into that loop, ch4, sl st into neighbor's loop, ch1, sl st back into your motif and continue sc along edge. Repeat at each of the four join points (result: your motif is now physically attached to neighbors at four points).
Round J2 :
Reinforce join points by working 3 sc in the small ch spaces created by J1 and sl st into neighbor motif chain if necessary. This closes any small gaps at join intersections and produces small decorative picots visible on the surface.
Info :
Keep each join identical: if you tie the new motif tighter on one side, the grid will bias. Work slowly and block often.
— Assembly Layout :
Info :
Decide final blanket layout before joining. Example layout for throw: 7 motifs wide x 9 motifs long (63 butterfly motifs) with 6-9 leaf motifs scattered as accents. Adjust as you like. Lay motifs RS up when joining for consistent perspective.
— Edge Finishing & Scalloped Border :
Round E1 :
After all motifs are joined and blocked, work one round of sc evenly around the outside edge to stabilize the blanket edge. Work 3 sc into every valley between outer motif wings to keep edge flat. This establishes a round count for the scalloped edge (approx 700-900 sc depending on blanket size).
Info :
We recommend using a single color for the outer round to create a frame—use either the dominant rust or the golden accent for contrast.
Round E2 :
Scallop foundation: *ch3, (2 dc, ch2, 2 dc) into same st, sk 4 sc, sl st into next sc; rep across edge to create even scallops. Adjust sk count to distribute scallops evenly. Typical blanket will have 50-70 scallops depending on size.
Round E3 :
Decorative picots: In each scallop: sl st to center ch2, ch3, 3 dc around center, ch3, sl st back at base. This deepens scallop and echoes motif arches. Fasten off and weave ends securely.
— Optional Surface Embroidery & Finishing Touches :
Info :
If you want more depth, couch a thin cord of contrasting yarn down the central body of each butterfly and tack ends beneath motif centers. You can also add small French knot style raised stars in the small spaces using embroidery yarn for sparkle.
— Cutting, Blocking & Care :
Info :
Block each motif before joining so every wing is identical. After joining, wash blanket gently and reshape while damp—cotton will relax and the lace will open. Air dry flat. For cleaning, gentle machine wash cold in a mesh bag is usually safe for cotton blends but line dry to retain shape. Avoid bleach; press lightly with steam if needed to flatten scallops.
— Pattern Summary & Total Rounds Count :
Info :
This pattern contains approximately 130+ working rounds across motif construction, connectors and edging when producing a throw of moderate size (63 motifs). Butterfly motifs use about 16 rounds of construction plus blocking and join rounds. Leaf motifs use about 9 rounds. Connector stars add 3-4 rounds each. Border assembly uses 3-4 rounds. Exact totals vary by layout and personalized decorative rounds.
Assembly Instructions
- Lay out all blocked motifs RS up in final configuration on a large blocking board or clean floor, leaving spacing consistent and checking orientation so butterflies face the same direction.
- Work join-as-you-go: pick a corner motif as your starting point. Attach a new motif to already-placed motif(s) using the described joining rounds, always joining at marked outer loop points for consistent connectors.
- Where four motifs meet at a single point, make a small star connector by crocheting into each motif's loop sequentially and finishing with a small shell (3 dc, ch3, 3 dc) to secure the intersection.
- Sew in the central body cord for each butterfly using the long tail left from Round 14. Couch it along the motif center and tack at 4-5 points underneath with small stitches to hide ends.
- After all motifs are joined, work the stabilization Sc round (E1) all around to even out the edge, then work the scalloped edge rounds (E2 and E3) to finish. Make sure scallops are evenly spaced by adjusting skipped stitches.
- Weave in all tails by threading them through a yarn needle and running them through several adjacent stitches on the WS, trimming close. Block entire blanket flat to shape scallops and wings after final weaving.
Important Notes
- 💡Use stitch markers to mark the first stitch of each round and to mark the four primary join loops on each motif to avoid misalignment when joining.
- 💡Block each motif before joining to ensure consistent shape; unblocked motifs will not line up properly and will produce a wavy finished blanket.
- 💡Stuffing is not required for motifs, but ensure surface ribs and body cord are slack enough to be couched without pulling the motif out of shape.
- 💡Maintain consistent tension and check motif counts frequently; a single mis-sized motif can skew several rows of joins.
- 💡Work joins with the same crochet hook you used for motifs to keep tension consistent across join points.
- 💡When changing colors, perform the color join in the final yarn-over of the previous stitch to ensure a clean transition and minimal ends to weave.
- 💡Keep spare yarn and extra connector stars on hand; you may need additional connectors for unexpected gaps or decorative additions.
- 💡For gifting, secure all ends and consider adding a small care tag with laundering instructions to protect the cotton fibers.
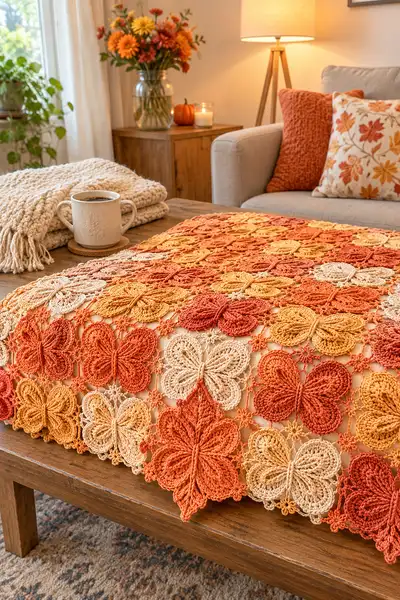
This Rustin Gold Butterflies Throw is a beautiful blend of texture and lacy openness—perfect for autumn decor. Each butterfly motif is like a tiny sculpted leaf, and together they create a blanket that is both cozy and decorative. I hope making it fills your home with warmth and color 🍂🧶. Enjoy the slow, relaxing rhythm of motifs and the satisfying moment when the whole throw comes together. Happy stitching and share a photo when you're done! ✨
What is the finished size of this throw?
Using the suggested yarn and hook a 7x9 motif layout produces a throw approximately 140cm x 180cm (55in x 71in). Final size varies by blocking and motif count; add or subtract motifs to customize size.
Can I use a different yarn weight for this pattern?
Yes—switching yarn weights will change motif size. Use a hook 1-2 sizes smaller than the yarn recommendation for tight lace and test one motif to calculate how many motifs you need for your desired dimensions.
Do I need to block every motif?
Blocking each motif is strongly recommended; it flattens wing arches and aligns edges so join-as-you-go works properly and the final blanket lies flat.
Can I join motifs with a different method?
Yes, you can sew motifs together with a yarn needle or work continuous join rounds. However, join-as-you-go produces the lace star connectors and looks the most like the pictured blanket.
How much yarn will I need?
Approximately 500-700g total worsted weight cotton depending on throw size. The pattern gives a color breakdown: rust 180-220g, pumpkin 120-150g, gold 100-140g, cream 80-100g.
Can I machine wash the finished blanket?
Most cotton blends tolerate gentle machine washes, but reshape and air dry flat to protect lace. Check yarn label instructions; gentle or hand wash is safest.
What if my motif has the wrong stitch count?
Unravel to the last correct round. Trying to force the motif to fit usually creates distortion. Use stitch markers and recount frequently.
Can I adapt these motifs into other projects?
Absolutely—these butterfly and leaf motifs make great cushion covers, table runners or wall hangings. Scale by changing yarn/hook or by adjusting motif counts.
Stay in the Loop!
Get notified when we release new free crochet patterns and join our crafting community!