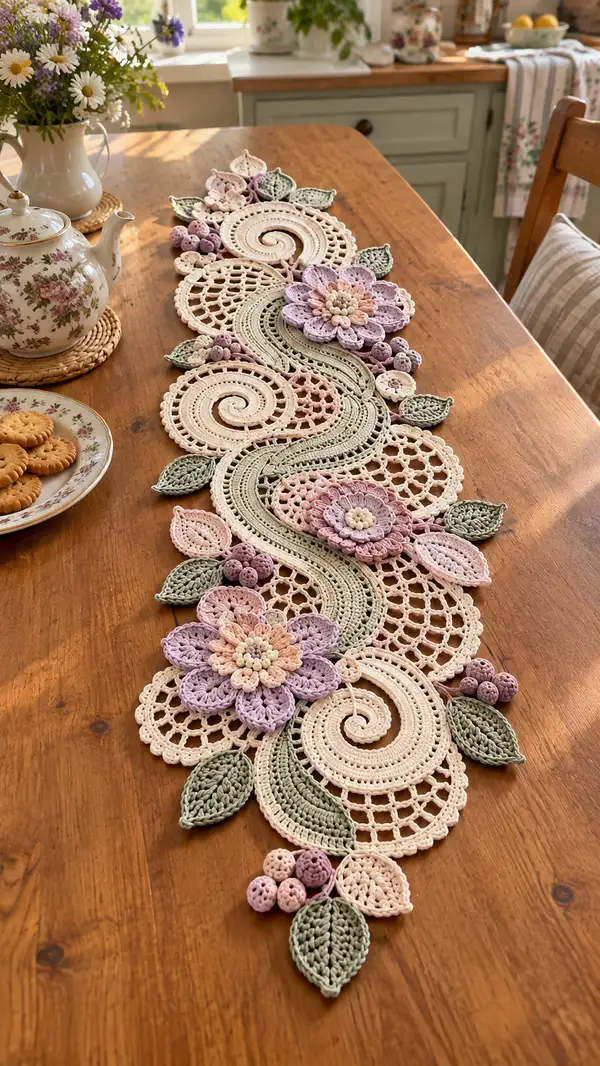
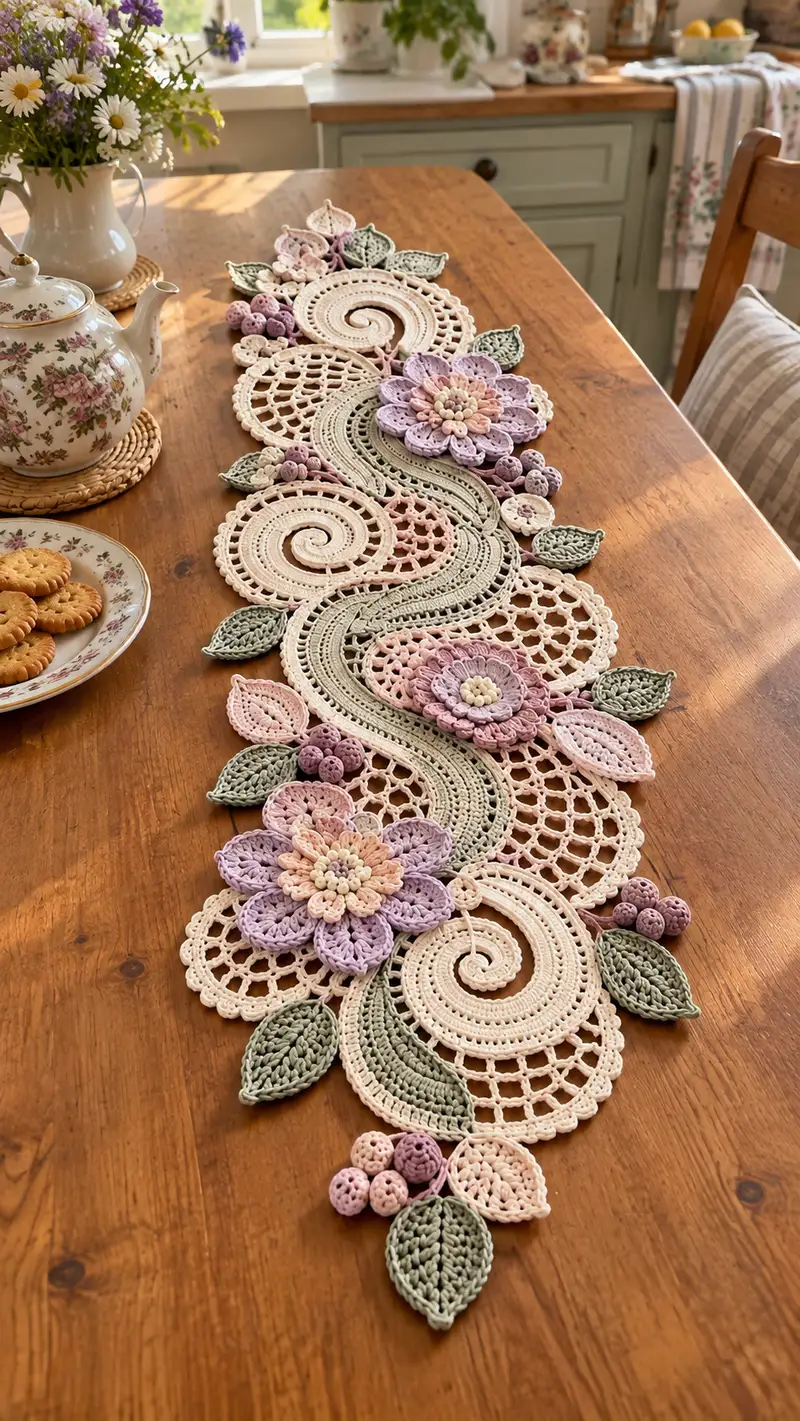
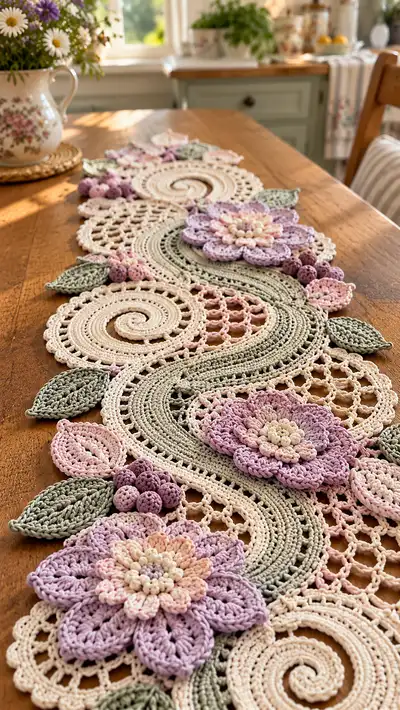
Create a romantic vintage-inspired floral lace table runner decorated with spirals, openwork doilies, layered flowers, leaves and tiny berry clusters. This pattern recreates the airy lacy motifs and flowing S-curve joinery seen in the photo — perfect for a tea table or dresser. Uses soft pastel cottons and textured stitches for a dimensional, heirloom finish. Detailed motif-by-motif instructions and assembly tips included.
Progress Tracker
0% Complete
— Spiral Motif (make 6) :
Round 1 :
6 sc in magic ring (6)
Round 3 :
(1 sc, 1 inc) x 6 (18)
Round 4 :
(2 sc, 1 inc) x 6 (24)
Round 5 :
(3 sc, 1 inc) x 6 (30)
Info :
Use cream yarn for main spiral body. Work with a slightly looser tension to allow the spiral to lie flat in later shaping.
Round 6 :
(4 sc, 1 inc) x 6 (36)
Round 7 :
(5 sc, 1 inc) x 6 (42)
Round 8 :
(6 sc, 1 inc) x 6 (48)
Round 9 :
1 sc in each st (48)
Round 10 :
1 sc in each st BLO to create an inner ridge (48)
Info :
To form a spiral arm, we will now extend the motif outward with increasing rows that bias the work; ensure to place your hook through the back loop in the ridge rounds as noted.
Round 11 :
(7 sc, 1 inc) x 6 (54)
Round 12 :
(8 sc, 1 inc) x 6 (60)
Round 13 :
1 sc in each st (60)
Round 14 :
1 sc in each st BLO (60)
Round 15 :
To create the spiral tail: ch 2, 1 hdc in next 2 sts, 1 sc in next 3 sts, 1 sc in next 2 sts, dec over next 2 sts, 1 sc in next 3 sts (work across one side only) — this shapes the beginning of the spiral tail; do not close into a round; turn work to continue in rows along the curve
Info :
This spiral tail is worked as a narrow flange in rows attached to the round body; the curvature is set by placing extra sc on the inner turn and fewer on the outer edge. Pin to blocking mat in a spiral while wet to set the shape.
Round 16 :
Row-style: ch 1, 1 sc in each st across the tail flap (approx 15 sc) turn. Repeat the row-style for 4 rows to lengthen tail (15)
Round 17 :
Dec at inner edge every other row to create curvature: Row1 ch1 dec, 1 sc x10, dec end (13)
Round 18 :
Row2 ch1 1 sc in each st (13)
Round 19 :
Row3 ch1 dec, 1 sc x7, dec (9)
Round 20 :
Row4 ch1 1 sc in each st (9)
Info :
Fasten off tail when desired tightness and shape achieved. Leave long tail for sewing. Block spiral motif flat to emphasize the circular center with a gentle raised roll along the tail.
— Lattice Doily Disc (make 6) :
Round 1 :
6 sc in magic ring (6)
Round 3 :
(1 sc, 1 inc) x 6 (18)
Round 4 :
(2 sc, 1 inc) x 6 (24)
Round 5 :
(3 sc, 1 inc) x 6 (30)
Info :
Change to blush pink for alternating discs if making multi-color. The open lattice will be formed via chain loops; keep tension balanced to avoid oversize holes.
Round 6 :
1 sc in each st (30)
Round 7 :
*ch 5, skip 2 sts, sl st in next st* repeat around (10 ch-5 loops)
Round 8 :
Into each ch-5 space: (sc, ch3, 3 dc, ch3, sc) to form a decorative loop arch (10)
Round 9 :
Between arches work 1 sc; in arches work 3 dc separated by ch3 — this forms an early lattice structure (approx 60 sts overall)
Round 10 :
Begin netting: *ch4, skip 2 ch, sl st in third loop* repeat around to create grid (40 ch-4 loops)
Round 11 :
Work into each ch-4 loop: 1 sc, ch3, 1 sc (creates net nodes) (40)
Info :
Adjust the number of chains in the mesh to match your desired openness. When blocked the net will open and create the airy look seen in the photo.
Round 12 :
Edge round: 1 sc in each open space and dc clusters to fill shape, finishing with picot scallop - *(3 sc, ch2, sl st in 2nd ch from hook)* around for delicate edging
Round 13 :
Fasten off and weave ends. Block disc flat with pins to open net evenly.
— S-Curve Connector Band (make 1 long piece) :
Info :
This central S-shaped band is worked flat in increasing rows and joined as you go into adjacent spiral and disc motifs. Use dusty sage yarn for the band. Work on a long gauge and check curvature frequently against motifs to match photo.
Round 1 :
ch 36, join with sl st to form a long loop, do not twist (36)
Round 2 :
ch1, 1 sc in each st around (36)
Round 3 :
ch1, 1 sc in each st BLO (36) — creates a firm ridge that helps define the edge of the S
Round 4 :
ch1, (4 sc, inc) x 6 around (42)
Info :
To create the S curve, we will selectively increase on one side of the loop and keep the opposite side even. Use stitch markers to mark the center points where curvature changes are required.
Round 5 :
ch1, sc in first 7 sts, (2 sc, inc) x3, sc in next 7 sts, (2 sc, inc) x3 (48)
Round 6 :
ch1, 1 sc in each st BLO (48)
Round 7 :
ch1, (5 sc, inc) x 6 (54)
Round 8 :
ch1, 1 sc in each st (54)
Round 9 :
ch3 (counts as dc), *sk 2 sts, 3 dc in next st, sk 2 sts, 1 sc in next st* repeat across to form a raised decorative rib inside band (creates textured channel)
Info :
Work several texture rows to mimic the ribbed centre seen in the photo. Alternate dc ribs and sc rounds to keep band flexible yet defined.
Round 10 :
ch1, 1 sc in each st (54)
Round 11 :
ch1, 1 sc BLO in first half of band (27), 1 sc FLO in second half (27) to create a subtle two-texture effect (54)
Round 12 :
ch1, (6 sc, inc) x 6 (60)
Round 13 :
ch1, 1 sc in each st (60)
Round 14 :
Begin decorative side loops for joining: *ch6, skip 3 sts, sl st in next st* around one side only at chosen intervals to create tie points for discs/spirals (approx 10 loops)
Info :
When assembling, you will use these ch loops to seam openwork discs and spirals. Make loops where motifs will attach by placing markers and counting evenly along the curve.
Round 15 :
ch1, sc around including sl st into loop bases to secure them (60)
Round 16 :
Repeat rounds 9-15 twice more, adjusting increases along the inside edge to form two opposite curves that produce the continuous S. Each repetition adds approx 24 rows of length — check against layout as you go.
Round 17-40 :
Continue alternating texture rows and increase zones to achieve the desired length and curvature (final band width should measure approx 7-8 cm after blocking)
Info :
As you approach the end of the band, reduce increases symmetrically to taper the tip where it meets final spiral; fasten off and leave long tail for joining.
— Large Layered Flower (make 3) :
Round 1 :
6 sc in magic ring (6)
Round 3 :
(1 sc, 1 inc) x 6 (18)
Round 4 :
Change to buttercream/peach for center: 1 sc in each st (18)
Round 5 :
Work bobble center: *ch2, (hdc, dc, hdc) all in same st, sl st next*, repeat 6 times to create 6 small bobble petals around center; fasten off inner color (creates a textured button center)
Info :
Use a contrasting pale cream for the tiny bobble centers to mimic the cluster in photo. Leave tail for weaving through the back to flatten center if needed.
Round 6 :
Attach petal color (lilac): ch1, *(in next round space) (sc, ch2, 5 dc, ch2, sc)* repeat 6 times to create 6 large outer petals
Round 7 :
Work second petal layer beneath first: Join pale pink under each outer petal and work *sc, ch3, 3 tr, ch3, sc* to form slightly smaller petals, staggered between large ones (6)
Round 8 :
Edge round for both petal layers: slip stitch around petal edges to tidy and add a picot (sc, picot) at petal tips
Round 9 :
Create 3D lift: Using cream, work behind petals to add small raised petals (sc clusters) between large petals — *in petal valley: (ch3, 3 dc, ch3) sl st in valley* x6
Info :
Block each flower flat, pinning the underside so petals maintain open shape. Sew center bobbles to petal layers using long tails for a secure join.
Round 10 :
Fasten off leaving long tail for sewing to runner. Weave in remaining ends neatly on the back.
— Small Flower / Rosette (make 8) :
Round 1 :
6 sc in magic ring (6)
Round 3 :
*(sc, ch2, 3 dc, ch2, sc) in next st* repeat 6 times to make small petals (6)
Round 4 :
Edge round: 1 sc around with small picots on petal tips. Fasten off and leave long tail for sewing.
Info :
Small flowers are used as filler between large blooms and along the band. Make several to suit your layout.
— Leaf (make 20 assorted) :
Round 1 :
ch 8, sl st to join to form a small loop (8)
Round 2 :
ch1, 8 sc around loop (8)
Round 3 :
Increase row: (1 sc, inc) x4 (12)
Round 4 :
Work shaping: 1 sc in next 3, hdc in next 3, dc in next 3, tr in next 3, continue to tip then mirror back down other side: tr, dc, hdc, sc to base (this creates a pointed leaf with textured center) (approx 30)
Round 5 :
Edge finish: 1 sc in each st around, sl st to close, fasten off leaving tail for sewing
Info :
For larger leaves use ch 12 base and add extra increases in round 3. Use dusty sage for all leaves and stitch a central vein with a contrasting hdc row worked in FLO before the edge round.
— Berry Cluster (make 12 clusters; each cluster 5 berries) :
Round 1 :
With faded plum/pink, 6 sc in magic ring (6)
Round 2 :
1 sc in each st (6)
Round 3 :
*sc inc, sc, sc* around to slightly expand sphere (8)
Round 4 :
Fasten off leaving 6-8cm tail. Stuff lightly with a tiny pinch of fiberfill; do not overstuff (8)
Round 5 :
Make 5 berries and sew them together in a tight cluster with long tails, arranging as small grapes. Fasten off and weave tails into back of cluster.
Info :
Cluster placement adds organic texture. Groups of 3-5 berries tucked under leaves mimic the photo's natural arrangement.
— Decorative Joining Motifs and Small Discs (make assorted) :
Round 1 :
6 sc in magic ring (6)
Round 3 :
(1 sc, 1 inc) x 6 (18)
Round 4 :
Switch to open mesh: *ch6, sl st in next st* repeat around (6 ch-6 loops)
Round 5 :
Into each ch-6 space: (sc, ch4, 3 dc, ch4, sc) to create a lacy mini-disc; fasten off and block (6)
Info :
These small discs and rosettes fill gaps and help anchor leaves and flowers into the runner during assembly. Make a selection in coordinating colors.
— Finishing Edging and Scallops :
Round 1 :
Once runner motifs are joined, work a continuous round of 1 sc around entire perimeter, picking up edge sts and joining seams invisibly. Maintain even stitch counts on symmetrical sides.
Round 2 :
Scallop round: *(5 dc in next st, sl st in next st)* repeat around to form large scallops along exposed outer edges
Round 3 :
Tip picot: *sc, ch3, sl st in first ch (picot), sc* on scallop peaks to finish with delicate points
Info :
Work edging in the same cream color to unify the runner. Carefully check for even spacing and adjust by adding or skipping a sc where necessary to avoid puckering.
— Blocking and Final Touches :
Info :
Wet block each motif individually then pin the whole runner to exact shape; use generous pins to open mesh and define scallops. Allow to dry fully (24 hours) before removing pins. Steam blocking is acceptable for cotton, but test a scrap first.
Info :
Weave in all tails on the back side of the runner. Trim loose ends and secure join points with a tiny dab of fabric glue if desired for extra stability in high-traffic use.
This delicate lace runner makes a beautiful heirloom piece for your table, combining romantic florals with airy openwork. Each motif is satisfying to crochet and rewarding to join into the flowing S-shaped design. The pastel palette and textured petals create a timeless, cozy look for tea time or special occasions. I hope this pattern brings you joy and becomes a centerpiece you treasure. 🧶🌸