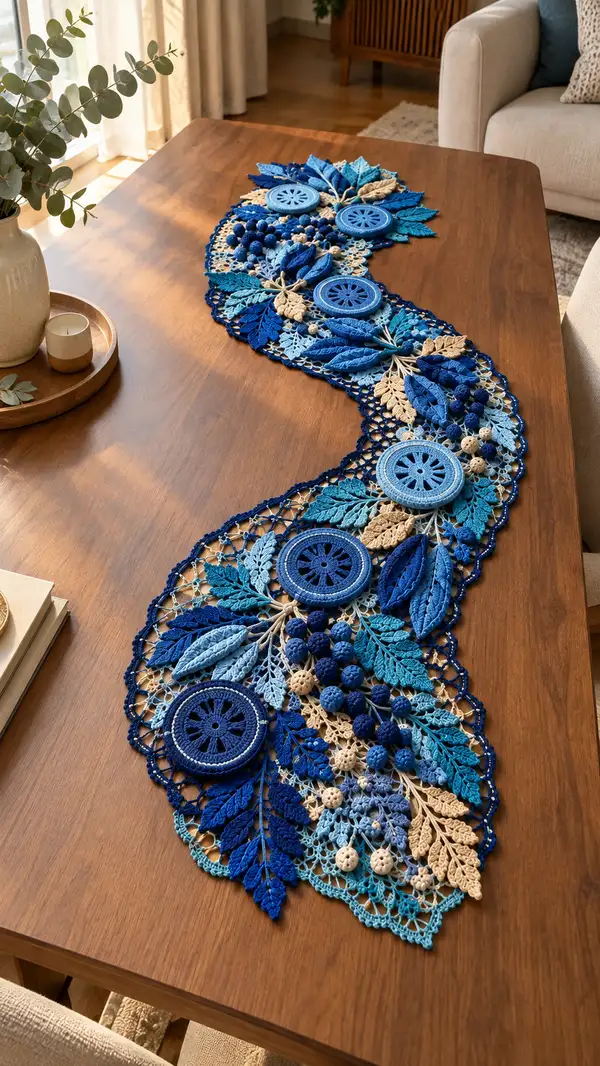
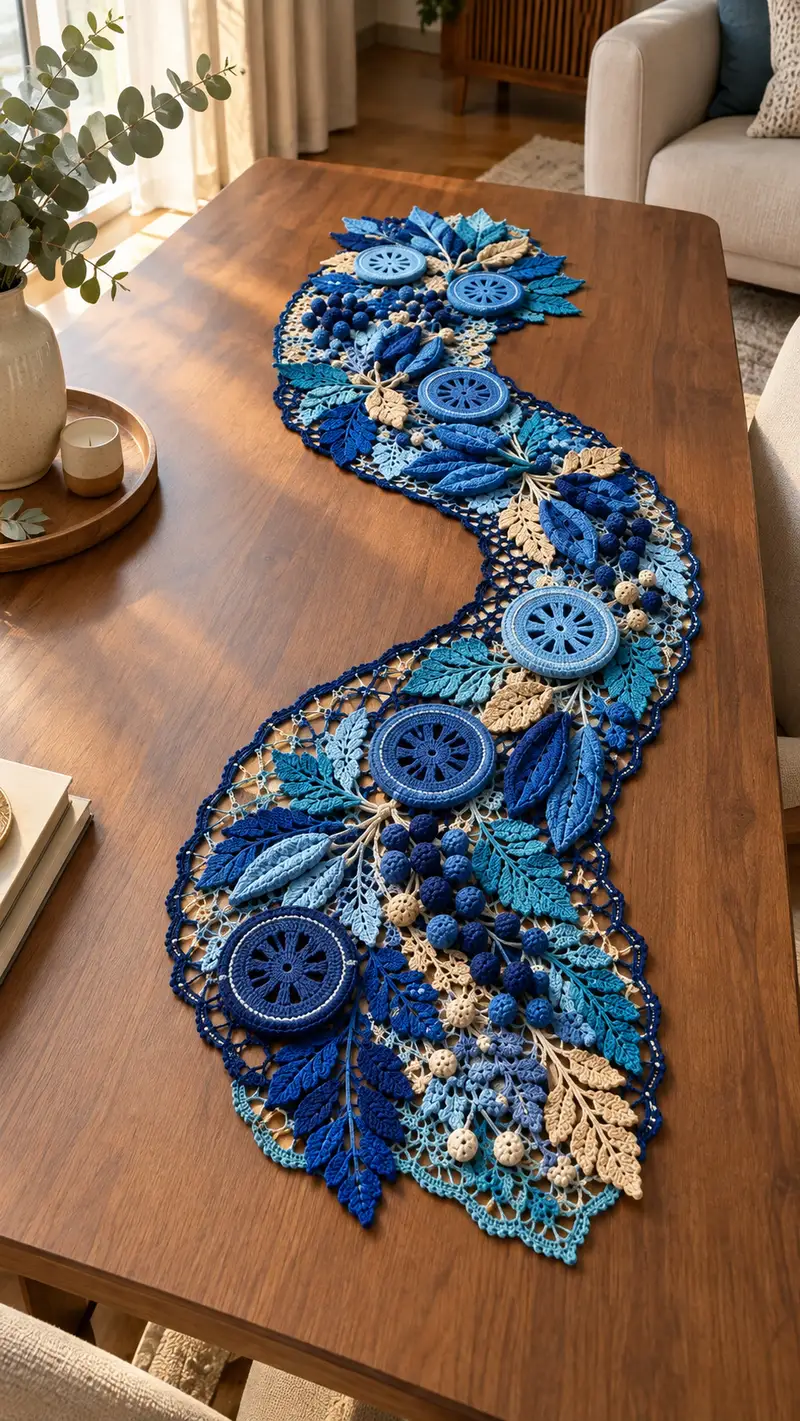
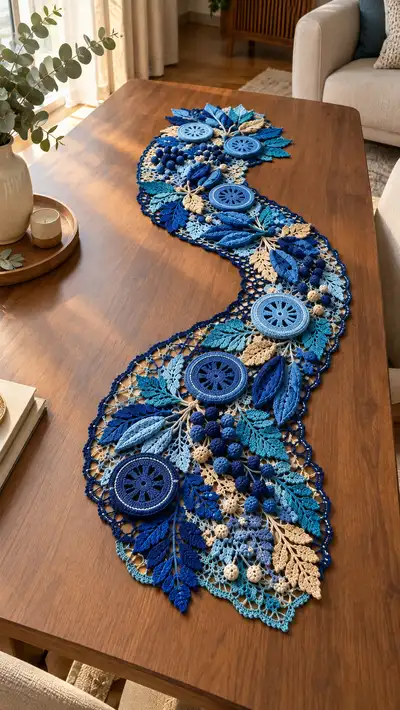
A striking S-shaped crochet table runner featuring layered botanical motifs in a palette of deep navy, cerulean, sky blue and sandy beige. This richly textured design combines circular rosettes, sculpted leaves, clustered berries and delicate lace mesh to create a dimensional centerpiece. Finished with a scalloped lace border, it lays beautifully along long dining tables or sideboards. Detailed construction uses modular motifs and join-as-you-go techniques for a bespoke, heirloom-quality result.
Progress Tracker
0% Complete
— Overview :
Info :
This pattern is modular. You will crochet: Large Rosettes (5), Medium Rosettes (3), Small Rosettes (6), Large Leaves (20), Medium Leaves (36), Small Leaves (48), Bead Clusters (varied - make about 60 crochet beads), Lace Mesh Panels (6), and a scalloped Border worked last. Gauge is flexible; use the listed yarn weights and hooks for similar drape. Block all pieces before assembly.
— Large Rosette (Make 5) :
Round 1 :
6 sc in magic ring (6)
Round 3 :
(1 sc, inc) x 6 (18)
Round 4 :
(2 sc, inc) x 6 (24)
Round 5 :
(3 sc, inc) x 6 (30)
Round 6 :
1 sc in each st (30)
Info :
Change to Color B or deep blue for visual center if desired. Carry color or fasten off and join new color with a sl st.
Round 7 :
(4 sc, inc) x 6 (36)
Round 8 :
1 sc in each st (36)
Round 9 :
(5 sc, inc) x 6 (42)
Round 10 :
1 sc in each st (42)
Round 11 :
Work a decorative wheel: *ch3, sk1, sl st in next* around to create radial slits (42 slits total). Fasten off and weave ends.
Info :
Optional: embroider small spokes with surface crochet or chain stitches to emphasize the wheel center. Block flat, pinning inside shape to keep rounds even.
Round 12 :
Join contrasting yarn in back loop of Round 10 to create outer ridge: 1 sc in each st BLO (42)
Round 13 :
(6 sc, inc) x 6 (48)
Round 14 :
1 sc in each st (48)
Round 15 :
Edge round: *ch3, sl st in 3rd ch from hook, sl st in next st* repeat around to create small picot loops (48 loops). Fasten off.
Info :
Block large rosettes to 11-12 cm diameter (or desired size). Make five. These will act as focal points and are placed in the S-curve spacing shown in the image.
— Medium Rosette (Make 3) :
Round 1 :
6 sc in magic ring (6)
Round 3 :
(1 sc, inc) x 6 (18)
Round 4 :
(2 sc, inc) x 6 (24)
Round 5 :
1 sc in each st (24)
Round 6 :
(3 sc, inc) x 6 (30)
Round 7 :
1 sc in each st (30)
Round 8 :
Create radial spokes: *ch4, sl st in next* repeat (30 spokes). Fasten off and block to 8-9 cm diameter.
Info :
Make three medium rosettes to balance the large focal pieces. Use alternating blues to create the layered gradient effect seen in the photo.
— Small Rosette (Make 6) :
Round 1 :
6 sc in magic ring (6)
Round 3 :
1 sc in each st (12)
Round 4 :
Edge: *ch3, sl st in next* repeat 12 times to create small loops. Fasten off and block to ~4.5 cm.
Info :
Small rosettes sit between leaves and bead clusters to add rhythm across the runner. Make six, vary colors to maintain visual interest.
— Crochet Beads / Berries (Make approx. 60) :
Round 1 :
6 sc in magic ring (6)
Round 3 :
1 sc in each st (12)
Round 4 :
(1 sc, dec) x 4 then 4 sc (exact shaping to keep even) (12)
Round 6 :
Fasten off leaving long tail. Stuff lightly, close with tapestry needle using invisible decrease and weave tail through to secure. Final bead diameter approx 1.2-1.6 cm depending on yarn and tension.
Info :
Use fiberfill sparingly; beads should be firm but not overstuffed. Make clusters of 3-8 beads attached to short stems (ch6-10) to mimic the grape-like clusters visible in the photo.
— Large Sculpted Leaf (Make 20) :
Round 1 :
ch 12, sc in 2nd ch from hook, 1 sc in next 8 ch, 3 sc in last ch (turn to work down other side), 1 sc in next 8 ch, 2 sc in final ch (36)
Round 2 :
1 sc in each st around (36)
Round 3 :
BLO round for central vein: 1 sc in each st BLO (36)
Round 4 :
Surface stitch: Using long tail, embroider a central vein with beige or contrasting color using chain-stitch surface slip or chain embroidery. Fasten off.
Info :
Block leaf with slight curl by pinning edges downward and steaming lightly. Leaves should measure approximately 8-10 cm long. For deeper texture, work FLO on Round 3 instead for raised edge.
Round 5 :
Optional ridge: rejoin yarn at leaf tip and work 6 sc decreasing along center to create tapered point if a sculpted edge is desired (final stitch counts will reduce by 6-8 sts if shaping applied). Fasten off and weave in ends.
— Medium Sculpted Leaf (Make 36) :
Round 1 :
ch10, sc in 2nd ch from hook, 1 sc in next 6 ch, 3 sc in last ch, 1 sc in next 6 ch, 2 sc in final ch (30)
Round 2 :
1 sc in each st (30)
Round 3 :
BLO 1 sc in each st (30)
Info :
Make 36 medium leaves in varying blues and sandy beige. These create layered sprigs. Pin and steam-block to 6-8 cm lengths.
— Small Delicate Leaf (Make 48) :
Round 1 :
ch8, sc in 2nd ch from hook, 1 sc in next 4 ch, 3 sc in last ch, 1 sc in next 4 ch, 1 sc in final ch (22)
Round 2 :
1 sc in each st (22)
Round 3 :
Emphasize vein with slip-stitch surface embroidery or a contrasting slip-stitch down center. Fasten off after blocking to approx 4-5 cm length.
Info :
Small leaves are layered to fill gaps and soften transitions between rosettes. Use lighter blues and beige for visual contrast.
— Leaf Stem Bundles (Make approx 28 bundles) :
Round 1 :
ch8, sl st back along chain to create a firm stem (7 sl st). Secure and leave long tail for sewing. Attach 2-5 leaves to this stem by sewing leaf base to stem using tail.
Info :
Arrange leaves on the stem so larger leaves are outermost and small delicate leaves nest between. Vary angles for organic appearance. If using wire, insert thin wire along stem before sewing leaves on and wrap with yarn to conceal.
— Lace Mesh Background Panel (Make 6 panels) :
Round 1 :
ch 40, sl st to form ring (or work on foundation chain; this panel will be rectangular/oval, adjust chain length to desired mesh width)
Round 2 :
ch4 (counts as tr), *sk 2 ch, tr in next ch, ch2* repeat to end, sl st to top of beg ch4 (13 tr and 13 ch2 sps depending on length)
Round 3 :
Ch4, tr in each tr, ch2 in each ch2 sp across, sl st to join
Round 4-8 :
Repeat Round 3 for 5 rounds to build a stable mesh (width will be defined by initial chain length). Fasten off and block flat to desired shape.
Info :
These mesh panels will be connectors between motifs. You can shape them as narrow swaths that follow the S-curve. Work panels in a light color (Color D) or beige to contrast the darker leaves and rosettes.
Round 9 :
If you prefer smaller diamond mesh, work *ch5, dc in next tr, ch5* for airy openwork. Block each mesh panel using pins and a light steam or wet-blocking to set dimensions.
— Joining Mesh to Motifs (Join-As-You-Go technique) :
Round 1 :
When you reach a corner or edge stitch of a rosette during its final round, join mesh chains by sl st into the mesh ch-space then continue rosette edging. This forms a reinforced join that keeps motifs anchored to mesh.
Info :
For a neat join, pin rosettes and mesh panels in final layout first on a blocking mat. Work join-as-you-go in the order that minimizes stress on the fabric — anchor central rosettes first, then branches and leaf bundles.
— Decorative Scalloped Border Around Assembled Runner :
Round 1 :
With Color A join at any outer edge point and sc evenly around entire assembled runner; aim for one sc per 0.5 cm edge to create even base. Count total stitches; you will create scallops every 6 or 7 stitches depending on count.
Round 2 :
*Skip 3 sc, 5 dc in next sc (shell), skip 3 sc, sl st in next sc* repeat around to form shells; adjust repeat to close neatly at the end (shell count should be an even number). Fasten off.
Round 3 :
Optional picot trim: In each shell center work *ch3, sl st in 3rd ch from hook, sl st in shell top* to add tiny looped edging. Fasten off and weave ends.
Info :
Blocking after this border is critical. Pin the scallops out to an even arc and steam or wet block to set the shape. This final touch defines the S-curve and gives a finished look.
— Assembly: Positioning and Sew-On Order :
Info :
Arrange all motifs on a blocking mat or large flat table in the S-shaped composition before sewing. Place rosettes first (large rosettes on the curve points), then mesh panels to form background, then staple with leaf stem bundles and bead clusters. Pin each piece securely and take a photo for reference before sewing.
Round 1 :
Sewing motifs: Use matching yarn and a tapestry needle. Whip stitch rosette edges to mesh every 6-8 sts using the long tail from final round or join yarn. Ensure not to pull too tight to avoid puckering; aim for flat joins.
Info :
For leaves sewn to rosettes or mesh, position leaf bases under rosette edges or into mesh ch-spaces and sew securely with small invisible stitches. For clusters of crochet beads, use the stem tails to sew bead clusters onto mesh and around rosette perimeters.
— Detailed Stitch-By-Stitch Joining Plan (20 steps of micro-assembly) :
Step 1 :
Place first large rosette at top S bend. Use 4-6 evenly spaced whip-stitches to tack into mesh panel and then reinforce with 8-10 stitches around perimeter.
Step 2 :
Add two medium rosettes below the large rosette, nested half overlapping; whip-stitch their adjoining edges together before securing to mesh.
Step 3 :
Pin leaf stem bundles radiating outward from rosettes: two large leaves, three medium leaves, two small leaves per bundle. Sew bases with 6-10 stitches each to hold securely.
Step 4 :
Group 4-6 crochet beads into clusters on short yarn stems and sew them into small triangular groupings beside rosettes, anchoring stems both to mesh and to adjacent leaf bases.
Step 5 :
Sew small rosettes in gaps between leaf clusters to visually connect rosettes and leaves. Use slip stitch joins if you still have working yarn tails to keep joins tidy.
Step 6 :
Check balance of color across the composition; swap a medium leaf or bead cluster if one side is visually heavy. Adjust until S-curve looks balanced from both ends.
Step 7 :
Once pinned and roughly sewn, reinforce all joins from the underside with small running stitches using strong cotton thread to prevent separation with handling.
Step 8 :
After all motifs are sewn, work the scalloped border as described earlier directly onto assembled edges using join-as-you-go when possible to avoid distorting layout.
Info :
Take breaks and inspect both sides while assembling. Re-block partially assembled sections if joins cause distortion. The surface is three-dimensional; keep stitches small and frequent for durability.
— Alternative Leaf Texture (Optional Raised Leaves) :
Round 1 :
Work a small leaf motif of ch10, sc across, then in next round use FLO to raise the edges: 1 sc in each st FLO to create a defined ridge. Add surface slip-stitch veins in contrasting color.
Info :
Raised leaves make pronounced shadow and are ideal near rosette edges to give sculptural effect. Substitute 8-12 medium leaves for 4 of the large leaves across the runner to vary texture.
— Tips for Color Blending and Gradient Effect :
Info :
Create a gradient by placing darkest tones (Color A) at focal rosettes, medium tones (B & C) in adjacent leaves, and lightest tones (D & E) at outer fill areas. When joining, avoid abrupt color changes by inserting small clusters of contrasting small leaves to transition between tones.
— Final Finishing Rounds (Edge reinforcement and finishing touches) :
Round 1 :
With Color A, sc evenly around entire runner (this is a reinforcement round). Approximate total sc count will depend on final assembled perimeter; aim for consistent spacing.
Round 2 :
Work 1 sc in each st BLO for 1 round to create a subtle ridge that frames the scallop edge (count will match Round 1).
Round 3 :
Optional: Add tiny embroidered seeds or French knots with matching embroidery thread at random among bead clusters to add tactile detail. Secure thread ends on wrong side and weave through multiple stitches for stability.
Info :
Check all sewn joins, clip any stray threads, and give the entire runner a final steam block while pinned into the desired S-shape. Allow to fully dry before moving.
— Quantities & Production Notes (Checklist) :
Info :
Total motifs: Large Rosettes 5; Medium Rosettes 3; Small Rosettes 6; Large Leaves 20; Medium Leaves 36; Small Leaves 48; Crochet Beads ~60; Mesh Panels 6. Make extra small leaves (10-12) to allow for last-minute adjustments.
Info :
Yield is an approximate 130-150 cm long runner shaped in an S-curve; final length varies with gauge and motif spacing. Adjust the number of mesh panels or rosettes to lengthen or shorten the runner.
— Care Instructions :
Info :
Hand wash gently in cool water with mild soap. Reshape and block flat; lay flat to dry. Avoid heavy damp heat or tumble drying which may distort the sculpted elements.
Completing this S-shaped botanical table runner is a wonderfully satisfying journey from small motifs to a stunning centerpiece! Each rosette, leaf and bead cluster layers together to create rich texture and movement along the length of the table. Blocking, careful joins, and a patient assembly process yield an heirloom-quality accent your home will cherish. 🧶 Take your time, enjoy arranging the composition, and share your finished runner to inspire others! 🌿