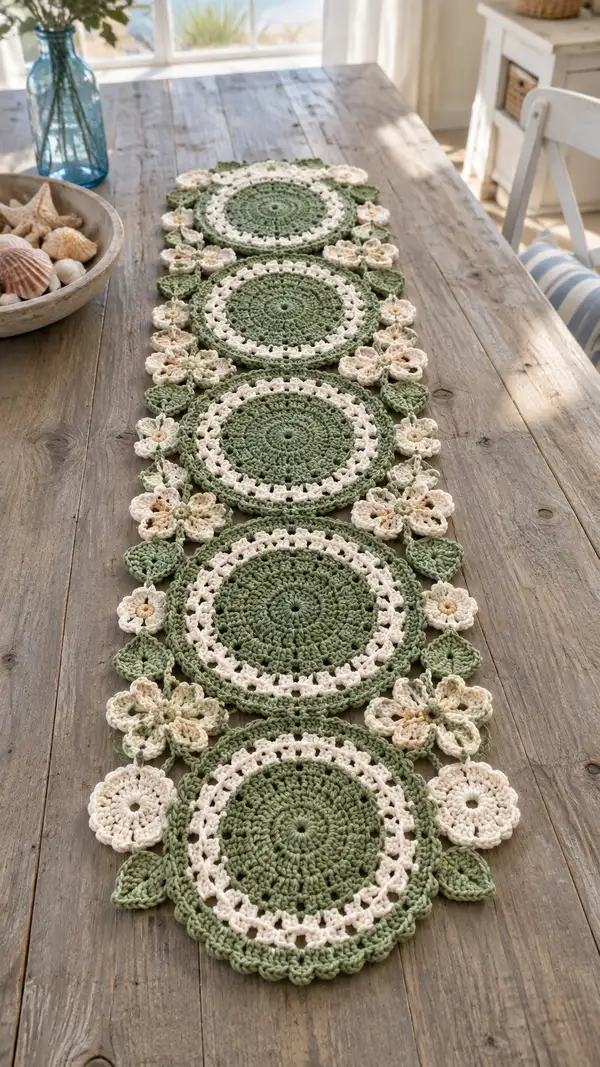
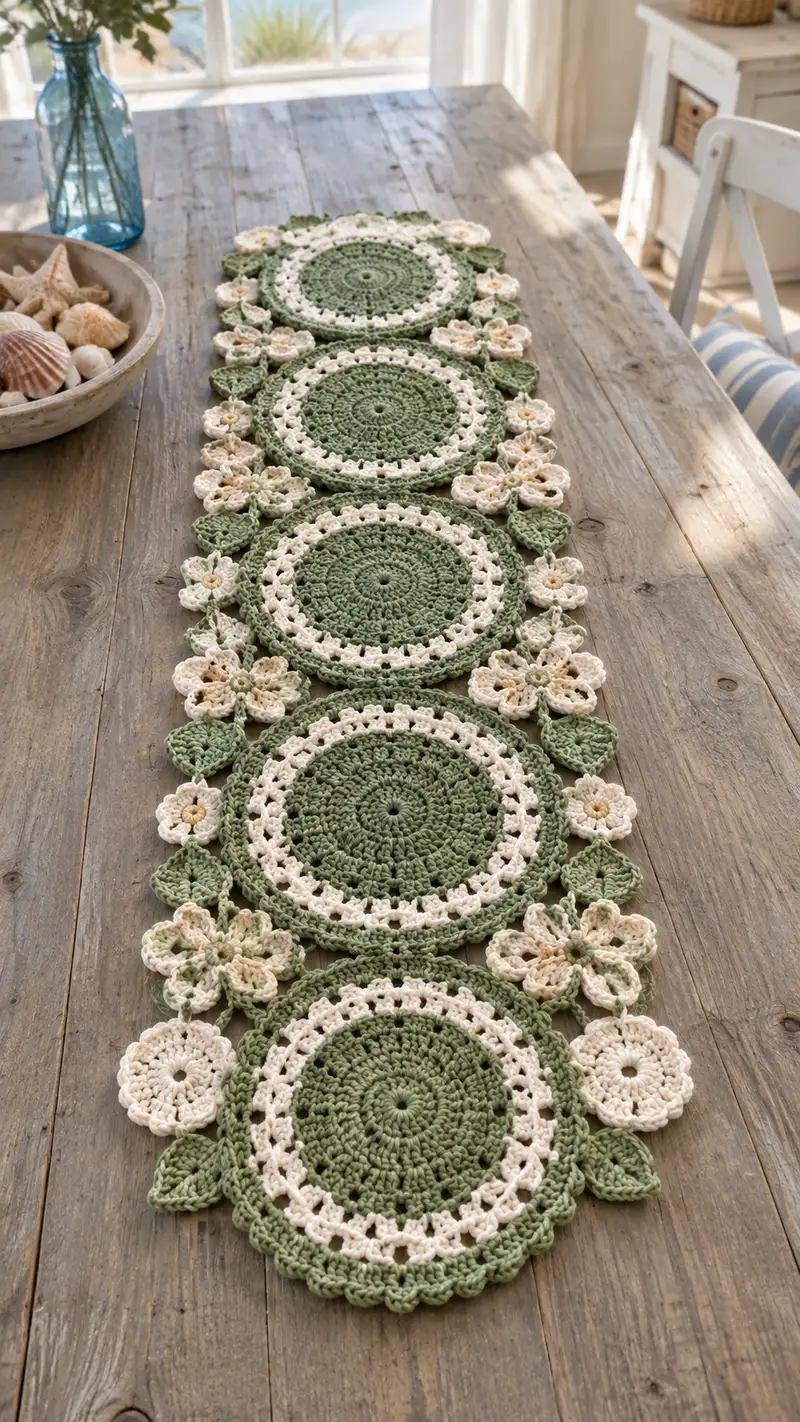
A beautifully detailed table runner made from connected round motifs in sage green and cream with three-dimensional cream flowers and leaf accents. The runner features five large circular medallions joined by floral connectors, scalloped edges and layered lace rings for a vintage, cottagecore look. Perfect for a dining table, console or entryway to add a soft botanical touch.
Progress Tracker
0% Complete
— Notes & Gauge :
Info :
This runner uses worsted-weight cotton for a crisp, flat finish. Gauge is not critical for motif count but affects final motif diameter. Gauge sample: 12 rounds = approx. 6.25" diameter using 4.0mm hook. Work tightly enough to avoid visible gaps in the center; loosen slightly for the lacy cream ring for drape.
— Main Large Circle Motif (Make 5) :
Round 1 :
mr, 12 sc in magic ring (12)
Round 2 :
inc in each st around (24)
Round 3 :
(1 sc, inc) x12 (36)
Round 4 :
(2 sc, inc) x12 (48)
Round 5 :
(3 sc, inc) x12 (60)
Info :
Keep tension consistent here — this builds the flat base. If your circle ruffles, reduce increases in one round by evenly spacing an extra sc between increases; if it cups, add a few extra increases in the next round.
Round 6 :
1 sc in each st around (60)
Round 7 :
1 sc in each st around (60)
Round 8 :
(3 sc, inc) x12 (72)
Round 9 :
1 sc in each st around (72)
Round 10 :
1 hdc in each st around (72)
Info :
Change to cream yarn for the lacy band on the next round. Fasten off sage and join cream in a back-loop or at any visible gap for a neat transition.
Round 11 :
Join cream. *ch3 (counts as dc), skip next st, dc in next st; ch1, skip next st* rep around to create open chain spaces. Adjust spacing so final count remains 72 adjusted for pattern repeat. End with sl st to first dc (72 lace points/spaces)
Round 12 :
In same cream: *sl st into chain-1 space, ch3, 2 dc cluster in same ch-1 sp, ch1* rep around. This creates a shallow shell look (maintain 36 shells if spacing two sts per repeat)
Round 13 :
Change back to sage. 1 sc in each st and space around working through both loops to anchor lace ring (approx. 72)
Info :
Check that the lace ring lies flat. Pin the motif flat and steam/block lightly if needed before continuing to outer rounds so scallops will lie even when motifs are joined.
Round 14 :
(5 sc, inc) x12 (84)
Round 15 :
1 sc in each st around (84)
Round 16 :
*sc in next 2 sts, sc in next st BLO* rep around to begin a subtle ridge (84)
Round 17 :
1 sc in each st around (84)
Round 18 :
(6 sc, inc) x12 (96)
Round 19 :
1 sc in each st around (96)
Round 20 :
Scallop round: *skip 2 sts, 7 dc in next st (shell), skip 2 sts, sl st in next st* rep around (12 shells). Fasten off and weave ends (approx. 96 base sts + 12 shells)
Info :
Each completed large medallion will measure roughly 7"-7.5" across depending on tension and yarn. Make five identical medallions for the runner shown. Block each motif lightly to open the lace and flatten scallops.
— Cream Small Round Rosette (Make 6 for edge accents) :
Round 1 :
mr, 6 sc in magic ring (6)
Round 2 :
inc in each st around (12)
Round 3 :
(1 sc, inc) x6 (18)
Round 4 :
Change to pale beige center color if desired: 1 sc in each st around (18)
Round 5 :
*ch3, sl st in next st* repeat around to form tiny loops (18 loops)
Round 6 :
In cream: *in each ch3 loop work (sc, hdc, 3 dc, hdc, sc)* to create full rosette petals (18 petals). Fasten off and weave tail.
Info :
These smaller rosettes tuck neatly between larger circles and flowers around the runner edge; they add balance to the arrangement in the picture.
— Layered Flower Motif (Make 8-10) :
Round 1 :
Using pale beige: mr, 6 sc in ring (6)
Round 2 :
inc in each st around (12)
Round 3 :
(1 sc, inc) x6 (18)
Round 4 :
Change to cream. *ch3, skip 1 st, sc in next st* rep around forming 9 chain loops. Adjust loops so there are 9-10 loops depending on spacing.
Info :
Make sure loop count divides evenly to allow a symmetric petal arrangement. If there are too many loops, tighten your starting rounds to compress centre slightly.
Round 5 :
In cream: In each loop do (sc, hdc, 5 dc, hdc, sc) to make larger outer petals. Fasten off and leave long tail for sewing.
Round 6 :
Make a second smaller petal layer if desired: join beige to center back and work a second row of small petals (sc clusters) offset between larger petals. Fasten off.
Round 7 :
Embellish center: with beige or light yellow, embroider a tight French-knot-like spiral by stitching yarn through center several times, or use a tiny yarn-wrapped button. Secure and weave ends.
Info :
For three-dimensional depth, lightly shape petals by pinching and adding a few stitches through petal bases to secure slight cupping. Do not over-stitch or petals will lose volume.
— Leaf Motif (Make 20-24) :
Round 1 :
Join sage. ch6, sc in 2nd ch from hook, hdc in next, dc in next, tr in next, dc in next, hdc in next, sc in next; turn and work other side of chain: hdc, dc, tr, dc, hdc, sc (total approx. 12 sts forming a leaf). Fasten off leaving tail for sewing.
Round 2 :
Optional: With darker green or same sage, embroider central vein using single strand of yarn with running stitch from base to tip. This adds definition and matches photo leaf texture.
Info :
Leaves are slightly cupped; press lightly under damp cloth to set shape. Leaves in photo appear slightly stuffed; you can add a tiny bit of fiberfill between layers if you want a puffier look before stitching onto runner.
— Small Connecting Petal (Make 12) :
Round 1 :
mr, 8 sc in ring (8)
Round 2 :
(1 sc, inc) x4 (12)
Round 3 :
ch2, in next st work (sc, hdc, 3 dc, hdc, sc) across repeating for 4 small petal bumps. Fasten off.
Info :
These small connectors are used to anchor flowers to the large medallions and keep spacing even between motifs. Make extras — you may use more for tighter spacing when joining.
— Assembly & Joining Motifs :
Info :
Layout: Arrange five large medallions in a straight line, with circular centers aligned. Place layered flowers between medallions at alternating sides (upper/lower) as in the image, tuck leaves under flower edges, and place small rosettes to fill gaps toward the sides. Pin everything in place on a flat surface before sewing.
Round J1 :
To join two adjacent large medallions: place them right sides up, align scallop edges where they will meet. Using sage yarn and tapestry needle, sew through outermost rounds of each motif using whip stitch or mattress stitch, taking care not to pull too tight. Aim for 8-12 secure stitches across each contact arc depending on overlap width.
Info :
Alternate joining method (optional): join motifs with loop-and-chain method on final round - while working scallop round on second motif, join via sl st into scallop picots on the first motif at even intervals. This allows an integrated crocheted join instead of sewing.
Round J2 :
Sew flower bases to motif joins: place each layered flower so its base overlaps the seam between two medallions. Use long tails left from flowers to sew through back loops and secure flower base to both medallions with hidden stitches; add a couple of stitches through the lace band round for extra stability.
Round J3 :
Sew small rosettes and connector petals into gaps: position small rosettes at the exterior side gaps and use short mattress stitches to anchor them. Sew leaves under flower edges by catching just a few threads through the leaf base and the medallion rounds — this keeps leaves slightly lifted.
Info :
When sewing parts together, weave the yarn needle through the backside loops of motifs to hide joins. Use a thread color that closely matches the yarn used in that area for invisible seams.
— Final Edge Unifying Round (Worked around entire runner after assembly) :
Round E1 :
With sage yarn and 4.0mm hook pick a starting point at one outermost scallop. Working along edges of joined medallions and attached flowers, work 1 sc evenly around all outer edges catching motif edges and flower bases. Work 1 sc for approximately every 4 mm of edge to keep tension flat. Continue around entire runner. Join with sl st to first sc.
Round E2 :
*ch3, skip next sc, sc in next sc* around to create light picot chain spaces that echo inner lace band. Adjust repeats so picots fall centered on outer scallops and flower tips.
Round E3 :
In cream: In each ch3 space work (sc, hdc, 5 dc, hdc, sc) to create floral petal clusters forming a continuous lacy border between scallops and flowers. Fasten off.
Info :
The unified edge ties motifs together visually. Work loosely here to allow the runner to lie flat without puckering. Block gently after this round if necessary to flatten the border.
— Decorative Scallop & Topstitching Rounds :
Round S1 :
Join sage: *sc in next 3 sts, (7 dc) in next st, sc in next 3 sts* around outermost edge shells to reinforce scallops. Fasten off.
Round S2 :
Using cream: slipstitch around outermost dc of scallops picking up both layers where necessary, this gives a finished topstitch look and slightly brightens the border lines.
Info :
Topstitching also helps stabilize the shapes after joining and encourages petals and leaves to stay in position when the runner is used on a table.
— Optional Embellishments & Fixes :
Info :
Add tiny seed beads or French-knot embroidery to flower centers for sparkle. If any motifs pucker inward, steam-block them gently by pinning flat and misting then allowing to dry fully before removing pins.
Round F1 :
Optional leaf veins: use a single strand of darker yarn and simple running stitches from base to tip; anchor ends through backside; this will not show from top but adds subtle texture.
Round F2 :
Extras: If you prefer a narrower runner, omit one or two medallions and re-balance flowers and leaves accordingly; adjust assembly stitches to account for new joins.
Info :
Weave all tails into the thickness of the runner and trim close. For durability, weave ends for at least 2-3" into surrounding fabric rather than securing superficially.
— Finishing Touches :
Round FT1 :
Block and press: pin runner to desired shape on a blocking board, gently steam or mist, and allow to dry fully. This will even out lace rings and scallops so the runner lies flat on a table.
Round FT2 :
Care: Hand wash in cool water with mild soap. Lay flat to dry. Avoid tumble drying to protect cotton fibers and shape of petals.
Info :
Your finished runner will be approximately 36"-42" long by 9"-11" wide depending on the number of medallions and blocking. Adjust medallion count if you desire a longer or shorter runner.
Completing this floral circle table runner brings such a satisfying sense of accomplishment — every medallion, petal and leaf joins together to create a charming, cohesive design. The sage and cream palette reads calm and refined, and the dimensional flowers add a handcrafted touch that guests will notice. Add a sprig of greenery down the center for a styling touch, and enjoy the cozy, cottagecore charm this runner brings to your table. 🧶🌿✨