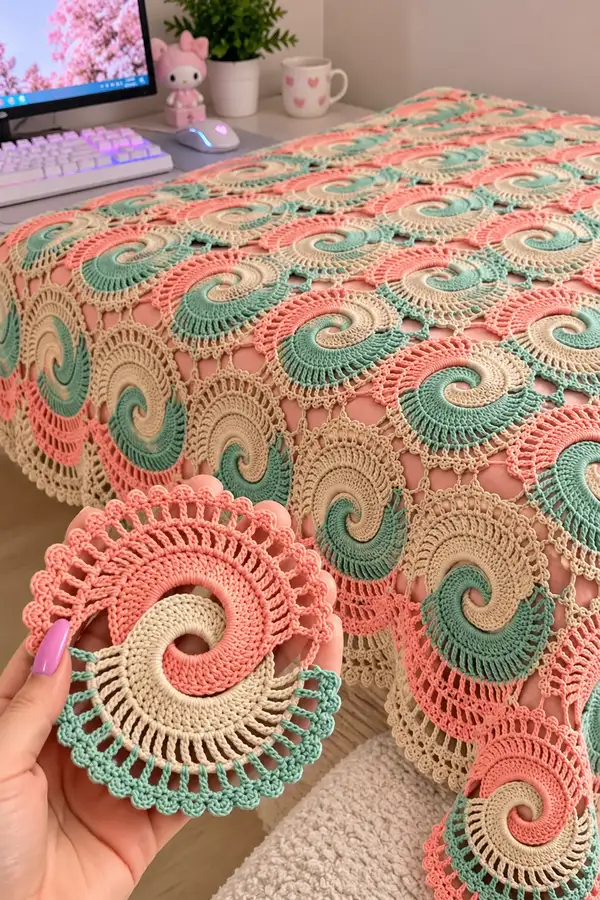
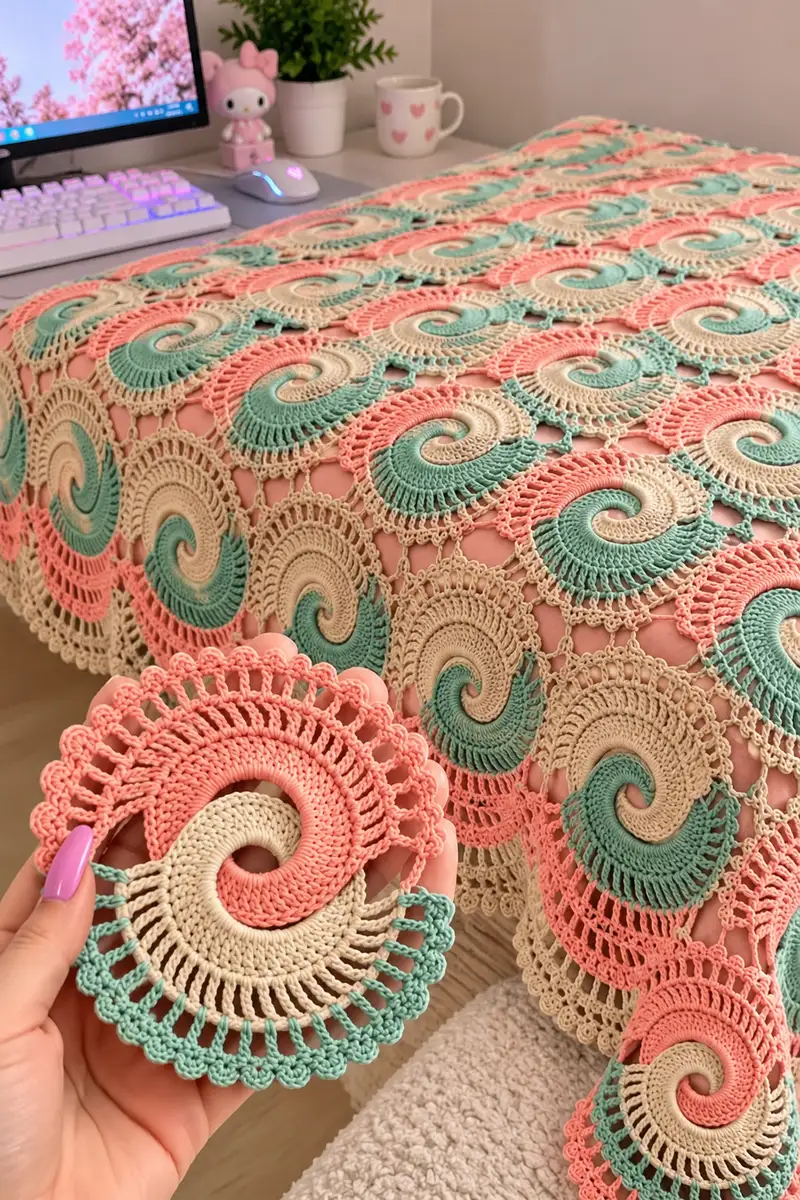
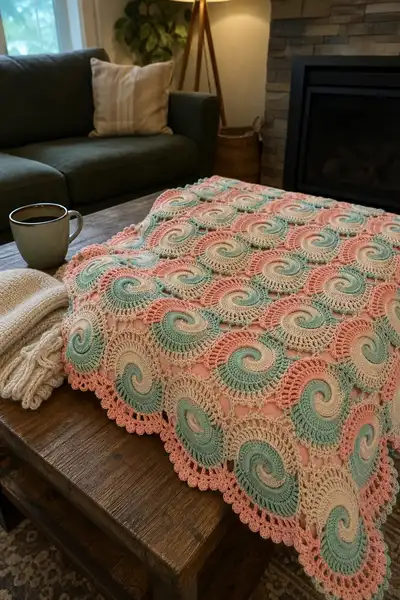
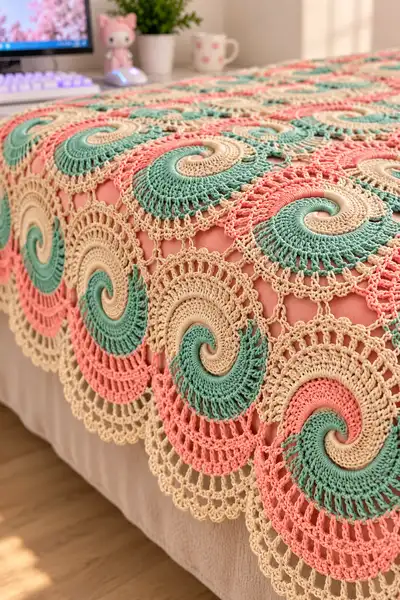
A delicate, vintage-inspired bedspread composed of interlocking spiral granny motifs in sage green, blush peach and soft cream. Each motif is worked in a continuous spiral and joined into a lacy openwork grid to create a flowing wave effect. The pattern includes a full motif chart, detailed round-by-round instructions, joining method and a scalloped border to finish the bedspread with crisp, feminine edges.
Progress Tracker
0% Complete
— Spiral Motif :
Round 1 :
Using Sage (Color A). Make a magic ring, ch2 (counts as first dc), work 11 dc into ring. Join with sl st to top of ch2. (12)
Round 2 :
Ch2, 1 dc in same st, *2 dc in next st; rep from * around. Join with sl st to top of ch2. (24)
Round 3 :
Ch2, 1 dc in same st, *1 dc in next st, 2 dc in next st; rep from * around. Join. (36)
Info :
These first three rounds create a small flat disc to begin the spiral center. Keep tension loose enough so the center lays without ruffling.
Round 4 :
Ch2, 1 dc in same st, *1 dc in each of next 2 sts, 2 dc in next st; rep from * around. Join. (48)
Round 5 :
Ch2, 1 dc in same st, *1 dc in each of next 3 sts, 2 dc in next st; rep from * around. Join. (60)
Round 6 :
Switch to Peach (Color B) with last yarn of previous round or fasten off A and join B in any stitch. Ch2, 1 dc in same st, *1 dc in each of next 4 sts, 2 dc in next st; rep around. Join. (72)
Info :
Change color so the spiral begins to show banding. When changing colors, carry the unused yarn loosely across the back if you plan to use it in the next round; otherwise weave in ends later.
Round 7 :
Ch3 (counts as dc + ch1), *sk 1 st, dc in next st, ch1; rep from * around to create a spaced round — join with sl st to 2nd ch of ch3. This creates a small gap round that will start the spiral shaping. (72 dc with 36 ch-1 sps)
Round 8 :
Switch to Cream (Color C). Join C in any ch-1 space. Ch3 (counts as dc), work (2 dc, ch1, 2 dc) in same ch-1 sp, *sk next dc, in next ch-1 sp work (2 dc, ch1, 2 dc); rep around. Join. This makes little fan arches every other space. (36 fans)
Round 9 :
With Color C continuing, sl st to the center dc between two fans. Ch2, 1 dc in same st, *1 dc in each dc across next fan center (3 dc), 2 dc in next dc (the dc between fans); rep around. Join. (108)
Info :
From this round onward we will create the spiral by introducing asymmetrical increases: one side of the motif will receive extra increases over multiple rounds so the motif grows more on that side producing the spiral curve.
Round 10 :
Ch2, 1 dc in same st, *1 dc in each of next 8 sts, 2 dc in next st; rep around. Join. (120)
Round 11 :
Change to Color A (Sage). Ch2, 1 dc in same st, *1 dc in each of next 9 sts, 2 dc in next st; rep around. Join. (132)
Round 12 :
Ch2, 1 dc in same st, *1 dc in each of next 10 sts, 2 dc in next st; rep around. Join. (144)
Info :
If you prefer the spiral to read more tightly, reduce the number of plain dc between increases by one every second round; to open it up, add more plain dc. The sample keeps a gentle expansion to keep the curved shape.
Round 13 :
Switch to Color B (Peach). Ch3, tr in same st, *tr in next 11 sts, 2 tr in next st; rep around. Join. (156)
Round 14 :
Ch3, tr in same st, *tr in next 11 sts, 2 tr in next st; rep around but on the last repeat only work 1 tr instead of 2 to subtly bias this round and start the spiral pull (do not join tightly, do a loose sl st). (156)
Round 15 :
With Color B continue: Ch2, dc in same st, *dc in next 12 sts, 2 dc in next st; rep around. Join. (168)
Info :
Round 14 includes a small intentional under-increase at one spot (work only 1 tr instead of 2 on the final repeat) — this tiny asymmetry is one of the invisible tricks that starts the spiral. Keep track of where you make that smaller repeat with a stitch marker to maintain the spiral curvature each motif.
Round 16 :
Switch to Color C. Ch3, dc in same st, *dc in next 13 sts, 2 dc in next st; rep around. Join. (180)
Round 17 :
Ch3, dc in same st, *dc in next 14 sts, 2 dc in next st; rep around. Join. (192)
Round 18 :
Ch3, dc in same st, *dc in next 15 sts, 2 dc in next st; rep around. Join. (204)
Info :
Stitch counts are increasing steadily; as the motif grows, the spiral will become visually obvious. If your motif starts to ruffle, skip one increase evenly spaced on the opposite side to flatten it slightly.
Round 19 :
Change to Color A. Ch2, dc in same st, *dc in next 16 sts, 2 dc in next st; rep around. Join. (216)
Round 20 :
Ch2, dc in same st, *dc in next 17 sts, 2 dc in next st; rep around. Join. (228)
Round 21 :
Switch to Color B. Ch1, sc in same st, *ch3, sk 3 dc, sc in next dc (this creates vertical openwork slits on the outer side of the spiral); rep around. Join. (Approx 76 sc with 76 ch-3 sps)
Info :
Round 21 begins the decorative lacy outer area. The ch-3 loops form the foundation for arches and shells that will produce the scalloped texture in the finished blanket. Keep consistent tension so decorative loops remain uniform across motifs.
Round 22 :
With Color B: Sl st into first ch-3 sp, ch3 (counts as dc + ch1), (2 dc, ch1, 2 dc) in same ch-3 sp to make a fan; *in next ch-3 sp make (2 dc, ch1, 2 dc); rep around. Join. (Approx 76 fans)
Round 23 :
Change to Color C. Sl st to center of first fan. Ch1, sc in center, *ch5, sc in center of next fan; rep around to create large chain loops between fans. Join. (Approx 76 sc and 76 ch-5 sps)
Round 24 :
With Color C: Sl st into first ch-5 sp, ch3, 11 dc into same ch-5 sp (or work 12 dc including ch3) to create a big shell; *in next ch-5 sp work 12 dc; rep around. Join. (Approx 76 shells)
Info :
At this stage each motif has a spiral center and an outer lacy shell ring. Count your shells and loops; you will join motifs using the ch-5 and shell points so they line up evenly in a grid. Use stitch markers to note a specific shell that marks the "start" of each motif so orientation is consistent when joining.
Round 25 :
Change to Color A. Sl st to the 6th dc of first shell, ch1, sc in same st, *ch3, sk 3 dc, sc in 6th dc of next shell; rep around. Join. This creates small arches that will be used for join points. (Approx 76 small arches)
Round 26 :
With Color A: In each small arch work (sc, ch3, sc) to make uniform connecting loops along the shell edge. Join. (Approx 76 (sc,ch3,sc) groups)
Round 27 :
Switch to Color B. Sl st into center sc of first (sc,ch3,sc) group, ch3, 9 dc in same group (or 10 dc including ch3) to create a decorative picot-edge ridge; *in next (sc,ch3,sc) group repeat 10 dc; rep around. Join. (Approx 760 dc total depending on motif size)
Info :
These outer rounds build a pronounced scallop that will nest nicely with neighboring motifs when joined. Always keep track of your motif orientation and where you made the under-increase on Round 14 so all motifs spiral the same direction (important for the visual flow in the blanket).
Round 28 :
With Color C: Sl st to top of first dc of last round, *ch3, sl st into space between motifs when joining (later) OR if finishing motif alone, work (sc, ch3, sc) into each gap to finish edge; rep around and fasten off leaving long tail for weaving. (Edge completed.)
Info :
Finish motifs with long tails (~20cm/8in) for joining. Block each motif flat to a 10.5-11 cm diameter (sample) to ensure even joining. All motifs should be blocked to identical dimensions to make assembly straightforward.
— Motif Variant (reverse color order) :
Round 1 :
Make motif repeating Rounds 1-9 but reverse the order of colors so inner spiral is Peach then Sage then Cream. This variant alternates through the blanket to form the checkerboard spiral color effect. Follow Rounds 10-28 as written but swap the color names.
Info :
Alternate motif color order every other motif row to create the pictured alternating spiral pairs. Keep the same stitch counts so motifs remain identical in size; only change colors where indicated.
— Joining Motifs (Modular Join Method) :
Info :
Decide your layout before joining: the sample blanket uses rows of 6 motifs across by 8 rows long for a throw. Join motifs while you go, row by row, using the ch-3 connector loops made in Round 25. Joining while you go keeps work flat and makes alignment easier.
Round 1 (Join start) :
Place two motifs right sides up next to each other so their outer scallops align. With Color C, insert hook into the ch-3 sp on motif A, ch1, sc in that space, *ch1, sl st into the corresponding ch-3 sp on motif B to join, ch1, sc in next ch-3 sp of motif A; rep across the touching scallops. Fasten off. This makes a neat invisible chain join. (Number of joins equals number of corresponding arches between the two motifs.)
Info :
When joining, always begin at the shell that corresponds to the "start" marker used during motif making so spiral orientations stay consistent across the blanket. Use pins to hold motifs in the correct position before joining.
Round 2 :
To join the full row, join each subsequent motif to the previous one the same way. When you reach the end of a row, turn work and join a new motif to the full edge of the row from the opposite side, matching scallops and ch-3 loops to ch-3 loops. Continue until full number of motifs in row are joined.
Round 3 :
To join rows together: align two completed rows of motifs so that the scallops of row below fit into the gaps of the row above. Use sl st joins through the ch-5 loops (Round 23) at intersection points: insert hook through ch-5 loop of motif A and through corresponding point on motif B, sl st to join. Repeat across the row. Secure and weave in tails as you go to keep joins tidy.
Info :
Check alignment visually every 4-5 joins; minor misalignments can be fixed by adjusting tension of the joining sl sts or by unpicking small sections and rejoining. Using blocking pins when dry helps keep the grid square.
Round 4 :
When three motifs meet at a corner intersection (classic three-motif junction in this pattern), create a small connecting picot: ch3, sl st into center of adjacent shell, ch3, sl st to second motif center, ch3, sl st to third motif center. This adds stability at triple points and prevents holes forming. Fasten off and weave ends.
Info :
Alternate method: for a sturdier join use single crochet join instead of sl st for the primary seam and decorative chain picots at triple points to keep the lacy look.
— Border & Edging :
Info :
After joining all motifs and checking the blanket layout, lightly block the entire assembly to even out motif edges. Work border rounds in Cream (Color C) to unify the overall look. The border consists of three main parts: a mesh stabilizing round, a tall shell round to match motif scale, and a final delicate picot scallop.
Border Round 1 :
Join Cream to any outermost ch-3 space along the outermost edge of the blanket. Ch1, sc around the entire edge working 1 sc in each available space along scallops and joining points; where a larger gap exists work (sc, ch3, sc). This evens the outer edge and creates a straight edge to work the next rounds. Join. (Stitch count will equal number of outer gaps; adjust placement to keep edge flat.)
Border Round 2 :
Ch3 (counts as dc), *2 dc in next 2 sts, ch1, sk 2 sts, 3 dc in next big gap (created by previous join); rep around to create tall shells along edge. Join. (Work evenly to preserve border symmetry.)
Info :
Border Round 2 uses taller shells to echo the motif shells. Adjust the number of dcs per shell to keep the border from ruffling or flaring: more dcs = more curve; fewer dcs = flatter border. Aim to match the curve of the motif edges for a neat look.
Border Round 3 :
Sl st to center of first shell, ch3, 11 dc in same shell (or 12 including ch3), sl st to base between shells, *in next shell repeat 12 dc; rep around. Join and fasten off. (Creates pronounced scallop.)
Border Round 4 :
With Color A (optional contrast), rejoin at tip of any scallop, ch1, sc in same st, *ch5, sc in tip of next scallop; rep around. Join. This creates decorative loops for the final picot round to sit on.
Border Round 5 :
With Color C, sl st into first ch-5 loop, (sc, ch3, sc) into loop, sl st to next loop, (sc, ch3, sc) into next loop; rep around. Join and fasten off. Weave in ends neatly along back of work.
Info :
Final finishing: steam-block lightly if using cotton to relax fibers and set shape. Use blocking pins to accentuate scallops and openwork for the most striking visual effect.
— Optional Extra Deep Scallop (for bedspread length) :
Round 1 :
Working into the tips of the previously made scallops, ch3, 19 dc in same tip, sl st to base between scallops, *in next tip repeat 19 dc; rep around. Join. (This deepens the edge for a ruffled, draping border.)
Round 2 :
Ch1, sc around each dc across the deep scallops to even out thickness; where scallop meets a motif corner, work (sc, ch3, sc) to create decorative picot anchor points. Join.
Info :
Use this optional deep scallop when you want a more dramatic drape on the bedspread edges (as pictured). It uses more yarn and increases finishing time but yields a luxurious finish.
— Finishing Touches & Weaving Ends :
Info :
Weave all tails through the back of motif stitches with a yarn needle, following the curve to hide ends. Trim tails short after weaving back at least 2 inches to secure them. For extra security on joins, whip stitch through adjacent motif rounds with a small matching yarn strand and hide the tail inside the seam.
Round 1 :
If you notice small gaps at join points, add small sc bars across the hole: insert hook at join edge and work 1 sl st across the hole then 1 sc at each side to stabilize. Weave ends and steam-block again to relax any pull marks. Final press is optional but recommended for photo-ready finish.
Info :
You now have a modular spiral granny bedspread. Adjust the number of motifs and rows to suit your desired finished size. When reproducing the pictured color layout, alternate motif color order across columns and rows to achieve the checkerboard spiral effect shown in the images.
This delicate spiral granny bedspread is a joyful mix of vintage charm and modern colorwork. Each motif is a small sculpture of concentric curves and lacy shells that come together to form a draped, textural coverlet you will be proud to display. Make it in your favorite palette to match a bedroom or living space — this project is equally lovely as a throw, bed runner, or full coverlet. 🧶💕 Take your time, block carefully, and enjoy the rhythmic repetition: the finished spread is truly rewarding. 🌿