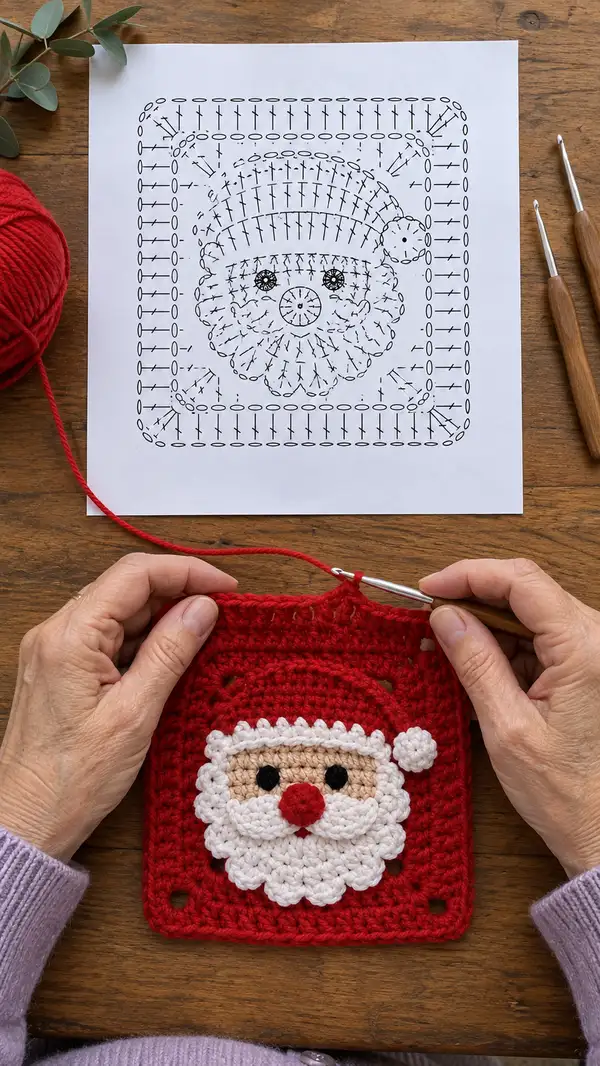
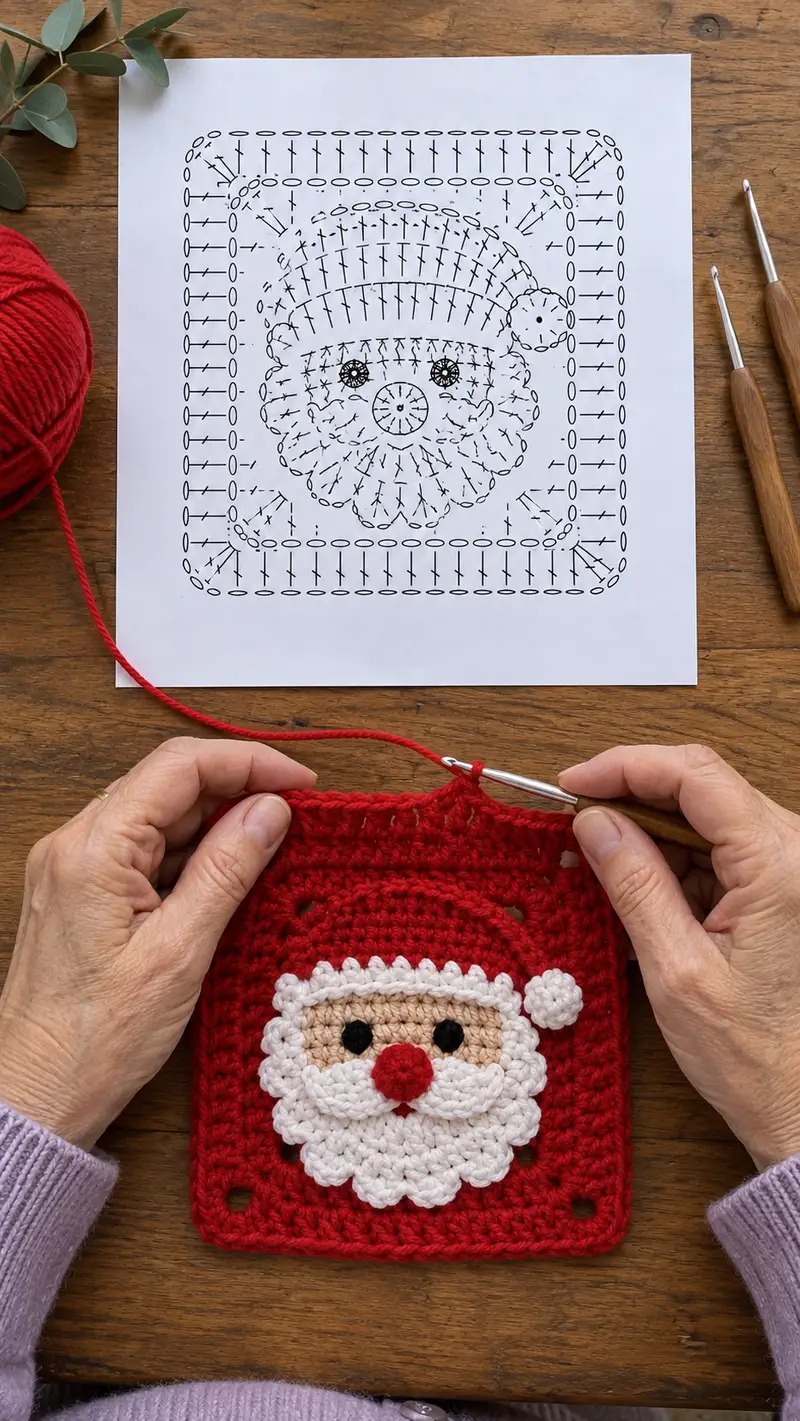
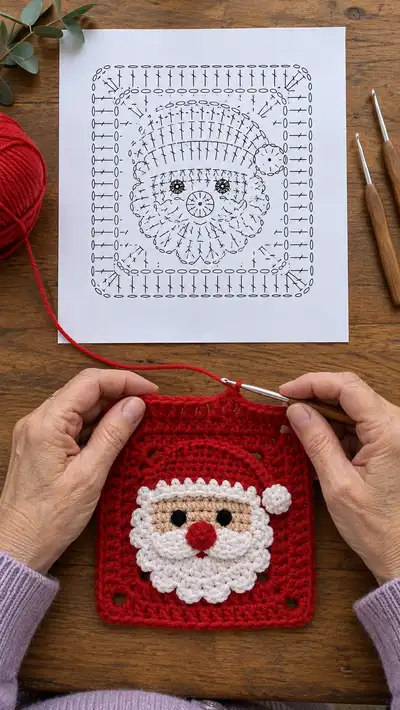
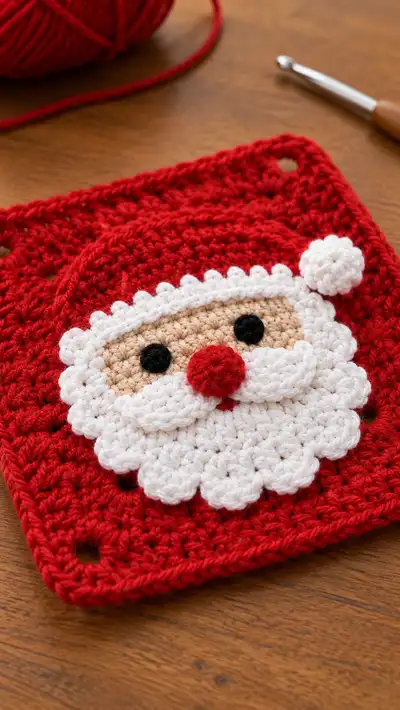
A festive Santa Claus granny square applique that combines a classic square background with a cute raised Santa face. Features a scalloped white beard, textured moustache, rosy red nose pompom and a jaunty red hat with pompom. Perfect for holiday blankets, cushions or seasonal bunting — made in worsted yarn for a squishy, cozy finish.
Progress Tracker
0% Complete
— Face Disk (Head) :
Round 3 :
(1 sc, inc) x 6 (18)
Round 4 :
(2 sc, inc) x 6 (24)
Round 5 :
(3 sc, inc) x 6 (30)
Round 6 :
(4 sc, inc) x 6 (36)
Round 7 :
(5 sc, inc) x 6 (42)
Round 8 :
(6 sc, inc) x 6 (48)
Round 9 :
(7 sc, inc) x 6 (54)
Round 10 :
(8 sc, inc) x 6 (60)
Round 11-14 :
1 sc in each st (60)
Info :
Place eyes between rounds 12 and 13. Measure about 6-8 sts apart (count on round 12) for the sweet expression; mark the first eye stitch with a stitch marker before crocheting the second.
Round 15 :
(8 sc, dec) x 6 (54)
Round 16 :
(7 sc, dec) x 6 (48)
Info :
Optional: embroider eyebrow or tiny crease lines now with a matching beige or light brown yarn; use small stitches between rounds 11-14.
Round 17 :
(6 sc, dec) x 6 (42)
Round 18 :
(5 sc, dec) x 6 (36)
Round 19 :
(4 sc, dec) x 6 (30)
Info :
Begin lightly stuffing the face disk if you want just a faint 3D effect. For a flat applique keep stuffing minimal. If using safety eyes, insert and secure between rounds 12-13 before further stuffing.
Round 20 :
(3 sc, dec) x 6 (24)
Round 21 :
(2 sc, dec) x 6 (18)
Round 22 :
(1 sc, dec) x 6 (12)
Info :
Fasten off leaving a 20-25 cm tail for sewing to the square. Weave tail to the wrong side to secure and hide. If you prefer an unstuffed flat face, do not add stuffing and close completely.
— Beard (Scalloped Applique) :
Round 3 :
(1 sc, inc) x 6 (18)
Round 4 :
(2 sc, inc) x 6 (24)
Round 5 :
1 sc in each st (24)
Info :
We will make scalloped shells to create the beard edge. Keep working in white yarn for beard. Do not fasten off after the next rounds; the beard remains slightly cupped to sit on the square.
Round 6 :
*Skip next st, 5 dc in next st, skip next st, sl st in next st* repeat around to form scallops (12 shells) (24)
Round 7 :
In each shell: sl st to center dc, ch1, 3 sc in center dc, sl st to next shell center (12 small clusters)
Round 8 :
*In next shell: dc, tr, dc in center shell; sl st between shells* repeat around forming fuller petals (12 shells)
Info :
Count your scallops: you should have twelve distinct petals. Adjust tension so petals sit flat and form a semi-circle that will drape below the face disk.
Round 9 :
1 sc in each st around body of beard and through some shell bases to stabilize (approx 36 sc total; if different, keep stitch count even)
Round 10 :
*Ch1, sc in next 2 sts, (5 dc in next st), sc in next 2 sts, sl st in next st* repeat around (12 prominent scallops)
Round 11 :
1 sc in each st making sure to pick up the shell points to make a tidy seam (approx 48)
Round 12 :
Fasten off leaving 20-25 cm tail for sewing. Weave tail through back of beard to secure shape.
Info :
Block the beard by pinning scallops to shape on a towel and lightly steaming; this helps the petals lay neatly when sewn to the square.
— Moustache (Make 1) :
Round 3 :
(1 sc, inc) x 6 (18)
Round 4 :
Ch1, 3 dc in next st across to form left lip curl, sl st back to right side, turn and repeat to form mirrored curl creating a single moustache shape (shape will be short and wide)
Round 5 :
Work 1 sc around base of moustache to stabilize (approx 20 sc)
Round 6 :
Shape edges with 1 sc, 1 hdc into outer loops to create gentle curve; fasten off leaving long tail for sewing
Info :
Position moustache above the beard scallops and under the nose; sew down the center and edges to create the classic Santa handlebar shape.
— Nose (Pompom Nose) :
Round 3 :
(1 sc, inc) x 6 (18)
Round 4 :
1 sc in each st (18)
Round 5 :
Work a tight round of sc in BLO to create a rounded edge, fasten off leaving long tail (18)
Round 6 :
Make small pompom by stuffing lightly and sewing edge closed; alternatively wrap yarn around a small cardboard ring about 30-40 wraps and tie tightly then trim to a small pompom; sew securely to center of moustache
Info :
If you prefer a flatter nose, use the small crochet motif without stuffing and sew centered slightly above the moustache central seam.
— Eyes (Make 2) :
Round 1 :
6 sc in mr using black yarn (6)
Round 3 :
(1 sc, inc) x 6 (18)
Round 4 :
1 sc in each st (18)
Round 5 :
Option A: Fasten off leaving tail and sew to face between rounds 12-13 of face disk. Option B: Embroider with black yarn directly on the face disk (no separate motif required).
Round 6 :
If using separate motifs, place and stitch compressing slightly to flatten the eye and give a soft, button-like look. Fasten off and weave in ends.
Info :
Spacing: measure approx 6-8 sts between centers for a balanced, childlike expression. If using safety eyes, place them between rounds 12-13 and secure firmly before excess stuffing.
— Hat (Cotton/Red Hat Applique) :
Round 3 :
(1 sc, inc) x 6 (18)
Round 4 :
(2 sc, inc) x 6 (24)
Round 5 :
(3 sc, inc) x 6 (30)
Round 6 :
1 sc in each st (30)
Info :
This builds the rounded crown of the hat. We will increase diameter then shape into a half-ellipse for a jaunty folded brim.
Round 7 :
(4 sc, inc) x 6 (36)
Round 8 :
(5 sc, inc) x 6 (42)
Round 9 :
1 sc in each st (42)
Round 10 :
Switch to FLO and work 1 sc in each st BLO on next round to create a defined brim ridge. 1 sc in each st BLO (42)
Round 11 :
1 sc in each st (42)
Round 12-14 :
1 sc in each st (42)
Info :
To make a half-hat that sits on top of the face, we will flatten the circle by decreasing across one half; mark the midpoint opposite the center front and pipe decreases across that half.
Round 15 :
Working across one half only: (5 sc, dec) x 3 across the designated half to reduce that side and shape into a shallow cone (reduce total by 3) (39 around)
Round 16 :
Work 1 sc in each st around (39)
Round 17 :
(4 sc, dec) x 3 on the same half to bring a slight curve (36)
Round 18 :
Fasten off the main red; join white yarn at base and work 1 round of sc in white to create trim (36)
Round 19 :
*Ch1, sc in next st, ch1 skip 1* repeat to give a picot-like edge along trim (approx 36)
Round 20 :
Fasten off leaving a long tail for positioning and sewing to the face disk. Lightly block to flatten.
Info :
Hat placement: position the hat so the white trim aligns with the topmost stitches of the face disk (round 11-13 area). Sew the brim carefully so it looks naturally folded over the head.
— Hat Pompom :
Round 3 :
1 sc in each st (12)
Round 4 :
Fasten off and stuff lightly; pull center tight and sew securely for a small pompom, or make a pompom by wrapping yarn about 50 times and trimming
Round 5 :
Sew pompom to hat tip or to side of brim as pictured; weave in ends
Info :
Make the pompom slightly firm so it holds its globe shape. Use small stitches to attach so it will not flop off in use or washing.
— Square Background (Granny Square Base) :
Round 1 :
Ch4, sl st to form ring, ch3 (counts as first dc), 2 dc in ring, ch2, 3 dc in ring, ch2, 3 dc in ring, ch2, 3 dc in ring, ch2, sl st to top of starting ch3 (four corner clusters) (12 dc + 4 ch-2 sps)
Round 2 :
Join red at any corner, ch3, 2 dc into same corner sp, ch2, 3 dc into same corner sp, *3 dc in next ch2 space between clusters, 3 dc, ch2, 3 dc in next corner* repeat 3 more times, sl st to first ch3 (24 dc clusters plus corners)
Round 3 :
Join, ch3, 2 dc in corner sp, ch2, 3 dc in same corner; along side work 3 dc in each side space (not in stitches) creating groups: *3 dc, 3 dc, ch2, 3 dc* around; sl st to join (increasing square size)
Round 4 :
Repeat previous round increasing 3-dc clusters along sides; work evenly so that you have square corners and maintain stitch multiples (approx 48 dc groups overall)
Info :
Work 4-6 rounds of classic granny clusters to get a base approximately 12-14 cm square depending on tension. Keep the four corner ch-2 spaces clear; these are helpful alignment points when positioning the Santa applique.
Round 5 :
Repeat cluster round maintaining corners; if you want square holes like pictured, stop after 6 rounds; otherwise continue one more round for larger square.
Round 6-9 :
1 dc cluster in each cluster space; at corners work (3 dc, ch2, 3 dc) to keep corners square
Round 10 :
Switch to 4.0mm hook if you prefer looser fabric for a cozier blanket look. Continue 1 round of clusters.
Round 11 :
Fasten off main body if you plan to add a separate border. We will now create a tidy square field for sewing the applique.
Round 12 :
Join yarn at any side center and work 1 sc in each stitch around for a firm base to secure applique (approx 80 sc depending on size)
Info :
Block the square to make it lie flat. Use the corner ch-2 spaces to align the applique centrally—mark the center of the top edge and bottom edge and find the center intersection to place the face disk.
Round 13-16 :
Optional rounds: If you want a thicker square, add two more rounds of sc or hdc to reach desired depth. Keep counts even across sides to avoid skewing.
Round 17 :
Work single crochet around edging using BLO to create a slightly ridged border (approx 80 sc)
Round 18 :
Ch3, skip 1, dc cluster across the side to form a decorative line one stitch in from the edge; sl st at corners to pivot (approx 20 clusters)
Round 19 :
Fasten off and weave ends to wrong side. Pin the square flat ready for applique sewing.
— Square Border & Finishing Rounds :
Round 1 :
Join red at any corner, ch1, sc around the entire square working 3 sc into each corner sp to keep corner rounded (approx 84 sc)
Round 2 :
1 sc in each st around, sl st to join (84)
Round 3 :
Switch to a decorative round: *ch1, skip 1, sc* along and at corners work (sc, ch2, sc) to maintain square shape (approx 84)
Round 4 :
Work 1 round of hdc around to create a gentle raised edge (84)
Round 5 :
For a final polished look, add a reverse single crochet (crab stitch) around the edge. This creates a twisted rope-like finish (84)
Info :
If you want hanging loops at the corners, use the corner ch-2 spaces: ch20 at two opposite corners and sl st to same corner to form loops before doing final border round.
Round 6 :
Fasten off and weave in all ends. Block the finished square flat and steam lightly to help stitches settle.
— Optional Decorative Embellishments :
Round 1 :
Add small embroidered blush by dabbing a tiny amount of pink yarn in a running stitch and brushing gently, or use fabric-safe chalk/powder for subtle rosy cheeks.
Round 2 :
Sew a few metallic seed beads or small bells to the hat trim if making for decorative use only (avoid beads for toys intended for small children).
Info :
All embellishments should be sewn with extra passes of thread for security if the square will be handled frequently. Avoid small detachable parts if gifting to small children.
This Santa granny square is a joyful little project with huge seasonal charm! Each scallop and stitch builds a cheerful face that looks handmade and heartwarming. It’s perfect for festive blankets, tree decorations, or cozy cushions. 🧶🎁 Keep one as a holiday keepsake or make a set to spread holiday cheer. Happy hooking and enjoy the sparkle this square brings to your home! 🎅✨