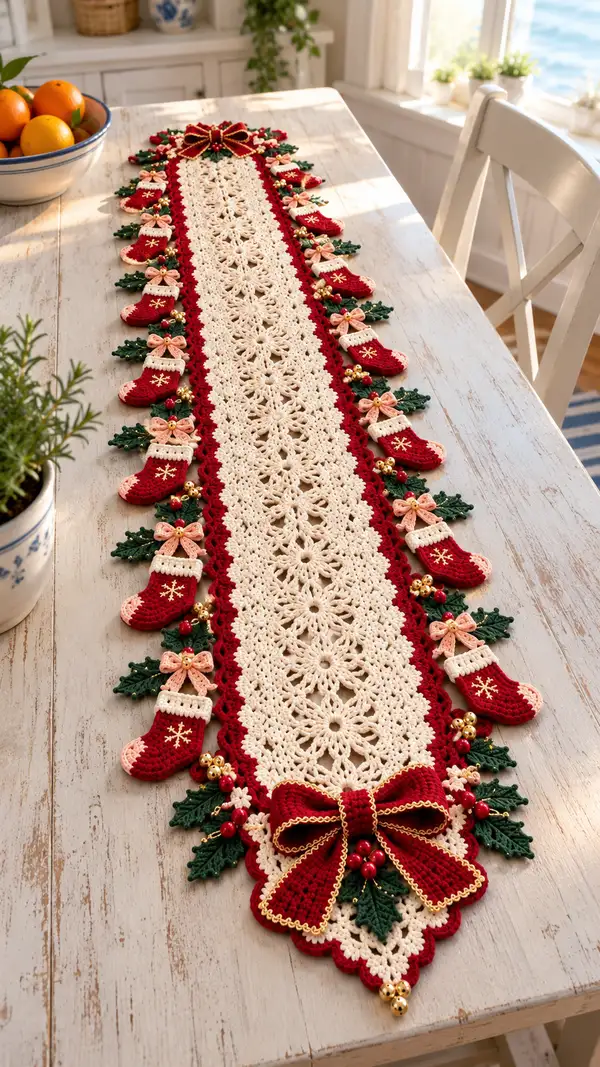
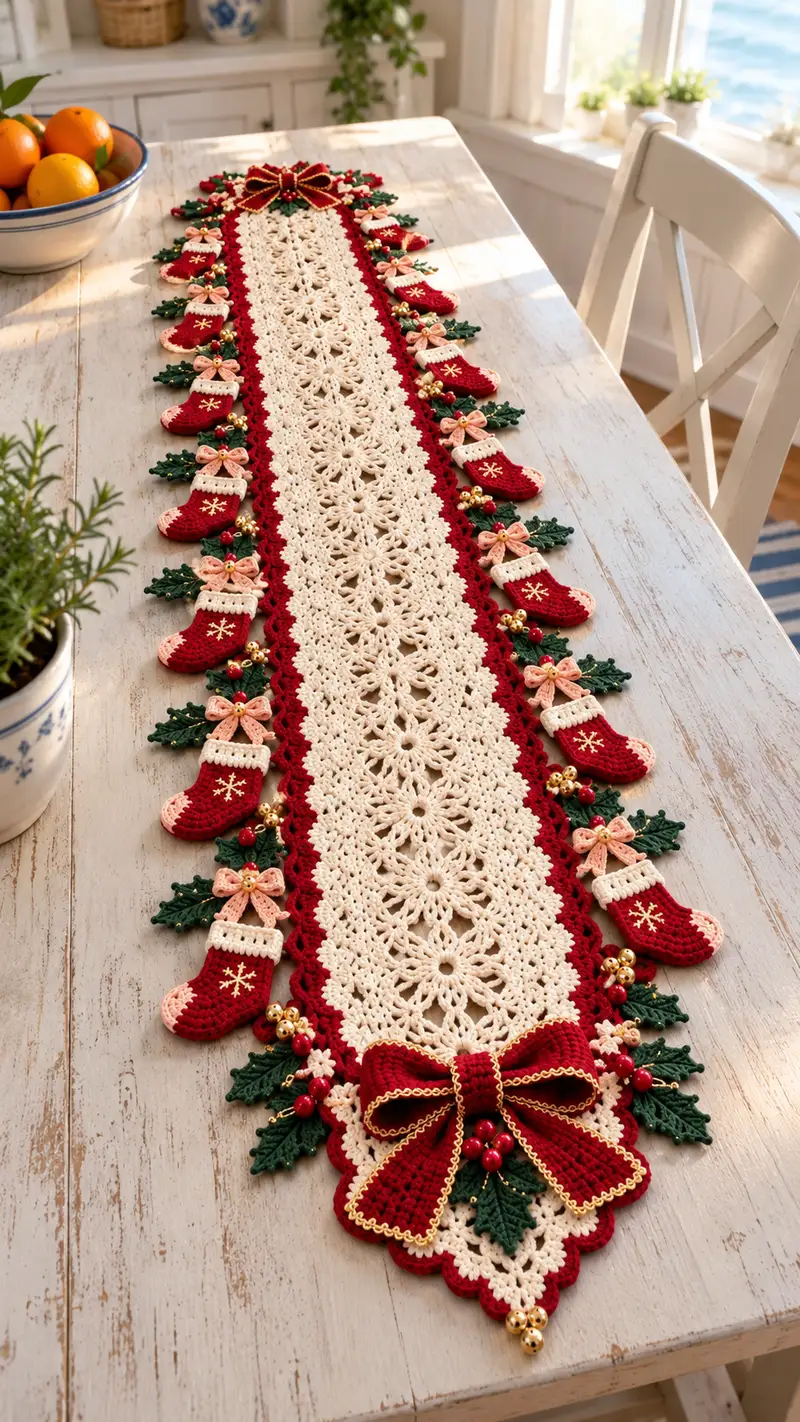
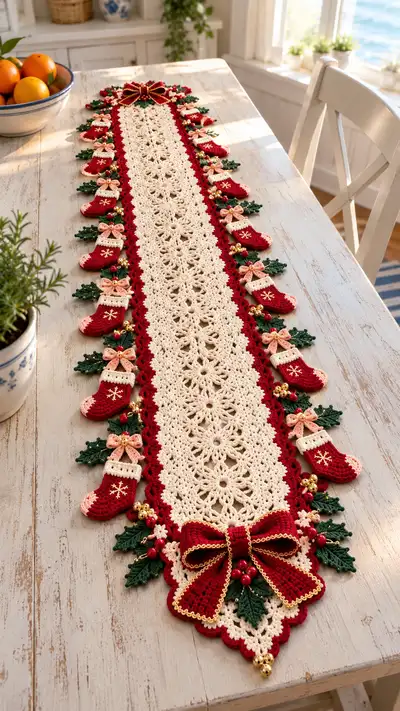
Create a stunning holiday table runner featuring a lacy cream central panel, deep red scalloped borders and a charming line of tiny red stockings, holly leaves, golden bells and pink bows. The runner shown has a rich, vintage-inspired look with delicate lacework, bold scallops and eye-catching embellishments for a festive centerpiece. Detailed step-by-step instructions guide you through making the central motifs, borders, stockings, leaves and bows, then assembling everything into a polished, show-stopping runner.
Progress Tracker
0% Complete
— Materials & Gauge :
Info :
Gauge is not critical for this decorative runner but helps keep proportion. Using worsted weight yarn and a 3.5mm hook the central lace panel motif (one motif repeat) should measure approximately 4.5" wide by 3.5" high before blocking. Adjust hook size to match your preferred tension. The finished runner in the photo measures roughly 10-12" wide (including scallops) and about 52-56" long—adjust number of motif repeats to lengthen or shorten.
— Central Lace Panel (Make motif strips and join) :
Round 1 :
Make a foundation: ch 8, join with sl st to form a ring, ch 3 (counts as first dc).
Round 2 :
Work 15 dc into ring evenly (including ch3) (16 dc)
Round 3 :
Ch 3, *dc in next 2 sts, ch 2, sk 1 st, dc in next 3 sts; rep from * around finishing with dc into top of ch3 (work 4 ch-2 loops total) (16 dc plus 4 ch-2 sps)
Round 4 :
Into each ch-2 space: *(ch3, 2 dc, ch2, 3 dc) in ch-2 sp, sk next 3 dc, dc in next dc; rep from * around. This forms small petal shells between dc columns (4 large petals)
Round 5 :
Ch 1, sc into top of next dc, work *(5 dc shell into center ch-2 of each petal, sc in next dc) rep around to make raised petals (4 shells)
Info :
Block each completed motif flat at this stage to open the lace. Use pins positioned at petal points to keep each motif round and equal. Blocking will dramatically improve appearance and make joining easier.
Round 6 :
Ch 4 (counts as tr), tr twice into the top of each petal shell, ch 3 between petal points and make small picot (ch3, sl st into 3rd ch) at each petal tip to create decorative points; rep around (petal points: 4)
Round 7 :
Ch 1, sc evenly around working 2 sc in around each picot area to stabilize edge and creating 32 sc total around the motif circumference (32 sc)
Round 8 :
Ch 3, *(2 dc, ch 2, 2 dc) in every 4th sc to create small square lacy corners; sc in intervening scs to maintain shape. Aim for 8 larger lacy arches around motif circumference (total stitch count varies but keep tension even)
Round 9 :
Ch 1, sc in each st around but in every arch work (sc, ch 3, sc) to form a joining loop for strip connection. End with sl st to first sc (st count same as round 7 with ch-3 loops added)
Info :
Make 11-12 motifs for a runner of the pictured length. You can make fewer or more motifs to shorten or lengthen the runner. Join motifs as you go or join later — we recommend joining with slip stitch through ch-3 loops for an almost invisible seam.
Round 10 :
Joining round (option A - join-as-you-go): With right sides facing, sl st through ch-3 loop of motif A, then through corresponding loop of motif B, *sl st into next loop on motif A, sl st into next loop on motif B; rep across one side to join. Finish joining each motif along the long edges until you have one long strip of motifs.
Round 11 :
Once strip is formed, run a round of sc along both long edges of the joined strip: ch1, sc evenly along edge placing 2 sc in each join where motifs meet to smooth seam (approx 120 sc per side for 12 motifs combined)
Round 12 :
Ch 3, dc in same st, dc every 2 sts across to build minor height; aim for even edge before adding decorative scallops (maintain stitch multiples of 6 across length).
Info :
If your motif strip edge measures differently than mine, count stitches and adjust by adding or removing small sc sections between motifs so the scallop border (which works in repeats of 6) will fit evenly along both sides.
Round 14 :
Work a row of shells along the edge: *(sk 2, 5 dc in next st, sk 2, sl st in next st) x across to create spaced shells that will anchor the red scalloped border (repeat shell placement evenly across both sides)
Round 15 :
Ch 1, sc in each st across including around shell posts to tidy edge. This will be treated as the base for red scallop rounds (st count unchanged)
Info :
At this point soak and block the entire central panel to open lace and get exact straight sides for joining the red border comfortably. Dry completely before continuing.
— Red Scalloped Border (Work along both long sides and across ends) :
Round 1 :
Join deep red yarn at start of shell row: ch1, sc in same st, *sc in next 2 sts, (sk 1, 7 dc shell in next st, sk 1, sc in next 3 sts) rep across. This builds the raised red scallops across the runner sides (repeat shells across edge spacing to match central edge)
Round 2 :
Ch 1, sc around each dc of shells and place (3 sc) into the center of each 7-dc shell to firm up scallop shape. Turn corners at ends by placing 6 sc evenly across each corner to create a rounded end piece (adjust number to maintain shape)
Round 3 :
Ch 3, *dc in each sc around working (dc, ch2, dc) across the top of each shell to create pointed scallop ridges; rep across length. Work extra dc clusters at each runner end to shape bow area (st count will vary by length).
Info :
Add a small row of BLO single crochet along the inner edge of the red border if you want a ridged piping effect next to the cream lace. This creates a neat shadow line and hides join threads.
Round 4 :
Ch 1, sc in each st around including corners. For decorative gold trim: with metallic gold yarn, sl st in every other sc around the outer edge to create a fine piped highlight (optional).
Round 5 :
Work a stabilizing reverse-shell row on the underside: with red yarn, sc in each st along underside and place 3 sc in points opposite each scallop to give a slightly firmer perimeter (st count matches previous row)
Info :
Work the red border before attaching stockings and holly so that the embellishments are sewn through the scallop edge and central motif join for secure anchoring.
— Tiny Stocking Motifs (Make 22 - 12 per side or adjust) :
Info :
Each stocking is worked flat in rounds then folded and seamed to form a tiny 3D stocking. Make one sample and adjust size to fit scallop spacing. The sample below yields stockings approximately 2.25" tall and 1.5" wide after seaming.
Round 1 :
Using red yarn, MR, ch1, 6 sc in MR (6)
Round 3 :
(1 sc, inc) x6 (18)
Round 4 :
(2 sc, inc) x6 (24)
Round 5 :
1 sc in each st around (24)
Round 6 :
Change to blush/pale pink: Info : Change to blush yarn. Work next rounds in blush for cuff. Ch1, sc in each st across (24)
Round 7 :
Work in BLO for cuff ridge: 1 sc BLO in each st around to create a textured cuff (24)
Round 8 :
Switch back to red: Info : Change back to red yarn. Fold the round into a toe shape by creating a shallow curve. On next round work dec shaping for toe area: (3 sc, dec) x4 (20)
Round 9 :
(2 sc, dec) x4 + sc across remaining sts (16) - shaping foot length
Round 10 :
(1 sc, dec) x4 + sc across remaining sts (12)
Info :
Start stuffing very lightly with a small amount of fiberfill to give a gentle rounded toe. Overstuffing will prevent neat folding and seaming; stockings should be slightly soft but not firm.
Round 11 :
6 dec around to almost close toe (6). Fasten off leaving long tail for seam and shaping.
Round 12 :
Fold stocking lengthwise with wrong sides together and whip stitch the sole seam from toe up to just below the cuff leaving cuff open. Weave in ends. Add a decorative pale peach stitch to the toe if desired: embroider a tiny star or heart with contrasting peach yarn.
Round 13 :
Decoration: Using metallic gold yarn, embroider a simple snowflake on the outer front of the stocking. Make a small cross then add angled stitches to form a 6-point star. Secure thread ends inside stocking.
Round 14 :
Bow kit: With blush yarn, ch 18, turn and sc across to make narrow bow loops, fold and sew into small bow. Alternatively, crochet two small rounded bows (ch 8, 2 rows) and stitch together with a wrapped center. Attach bow to stocking cuff with a bead at center.
Info :
Make 22 stockings (11 per side for a typical runner) or fewer depending on runner length. Space stockings so that each sits centered in a scallop of the red border. Pin each one into position before sewing.
— Holly Leaves & Berry Clusters (Make 44 leaves and bead clusters) :
Round 1 :
With forest green, ch 8, sc in 2nd ch from hook, hdc, dc, tr, dc, hdc, sc (leaf spine formed) (7 sts along)
Round 2 :
Work around foundation: ch1, sc in same st, *(sc, hdc, dc) down one side of chain, sl st in tip, then replicate (dc, hdc, sc) up other side, sl st in base to make full leaf; rep for each leaf (leaf shape complete)
Round 3 :
Add serration: With green yarn work small picots along edges: *(ch3, sl st in 3rd ch) spaced along edge to create small points; rep along both sides. Fasten off leaving tail for sewing.
Info :
For a sharper holly look, make 3 points per side by decreasing in some edge picots to form defined indentations. Use smaller hook (3.25mm) for crisp points if desired.
Round 4 :
Make 44 leaves total (22 per side) so that each stocking can have 1 or 2 leaves depending on design. Block flat on shaping board to keep points crisp.
Round 5 :
Bead clusters: Thread three small red beads onto a length of upholstery thread or very strong sewing thread; knot secure and sew the cluster onto runner or into leaf junction. Add 1-3 small gold jingle bells with a stitch to form a festive cluster.
Info :
Sew bead clusters onto leaves before attaching to runner: this gives easier access and more secure positioning. Add a few extra stitches into bead holes and tie knots back into inner fabric so beads do not slip.
— Large Decorative Bow (Make 2 for ends) :
Round 1 :
With deep red and 4.0mm hook, ch 31, sc in 2nd ch and across (30 sc). This becomes central long strip for the bow loops.
Round 2 :
Ch1, turn, sc in each st across for 10 rows to build a strip with body approximately 1.2" tall. Fold into bow loops and secure center with rows of gold-wrapped yarn.
Round 3 :
Edge round: With metallic gold yarn, sl st around the long edges creating a delicate piped edge. Work slowly to keep gold thread even and neat.
Round 4 :
Center band: With red yarn, ch 6, work sc across for 2 rows then wrap around mid point of folded strip tightly and sew ends on the underside. Stuff lightly under center before final cinching to give fullness.
Round 5 :
Make two loop sections per bow (left and right) by folding and sewing opposite sides so loops sit proud. Add 3 small berry clusters and two holly leaves decorating the center knot using sewing thread to secure.
Info :
Block bows on a curve by shaping over a rolled towel to create a natural curved loop look. Sew a few hidden stitches through each loop to maintain shape long-term.
— Small Decorative Flowers & Gold Accents :
Round 1 :
Small 5-petal flower: With blush yarn do MR, ch1, 5 sc in MR, sl st to join (5)
Round 2 :
*ch3, sl st into next sc to form a petal loop; rep x5 to form a 5-loop flower. Fasten off and sew small gold bead into center.
Info :
Make approximately 22 small flowers to intersperse between stockings and holly clusters. Use gold or metallic yarn to couch a tiny chain trim along the outer edge of center lace for extra shimmer.
— Assembly & Placement :
Info :
Assemble on a flat blocking board or large table. Place the central lace panel and pin the red scalloped border in place so both sides mirror each other precisely. Mark the center point on each runner end to anchor the large bow.
Step 1 :
Lay runner flat and measure equal intervals along each long scalloped border to determine stocking placement. For 12 motifs across length, use 11 stockings per side spaced so one stocking centers on each scallop. Mark with pins through the outer scallop points.
Step 2 :
Pin each tiny stocking into its marked scallop. Sew securely through cuff and underside using the long tail left when finishing the stocking. Use 6-8 small whip stitches around the cuff anchoring into the red scallop base. For extra security, add a second row of stitches through the sole and back of cuff.
Step 3 :
Arrange 1–2 holly leaves next to each stocking and sew through the leaf base to the scallop and the stocking cuff. Sew bead clusters and tiny bells into the leaf junction so each stocking has a full cluster of berries and 1 gold bell. Tie off threads on underside and weave in ends.
Info :
When stitching beads and bells, make several passes through each bead hole and sew back into the runner fabric to disguise knots. Use upholstery thread for bead clusters for strength.
Step 4 :
Attach small blush bows above each stocking cuff with a center bead. Stitch through bow center and into cuff, making sure bows are evenly oriented either toward runner center or outward depending on desired look.
Step 5 :
Sew the large decorative bows to each end of the runner. Position so center of bow covers end motif seam. Stitch through center band into runner center and secure holly leaves and bead clusters beneath the bow tails for a cohesive look.
Info :
Double-check symmetry: stand back and view runner from both sides to ensure stockings, leaves and bows mirror each other along the center line. Adjust as needed before finishing stitches permanently.
— Finishing Touches :
Step 1 :
Use a small dab of fabric glue inside bow centers or inside bead holes for additional security if runner will be handled frequently. Allow glue to dry fully before trimming excess threads.
Step 2 :
Weave in all tails on the underside of the runner. Use a yarn needle to thread tails through several rows of stitches and trim close to work. Hide any knot tails between motifs to avoid lumps.
Info :
Final blocking: Lay runner flat under a towel and press with warm iron (use steam sparingly and place a protective cloth over crochet) or reblock gently to ensure scallops sit flat and the lace opens fully. Avoid flattening three-dimensional embellishments; reposition bows and beads after blocking if necessary.
Step 3 :
Optional: Couch metallic gold chain trim around bow loops and along outer red scallop edge using small, even stitches to secure for long-term use and a professional finish.
Info :
Store runner flat or rolled with tissue between layers to protect beads and bows. Remove bells or bead clusters if you plan to machine wash — spot clean recommended for embellished runners.
This festive table runner brings classic holiday charm to any table with delicate lace, bright red scallops and playful stocking details. Each motif and embellishment is an opportunity to add personality—customize bead colors, bow styles, or stocking patterns to match your holiday décor. The finished runner is a true labor of love and a gorgeous centerpiece for seasonal gatherings. Enjoy the creative process and display proudly throughout the holidays! 🎄🧶✨