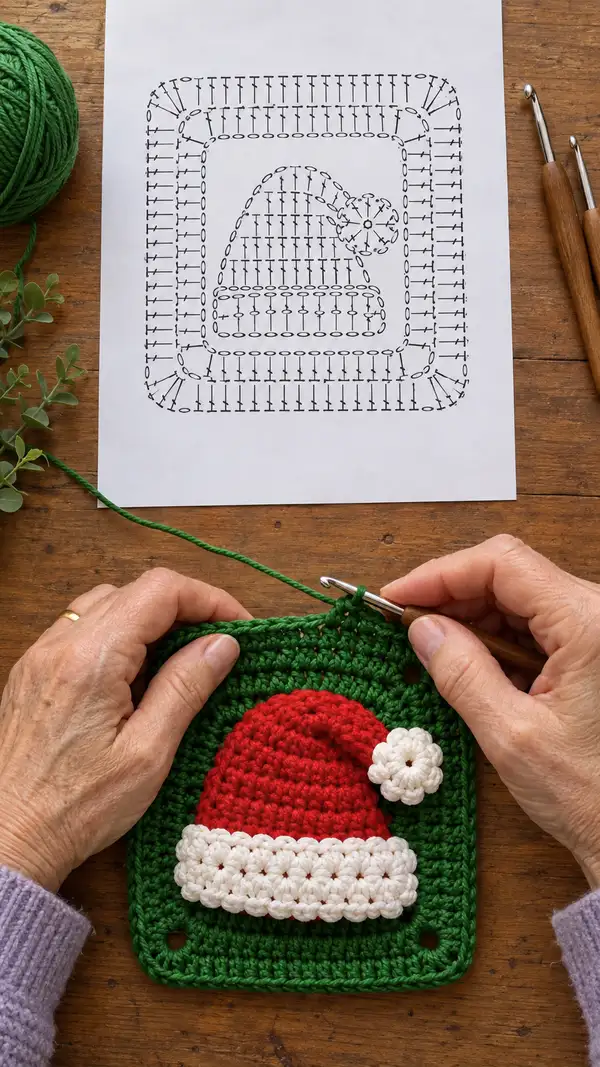
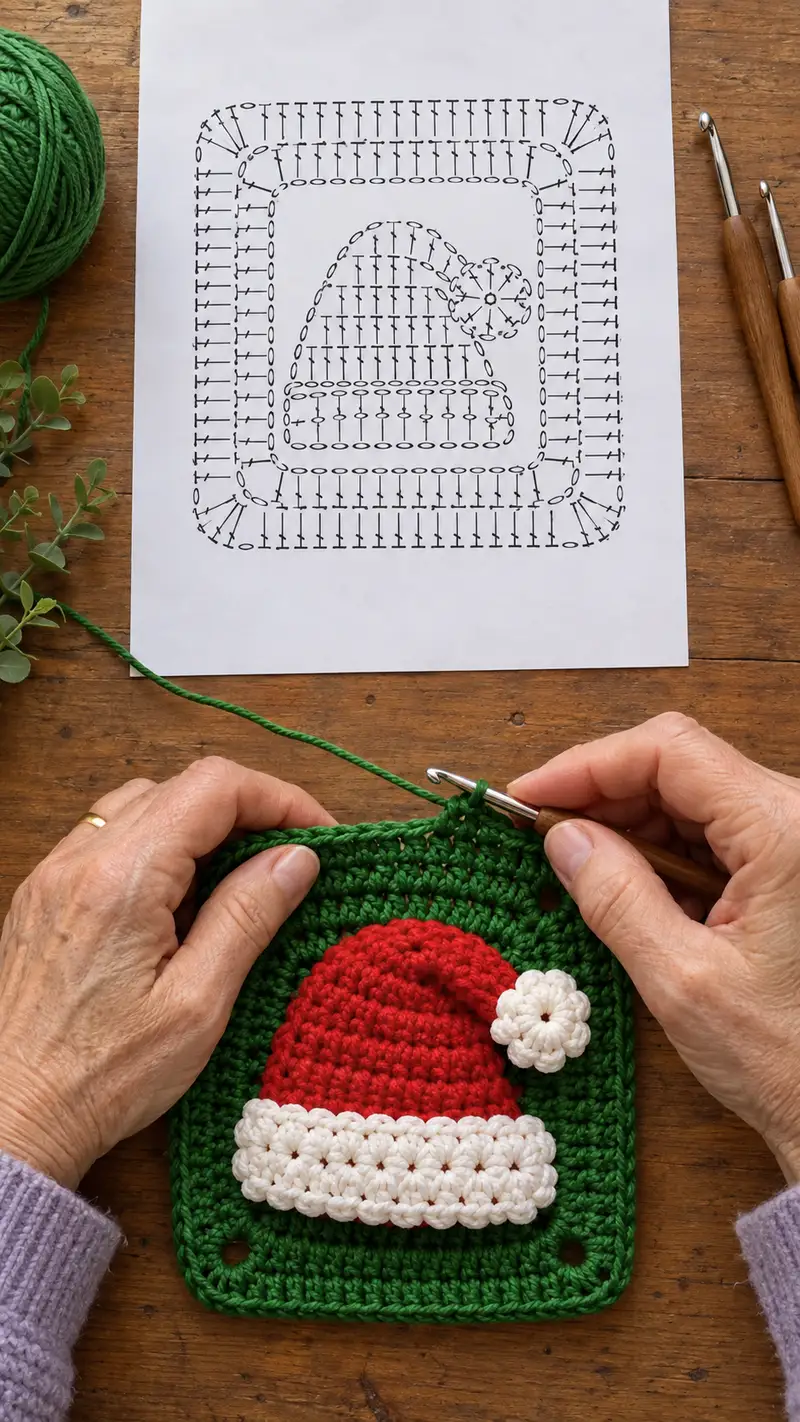
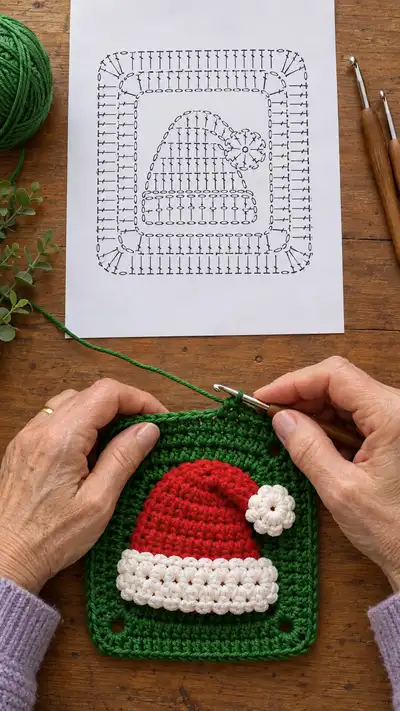
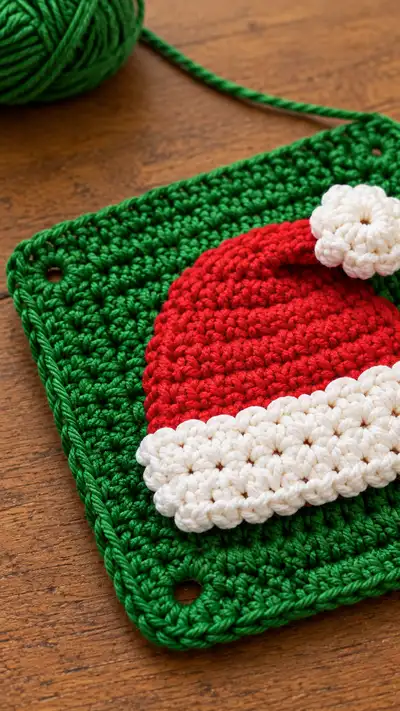
A festive granny square with a 3D Santa hat applique — bright red hat, textured white brim and pom-pom, mounted on a cheerful green square background. The project is worked in simple stitches with clear round-by-round instructions and helpful tips for finishing and assembly. Perfect for ornaments, garlands, or joining into a holiday blanket. Detailed stitch counts, color-change notes and finishing tips are included.
Progress Tracker
0% Complete
— Head :
Round 1 :
Using red yarn, 6 sc in magic ring (6)
Round 3 :
(1 sc, inc) x 6 (18)
Round 4 :
(2 sc, inc) x 6 (24)
Round 5 :
(3 sc, inc) x 6 (30)
Round 6 :
(4 sc, inc) x 6 (36)
Round 7 :
(5 sc, inc) x 6 (42)
Round 8 :
(6 sc, inc) x 6 (48)
Info :
These first 8 rounds form a circular disk that will become the dome of the Santa hat. Keep stitches even and do not pull the magic ring too tight; we will shape the top later. Use stitch marker at beginning of round 9.
Round 9 :
1 sc in each st (48)
Round 10 :
1 sc in each st (48)
Round 11 :
1 sc in each st (48)
Round 12 :
1 sc in each st (48)
Info :
Work 4-6 even rounds here to build the height of the hat. The number of even rounds determines how tall the hat dome will be — for a rounded, slightly slouched look use 9-12 even rounds total between increases and decreases (we are using rounds 9-20).
Round 13 :
1 sc in each st (48)
Round 14 :
1 sc in each st (48)
Round 15 :
1 sc in each st (48)
Round 16 :
1 sc in each st (48)
Round 17 :
1 sc in each st (48)
Round 18 :
1 sc in each st (48)
Info :
At this point the dome should look like a rounded half-sphere. If you want a taller hat, add extra even rounds (1 sc in each st) here in multiples to taste before beginning decreases.
Round 19 :
(6 sc, dec) x 6 (42)
Round 20 :
(5 sc, dec) x 6 (36)
Info :
Begin gently flattening the top toward a dome shape. Start shaping and lightly pressing the disk inward; if you want a slightly pointed slouch, you can add subtle directional decreases on one side only to create an off-center bend for the hat tip. Begin light stuffing only if you desire a puffed dome — this pattern generally attaches the flat dome to the square without major stuffing.
Round 21 :
(4 sc, dec) x 6 (30)
Round 22 :
(3 sc, dec) x 6 (24)
Round 23 :
(2 sc, dec) x 6 (18)
Round 24 :
(1 sc, dec) x 6 (12)
Info :
At round 25 you will have a small central cluster. Fasten off leaving a long tail (about 20-30 cm / 8-12 in) if you plan to sew the dome flat onto the brim piece. If you prefer the dome to remain slightly three-dimensional, do not close the final stitches entirely — instead slip stitch the remaining 6 together and leave a small opening to flatten and then whip stitch closed after placement.
Round 26 :
Fasten off and weave in ends if finished (if you plan to flatten the dome, draw the tail through the center and gather slightly to form a dome).
Info :
The dome (head) serves as the red body of the Santa hat. If you want a slouched hat tip (as seen in the photo where the hat leans slightly right), before fastening off fold the dome toward the desired slouch side and join a few stitches along the underside with a mattress stitch to lock the slouch in place. This creates a natural bend for the pom-pom to sit on.
— Brim & Pom-pom (treated as Arms) :
Round 1 :
Using white yarn, 6 sc in magic ring (6)
Round 3 :
(1 sc, inc) x 6 (18)
Round 4 :
Change to puff/cluster stitch pattern used for the brim bands: ch1, (yo, insert, pull up loop x3, yo pull through all loops) cluster into next st to create a puff cluster. For the row counts below we will approximate each cluster as occupying one stitch space created below.
Info :
The hat brim in the photo is a textured, scalloped row made from clusters that create a thick folded band. It is easiest to work the brim flat in rows or in joined rounds: make a strip of repeated puff clusters then sew the strip to the base of the red dome and fold slightly so it appears chunky.
Round 5 :
Work a round of clusters around the circle: *cluster in next st, ch1* around to create 18 clusters (18)
Round 6 :
Join second round of clusters on top of the first: slip st to first cluster, *cluster in same sp, ch1* around (18 clusters)
Round 7 :
Work one more round of single crochet in each cluster space to tidy the edge: 1 sc in each cluster sp (18)
Info :
Make the brim long enough to fold under the hat base by at least one cluster depth. When sewn, this creates the thick white band shown in the photo. If you prefer a cleaner look use a row of hdc in place of puff clusters for a lower-profile version.
Round 8 :
Fasten off, leaving a tail to sew the brim to the bottom of the red dome. Fold the brim strip in half and tack it in place along its back edge to form the thick band.
Pom-pom Round 1 :
Using the same white yarn, 6 sc in magic ring (6)
Pom-pom Round 2 :
6 inc (12)
Pom-pom Round 3 :
(1 sc, inc) x 6 (18)
Pom-pom Round 4 :
Form petals: *ch2, sl st in next st* around to create 6 small loops (use tail to close center)
Info :
The pom-pom in the photo is a flower-like cluster (a spool of small petals). You may lightly stuff the center with a pinch of polyester fiberfill to give it a slightly rounded shape before sewing it to the tip or side of the hat. A small sewn-on flower looks neater and is safer for gifts to small children than a loose yarn pom-pom.
Pom-pom Round 5 :
Fasten off leaving a long tail for sewing. Flatten petal loops and sew through the center multiple times to secure and shape into a floral pom-pom (no exact stitch count required; sew until secure).
— Body :
Round 1 :
Using green yarn, 6 sc in magic ring (6)
Round 3 :
(1 sc, inc) x 6 (18)
Round 4 :
(2 sc, inc) x 6 (24)
Round 5 :
(3 sc, inc) x 6 (30)
Round 6 :
(4 sc, inc) x 6 (36)
Round 7 :
(5 sc, inc) x 6 (42)
Round 8 :
(6 sc, inc) x 6 (48)
Info :
These initial rounds build a circular center. To transition to a square, we will introduce corner increases at four evenly spaced points over several rounds — this gives the square its four distinct corners. Keep stitch marker at round starts to track the center orientation.
Round 9 :
1 sc in each st (48)
Round 10 :
1 sc in each st (48)
Round 11 :
1 sc in each st (48)
Round 12 :
1 sc in each st (48)
Round 13 :
Work a shaping round to start corners: *(8 sc, inc, inc) repeat 4 times across round (each corner uses two increases) (48+4=52)
Note :
The repeat above places two increases at four quarter points. Stitch total becomes 52 - we will now stabilize the new stitch count by working even rounds to let the square blossom.
Round 14 :
1 sc in each st (52)
Round 15 :
1 sc in each st (52)
Round 16 :
Corner shaping: *Work 11 sc, (inc, inc, inc) into next stitch to form a pronounced corner; repeat 4 times* (This will add 12 stitches: new total 64)
Info :
At this stage the piece begins to square off because of the dedicated corner clusters. If your tension is tight you may see a slight bowl shape; gently press the work flat. Measure corner distances so each corner increase sits at approximately a quarter of the circumference.
Round 17 :
1 sc in each st (64)
Round 18 :
1 sc in each st (64)
Round 19 :
Establish granny-style texture: *(dc, ch1, dc) into same st for corner inspirations, then 6 dc across each side between corners* — you will remain at roughly 64 stitches but with grouped clusters; count carefully, you should have 64 dc and ch spaces arranged into 4 sides.
Round 20 :
1 dc in each dc and treat ch spaces as single stitch places, maintaining the established stitch count and alignment (64)
Info :
The green background in the photo is worked with small textured clusters (similar to star stitch or mini-shells) to give a dense but puffy surface. For best results use tight tension and work consistent stitch heights. If you want exact granny squares for joining later, on this round mark the centers of each side to align joins.
Round 21 :
Work 4 rounds of small clusters for texture: Alternate rounds of star-like clusters and single crochet to build 4 textured rounds (maintain 64 cluster positions and 64 stitches per round overall)
Round 22 :
1 sc in each st (64)
Round 23 :
1 sc in each st (64)
Round 24 :
Work a decorative round that introduces the corner hanging holes: at each corner, ch4, skip 3 sts and sl st to create a hole; work even sc along edges otherwise. Final stitch count remains approximately 64 but includes 4 ch-loop points.
Info :
The four small holes in the corners are visible in the photo; they are created with short chain loops while maintaining the round. These are useful for threading ribbon or for connecting squares together. Keep the chain loops gently sized to match the photo — about ch4 or ch5 each.
Round 25 :
1 sc in each st and in each chain-loop space around to maintain square shape (count will reflect the inclusion of chain spaces; expected around 68 sts)
Round 26 :
Work two more texture rounds in BLO to create a subtle rib across the square edge: 1 sc in each st BLO for 2 rounds (68)
Round 27 :
1 sc in each st (68)
Round 28 :
Begin border forming: *(9 sc, inc) x 7, 1 sc* to gently increase the margin and square the edges — add 8 stitches overall making final count approx 76
Info :
The border rounds square up the piece and create the thick frame seen in the photo. Work several tidy rounds of sc and optionally a round of hdc to add height to the border. If you are joining multiple squares later, use a uniform border width across all squares.
Round 29 :
1 sc in each st (76)
Round 30 :
1 sc in each st (76)
Round 31 :
Work two rounds of hdc across the edge for a neat, slightly raised frame (76 each round)
Round 32 :
Change to BLO and work 1 sc in each st BLO to create a neat rope edge (76)
Round 33 :
Work 1 round of sl st evenly around to create a firm finish. If you prefer the rope edge visible in the photo, you can instead do a crab stitch (reverse single crochet) around — this creates a raised twisted finish.
Round 34 :
Optional: Add a final round of slip stitch in contrasting color for definition (76)
Round 35 :
Fasten off and weave in ends. Block very lightly to square up if desired.
Info :
The finished square should measure roughly 12-14 cm (4.75-5.5 in) depending on your yarn and hook. If your piece is smaller, add extra border rounds to get the required size. Corners should sit at right angles; if they don't, add or remove a cluster on the next border round to balance.
— Arms (Corner Loops) - Make 2 :
Round 1 :
Using green (or contrast), ch10 (or ch6-10 depending on desired loop size)
Round 2 :
Sl st back along chain to create a firm loop, fasten off (one loop made)
Info :
There are four small holes in the corners of the square. Make at least 4 loops or use the existing chain holes. In this section we describe making two independent hanging loops if you want to hang only two sides; repeat as needed to make four. Sew loops in place using the long tails and a yarn needle.
Round 3 :
If you prefer a decorative tab instead of a simple loop, fold the loop strip in half and sew the ends to the corner for a neat tab (no additional stitch count).
Round 4 :
For added strength, whip stitch the loop firmly to the corner through multiple passes and weave tail back through the stitches to lock it in place.
Info :
These loops make it easy to thread ribbon or a dowel for hanging. If you plan to make a blanket of many squares, use uniform loop sizes and placements on each square for consistent joins.
— Legs (Decorative Tabs) - Make 2 :
Round 1 :
Using white yarn for contrast, ch6, 1 sc in 2nd ch from hook and each ch across (5 sc)
Round 2 :
Turn and 1 sc in each st across (5)
Round 3 :
Fold strip in half and sew ends together to make a small tab. Make two tabs and attach to the bottom of the square at desired locations for symmetry.
Info :
These two decorative tabs are optional and can be used to anchor buttons, or to add a little accent lower on the square. They’re not visible in every photo, but they allow customization.
Round 4 :
Fasten off and weave in ends.
— Ears (Pom-pom Flower) - Make 1 (or 2) :
Round 1 :
Using white yarn for the pom-pom flower, 6 sc in magic ring (6)
Round 3 :
(1 sc, inc) x 6 (18)
Round 4 :
Form petals: *sl st in next st, ch3, sl st in same st* repeat 6 times (creates 6 petal loops)
Info :
Squeeze a small bit of stuffing into the center of the flower if you want it slightly domed. Fold the petals together and sew through the center several times to secure the shape and flatten the loops into petal shapes. Fasten off and leave a long tail to sew to the hat tip.
Round 5 :
Sew flower to the extreme side or tip of the hat using the long tail, stitch through center multiple times and knot securely on the underside of the hat brim.
— Assembly & Finishing :
Info :
Before sewing pieces together, block your square lightly to get neat edges. Pin the red dome (hat) to the center of the square so that the brim sits horizontally across the lower third of the square — the brim should overlap the green background by 1-2 clusters to match the photo.
Round 1 :
Place the hat dome on the square where you want it (center horizontally, slightly above vertical center to leave space for brim). Use pins to hold in position.
Round 2 :
Sew the brim first: fold the white brim strip so the textured side faces outward. Using white yarn and a lengthened tail from the brim, whip stitch the back folded edge of the brim to the square at the row where you want the band to sit. Make sure to catch the square’s rows not just the surface so the sewn seam is secure.
Round 3 :
Next, sew the red dome to the brim and to the square around the brim edge: use the long red tail to ladder stitch evenly around the hat base through both hat and square. Aim for small, even stitches so seam is invisible from the front.
Round 4 :
Sew the pom-pom flower to the hat tip or side: position on the slouch side of the hat and sew until secure. Use several passes and tie off inside the hat so the knot is not visible.
Info :
Weave all tails into the back of the square and trim. If any gaps show, use small invisible whip stitches to close the seam and keep stuffing tucked. Block the finished piece again slightly if needed to flatten and even out the texture.
This Santa Hat Granny Square makes a cheerful holiday accent — perfect for cards, ornaments, or a festive blanket square. Each textured brim and tufted pom-pom adds personality and charm as you piece them together. 🧶🎅 The detailed instructions guide you through shaping, color changes, and neat finishing so you can create a polished finished square every time. Enjoy stitching this cozy little scene and share your handmade holiday cheer! ✨