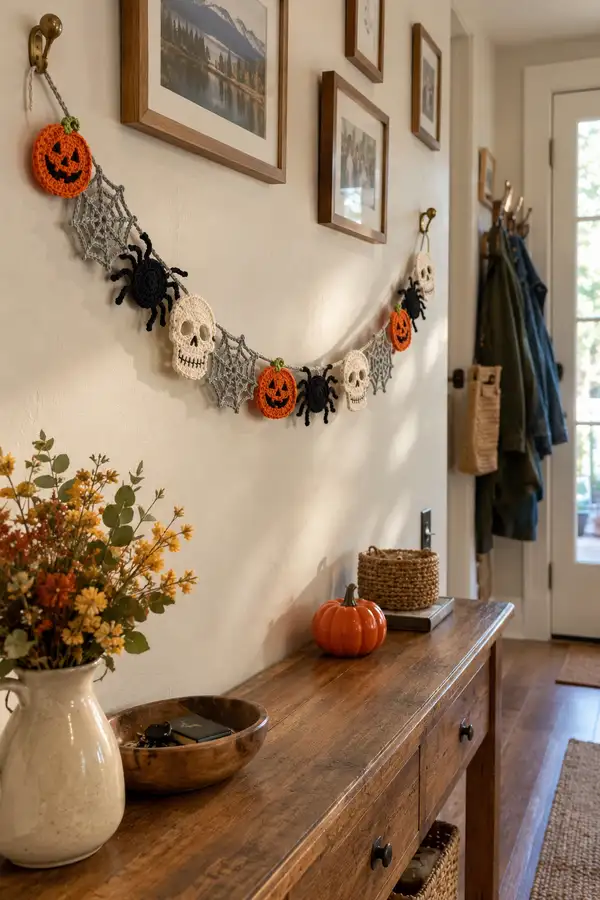
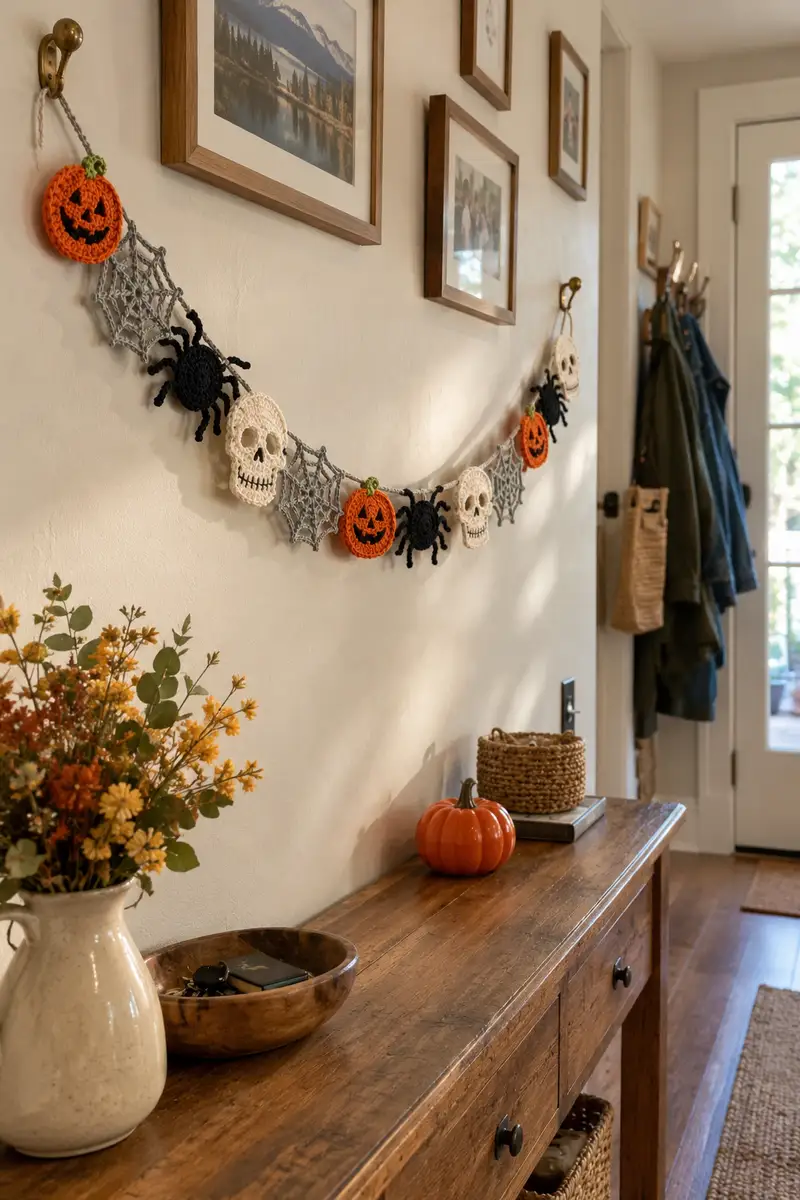
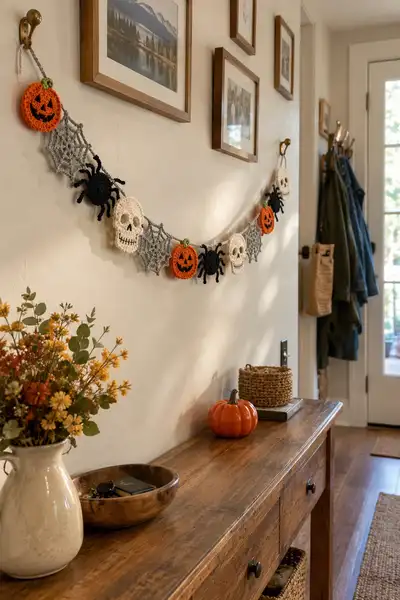
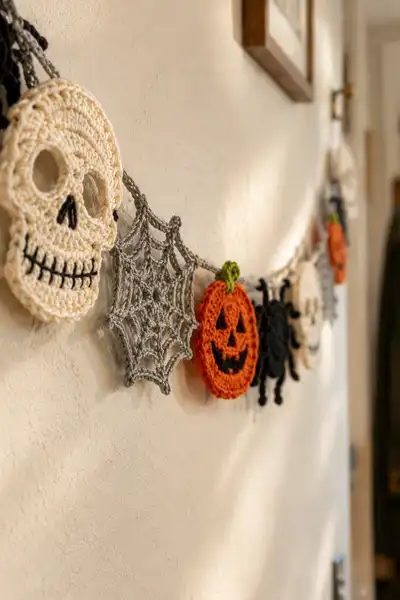
Create a festive Halloween garland featuring crocheted skulls, jack-o-lantern pumpkins, spiders and delicate spider webs. This pattern uses worsted-weight yarn and simple motifs joined on a twisted cord to create a charming entryway accent. Each motif is made flat and lightweight for easy hanging; the skulls have embroidered faces, pumpkins have carved faces in black, spiders have spiral legs, and webs are lacy and airy.
Progress Tracker
0% Complete
— Tools, Gauge & Prep :
Info :
Use worsted-weight yarn and a 4.0mm hook unless you prefer a denser feel; gauge is not critical for motifs but aim for firm stitches so stuffing is not required. For each motif work tightly enough that blocking shapes the pieces and hides holes from embroidery. Prepare to make multiples of each motif: plan for at least 3 pumpkins, 3 skulls, 3 spiders, and 4 webs for an 8-10 motif garland.
— Skull Motif :
Round 3 :
(1 sc, 1 inc) x 6 (18)
Round 4 :
(2 sc, 1 inc) x 6 (24)
Round 5 :
(3 sc, 1 inc) x 6 (30)
Info :
We are creating a flat skull disc for the forehead and top of head. Keep tension even and try to make the circle lie flat. If you notice cupping, add one more even round before continuing.
Round 6 :
(4 sc, 1 inc) x 6 (36)
Round 7 :
(5 sc, 1 inc) x 6 (42)
Round 8 :
(6 sc, 1 inc) x 6 (48)
Round 9-11 :
1 sc in each st (48)
Info :
These even rounds shape the forehead area. Mark the stitch at the center front to orient facial features. Eye placement will be worked later by creating eye sockets in a later round — do not embroider yet.
Round 12 :
1 sc in next 6 sts, ch 5, skip 5 sts, 1 sc in next 10 sts, ch 5, skip 5 sts, 1 sc in remaining sts (38 sts worked + 2 ch-5 openings)
Info :
This round begins the eye sockets by creating two chain-5 openings opposite each other across the circle. The ch-5 creates a hole the correct size for round eye sockets on the skull. Ensure the two openings are centered on the vertical midline.
Round 13 :
Working into the chains: where you made ch-5, join and work 5 sc around each ch-5 to form a neat eye ring. Continue 1 sc in the remaining sc sts across the rest of the round. Final worked sts = 48 (including sc around eye rings)
Round 14 :
1 sc in each st (48)
Info :
If you want deeper eye sockets, in Round 13 instead work (hdc, 3 sc, hdc) in each ch-5 ring; that will create a slightly raised rim. Now is a good time to lightly block the motif flat on a mat to hold shape before adding jaw details.
Round 15 :
1 sc in next 4 sts, (2 sc in next st, 1 sc in next 4 sts) x 6 (54)
Round 16 :
1 sc in each st (54)
Round 17 :
(5 sc, 1 dec) x 7 (42)
Info :
Begin shaping the lower skull and jaw. These decreases create an indentation under the cheekbones that helps form the jawline. Keep motif flat by pressing gently while working.
Round 18 :
(4 sc, 1 dec) x 7 (35)
Round 19 :
1 sc in each st (35)
Round 20 :
(3 sc, 1 dec) x 7 (28)
Info :
Now we'll carve out jaw curves and teeth placement. Eyeholes are already established; stitch a small satin-stitched nose triangle later with black yarn. Keep the motif symmetrical—use pins when transferring stitches for jaw details.
Round 21 :
(2 sc, 1 dec) x 7 (21)
Round 22 :
(1 sc, 1 dec) x 7 (14)
Info :
Fasten off and weave tail through the 7 remaining sts to close. Leave a long tail for attaching to garland cord or to back a small felt circle for additional stability if desired. Do not over-close—skull should remain flat.
Round 24 :
Optional finishing round: Reattach yarn at bottom jaw and work 7 sc evenly around the jaw edge to create a rim if you prefer a thicker jaw outline. Fasten off (7)
Info :
Embroider facial details: using black yarn or embroidery thread, stitch a small inverted triangle for the nose between the eyes on the top of the jaw area (use satin stitch). For teeth, use horizontal backstitched lines across the jaw opening—six short vertical stitches spaced evenly give a stitched grin look.
— Pumpkin Motif :
Round 3 :
(1 sc, 1 inc) x 6 (18)
Round 4 :
(2 sc, 1 inc) x 6 (24)
Round 5 :
(3 sc, 1 inc) x 6 (30)
Info :
Work flat circle to desired diameter for your pumpkin—these counts give a pumpkin roughly 2.5-3 inches across when using worsted weight yarn and 4.0mm hook. Increase or add even rounds for larger pumpkins.
Round 6 :
(4 sc, 1 inc) x 6 (36)
Round 7-9 :
1 sc in each st (36)
Info :
To create pumpkin ribs, we'll use surface slip stitch ridges later. For now, keep the circle even; mark the top center to orient the stem later.
Round 10 :
1 sc in next 3 sts, (2 sc in next st, 1 sc in next 3 sts) x 8 (44)
Round 11 :
1 sc in each st (44)
Round 12 :
1 sc in next 4 sts, (1 sc, 1 dec) x 8 (36)
Info :
These increases and decreases create a slightly domed pumpkin; it remains flat but with a subtle curvature. For carved face, leave a central area clear; we'll embroider the jack-o-lantern face using black yarn.
Round 13 :
1 sc in each st (36)
Round 14 :
(3 sc, 1 dec) x 6 (30)
Round 15 :
1 sc in each st (30)
Round 16 :
(2 sc, 1 dec) x 6 (24)
Round 17 :
(1 sc, 1 dec) x 6 (18)
Info :
Fasten off, leaving a long tail if you plan to sew the motif to the cord. Embroider the jack-o-lantern face now: triangles for eyes and nose, and a wide smile. Use tight satin stitch for the face in black yarn so the orange remains visible as the pumpkin's body.
Round 19 :
Stem: With green yarn, ch 6, join with sl st to form loop, work 6 sc around chain loop twice (12), sl st to join, fasten off leaving long tail for sewing
Info :
To add pumpkin ribs, use black or darker orange yarn and surface slip stitch from top to bottom creating 6 evenly spaced vertical ridges. Work gently so the stitches sit on the surface and do not distort the circle.
— Spider Web Motif :
Round 1 :
Ch 6, join with sl st to form ring, ch 3 (counts as dc), work 11 dc in ring, join (12 dc)
Round 2 :
Ch 1, *sc in next dc, ch 4*, rep from * to * around, join with sl st to first sc (12 sc + 12 ch-4 loops)
Info :
These chain loops become radial spokes. Keep loops even. Position motif so points of the web will align when working connecting rounds.
Round 3 :
Join in first ch-4 loop, *(sc, ch 3, tr, ch 3, sc) in loop, sl st to next ch-4 loop*, rep 11 more times, join (12 small spokes)
Round 4 :
Ch 1, sl st to center of first spoke, *ch 5, sl st to center of next spoke*, rep around to make inner circle of chain arcs (12 ch-5 arcs)
Info :
When making chain arcs, keep tension loose so the arcs don't pucker. This round creates the inner ring that the next connecting round will anchor to with dc clusters.
Round 5 :
Working from back: join yarn at first ch-5 arc, *sc, ch 4, 3 dc in ch-5 arc, ch 4, sc in same arc, sl st to next arc*, rep around and join (12 dc clusters)
Round 6 :
Ch 1, sl st to next spoke center, *ch 7, sl st to next spoke center*, rep around to form outer chain arcs (12 ch-7 arcs)
Round 7 :
Join in first ch-7 arc, *sc, ch 5, 5 dc in arc, ch 5, sc, sl st to next arc*, rep around, join (12 dc clusters)
Info :
These alternating chain arcs and dc clusters build the lacy look of a spider web. Block this motif flat so the arcs spread evenly. If your web looks twisted, dampen and pin flat overnight.
Round 8 :
Optional small picot edging: *ch 3, sl st in same st, skip 1*, around spokes to give a pointed web look; fasten off
Info :
Use gray yarn for a subtle web; white is also attractive. Make as many webs as needed—these are visually light and will space nicely between heavier motifs like pumpkins and skulls.
— Spider Motif (Body + Legs) :
Round 3 :
(1 sc, 1 inc) x 6 (18)
Round 4 :
(2 sc, 1 inc) x 6 (24)
Info :
Spider body is a small disc. Work tightly to keep it compact. This size gives a body about 1.5-2 inches across. The legs are created as simple chain spirals attached around the perimeter.
Round 5 :
1 sc in each st (24)
Round 6 :
(3 sc, 1 dec) x 6 (18)
Round 7 :
1 sc in each st (18)
Round 8 :
(2 sc, 1 dec) x 6 (12)
Round 9 :
1 sc in each st (12)
Info :
Fasten off leaving a tail for sewing. We will attach eight legs around the body evenly spaced. Use the head of a pin to mark leg attachment points before making legs.
Leg 1 (Make 8) :
Join black yarn at marked point, ch 14, sl st in 2nd ch from hook, sl st in remaining chs to create a curled cord (13 sl st), sl st back into body to secure
Info :
Make legs with slightly larger or smaller chain lengths to create natural variation; legs closer to front can be a touch longer. Twist each chain gently to form a spiral. You may prefer to crochet legs with sc along the chain for thicker legs: ch 10, sc back along chain into body.
Leg 2-8 :
Repeat Leg 1 at remaining marked points to make a total of 8 legs (4 on each side)
Info :
Trim and tidy ends; smoke the ends lightly with a match held briefly if using acrylic to curl and seal the tips (exercise caution and do this over a sink). Alternatively, knot ends and weave in securely on the reverse side.
— Garland Cord & Joining :
Round 1 :
Make twisted cord: cut three lengths of yarn each about 1.5x finished desired length (for 6ft garland cut 9ft total divided into three 3ft lengths). Join ends, braid the three strands loosely, tie off one end, and twist tightly then fold in half to allow the twist to coil as a cord.
Info :
Alternatively make a chain rope: using 4.0mm hook ch to desired length, join ends and sc in each chain to create a thicker rope. Whichever method, leave long tails at both ends for tying to hooks.
Round 2 :
Lay motifs on cord to check spacing. For an entryway garland with 9 motifs, allow roughly 6-8 inches between motif centers depending on motif size.
Info :
Lay motifs in your preferred sequence (example from left to right: pumpkin, web, spider, skull, web, pumpkin, spider, skull, web). Pin motifs to the cord using sewing pins to ensure even spacing before sewing.
Round 3 :
Sew each motif to the cord: Position motif so top edge aligns with cord; using a matching yarn tail from motif or separate yarn, whip stitch through back loops of edge stitches to the cord every 3-4 stitches. Secure with a knot and weave in tail to the back.
Info :
For motifs with a definite top (pumpkin stem, skull forehead), align the top so the motif hangs upright. For webs, sew a small loop at a spoke point to allow the web to dangle. Avoid bulky stitches on the front—sew mostly from the back or edge to keep visible join neat.
Round 4 :
Finish ends of cord with a loop: fold end over 1 inch, stitch across to create a hanging loop, hide ends by weaving them into the cord body, trim excess.
Info :
Press the assembled garland flat with light steam or pin into shape. Spread motifs slightly to avoid overlap. If garland will be stored, remove pom-pins and keep flat to retain shape.
— Variation & Assembly Details :
Info :
Alternate motif order for visual balance: place heavier motifs (pumpkins and skulls) separated by two lighter webs or spiders. If hanging along a stair rail use double the cord and stitch motifs back-to-back for a two-sided effect. For outdoors, use acrylic yarn and secure ends with a dab of fabric glue inside knots to prevent fraying.
Info :
If you want a fuller garland, make each motif twice, block them flat, then whip-stitch motifs back-to-back around the cord so motifs show on both sides. This doubles weight so ensure cord and hooks are sturdy.
Info :
Color change tip: Carry black yarn behind the motif when embroidering faces for tidy backs, or embroider after motifs are blocked. For pumpkins, using a darker orange for surface slip-stitch ribs adds realism; use short back stitches in embroidery for sharp jack-o-lantern faces.
Info :
Storage: keep garland flat in a breathable bag or box, or hang folded gently; avoid heavy compression which can flatten web arcs permanently. Spot clean with a damp cloth; acrylic can be handwashed and reblocked if needed.
This skull-and-spider web garland brings seasonal charm and just the right amount of spooky whimsy to any entryway or mantel! The mix of lacy webs, carved pumpkins, stitched skulls, and curly-legged spiders creates a balanced and festive look. Each motif is quick to make and fun to arrange, offering a satisfying afternoon project with a beautiful display result. 🎃🕸️ Happy stitching and enjoy displaying your Halloween handiwork!