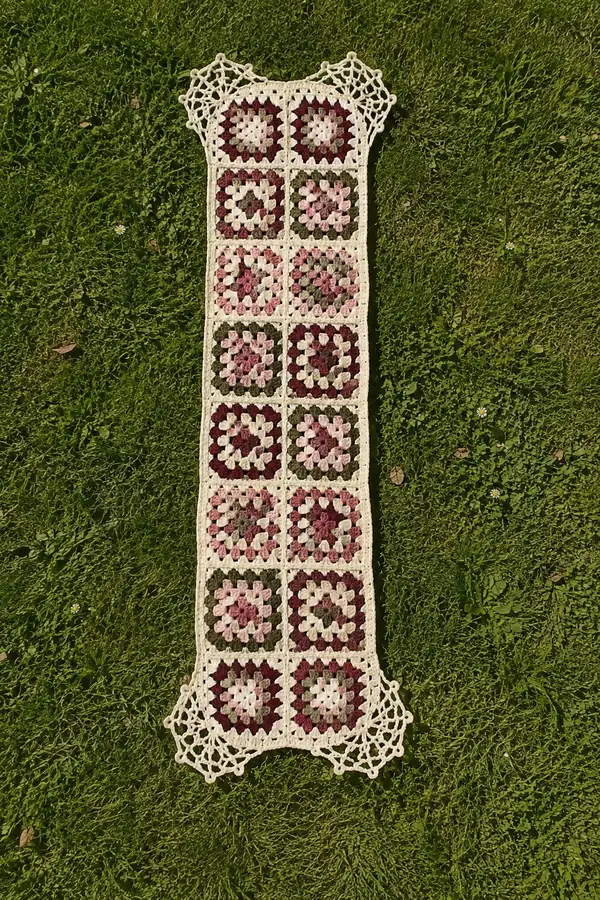
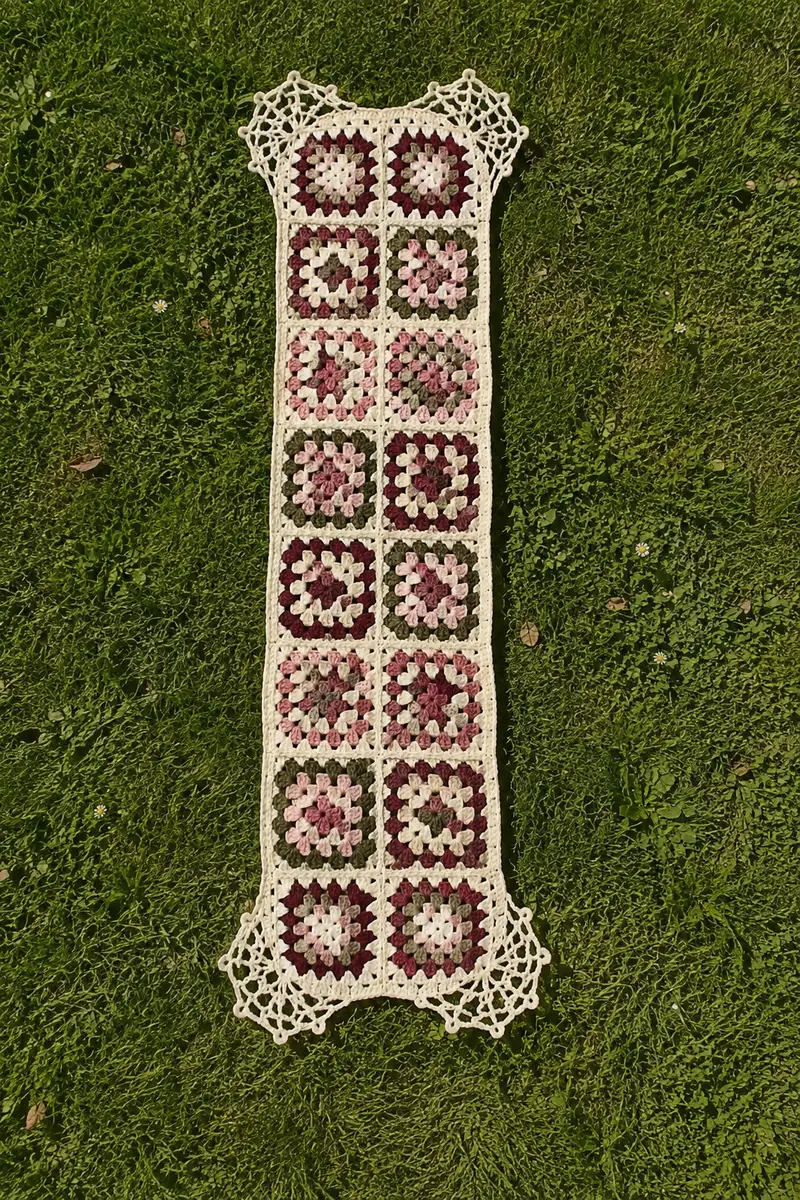
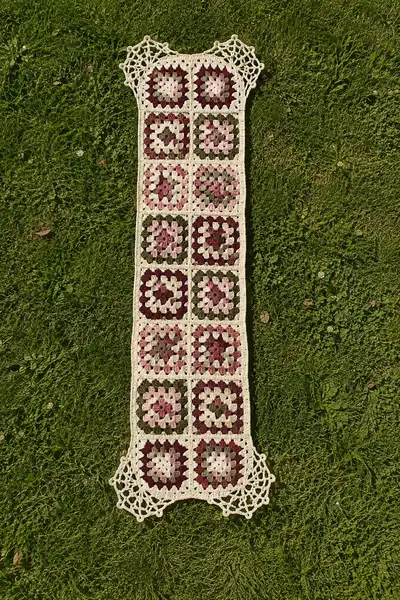
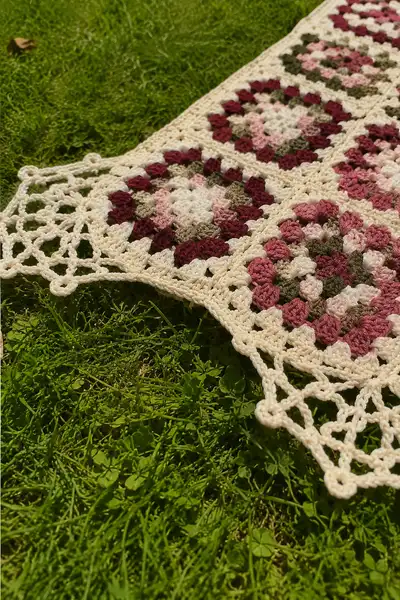
A long, elegant table runner made from 12 classic granny squares joined in a 2x6 layout, trimmed with a lacy spider-web corner motif and a clean cream border. This pattern uses warm berry, rose, moss and cream tones for a vintage-inspired look. Step-by-step instructions guide you through square construction, join-as-you-go techniques, edging and the decorative spider-web corners.
Progress Tracker
0% Complete
— Notes and Overview :
Info :
This pattern makes a 2 x 6 arrangement of classic granny squares joined into a long runner approximately 100-110 cm (39-43 in) long by 18-22 cm (7-8.5 in) wide, depending on your gauge and yarn. The sample uses cotton-worsted weight yarn and a 4.0mm hook. You will make 12 granny squares, join them with a cream join-as-you-go method, add a 6-8 round cream border along the long edges and a four-corner spider web lace motif at each short end. Block squares prior to final joining for best results.
Info :
Terminology: In this pattern dc clusters refer to groups of 3 dc worked together into the same space (typical granny cluster). Where clusters are called for, work 3 dc into the same ch-space or stitch unless otherwise specified.
— Classic Granny Square (Make 12) :
Round 1 :
Using Color A (central color) ch 4, sl st into first ch to form a ring. Ch 3 (counts as first dc), work 2 dc into ring, ch 2, (3 dc into ring, ch 2) × 3 more times, join with sl st to top of beginning ch-3. (4 corners; 12 dc in 4 clusters)
Round 2 :
Change to Color B. Sl st into first ch-2 corner space, ch 3 (counts as dc), work (2 dc, ch 2, 3 dc) into same corner space. *Ch 1, skip next 3 dc cluster, into next ch-2 corner space work (3 dc, ch 2, 3 dc).* Rep from * to * around, end ch 1 and join with sl st to top ch-3. (4 corner clusters; 4 side ch-1 spaces)
Info :
When changing colors, finish the final yarn-over of the last dc with the new color to achieve a clean join. Carry unused yarn loosely along the inside if you prefer not to weave ends immediately, but avoid tight carries which distort the square.
Round 3 :
Change to Color C. Sl st to next ch-1 space on side, ch 3 (counts as dc), work (2 dc) into same ch-1 space to make a cluster, *ch 1, in next ch-1 space work 3 dc cluster; rep from * across side until you reach a corner, in corner space work (3 dc, ch 2, 3 dc). Continue around and join to top ch-3. (Each side now has 3 clusters separated by ch-1; corners remain ch-2)
Round 4 :
Change to Color D. Sl st to a side ch-1 space, ch 3, work (2 dc) into same space (cluster), ch 1, work 3 dc cluster in next ch-1 space, repeat across to corner; in each corner work (3 dc, ch 2, 3 dc). Continue for full round and join to top ch-3. This round increases the visual size of the square while maintaining 4 corners. (Side clusters: 3 per side; corner clusters as above)
Info :
At this point your square should be roughly square shaped and measure slightly smaller than final targeted square size. If you prefer larger squares, add one additional granny round in contrasting color: (ch 3, (2 dc) in ch-1 spaces, corner (3 dc,ch2,3 dc)).
Round 5 :
Change to Color E (optional contrast or same as Color A). Work as Round 4 for final decorative round: side clusters separated by ch1, corners (3 dc, ch 2, 3 dc). Fasten off and weave ends, leaving a 15-20 cm tail if you plan to join-as-you-go from this round. Block the square to a consistent size with other squares. (Final round forms the outer shell that will be joined)
Info :
If you want a tighter, neater join, make Round 5 in the cream joining color to create an even edge before joining. Blocking at this stage flattens corners and opens stitches for neater join-as-you-go connections.
— Layout, Color Planning & Blocking :
Info :
Lay out 12 blocked squares in a 2 columns x 6 rows grid. For the sample, alternate center and second round colors to create a balanced vertical stripe of color. Pin squares to blocking mat to exact dimensions (all squares should be identical after blocking). Ensure corners are square and edges are straight before joining.
Info :
Number your squares with safety pins or notes so you follow the intended layout when joining. This avoids accidentally swapping color placement during join-as-you-go.
— Join-As-You-Go (JAYG) Vertical Joins (Joining squares along long sides into rows) :
Info :
This pattern uses a join-as-you-go method primarily worked with the cream color. You will join squares in columns: first join within each row (2 squares per row), then join rows end-to-end to build the runner lengthwise. JAYG is done on the final round of the square (Round 5 above) to create seamless joins.
Round 1 :
With outer round completed on the square you will attach next square by starting new square’s Round 5 and connecting into the side spaces of the already-placed square. Align right sides together. Start at a corner of the placed square: join cream with sl st into corner ch-2 space, ch 3 (counts as dc), (2 dc, ch 2, 3 dc) in that corner space to mirror the corner; now move along the side: for each ch-1 side space on the new square, work 3 dc cluster into that ch-1 and then instead of chaining 1 and skipping, sl st into the corresponding ch-1 space of the square already placed to join, ch 1 to move to next. Continue working clusters and slip-stitch joins across the side until you reach corner; complete corner as (3 dc,ch2,3 dc) and sl st into placed square corner to secure. Fasten off. (This round attaches one side; repeat for the opposite side when joining rows)
Info :
When slip-stitching into the adjacent square, insert hook under only the loop of the ch-space or into the ch-1 space (not through fabric too far) to keep the join flat and tidy. Keep tension relaxed to avoid drawing edges in.
Round 2 :
Repeat Round 1 process for each square of the pair so every long edge is joined in the column. After placing second square and joining along one long side, rotate the pair and join the opposite long side of the second square to create a neat seam that matches the rest of the runner. Double-check that corners and motifs align during each join.
Info :
If your squares look slightly different after joining, you can adjust with a row of sc around each join to even the edge; however the sample opts for a narrow joined seam only in cream.
— Forming Columns & Joining Rows (Horizontal Joins) :
Round 1 :
After you have created 2-square columns (there will be 6 columns in total if you make 12 squares as 2 columns by 6 rows), place two columns side by side and join along the vertical long edges using the same JAYG method described above. Work into ch-1 side spaces: work 3 dc cluster in new square then sl st into the corresponding ch-1 of adjacent column, ch 1 to move. Continue until full seam is joined. Repeat to attach all columns to form the continuous runner length.
Info :
At the end of these joins you will have a single long panel made of 12 squares. Make sure joins are consistent and that the runner lays flat—if any join is tight, carefully remove a few joins and rejoin with a slightly looser tension.
Round 2 :
Once all vertical and horizontal joins are complete and the entire panel is assembled, work a narrow sl st or reverse sc (optional) along both long edges to tidy joins: With RS up and cream yarn, join with sl st at a corner and work even sl sts across the top of join spaces. This creates a base for the outer border. (Total length will equal the sum of outer rounds of each square; exact stitch counts depend on your square gauge.)
Info :
When joining rows, periodically lay the runner flat and measure to ensure columns have remained parallel. Pin if needed to prevent skewing while working the next rounds.
— Long Edge Border (worked across entire runner length) :
Round 1 :
With RS facing, join cream yarn at one corner of the runner at the very edge. Ch 1, work 1 sc in same edge stitch, *skip 1 edge stitch, (3 dc, ch 1, 3 dc) in the seam or ch-space to create a faux shell where desired (approx every 6-8 stitches), sc into edges between shells*; rep along entire long edge to create a repeating shell-and-sc border. Join with sl st and turn. (This creates a visually balanced border with shells to echo granny clusters.)
Info :
Because the runner is long, count repeats by number of square sides rather than total stitches; typically you should aim to place 3-4 shells per square edge depending on your gauge for even spacing.
Round 2 :
Ch 3 (counts as dc), work dc into each stitch or shell top around the long edge to build a raised border row. Where you encounter 3-dc shells, work 3 dc into the top of that shell to maintain even height. Join with sl st to top of ch-3.
Round 3 :
Work a decorative picot-row: *ch 3, sl st into 3rd ch to form picot, sc in next 2 stitches* repeating along the long edge to create a scalloped finish. This row softens the edge before the corner lace is attached.
Info :
Try this border on a swatch to gauge spacing for shell placement. Adjust number of sc between shells to make shells sit centered over each square if desired.
— Spider Web Corner Motif (Make 4 - two mirrored pairs) :
Info :
The spider-web corner is a triangular lace motif worked separately then attached to the short ends of the runner. Each corner is built in rounds to form a triangular, pointed lace with loops and spider-web netting. Work two left-pointing and two right-pointing motifs so they mirror when attached.
Corner Round 1 :
Using cream, ch 10, join with sl st to form a ring (or ch 3 then join into small loop). Ch 3 (counts as dc), work 11 dc into ring (total 12 dc including ch3), join with sl st to top ch-3. (12 dc)
Corner Round 2 :
Ch 3, (2 dc, ch 2, 3 dc) in first ch-space to form the triangle's first corner; *ch 3, skip 3 dc along, work 3 dc cluster into next space or between clusters to start the first side.* Repeat to create two sides and a second corner so that you have a triangular motif forming from the circle. Join and fasten off if desired or continue increasing. (Forming 3 corners in a triangular arrangement)
Corner Round 3 :
Rejoin cream at a corner space, ch 4 (counts as tr), work a fan of 5 tr into corner, ch 4, sl st into corner base to create a pointed corner. Move along the side: *ch 4, sl st in next side chest-space to create netting*, repeat until the triangle has three distinct points. Join and weave in ends lightly; keep join tail for final sewing. (This round constructs the initial lace points.)
Info :
Pin this triangular motif on the short end of the runner to judge the size before committing; you can increase the ch-4 netting or add another fan round to enlarge the lace point if desired.
Corner Round 4 :
Ch 1, sc around the outer edge of the triangular motif to give a neat foundation for the spider-web netting. Work sc evenly along each side, placing 1 sc per loop or 1 sc per 2 stitches where needed to maintain a smooth outer edge. Join.
Corner Round 5 :
Work spider-web netting: *into each sc along the edge ch 8, sl st into sc 4 spaces ahead to form big loops; repeat across the edge creating mesh loops.* At points where mesh loops meet corners, work an additional ch-2 loop and secure with sl st to anchor. This creates a large decorative net resembling a spider web.
Info :
Spacing here is aesthetic; however keep loops consistent in length. If loops are too loose they will droop; if too tight they will pull the corner flat. Pin and measure loops as you go to keep all four corners consistent in final look.
Corner Round 6 :
Reinforce web: in each large ch-8 loop work (sc, ch 6, sc) across the loop to create a secondary spoke. Then work sl st into the spoke intersection to anchor. Repeat across all loops. This adds a denser spider-web look and helps the motif keep shape when washed or handled.
Corner Round 7 :
Decorative edge: Work a final row of picots around the outside perimeter of the triangular motif: *sc, ch 3, sl st into tip of ch-3 to make picot, sc in next 2 sts* around. Fasten off leaving tail for sewing and weave in tails after attaching to runner.
Info :
Make one left-oriented motif and one right-oriented motif for each short end so that points mirror each other when seamed to the runner. To mirror, simply reverse the direction you work the motif (or rotate when attaching).
— Corner Attachment and Decorative Seaming :
Round 1 :
Pin the spider-web motif to the short end of the runner so the central corner point aligns with the center seam between two squares; mark the join points using pins every 2-3 stitches. Using cream yarn and a yarn needle, tack the motif down at spaced intervals with small overcast stitches through the foundation round of the motif and the border edge of the runner. Use the long tail from the motif for the final seaming to avoid extra ends.
Info :
Sew from RS so your stitches are hidden on the WS. Keep stitches small and consistent for an invisible seam. If you prefer, you can also crochet the motif directly to the runner by slip-stitching into edge spaces, but hand sewing gives more control and is recommended for lace corners.
Round 2 :
After tacking, work a round of short sc stitches through both motif edge and runner edge around the seam to secure the lace and tidy the join. Sc about every 3-4 mm (one sc per small loop) and make sure the seam is evenly distributed across the junction so the lace points sit flat.
Info :
After attaching both spider-web motifs to one end, repeat the process on the opposite short end of the runner. Ensure motifs are centered to each other so the runner’s symmetry is maintained.
— Final Lace Edge & Finishing Rounds :
Round 1 :
Work a continuous decorative loop-row around the entire runner (including around attached corner motifs) to tidy and unify the look: with cream, join and ch 4, *skip 2, sc into next, ch 3, skip 2, repeat* working evenly. In the corners, add additional loops to preserve corner shape. Join and fasten off.
Round 2 :
Stitch a final ornamental ridge: with a smaller 3.5mm hook and cream yarn, work 1 sc into each ch-3 loop around the runner, then work 5 dc into every 4th loop to create gentle scallops and defined edging. This adds a refined finish and weight to the edges so the runner lays flat.
Info :
If any edge or lace loops are longer than others after blocking, steam press carefully from WS or re-block with additional pins to shape edges perfectly before final finishing.
Round 3 :
Weave in all ends using a yarn needle, working tails into the body of the runner across multiple stitches to avoid loose ends coming undone. Trim close but not too short—leave about 3-5 mm of yarn seam under the fabric if you plan to wash the runner frequently.
Info :
Give the entire runner one final blocking session: pin the runner to exact rectangular dimensions and pin lace points to crisp triangles. Spray with water or steam lightly and leave to dry completely for best lace definition.
— Alternative Joining and Border Options :
Info :
If you prefer a visible seam, skip JAYG and join squares with whip stitch or single crochet join after all squares are completed. For a wider border, add 3-6 rows of dc along the long edges before the lace corners to increase length and presence on the table.
Info :
To make runner longer or shorter, increase or decrease the number of square rows: adding one row adds the height of one square plus border. Maintain consistent pattern by blocking each added square to match the original size precisely.
— Care Instructions :
Info :
Hand wash or machine wash gently on cold in a mesh bag; reshape while damp and re-block to maintain lace points. Use mild detergent and do not bleach. If using cotton, a light steam press from WS keeps lace crisp.
This granny-square runner turns classic crochet motifs into a beautiful heirloom accent—soft cream edges balancing lush berries and moss tones. The lace spider-web corners add an elegant, vintage feel that elevates any table or dresser. Each repeated square and careful join creates a calm, rhythmic crafting experience that is immensely satisfying. I hope this pattern inspires you to create a runner that becomes a favorite display piece in your home. 🧶✨