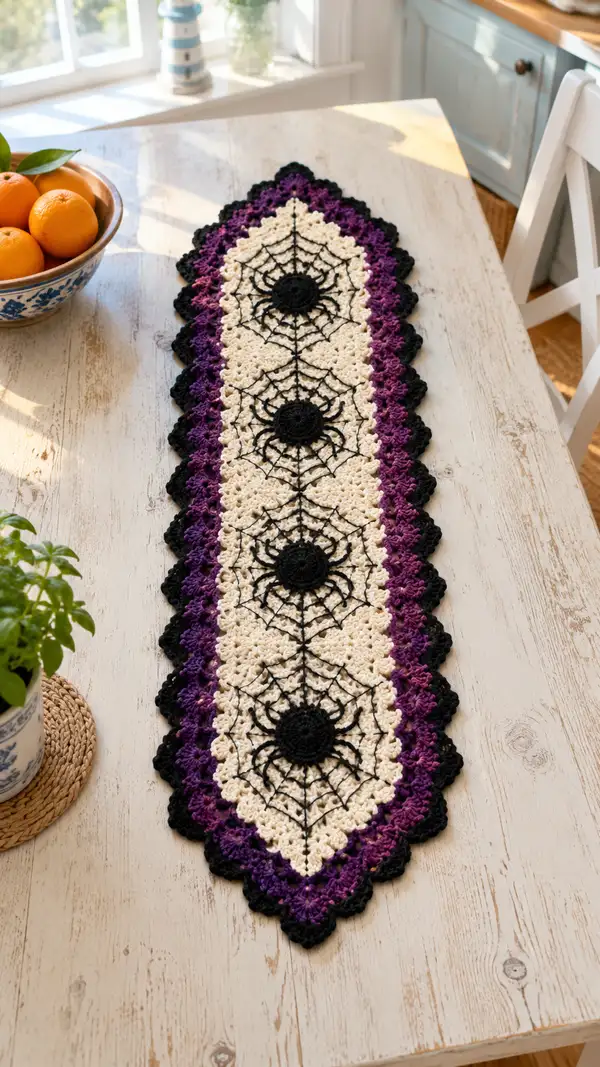
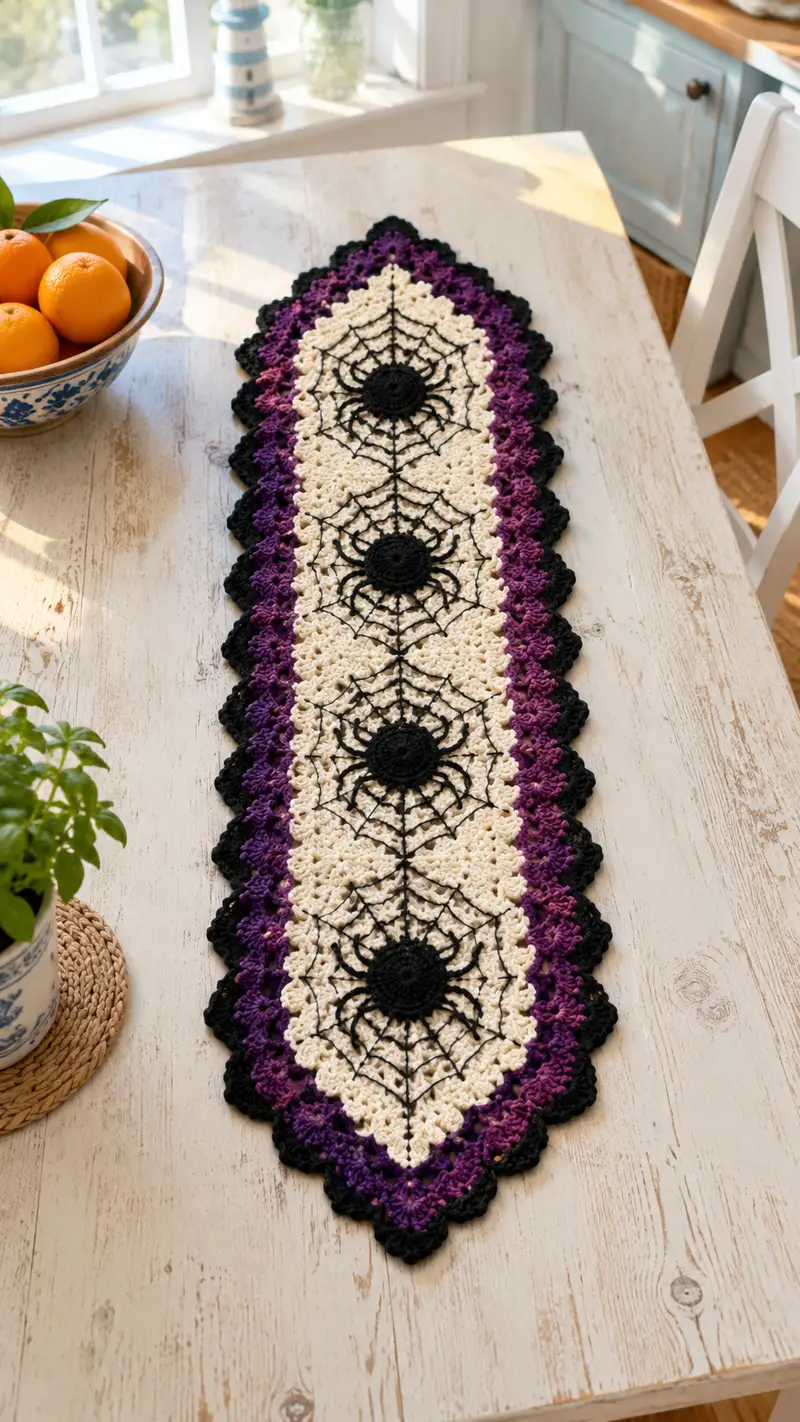
A spooky elegant table runner featuring three spiderweb medallions down a creamy lace center, framed with rich purple gradient rounds and a crisp black scalloped edge. The design blends open lace stitches with bold surface-spun spiderweb lines for dramatic contrast. Perfect for Halloween décor or any season when you want a touch of gothic charm on your table. This pattern uses basic crochet motifs joined together and surface crochet/embroidery for the web detail.
Progress Tracker
0% Complete
— Materials & Gauge :
Info :
Gauge is not critical for this decorative runner, but for reference 12 dc = 3 inches in open lace sample using worsted weight on 4.0mm hook. Adjust hook size to reach similar drape. Pattern is written in US terms.
— Overview & Construction :
Info :
This runner is constructed from three identical spider medallions worked from the center outward, joined together using join-as-you-go technique. After joining, an elongated cream panel is worked to smooth the transitions, then purple gradient rounds and a final black scalloped edging create the finished diamond/pointed runner shape. Surface crochet or embroidery adds the spiderweb motif in black over the cream panel.
— Center Spider Medallion (Make 3 identical) :
Round 1 :
Using black yarn: 6 sc in magic ring (6)
Round 3 :
(1 sc, inc) x 6 (18)
Round 4 :
(2 sc, inc) x 6 (24)
Round 5 :
(3 sc, inc) x 6 (30)
Round 6 :
(4 sc, inc) x 6 (36)
Info :
These first six rounds create a solid black center disc. Keep your tension slightly snug so the center reads as a firm round. Finish Round 6 by sl st to join; fasten off if you prefer to join cream later, or carry the cream up to the join to avoid weaving too many ends.
Round 7 :
Join cream yarn with a sl st to any st. Ch3 (counts as first dc), *ch2, skip 2 sc, dc in next sc* around, working 12 dc clusters spaced with ch2 sps (12 clusters, 36 base points)
Round 8 :
In each ch2 space: *(2 dc, ch2, 2 dc) in same ch2 sp (shell made)*; sl st to top of beginning ch3 to join. (12 shells)
Info :
Round 7-8 create an introductory lacy round. Keep shell spacing even; use a marker at the start of round 8 to track 12 shells. Blocking will help shells open nicely.
Round 9 :
Ch1, sc in same st, *ch3, sc between next two shells* around to create 12 ch-3 spaces between shells (12 ch-3 spaces)
Round 10 :
In each ch3 sp: (3 dc, ch2, 3 dc) in same ch3 sp creating larger shell clusters. Sl st to join at top of beginning st. (12 large shells)
Round 11 :
Ch1, sc in same st, *ch5, sc between next two large shells* around making 12 ch-5 picot spaces (12 ch-5 sps)
Round 12 :
In each ch5 sp: *(2 dc, ch2, 2 dc, ch1, 2 dc, ch2, 2 dc) — a double shell— in ch5 sp*; sl st to join. (12 double shells)
Info :
The medallion is expanding with 12 repeat units. At this point the medallion will be approximately 3.5-4 inches across depending on yarn and tension. Place a stitch marker at the top of round 12 to maintain orientation for later web embroidery.
Round 13 :
Ch1, sc in same st, *ch7, sc between next two double shells* around creating 12 ch-7 loop-spaces to later anchor join rows (12 ch-7 sps)
Round 14 :
Change to a cream continuation if needed (same cream). In each ch7 loop: work (3 dc, ch2, 3 dc) to create tall lacy petals. Sl st to join. (12 petals)
Round 15 :
Ch1, sc in same st, *ch3, sc at tip of next petal (between the 3dc groups)* around to create connections (12 ch-3 sps)
Round 16 :
In each ch3 sp: (dc, ch1, dc) to form small arches around the medallion. Sl st to join. (12 arches)
Info :
Round 13-16 open the medallion into a decorative lace ring. Check for evenness; if one side appears tighter, gently block medallion to flatten before continuing. Leave the last sl st and do not fasten off if you plan to join to adjacent medallion in the join-as-you-go step.
Round 17 :
Ch1, sc in same st, *(ch5, sc in next arch gap) x2, sc between next two arches* around to create a staggered network of ch-5 arches. (12 groups)
Round 18 :
In each ch5 arch: (2 dc, ch2, 2 dc) forming a wide shell; sl st to join. (12 shells)
Round 19 :
Ch1, sc in same st, *ch3, sc in center of next shell, ch3, sc in next gap* repeat around to create 24 small ch-3s spaced evenly (24 ch-3 sps)
Round 20 :
Work in each ch3 sp: (dc, ch1, dc) creating a final delicate lace round. Sl st to join. (24 small arches)
Info :
By Round 20 your medallion should read as a 5-6 inch open lace motif with a solid black center. Fasten off and weave in ends, or leave tails for joining. Make three identical medallions. Blocking of each medallion flat is recommended to open lace evenly before joining and surface webbing.
— Joining Medallions and Building the Center Panel :
Info :
Pin the three medallions in a straight line with about 1/4 inch spacing between each medallion's outer lacy points. You can join-as-you-go (JAYG) by working a joining round on medallion 2 and 3 that slip-stitches into corresponding ch-3 or ch-5 spaces on the adjacent medallions, or whip stitch using matching cream yarn for a nearly invisible seam. This section describes join-as-you-go for a smooth center panel.
Round 21 :
With cream yarn on medallion 2 (center medallion), join at one outer arch and ch1, sc around to the spot that meets the next medallion; when you reach the corresponding ch-3/ch-5 space of medallion 1, sl st into that space to join, ch1, continue sc around medallion 2, repeating join at symmetric spaces to attach medallion 1 at 6 evenly spaced points. Finish by joining medallion 3 the same way. (joins at 6 points each side)
Info :
If sewing instead of JAYG: use a length of cream yarn and whip stitch through outer loops of both medallions, pulling gently to close any gaps while preserving lace openness. Weave ends into the back of the lace.
Round 22 :
Work 1 sc in each available outer arch around the trio, filling gaps with sc and ch-3 where needed to create an even oval/elongated panel around the medallions. Aim for a total of approximately 120-140 sc around the assembled group depending on spacing (this count varies by tension; evenly space stitches).
Info :
At the joins the fabric may pull; add small sc bridges (ch1 + sc) to smooth transitions. Pin the assembled panel flat and measure: aim for a center panel length about 26-30 inches for the three medallions plus connecting lace, and width approximately 6-8 inches before adding border rounds.
Round 23 :
Ch3 (counts as dc), dc in each st around the connected panel to create a base round of dc; where gaps occur, work (dc, ch1, dc) to fill space. Join with sl st. (approx. 120-140 dc)
Round 24 :
Ch1, sc in each st around to flatten and tidy the edge. Join with sl st. (120-140 sc)
Info :
These rounds create a stable base for the purple gradient bands and ensure the edges are even for subsequent scalloped rows. If your dc count is significantly different, add or remove sc evenly to keep edges balanced.
— Cream Field Expansion (Rounds to stabilize center) :
Round 25 :
With cream: *ch3, skip 1 sc, dc in next sc* around to create 40-50 open arches spaced evenly around the center panel (count depends on previous stitches)
Round 26 :
In each arch: (2 dc, ch2, 2 dc) making shells around the entire assembled medallion area. Sl st to join. (counts equal to number of arches)
Round 27 :
Ch1, sc in same st, *ch3, sc in top of next shell* around to create even spacing for the purple rounds (same count as shells)
Info :
These rounds ensure the center area sits flush inside the purple band and that the runner will maintain an elongated shape rather than bunching at the joins.
— Purple Gradient Band (Work two shades for depth) :
Info :
We will work 6 rounds of purple gradient - 2 rounds medium purple, 2 rounds deep purple, then a transition round to black. Carry yarn up the back or fasten off and weave ends; color changes should be done at the beginning of rounds for a clean join.
Round 28 (Medium Purple - Shade A) :
Join shade A in any ch-3 sp: ch3, dc in same sp, *dc in next ch-3 sp* around forming one round of dc. Join. (same number of stitches as Round 25 arches)
Round 29 :
Ch1, sc in each st around. Join with sl st. (maintain count)
Info :
Switch to shade B (deeper purple) next to create a graduated look. If you prefer a smoother gradient, you may use a multicolored yarn with tonal shifts instead.
Round 30 (Deep Purple - Shade B) :
Join shade B: *(2 dc, ch2, 2 dc) in every 3rd stitch* around to add shell texture and deepen the color band. Join. (number of shells will equal ~1/3 of stitches)
Round 31 :
Ch1, sc in each st (or in each shell work sc2) around to create a smooth round for the next purple round. Join. (consistent stitch number retained)
Round 32 :
Repeat Round 30 in shade B to thicken the band and create a scalloped feel that will transition into the black border. Join. (same shell count)
Info :
If you have used two purple shades, weave in the join tails on the wrong side so the gradient reads smoothly. Block this entire piece flat to prepare for the black border and the surface web work.
— Transition Rounds to Black Border :
Round 33 :
Change to black yarn: Ch1, sc in each st around (this forms a neat contrast ring between purple and final scallop). Join with sl st. (maintain stitch count)
Round 34 :
Ch3 (counts as dc), *skip 1 sc, (3 dc) in next sc, skip 1 sc, dc in next sc* around to create staggered clusters that will support scallops. Join. (staggered cluster count)
Info :
These rounds prepare stitch spacing for a decorative scalloped edge. If your runner edges ripple, adjust pattern by adding or removing small ch-1 spaces evenly around until edges lay flat.
— Final Black Scalloped Edge :
Round 35 :
With black yarn: *in cluster top make (5 dc, ch2, 5 dc) as large scallop, sl st into next cluster top to anchor* repeat around. This will create a bold scalloped rim. Join with sl st. (scallop count approx 20-24 depending on previous shells)
Round 36 :
Ch1, sc in each dc around the scallop edge to tidy, catching the back loops of scallops on the previous round for a neat finish. Join. (stitch count roughly equal to number of dc in one scallop times scallop count)
Round 37 :
Optional: In each scallop top, work *(sc, ch3, sc) to create decorative picot peaks; sl st between scallops.* This gives a textured pointed edge like the one in the photo. Fasten off and weave in ends.
Info :
For a crisp edge, block scallops with pins pulled taut to create neat pointed ends. Steam blocking is effective for worsted weight yarn; avoid direct heat on synthetic yarns.
— Spiderweb Surface Embroidery (Do after blocking) :
Info :
Spiderwebs are worked on top of the cream center field using black yarn and a blunt tapestry needle or a chain stitch/ surface slip stitch method. The example uses surface crochet chains anchored into stitches; embroidery with yarn needle using chain stitch is simplest for most crocheters. Plan placement: centers aligned with black discs, spacing evenly along runner length.
Round 38 :
Identify medallion centers: with runner flat, find the black disc center of the top medallion. Using black yarn and tapestry needle: embroider 8 radial spokes outward from center to the outer cream field edge. Each spoke is a chain stitch or surface slip stitch anchored into top loops at even intervals. Repeat for each medallion. (8 spokes per medallion)
Round 39 :
Working in concentric circles around each medallion center: connect spokes with chain loops: first round encircling center: chain 5 between each adjacent spoke and secure with small backstitch in the spoke; second round chain 8 between spokes; third round chain 12 to reach the outer lacy shell. Secure each join with a small backstitch. This forms the web pattern. Fasten off and weave ends. (3 concentric arcs typical)
Info :
Keep web tension even and slightly loose to let the web sit above the lace. If you prefer a crocheted web, use a 3.5mm hook and surface chain stitch technique to create similar effect. Practice on a scrap swatch first.
— Optional Decorative Details & Reinforcements :
Round 40 :
Optional: Add small crocheted spiders for dimensionality: using black yarn, make small 6-round spider bodies (start MR 6sc, inc rounds to 18, 2-3 even rounds, stuff lightly). Attach to center disc with invisible stitches. Repeat for each medallion if desired.
Info :
Be mindful of table use: if this runner will be used under food or heavy wear, avoid tiny glued embellishments and secure all elements with sturdy sewing and weaving of ends.
— Finishing :
Round 41 :
Weave in all ends: use a tapestry needle to bury color joins through 8-12 stitches of the wrong side. Trim flush. Block the entire runner again to ensure scallops are even and web sits smoothly. Press gently if fiber allows.
Info :
For symmetry, check all medallions align on a central axis and scallops match on both sides. Use pins and a spray bottle during blocking to shape the final piece. Allow to dry fully before use.
Round 42 :
Enjoy and display: place runner on tabletop; for functional protection add a thin non-slip pad under the runner if used on a wooden dining surface to prevent movement.
Info :
To launder: hand wash cold, reshape while wet and lay flat to dry. Avoid tumble drying to maintain shape and color integrity.
This Spiderweb Table Runner brings a perfect mix of lacework and drama to any table. Each medallion and lace round builds into a striking, elegant piece you can proudly display for the season or year-round. The detailed instructions guide you step by step, from center discs to surface spiderwebs, making the process satisfying and rewarding. Have fun stitching, blocking, and styling — and share your spooky handiwork! 🧶🕸️