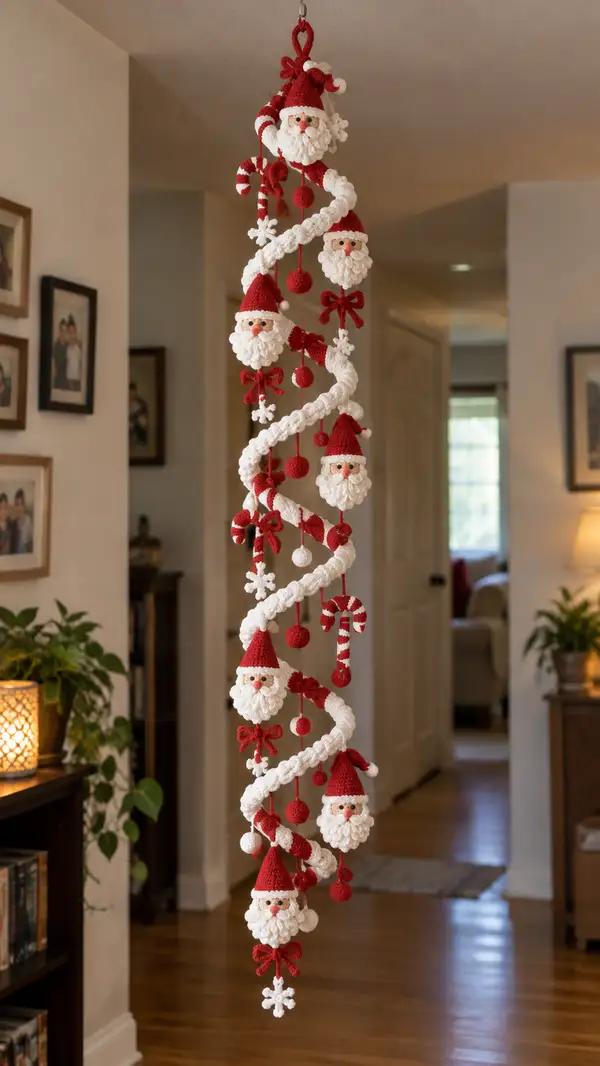
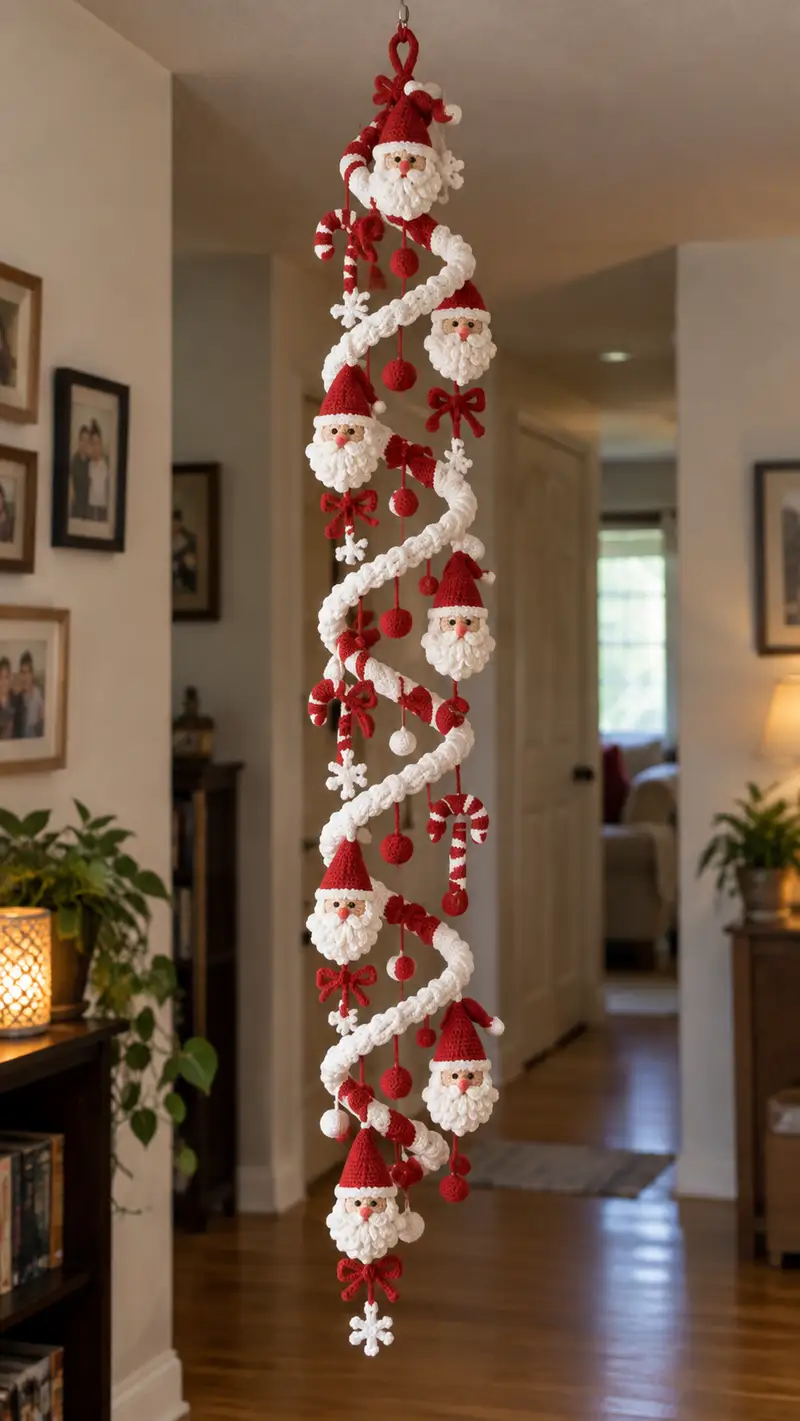
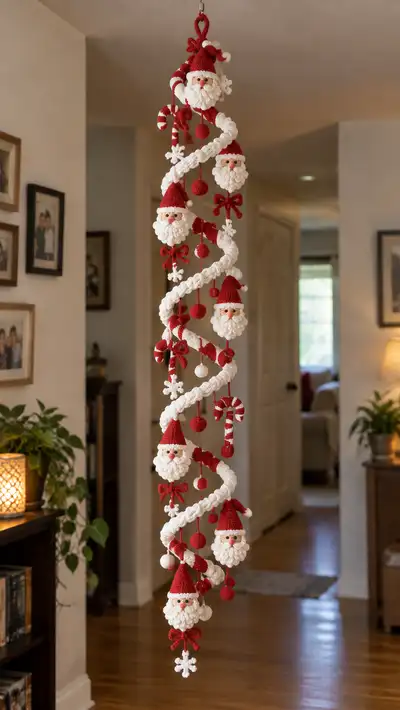
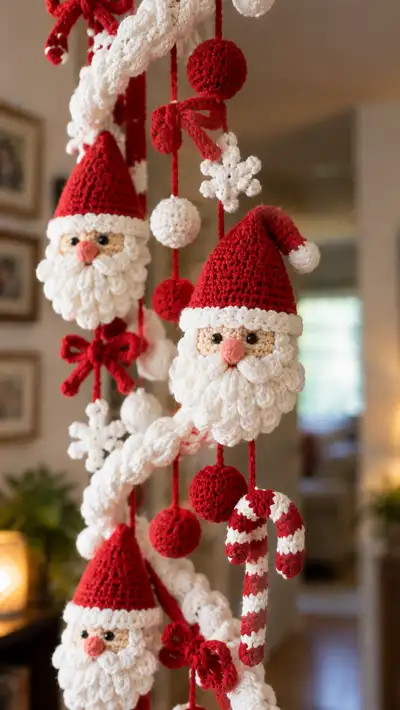
Create a charming hanging spiral garland dotted with tiny Santa heads, candy canes, snowflakes, bows and baubles. This pattern recreates the textured white spiral rope and multiple adorable Santas with looped beards, red cone hats and tiny button noses. Perfect for doorways, stairwells or as a vertical tree decoration — full step-by-step rounds for every small element shown in the photos.
Progress Tracker
0% Complete
— Overview :
Info :
This pattern details every element pictured: multiple small Santa heads with looped petal beards, cone hats with trims, small crocheted spheres (baubles), striped candy canes, tiny bows, six-pointed snowflakes and a textured spiral rope that holds everything together. Work each decorative element individually and assemble on a central cord or dowel. Gauge is not critical but use a slightly smaller hook than recommended on your yarn to keep stitches tight and stuffing hidden.
Info :
Note on construction method: The spiral rope is crocheted as a long textured tube/rope worked in rounds and then twisted into a corkscrew around a central cord. Santas are small amigurumi heads (no full bodies) with a flat face disk, looped beard petals added as small petal clusters, cone hat worked in rounds and a hat brim in FLO for texture. Attach all pieces to a central hanging cord or light dowel using slipstitch/sew connections as described in assembly.
— Santa Head - Face Base :
Round 1 :
6 sc in magic ring (6)
Round 3 :
(1 sc, 1 inc) x 6 (18)
Round 4 :
(2 sc, 1 inc) x 6 (24)
Round 5 :
(3 sc, 1 inc) x 6 (30)
Round 6 :
(4 sc, 1 inc) x 6 (36)
Round 7-8 :
1 sc in each st (36)
Info :
Switch to skin/peach yarn at Round 1 of this section. Work the face flat and slightly domed. If you prefer a slightly larger face, add one more even round before switching to positions for eyes and nose.
Round 9 :
1 sc in each st (36)
Info :
Place safety eyes between rounds 7-8 or 8-9, approximately 6-8 stitches apart depending on desired expression. Use stitch markers to mark their placement before closing head. If embroidering eyes, mark positioning and embroider before adding beard petals.
Round 10 :
(4 sc, 1 dec) x 6 (30)
Round 11 :
(3 sc, 1 dec) x 6 (24)
Info :
Begin very light stuffing behind face area to keep face flat but slightly padded. Do not overstuff - beard will cover most of the lower face.
Round 12 :
(2 sc, 1 dec) x 6 (18)
Round 13 :
(1 sc, 1 dec) x 6 (12)
Round 14 :
6 dec (6) - leave long tail for joining to hat base and beard foundation
Info :
Fasten off leaving a 25-30 cm tail to sew the face disk onto the lower interior of the hat and to anchor the beard petals. If you are making a slightly larger Santa, add extra rounds earlier and recalculate decrease pattern accordingly.
— Santa Nose :
Round 1 :
4 sc in magic ring (4)
Round 4 :
(1 sc, 1 dec) x 2 then 4 sc (6)
Info :
Stuff very lightly, just enough to give the nose a round shape. Sew to center of face between eyes, slightly protruding. You can embroider a nostril or add a small blush with fabric paint for rosy effect.
Round 5 :
6 dec (3) - close and leave tail to sew (optional)
— Santa Beard (Looped Petal Technique) :
Info :
The looped beard is built from a foundation round of single crochets around the lower edge of the face disk, then multiple petal/loop clusters are worked into dedicated stitches to form layered cascading curls. We recommend using a small hook (3.0mm) and denser tension so loops sit nicely.
Round 1 :
Join white yarn to the lower edge of the face disk where Round 9 met the face (or where desired). Work 36 sc evenly around the face edge to create a foundation (36)
Round 2 :
*ch 3, skip 1 st, sl st in next st* repeat around to create small anchor loops (36 sl sts/18 loops)
Info :
These ch3 anchor loops will be the base for petal clusters. Ensure loops are evenly spaced; mark the top, center and sides to keep balance. If your face foundation had a different stitch count, work petal clusters into every 1.5-2 stitches to maintain density.
Round 3 :
Working into each ch-3 loop: create a petal cluster = (3 dc, ch 2, sl st into base) - repeat into each loop around producing 18 petals
Round 4 :
Between rows of petals, work 18 sc evenly around to anchor petals (18)
Round 5 :
For second layer: into the space between petals, *ch 3, work (3 dc, ch 2, sl st)* to form 18 more petals creating fuller layered beard
Info :
After 2-3 petal layers the beard will look voluminous. You may work up to 4 layers depending on desired fullness. Stagger the placement so each new petal fills gaps. Trim long tails and tuck ends under petal bases.
Round 6 :
Work 18 sc around to anchor second layer (18)
Round 7 :
Optional: Add a final row of tiny 2-dc petals into every sc for an even ruffled edge; *2 dc, sl st* x 18
Info :
Stuff lightly behind beard to give face support. Use yarn needle to anchor inner edges of petal clusters so they do not flop forward excessively. Trim & shape petals with small scissors if needed for uniform look.
— Santa Hat - Cone :
Info :
Hat is worked in continuous rounds in red with a white trim brim worked in FLO to create the ridged effect. The hat is conical and should fit over the top portion of the face disk, lining up with the top of the forehead area. If you want a slouchy hat, increase height by adding a few even rounds.
Round 1 :
6 sc in magic ring (6)
Round 3 :
(1 sc, 1 inc) x 6 (18)
Round 4 :
(2 sc, 1 inc) x 6 (24)
Round 5 :
(3 sc, 1 inc) x 6 (30)
Round 6-12 :
1 sc in each st (30)
Info :
Rnds 6-12 create cone height about 6 rounds. For a taller hat, work extra even rounds up to 14-16. Be sure top of hat will cover top of face disk leaving room for brim. Use continuous rounds for smooth join and to avoid visible seams.
Round 13 :
(3 sc, 1 dec) x 6 (24)
Round 14 :
(2 sc, 1 dec) x 6 (18)
Round 15 :
(1 sc, 1 dec) x 6 (12)
Round 16 :
6 dec - close top into neat point. Leave 20-25 cm tail for sewing and hanging loop or to attach pom pom
Round 17 :
Change to white yarn. Join at base of hat for brim.
Round 18 :
1 sc in each st BLO around to create a raised brim ridge (18 or circumference of base)
Info :
Fold brim slightly and stitch to the inside of hat to create a natural brimroll. Add a small pom-pom by stuffing a mini ball or crocheting a 6-8 st pom ball then sew onto hat tip.
— Pom Pom (Hat Top) :
Round 1 :
6 sc in magic ring (6)
Round 3 :
1 sc in each st (12)
Round 4 :
(1 sc, 1 dec) x 4 then 4 sc (8)
Round 5 :
4 dec (4) - close leaving long tail, stuff lightly and sew to hat tip
Info :
Alternatively make a pom pom from scrap yarn and attach. Make sure it is small to keep scale consistent with tiny Santas.
— Small Hanging Bauble (Make multiple) :
Round 1 :
6 sc in magic ring (6)
Round 3 :
(1 sc, 1 inc) x 6 (18)
Round 4-6 :
1 sc in each st (18)
Round 7 :
(1 sc, 1 dec) x 6 (12)
Round 8 :
6 dec (6) - stuff firmly and close, leave long tail to hang from cord
Info :
Make several in red and white. To hang, crochet a small chain (ch 20-40 depending on desired length) and sew securely inside the top of the bauble, or string through with yarn and knot inside before closing.
— Candy Cane (Striped) :
Info :
Candy cane is a small hooked tube worked in alternating stripes. Work in rounds to create a hollow cane, stuff lightly only at the outer curve if desired for weight.
Round 1 :
6 sc in magic ring (6)
Round 3-6 :
1 sc in each st (12)
Round 7 :
Change to white yarn. 1 sc in each st (12)
Round 8 :
Switch to red yarn. 1 sc in each st (12)
Info :
Continue alternating colors every round to form stripes until cane reaches desired length (approx 20-28 rows for miniature cane). To curl cane tip: once tube length is full, decrease rounds along last 6-8 rows on one side to form curve, then stuff lightly and bend into cane shape and stitch closed.
Round 9-22 :
Alternate white and red rounds every round (12)
Round 23 :
For curve shaping - on next 6 rounds, place a dec on every other stitch on the outermost side to gradually shorten one side: (1 sc, 1 dec) x 4 then 4 sc (8) - repeat as needed to shape
Info :
Bend into candy cane shape and secure seam by sewing along inner curve; add small hanging loop at top by sewing a short chain into the topmost stitch.
— Bow (Make several) :
Round 1 :
ch 21, sc in 2nd ch from hook and across to create a strip (20 sc)
Round 2-3 :
turn, ch1, 1 sc in each st across (20)
Round 4 :
Fold strip in half and whip stitch across center to create bow loops, cinch center with a small length of yarn and tie securely. Attach a short hanging tail (ch 10) to hang from spiral.
Info :
Make bows in red. For smaller bows make shorter chains. Sew onto hanging cord or knot around chain for secure placement.
— Snowflake Motif :
Round 1 :
ch 6, sl st to form ring
Round 2 :
*ch 4, (1 dc, ch2, 1 dc) into ring, sl st into ring* repeat 6 times to create six points
Round 3 :
Sl st into next ch-2 space, *(sl st, ch 3, 3 dc, ch 3, sl st) in same ch-2 sp* repeat around to add tiny puff points and finished with sl st to base. Fasten off leaving tail for sewing
Info :
Block on a flat surface if necessary to shape well. Attach to spiral by sewing through one point to allow it to hang slightly rotated.
— Spiral Rope / Textured Garland Core :
Info :
The spiral rope is the longest element. Work either as a long chain then back-loop puff stitch tube or as a continuously worked round tube using puff stitch clusters to create a chunky texture. The rope must be fairly stiff; consider crocheting over a cord or inserting a light wire or dowel during assembly for stability. This section outlines a textured tube worked in continuous rounds using puff clusters to emulate the bobbly texture visible in the photos.
Round 1 :
ch 6, join to first ch with sl st to make loop. (ch-6 loop)
Round 2 :
Work 12 sc evenly around the loop (12)
Round 3 :
Work 12 sc in each st BLO around to get a neat ridge (12)
Round 4 :
*puff stitch in next st (yarn over, insert hook, pull up loop 5 times, yarn over and pull through all loops), sl st in next st* repeat to end (6 puff clusters and 6 sl st anchors = 12 sts)
Info :
Puff stitch details: keep puffs relatively small (5 loops) so they sit close together and do not create a too-bulky rope. Tight tension will compact puff clusters into a textured spiral that resembles the photograph. Practice a short swatch to match look.
Round 5-200 :
Continue repeating Round 3 and Round 4 pattern (work sc round then puff round) to desired length. Typical length for photographed piece: approximately 180-220 cm total rope length, worked as alternating sc and puff rounds (each pair of rounds equals about 1 cm depending on yarn). For this pattern we recommend making 150 puff rounds for an approximately 1.2-1.5 m long spiral before assembly (adjust quantity for your hanging height)
Info :
If your rope is too floppy: add a braided inner core by folding a 3-strand yarn braid inside before crocheting, or crochet around a thick cord (fiberglass or cotton cord). To create a half-white/half-red striped spiral seen in small portions, swap colors at the start of a puff round and carry unused yarn inside the tube to minimize ends.
Round 201 :
Finish with one sc round, fasten off and leave long tail for sewing to central hanging cord or dowel. Block rope slightly if needed to open puffs and match look.
— Hanging Cord and Loop :
Info :
Decide whether you will use a wooden dowel, wire or just a crocheted cord as the main vertical core. For a simple hanging, use a strong twisted chain (ch 200-300) folded and knotted at top to form loop. If using a dowel, wrap with yarn and secure the spiral rope around it.
Round 1 :
ch 120 (or length of hanging you want) - fold in half and make a hanging loop by joining ends with sl st and twisting into a loop. This becomes the vertical core to which all ornaments are attached.
Info :
For extra strength, braid three lengthwise cords and twist them together to form the core. Attach top knot or metal ring for hanging.
— Small Santa Assembly (one complete Santa) :
Info :
Each Santa consists of the face disk, nose, beard layers and cone hat. The hat should slip over the top of the face disk and be sewn in place. Be sure to position eyes prior to sewing hat. Sew beard petals around lower edge of face and secure inner edges. Attach a short cord at top of hat to hang from spiral rope.
Round 1 :
With face disk and hat made, position hat over face and pin. The hat brim should sit approximately 2-3 rounds above the top of the eyes (or on Round 8 of face base). Sew hat brim to face using whip stitch around brim seam.
Round 2 :
Sew nose between eyes and stitch securely through face foundation. Place beard petals and tack inner edges with short stitches so they remain layered.
Round 3 :
Sew a short hanging cord (ch 10-20) to top interior of hat. Reinforce with extra stitches so Santa hangs straight. Add pom pom or knot at the end of hanging tail if desired.
Info :
Make 5-7 Santas depending on the length of your spiral. Vary heights by using hats of slightly different heights to create visual interest. For security, add a dab of fabric glue on interior seams for ornaments that will hang outdoors.
— Additional Ornament Counts and Guidance :
Info :
Photograph shows about 5 Santas, 8-10 small baubles, 3 candy canes, 4 bows and 4 snowflakes incorporated along a long spiral. Adjust counts to your preference. Balance visually by spacing larger Santas evenly and filling gaps with baubles or small snowflakes.
Info :
Always attach ornaments by sewing through both the spiral rope and the ornament cord using strong polyester thread or multiple passes of yarn. Test hang weight as you go to ensure spiral doesn't sag in places.
— Finishing Touches :
Info :
Weave in all tails inside the spiral or down into the core to avoid visible ends. Lightly steam-block white puff petals if necessary to even them out. Add a tiny dab of glue where knots are visible to avoid unraveling. Add blush to cheeks using a small amount of pastel or fabric paint for extra personality.
Info :
For safety, if children will handle the garland, embroider eyes instead of using safety eyes to avoid small parts. Consider stitching a small felt backing inside hat tops if you want to make them extra child-safe.
This festive spiral Santa garland turns simple yarn and a few stitches into a dramatic vertical decoration full of charm! Each tiny Santa, candy cane and bauble adds personality and warmth to any doorway or corner. The detailed steps make assembly straightforward while leaving room for customization. Hang it up, step back and enjoy the smiles it brings — a truly magical handmade touch for the season. 🧶🎄✨