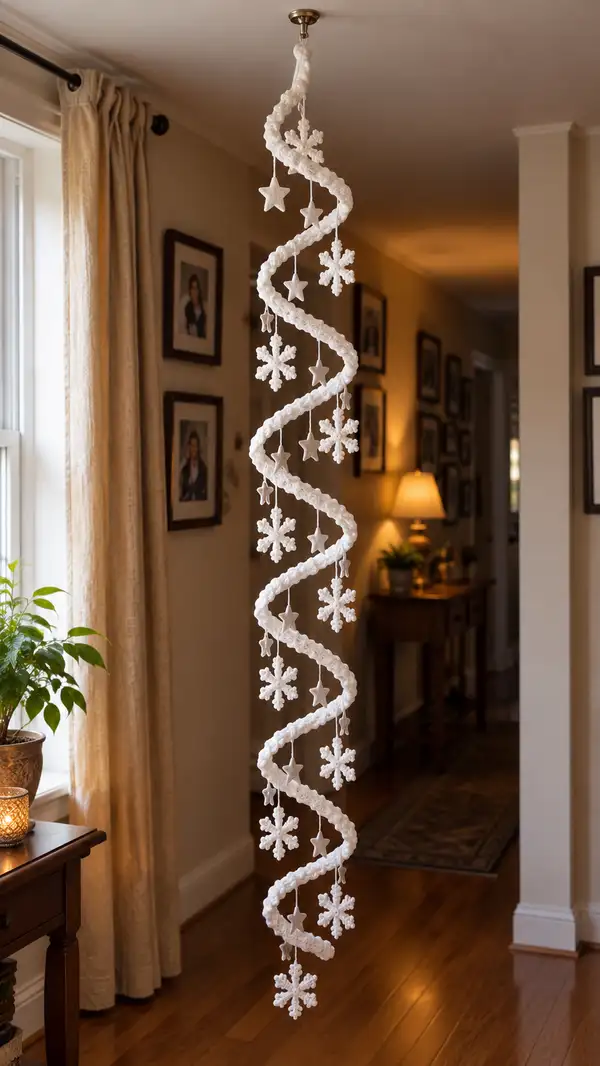
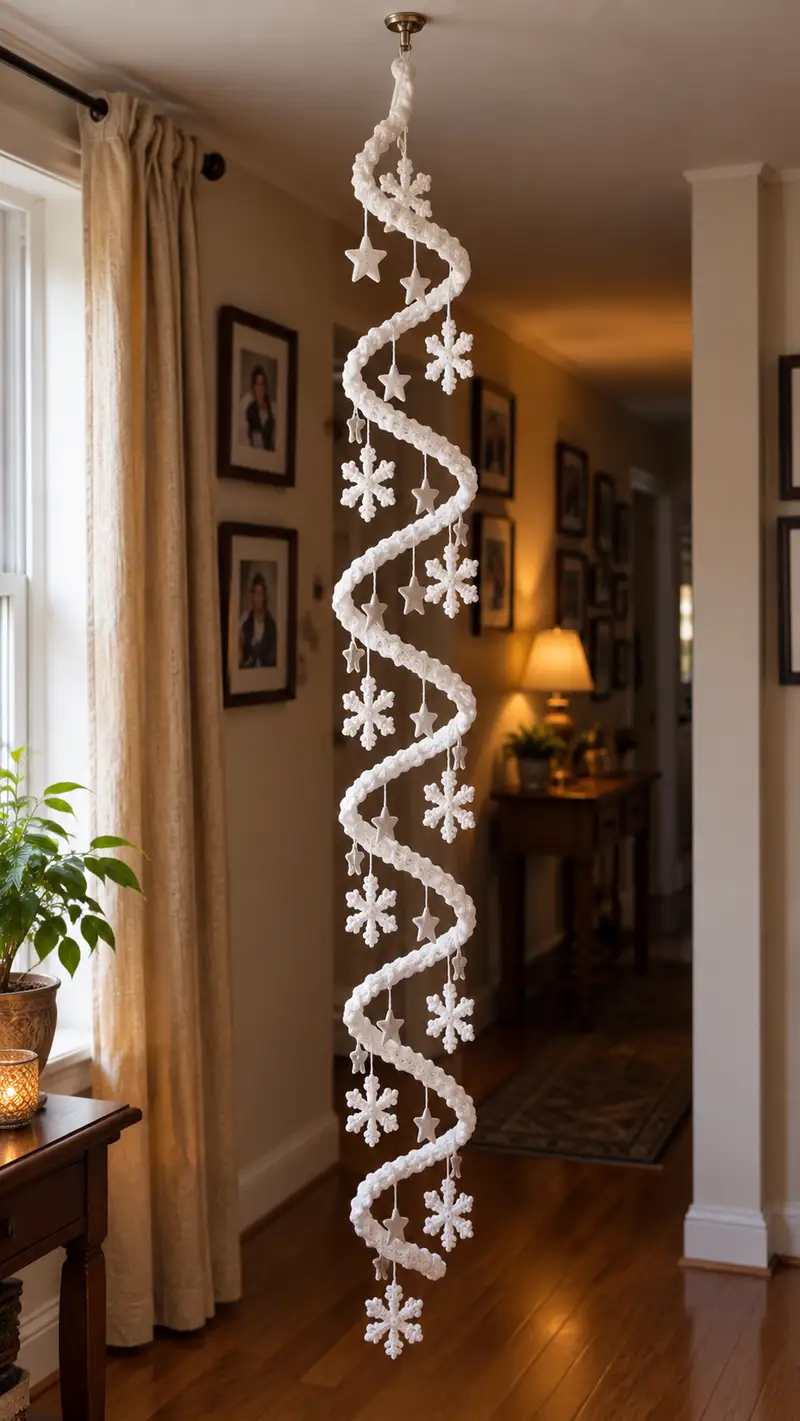
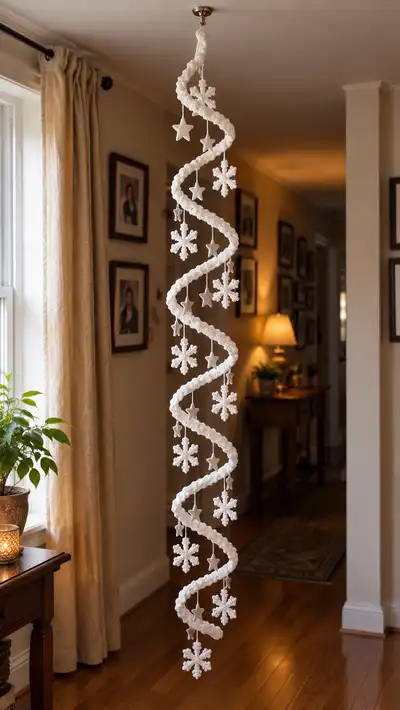
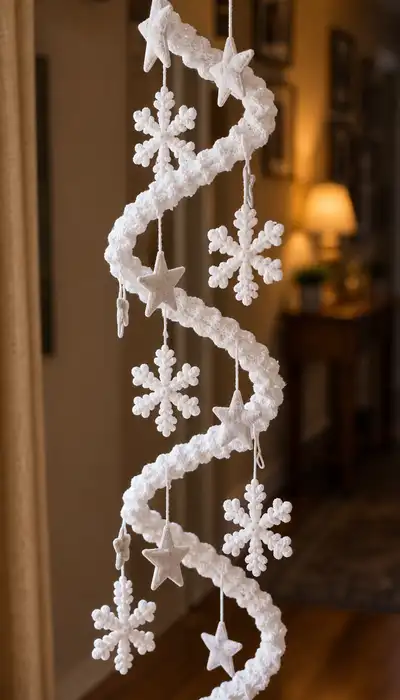
Create an elegant, cascading spiral garland featuring a textured crocheted rope with dangling snowflakes and stars. This all-white holiday decoration hangs in a graceful spiral and adds soft, cozy charm to any room. Pattern includes instructions for a long textured spiral tube, puffy 3D stars, six-point snowflakes, and detailed assembly tips. Perfect for seasonal decor, mantel accents, or a stunning doorway display.
Progress Tracker
0% Complete
— Materials & Overview :
Info :
This pattern is modular: make a textured tube (the spiral rope), several flat snowflake motifs, puffy 3D stars, and assemble them on hanging cords. The tube is worked in rounds to create a sturdy textured rope long enough to be coiled into a spiral. I recommend working the tube to your desired length (the sample pictured is approximately 1.6–1.8m/63–70 inches long before hanging). Measurements and ornament spacings are given below to recreate a similar look.
— Spiral Textured Tube (Make 1 long tube) :
Round 1 :
6 sc in magic ring (6)
Round 3 :
(1 sc, 1 inc) x 6 (18)
Round 4 :
(2 sc, 1 inc) x 6 (24)
Round 5 :
(3 sc, 1 inc) x 6 (30)
Round 6 :
(4 sc, 1 inc) x 6 (36)
Round 7 :
(5 sc, 1 inc) x 6 (42)
Round 8 :
(6 sc, 1 inc) x 6 (48)
Info :
These first eight rounds establish the internal diameter of the tube. The sample uses 48 stitches per round to form a tube approx 2.0–2.5cm / 0.8–1 inch in diameter when worked with worsted weight yarn and 3.5mm hook. If you want a thinner tube, stop increases earlier (e.g., at 36 sts). For thicker, continue increases by adding (7 sc, inc) and so on.
Round 9-16 :
1 sc in each st (48)
Info :
We're about to switch into a textured cluster/puff pattern to create the bumpy, snowy surface. Keep the 48-stitch round constant for texture repeats. Place a stitch marker at the first stitch of Round 9 and move it each round.
Round 17 :
(1 sc, 1 hdc, puff in next st, 1 hdc) x 12 (48)
Round 18 :
1 sc in each st (48)
Round 19 :
(1 sc, puff, 2 sc, puff) x 8 (48)
Round 20 :
1 sc in each st (48)
Info :
How to make the puff stitch used: Yarn over, insert hook into st, yo and pull up loop (repeat 3-4 times into same st depending on desired puff height). You will have multiple loops on hook; yarn over and pull through all loops, ch1 to close puff if desired, then sl st or continue. For counting purposes, each puff counts as one st.
Round 21 :
(1 sc, 1 hdc, puff in next st, 1 hdc) x 12 (48)
Round 22 :
1 sc in each st (48)
Round 23 :
(2 sc, puff, 1 sc, puff) x 8 (48)
Round 24 :
1 sc in each st (48)
Info :
Alternate a textured round (containing puffs and hdcs) with an even round of sc to keep the tube round and to give definition to the puffs. This alternating texture is what gives the rope its snowy, clustered look.
Round 25-40 :
Repeat Rounds 17-24 twice (1 sc rounds alternate with textured rounds) maintaining 48 sts each round (48)
Info :
At this point you have a cylindrical tube length equal to the number of rounds worked. The sample photo used a long tube worked to approximately 110 texture rounds after the increase section. Decide your desired finished length and continue the repeat of textured rounds until you reach it. Below are suggested measurements and rounds for common lengths.
Round 41-120 :
Continue alternating textured and plain rounds (pattern repeat R17-R24) until the tube reaches desired length. For the sample spiral (~1.6m/63 in) you will have worked a total of approx 120 rounds including increases (this includes R1-R8 initial rounds and roughly 112 alternating rounds), keeping 48 sts per round. Maintain stitch marker and keep tension consistent (48)
Info :
To estimate length: test a 10-round section and measure its length. Multiply to reach your target. If you need a longer tube, keep repeating the pattern; for a shorter tube, stop earlier. Keep the final number of rounds even so ornament placements fall symmetrically.
Round 121 :
1 sc in each st (48)
Round 122 :
(6 sc, 1 dec) x 6 (42)
Round 123 :
(5 sc, 1 dec) x 6 (36)
Round 124 :
(4 sc, 1 dec) x 6 (30)
Round 125 :
(3 sc, 1 dec) x 6 (24)
Round 126 :
(2 sc, 1 dec) x 6 (18)
Round 127 :
(1 sc, 1 dec) x 6 (12)
Info :
Fasten off, leaving a long tail. If you plan to thread internal hanging cord through the tube, leave an opening unclosed for threading (stop decreasing at round 124 and fasten off with a long tail to sew side seam after inserting cord). Otherwise, close the tube and weave in ends.
— Internal Support Cord (Optional but recommended) :
Info :
For a steady spiral that hangs without collapsing, insert a strong cotton cord or braided yarn through the center of the tube. Thread the cord before closing the tube completely or run it through by opening the seam. Tie a secure loop at the top for hanging and anchor the bottom with a knot or small stitch to prevent slippage.
— Large Snowflake Motif (Make 8-10) :
Round 1 :
mr, ch1, 6 sc in ring, sl st to first sc (6)
Round 2 :
*(ch3, sc) into next st* repeat around to form 6 loops, join with sl st (12 loops/joins vary)
Round 3 :
Work into each ch3 loop: (sc, ch4, picot, ch4, sc) x 6 to form 6 points, join (6 points)
Info :
Each point will be further refined with clusters to produce six arms. Keep tension firm so picots are defined. Blocking the flat snowflakes after finishing will open the picots and create a crisp look.
Round 4 :
Working on back loops around center where possible: Into each point work (sc, ch3, puff-stitch, ch3, sc) to add texture and three-dimensionality. Join after each point (6 points)
Round 5 :
Between each pair of points along the outer edge, create small picot loops to visually enlarge the snowflake: *ch2, picot, sc in next sc* repeat around for subtle lace (36 outer picots approx)
Round 6 :
Refine each arm by adding 3 tiny clusters on each arm: Into the long arm ch space: (ch2, (puff, sl st) x3, ch2), secure to base of arm. Repeat for 6 arms (6 textured arms)
Info :
Finishing: weave in tail, block gently to shape the snowflake flat and even. Use a small spray of water and pin to a blocking board if available.
Round 7 :
Optional border: sc around outer edge in BLO adding ch1 picots as decorative tips (approx 36 sc)
Round 8 :
Fasten off leaving long tail for sewing to hanging cord. If you want a thicker/fluffier snowflake, make two identical snowflakes and sew them together lightly with a bit of stuffing between for depth.
— Small Snowflake / Spacer Motif (Make 6-8) :
Round 1 :
mr, ch1, 6 sc in ring, join (6)
Round 2 :
*(ch3, sc) into next st* repeat around to make 6 loops (12)
Round 3 :
Into each loop work (sc, picot, sc) to make small star-like arms, join (6)
Round 4 :
Optional: sl st around outer edge for neat finish, fasten off leaving tail for hanging (6)
Info :
These smaller snowflakes are used to break up the spacing between large snowflakes and stars and add more visual movement to the hanging spirals.
— Puffy 3D Star Ornament (Make 10-12) :
Round 1 :
ch6, join with sl st to form a small ring (or start with mr and make 5 sc)
Round 2 :
Work 5 petals around ring: for each petal: (ch4, dc, tr, dc, ch2, sl st into base) repeat x5 (creates 5 loops for star points)
Round 3 :
Into each petal: (sc, hdc, puff, hdc, sc) secure to base to form a raised point. Repeat 5 times (5 points)
Round 4 :
Fold each point in half, sew center seams to form a 3D point. After shaping all 5 points, sew points together into a pentagonal star shape and leave an opening for stuffing.
Info :
Stuff star lightly with fiberfill before closing; do not overstuff. Use a yarn needle and matching yarn to sew the inner seams with small, neat stitches. Each star should be puffy but soft.
Round 5 :
Sew edges together neatly, fastening off and weaving in ends. Attach a small hanging loop of ch12 or a short cord, secure inside seam.
Round 6 :
Optional surface texture: Using a blanket stitch or embroidery with the same yarn, add small accent lines on star faces to mimic seams or to add a handmade look.
— Tiny Stars & Accent Drops (Make 10-12) :
Round 1 :
mr, ch1, 5 sc in ring, sl st (5)
Round 2 :
*(ch3, sl st) in next st* repeat to make 5 tiny points, sl st to join, fasten off leaving tail for hanging (tiny star)
Info :
These quick tiny stars take only a minute each and are excellent fillers between larger ornaments. They are almost flat—no stuffing required.
— Hanging Cord & Spacing Guidelines :
Info :
Decide your spiral length and spacing before attaching ornaments. For a sample 1.6m spiral, I spaced ornaments at roughly every 12–18 cm (4.7–7 in) along a straight length of cord before coiling. Plan the order: star, snowflake, star, snowflake, small snowflake, etc., so the visual weight is balanced when hung.
Round 1 :
Cut hanging cord lengths for each ornament. Sample: for a 1.6m tube you may need 8 long cords (30–40cm each) and 8 short cords (15–25cm each) depending on desired drop length. Knot cord to each ornament using a secure double knot and a dab of glue if desired (cord lengths vary)
Info :
Thread cord through ornament top loop or sew cord securely into the seam. For snowflakes, use the long tail left at the end and tie to the cord or whipstitch the loop to hide the knot. For stars, sew the cord inside the seam for a hidden attachment.
— Assembly & Attaching Ornaments :
Info :
Lay the textured tube straight on a large table. Using a tape measure, mark positions where each ornament will attach with removable pins or stitch markers. Maintain symmetry by mirroring placement on alternating sides if desired.
Round 1 :
For each marked position, insert the ornament cord under a couple of tube stitches and whipstitch the cord to the tube interior so the hanging line is anchored. Use a yarn needle to weave the cord tail deeply into the tube for stability (approx 6-8 stitches for each anchor)
Round 2 :
Secure the top: thread the internal support cord through the tube and tie a loop at the top for hanging. If you did not use internal cord, fold the first 10cm of the tube back on itself and sew a hanging loop into this folded top to create a strong anchor (10cm folded section)
Info :
To create a clean spiral shape, hang the assembled tube and allow the ornaments to hang freely. Gently coax the spiral into shape by wrapping the tube around a central support or by encouraging the tube into a loose helix using your hand. The internal cord helps the spiral hold shape; pinning temporarily in place while you finish sewing will help.
Round 3 :
Final finishing: sew the tube tail closed neatly, weave in all ends completely, trim stray fibers, and gently steam or block motifs if desired. Use small beads or tiny sewn stitches to prevent ornaments from rotating if you want them to face forward consistently (sew a small stabilizing stitch through the tube to the cord behind the ornament)
— Finishing Touches & Texture Tips :
Info :
If you like extra sparkle, weave in a strand of metallic thread into the outer rounds of the tube or use a sparkly worsted yarn for every 8th round to add subtle shimmer. For a softer, fluffier look, gently brush the surface of the tube with a soft toothbrush to raise a slight halo on the yarn (test on scrap first).
Info :
To adjust fullness: reduce puff count on textured rounds for a smoother rope, or add extra puff stitches for a more cloud-like, dense appearance. Keep stitch count per round constant (48 sts) to maintain a cylindrical tube for even hanging.
Info :
Storing: unhook the spiral gently and roll it loosely for storage to avoid flattening the puffs. Store ornaments separately to prevent crushing delicate picots and star points.
Congratulations — your spiral snowflake garland is ready to hang and delight! This project brings soft winter charm to any doorway or corner, combining textured crochet with delicate motifs. The long, coiling rope and puffy ornaments catch light and add handcrafted personality to your home. Enjoy showing off your cozy creation and happy decorating! ❄️🧶