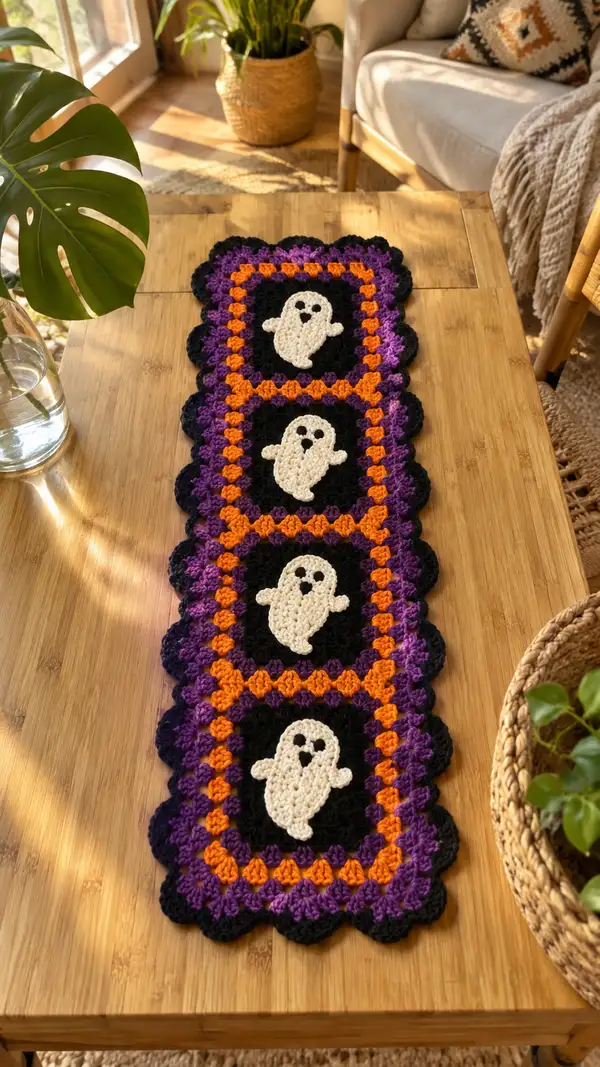
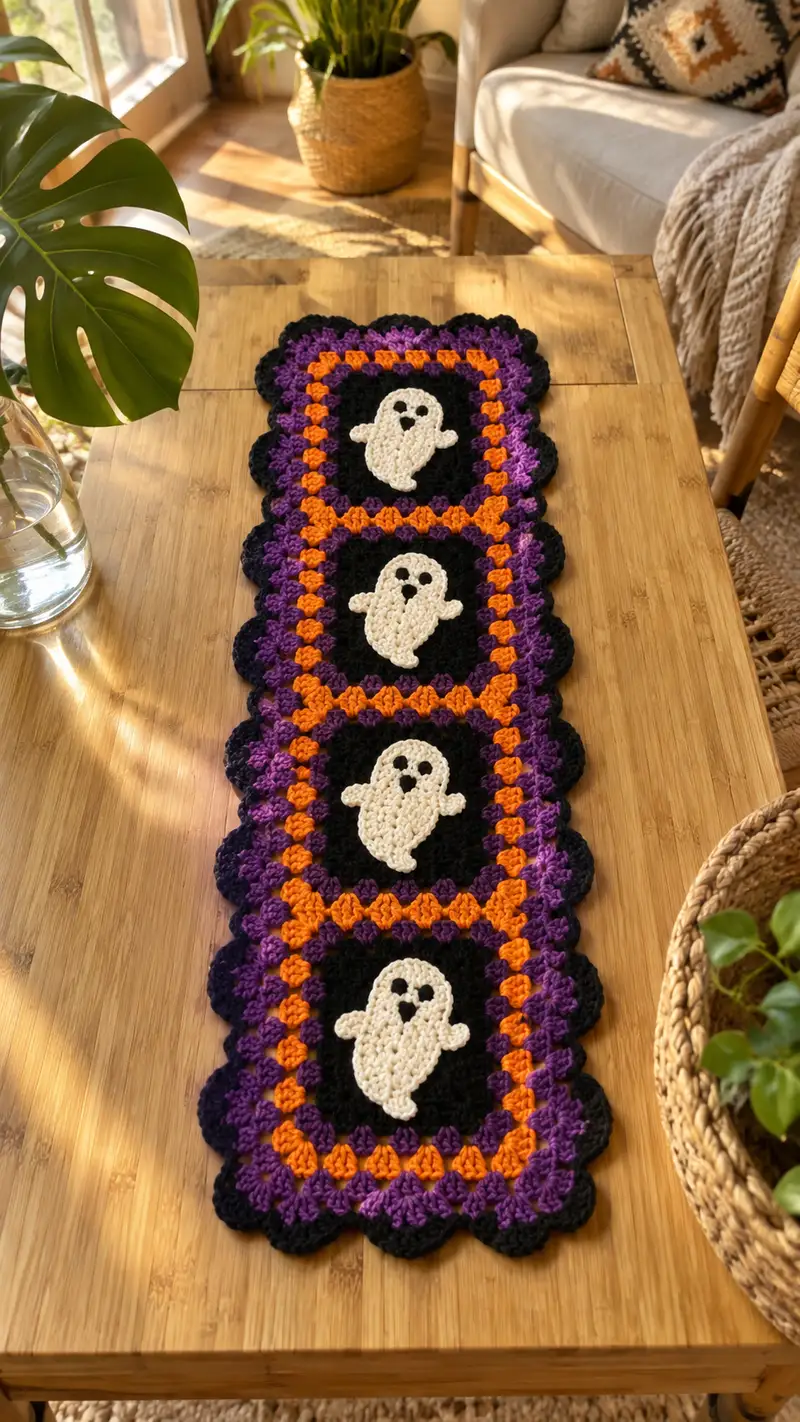
Create a festive Halloween table runner made from four framed granny-style squares, each featuring an appliqued ghost at the center. This runner uses bold seasonal colors — black, purple, orange and a creamy white ghost — finished with a scalloped edge for a polished look. The modular construction makes it easy to customize length and colors. A perfect seasonal accent for tabletops, sideboards, or entryways.
Progress Tracker
0% Complete
— Materials & Gauge :
Info :
Gauge is flexible for this decor piece but aim for approximately 14 sts x 8 rows = 4 inches in sc using 5.0mm hook to keep fabric stable. If your fabric is much looser, drop a hook size to avoid floppy edges. The runner pictured uses 4 identical framed squares (approx 9.5" square each before blocking) joined in a vertical column and finished with a scalloped edge.
— Framed Granny Square (Make 4 identical squares) :
Round 1 :
With black, form a magic loop. Ch3 (counts as dc), work 2 dc into ring, ch2, *3 dc into ring, ch2; rep from * 2 more times. Join with sl st to top of ch3. (4 clusters, 4 ch2 corners)
Round 2 :
Sl st into the next ch2 corner space. Working in corners and sides: (ch3, 2 dc, ch2, 3 dc) in the same ch2 corner, *ch1, (3 dc) in next ch2 space across side, ch1, (3 dc, ch2, 3 dc) in next corner; rep from * around. Join with sl st to top of ch3. (4 corners, 3 dc groups on each side)
Round 3 :
Change to purple in the last yarn-over of the join. Sl st into corner ch2. (ch3, 2 dc, ch2, 3 dc) in corner, *ch1, (3 dc) in each ch1 side-space across until next corner, ch1, (3 dc, ch2, 3 dc) in next corner; rep from * around. Join with sl st. (Square has grown, still 4 corners, more side groups)
Info :
Change color cleanly: complete last sl st of the round with the new color yarn by pulling through the loop with new color, then ch1 if you're switching to sc or continue with ch3 if switching to dc. We recommend carrying unused yarn inside the squares if you plan to later stitch through it when joining to avoid too many tails.
Round 4 :
With purple, repeat Round 3 to expand the purple ring by one extra cluster round: sl st to corner ch2, (3 dc, ch2, 3 dc) in each corner, ch1 between 3-dc groups on sides. Join. (Square expanded evenly)
Round 5 :
Change to orange in last yarn-over. Sl st to corner, (3 dc, ch2, 3 dc) in each corner, ch1 between side clusters. Join. (Orange ring formed as contrasting accent)
Round 6 :
With orange, work another round: sl st to corner ch2, (3 dc, ch2, 3 dc) in corner, ch1 between 3-dc groups on sides. Join. (Orange reinforced as single row of blocks)
Round 7 :
Change to purple again. Sl st to corner, (3 dc, ch2, 3 dc) in corner, ch1 between side clusters. Join. (Creates a purple frame outside the orange band)
Round 8 :
With purple, work a second purple round identical to Round 7 to widen the purple frame. Join. (Square now has black center, purple outer frame, orange ring in between)
Info :
At this point your square measures roughly 8.5 - 9.5 inches depending on tension. Block each square flat on a blocking mat to standardize size before joining. Use pins to gently square corners and measure so all four motifs match.
Round 9 :
Change to black. Sl st to corner ch2. Work (3 dc, ch2, 3 dc) in each corner, ch1 between side clusters for one full round. Join. (This black round defines the inner center framing and helps hide the applique seam later)
Round 10 :
With black, work a scallop-prep round: *ch1, sc in each 3-dc cluster across side groups, when you reach a corner work sc, ch3, sc in corner ch2; rep from * around to create defined edges. Join. (This round evens the edges for the scallop to sit on later)
Round 11 :
With black, work a rippled scallop base: *work 5 dc into the ch1 space between clusters (or into the central st of the 3-dc group) to make shell shapes on each side-space; in corner ch3 spaces work (sc, ch3, sc) to maintain corner angle; rep from * around. Join. (You should see half-shells around sides)
Round 12 :
With black, refine the shell: in each 5-dc shell work sl st to first dc, then ch1, sc in same st to anchor; this evens scallops so that when full runner edge is worked they line up for a continuous scalloped border. Fasten off and weave in ends. (Square complete — make 4 total identical squares)
Info :
Make 4 identical framed squares following Rounds 1-12. Keep tails long (~10-12" each) at color changes if you prefer to weave them in neatly after joining rather than carrying yarn. Blocking after Round 8 helps ensure consistent size between motifs.
— Ghost Applique (Make 4, one for each square) :
Round 1 :
With off-white, ch4, join to form small ring (or magic loop alternative). Ch1, 6 sc into ring. Join with sl st to first sc. (6)
Round 2 :
Ch1, 6 inc (2 sc in each st) evenly around. Join. (12)
Round 3 :
Ch1, (1 sc, inc) x6. Join. (18)
Round 4 :
Ch1, (2 sc, inc) x6. Join. (24)
Info :
This creates a small round base. The ghost body will be formed by working flat rows along one side to create an oval/teardrop shape; the next rounds transition into a semi-oval by working in front loops only to create a slight ridge where the ghost will sit on the square.
Round 5 :
Ch1, sc in next 6 sts (these will become the back of head), then turn work to begin building the body forward along the next 12 sts: hdc in next 6 sts, 2 hdc in next 2 sts, hdc in next 4 sts. Do not join — we will work in rows now to shape the body. (This is effectively working flat to create an elongated teardrop)
Round 6 :
Turn, ch1, working along the row edge: sc in 6, inc, sc in 6, inc, sc in 4. (Adjust counts to keep overall width comfortable. This round begins to create the taper at the bottom tail of the ghost.)
Round 7 :
Turn, ch1, sc along edge keeping increases spaced to form the teardrop shape: sc in 7, inc, sc in 7, inc, sc in 4. (This adds a bit more length.)
Info :
If you prefer a flatter applique, work these rows without turning by doing continuous rounds and using BLO for rows you want to stand off the square slightly. For the pictured look, the ghost is slightly raised from the square but mostly flat so it sits neatly when sewn on.
Round 8 :
Turn, ch1, sc around the curve and then sc evenly across the bottom tail to close shape: sc in 4, dec, sc in 6, dec, sc in 6. (Keep the decreases balanced; the final count will be approx 28-32 depending on your increases earlier.)
Round 9 :
Turn, ch1, Fasten off a long tail for sewing. Using tapestry needle and tail, shape the bottom scalloped edge slightly by pulling a few small gathering stitches where you want the ghost's bottom to have that classic wavy look. Weave in tail to secure. Applique should remain flat enough to sew to the square without bulk.
Round 10 :
Make small arms: With off-white, ch6, sc in 2nd ch from hook, sc in next 3, hdc in last, ch1, sl st to base of arm to form a tiny oval. Fasten off leaving long tail for sewing. Make 2 arms per ghost. (This is repeated 2 times per applicue.)
Round 11 :
Eyes and mouth: Using small scrap of black yarn or embroidery thread, embroider two round eyes and a small round mouth in a triangle arrangement near the upper center of the ghost. Eyes should be roughly 6-8 sts apart depending on your ghost size. Secure thread and weave in ends on WS.
Round 12 :
Optional small stuffing: if you want a slightly puffed ghost, insert a tiny bit of fiberfill behind the body before securing it to the square so it bulges slightly. Otherwise leave flat. Make 4 identical appliques and 8 small arms total. Fasten off and weave in ends.
Info :
The applique should be roughly 4-4.5" tall to sit proportionally in the central black framed area of each square. If your ghost is larger or smaller, adjust by adding or subtracting turns in the flat shaping rows.
— Attaching Ghost Appliques to Squares :
Round 1 :
Place the blocked square RS up. Position ghost centered in the black framed central area. Use pins to hold in place; ensure equal spacing from each corner (approx equal number of clusters on each side).
Round 2 :
Using the long tail from ghost or a matching off-white yarn and a yarn needle, sew the applique to the square with invisible whipstitch around the edge, catching only the front loops of the square to avoid pulling through to the WS. Make small stitches for a neat finish.
Round 3 :
Sew the two small arms on either side of the ghost body about two-thirds of the way down the body. Sew from the inside of the arm into the ghost body so the seam is invisible. Secure well with several passes of the needle then weave in tail inside the square and trim.
Info :
When embroidering the face, use a small stitch or backstitch for the mouth and simple french knots for the eyes if you like. Alternatively, tiny felt circles glued and stitched in place give a crisp look. Make sure any glued detail is secured with a few stitches to ensure durability.
— Joining the Four Squares into a Runner Column :
Round 1 :
Lay out the four finished squares in a vertical column, RS up, to confirm placement and orientation. The scallops should align so that shell edges will match up after the border is added.
Round 2 :
Choose joining method: for a flat join use whipstitch with RS facing, sewing through corresponding stitches along the side where squares meet. For a decorative join that reads as small gaps between squares (as pictured where there is a small orange connector row), use slip-stitch join with orange yarn, working through only top loops of both squares.
Round 3 :
To create the orange connector row as in the photo: with orange yarn, align two adjacent squares so their inner purple/orange frames meet. Insert hook through ch1 side-space of square A and corresponding space on square B; yo, pull through, ch1, sl st to join. Continue across the seam working (sl st, ch1) or small clusters (hdc cluster in the seam) spaced evenly to mimic the motif's little orange bridging stitches. Repeat for other seams to connect all four squares into a single strip.
Round 4 :
Secure ends: After joining the vertical seams, weave in all joining yarn tails at the WS, then gently block the entire runner to make sure seams release and edges line up for the scalloped border.
Info :
If you prefer an uninterrupted fabric, you can crochet an entire long rectangle and appliqué the ghosts on top. The modular join used here leaves a subtle grid pattern and allows easier color changes and correction if a square is imperfect.
— Scalloped Border Around Entire Runner :
Round 1 :
With black yarn and the assembled runner RS up, attach yarn at any corner with sl st. Ch1, work sc evenly around the perimeter, placing 2 sc into each shell valley where squares meet and 1 sc in side clusters so each side edge is evenly covered. When you reach corner points, work (sc, ch3, sc) to maintain corner shape. Join with sl st to first sc. (This evens the perimeter and prepares for scallops.)
Round 2 :
Ch1, *skip 2 sc, in next sc work (5 dc, sl st in next) to form a scallop shell across the edge; in corner (sc, ch3, sc) to keep corner; rep from * around. Join. (Scallops will start to form around entire runner; take extra shells across seams to keep scallop rhythm consistent.)
Round 3 :
Ch1, sl st to center dc of each 5-dc shell, then work (sc, hdc, dc, hdc, sc) across the shell to smooth the scallop and make it denser. In corners keep stitch pattern. Join. (This gives a fuller, tidy scallop edge like pictured.)
Round 4 :
Optional outer highlight: for extra definition, change to purple or orange and work a very small picot or chain loop into the center of each scallop: *sl st into shell center, ch3, sl st back into same st; rep from * around. Fasten off and weave in ends if used. (This is optional and adds a tiny colored dot at each scallop center.)
Info :
When working scallops across seams between squares, maintain tension so that shells do not pull the squares together unevenly. Use blocking pins along seams while working the border if needed to keep edges flat and straight.
— Finishing Touches :
Round 1 :
Weave in all ends from both RS and WS making sure tails are hidden within the shell stitches and between clusters so they do not show on the RS. Trim close to the work after weaving through at least 2-3 inches of yarn path.
Round 2 :
Block runner gently: dampen the piece (spray bottle) and pin flat on blocking board, shaping scallops and corners to be even. Let dry completely before removing pins. This will flatten stitch inconsistencies and allow the runner to sit flat on the table.
Round 3 :
Optional embellishments: Add small crochet buttons between squares at their joined seams, tiny felt pumpkins at the corners, or a contrast chain fringe if desired. Sew on any additional decorations with matching thread and reinforce with a couple of hidden stitches.
Info :
To change the runner length: add or remove framed squares before joining. Each square is modular and repeats the same pattern. If adding more than four squares, consider alternating where appliques are placed to create a balanced composition.
— Troubleshooting & Tips (multiple Info sections through pattern) :
Info :
If one square ends up slightly larger, use blocking to even it out. If blocking is not enough, you can add or subtract a small sc/gap on the outermost round to match sizes before joining. Keep notes on which rounds you used color changes so repeats are identical.
Info :
For neater color joins, change colors on the last yarn-over of the preceding stitch or use the invisible join for rounds that end with sc. This reduces loose tails and makes weaving in simpler after assembly.
Info :
To make a reversible runner, sew the ghosts to the middle layer then join two layers back-to-back and sew around the edges leaving a small opening to turn and stuff slightly for a padded runner. This is an advanced modification and will need extra yarn for bulk and finishing.
This Halloween table runner brings seasonal charm to any surface with its cozy granny texture and playful ghost appliques. Each framed square stacks into a striking column and the scalloped border gives a professional finish. It's a joyful, crafty way to celebrate the season and customize your home decor. 🧶🎃👻