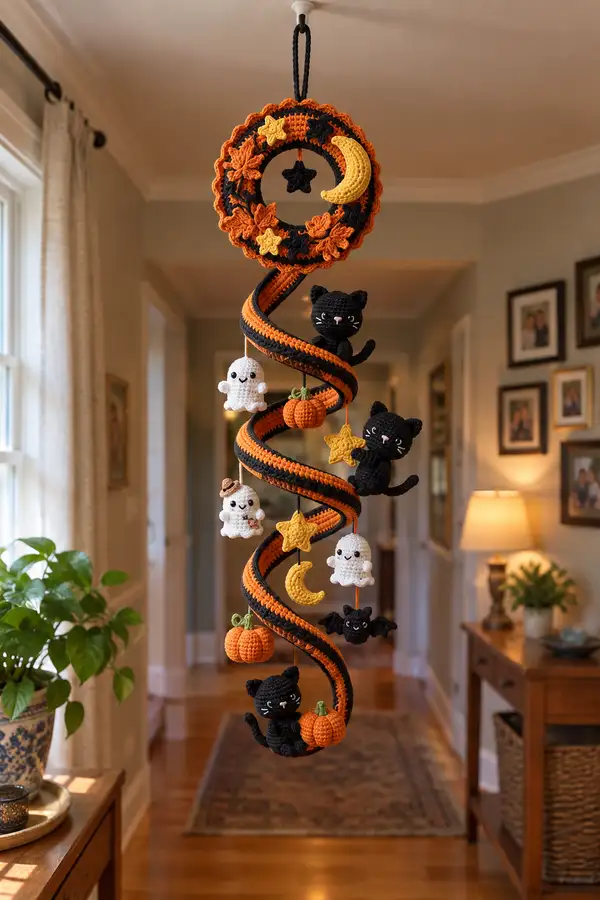
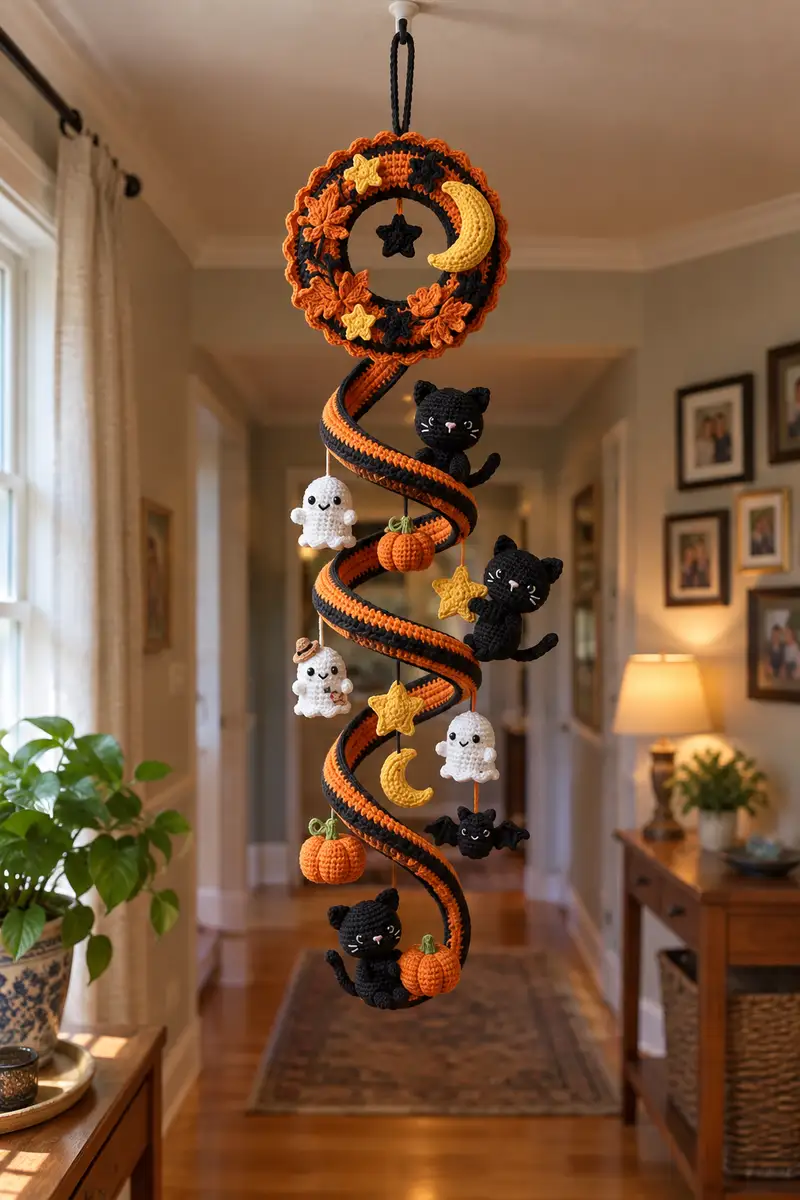
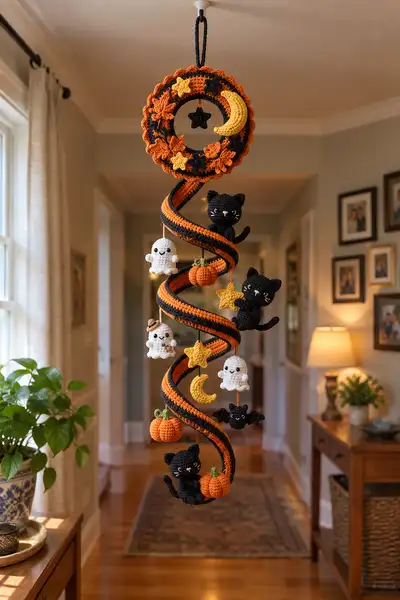
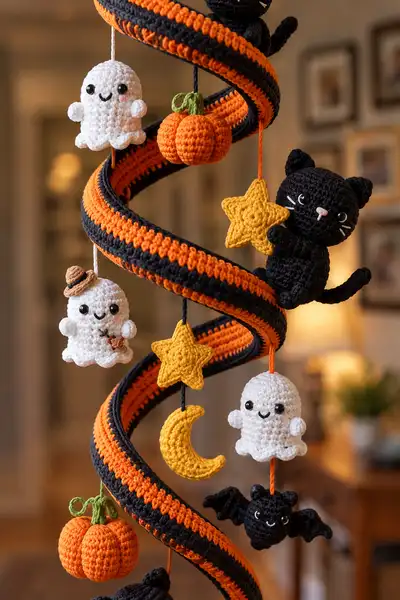
Create a whimsical hanging Halloween mobile filled with tiny amigurumi cats, ghosts, pumpkins, stars, a crescent moon and a playful bat. The spiral ribbon is striped orange and black and winds from a decorative wreath topper. Perfect for seasonal decor or a delightful handmade gift.
Progress Tracker
0% Complete
— Materials & Gauge :
Info :
Gauge is not critical for this mobile, but for reference: 16 sc x 20 rows = 4" in single crochet using 3.5mm hook. Work tightly to avoid stuffing showing through stitches. Use safety eyes appropriate to each charm size and secure with washers.
— Wreath Topper :
Round 1 :
With orange yarn: 6 sc in mr (6)
Round 3 :
(1 sc, inc) x 6 (18)
Round 4 :
(2 sc, inc) x 6 (24)
Info :
Wreath is built as a flat ring with interior hole. To create a ring large enough to fit the spiral tube through, we will expand the center with rounds worked short in the middle later.
Round 5 :
(3 sc, inc) x 6 (30)
Round 6 :
(4 sc, inc) x 6 (36)
Round 7 :
1 sc in each st (36)
Round 8 :
Change to black yarn. 1 sc in each st (36)
Round 9 :
1 sc in each st BLO (36)
Info :
We will create an inner circular opening: fold ring and join to form a donut - but first add a decorative scalloped edge around outer circumference.
Round 10 :
Switch to orange, *sc in next 2, 5 dc in next st (scallop made), sc in next 2; rep around* (36 scallop groupings)
Info :
Make small decorative stars and leaves to applique to the wreath now or later. See 'Leaf & Star Motifs' section below for full instructions. When done, fold center to create the hole large enough for the spiral tube and join edges with sl st to form a sturdy ring. Reinforce with sewing through both layers.
— Wreath Embellishments (Leaves & Stars) :
Leaf Motif (Make 6) Round 1 :
With orange: ch 6, sc in 2nd ch from hook, hdc, dc, hdc, sc in last ch. Fasten off leaving tail for sewing.
Leaf Motif Round 2 :
Work 3 sc along one side of foundation chain, then 3 sc along the other side to create rounded leaf. Make 6-8 leaves and slightly block with steam to flatten; sew onto wreath.
Star Motif (Make 4) Round 1 :
With yellow: ch 2, 5 sc in 2nd ch (5)
Star Motif Round 2 :
*ch 3, sl st into next sc, sc into next st* rep 5 times to create points. Fasten off leaving tail to sew stars onto wreath and along spiral as desired.
Info :
Applique stars and leaves to the wreath in a balanced arrangement; sew securely with matching yarn and weave ends into back of wreath. Add the small crescent moon (see Moon section) tucked into wreath before final joining.
— Spiral Tube (Main Structure) :
Info :
The spiral tube is worked as a long crocheted tube that will sit over a flexible spiral form or craft wire wrapped into a spiral. Work in continuous rounds - this will create a long tube approximately 36-40" (finished spiral length when stretched). Adjust rounds to change length.
Round 1 :
Using black yarn: 6 sc in mr (6)
Round 3 :
(1 sc, inc) x 6 (18)
Round 4 :
(2 sc, inc) x 6 (24)
Round 5 :
(3 sc, inc) x 6 (30)
Round 6 :
(4 sc, inc) x 6 (36)
Info :
We now have a small tube that will be lengthened by working in even rounds. Keep turning every 2-3 rounds if you prefer to join into a spiral seam when shaping; I worked continuously to avoid seams and to carry stripes inside the tube.
Round 7-10 :
1 sc in each st (36)
Round 11 :
Change to orange yarn at end of previous round: 1 sc in each st (36)
Round 12-15 :
1 sc in each st (36)
Info :
Stripe pattern: 4 rounds black, 4 rounds orange repeated. Carry unused color inside tube or cut and weave ends every color change for cleaner stripes. Tube diameter is ~2" when worked to 36 sts circumference depending on yarn tension.
Round 16-47 :
Repeat color blocks: 4 rounds black, 4 rounds orange, 4 rounds black (repeat pattern) until tube length reaches approx 36" (repeat until you have done a total of 40 alternating rounds). Maintain 36 sts in each round (36)
Round 48 :
Change to black and work 4 rounds (36)
Round 49-52 :
1 sc in each st (36)
Info :
If you want a stiffer spiral, insert a flexible craft wire or plastic spiral form inside the tube now. The wire should be slightly shorter than the tube; bend the tube in a spiral around a dowel or pole to shape. If using a wire, leave an opening at the top and bottom to feed in the wire and then sew closed securely around it.
Round 53 :
Work a decorative ridge: *sc in next 2, fpdc around next st* rep around to create a subtle ridge for texture (36)
Round 54-60 :
1 sc in each st (36)
Info :
After finishing the tube, block lightly and shape it around the spiral form. Secure the top two inches to the wreath interior with sewing and reinforcement stitches. The spiral should retain its coil but remain soft enough to jiggle gently with movement.
— Cats (Make 3 identical) :
Head Round 1 :
With black: 6 sc in mr (6)
Round 3 :
(1 sc, inc) x 6 (18)
Round 4 :
(2 sc, inc) x 6 (24)
Round 5 :
(3 sc, inc) x 6 (30)
Round 6 :
(4 sc, inc) x 6 (36)
Round 7-12 :
1 sc in each st (36)
Info :
Place safety eyes between rounds 9 and 10 approximately 8 stitches apart for a wide cute expression. Use 8mm eyes for best proportion. Mark the center stitch between eyes for later nose placement. Add a tiny stitch of blush with fabric-safe chalk after assembly if desired.
Round 13 :
(4 sc, dec) x 6 (30)
Round 14 :
(3 sc, dec) x 6 (24)
Round 15 :
(2 sc, dec) x 6 (18)
Round 16 :
(1 sc, dec) x 6 (12)
Info :
Fasten off leaving a long tail for sewing. Stuff head firmly but do not overstuff; a slightly firm head will hold the cat's shape. We will attach the head to the body after the body is made.
Ear (Make 2) Round 1 :
With black: ch 2, 4 sc in 2nd ch (4)
Ear Round 2 :
(1 sc, inc) x 2 (6)
Ear Round 3 :
1 sc in each st (6)
Ear Round 4 :
Sl st around and fasten off leaving tail for sewing. Slightly fold the base and sew onto head at rounds 6-7, spaced 8-10 stitches apart depending on desired ear tilt.
Body Round 1 :
With black: 6 sc in mr (6)
Body Round 3 :
(1 sc, inc) x 6 (18)
Body Round 4 :
(2 sc, inc) x 6 (24)
Body Round 5-9 :
1 sc in each st (24)
Info :
Body is a slightly elongated oval. Work even rounds to build height. Leave the neck opening wide enough to sew the head on; position head center over the front of body for a natural sitting pose.
Body Round 10 :
(2 sc, dec) x 6 (18)
Body Round 11 :
(1 sc, dec) x 6 (12)
Info :
Do not fasten off yet. Stuff body moderately firm and sew closed using the long tail. Leave top opening slightly flattened so the head can be sewn on with a neat seam.
Arm (Make 2) Round 1 :
With black: 6 sc in mr (6)
Arm Round 2-3 :
1 sc in each st (6)
Arm Round 4 :
(1 sc, inc) x 2, 2 sc (8)
Arm Round 5-10 :
1 sc in each st (8)
Info :
Stuff hands lightly so they remain flexible. Sew arms to sides of body at rounds 3-5 using hidden stitches for a clean finish. Bend arm slightly to create a hugging pose for some cats that hold a star or pumpkin.
Leg (Make 2) Round 1 :
With black: 6 sc in mr (6)
Leg Round 3-6 :
1 sc in each st (12)
Leg Round 7 :
(2 sc, dec) x 3 (9)
Leg Round 8-10 :
1 sc in each st (9)
Info :
Stuff feet firmly and sew to bottom of body so cat sits naturally. Slightly flatten foot base for stability, and add a few extra whip stitches through the foot base into the body for extra hold if the mobile will be moved frequently.
Tail Round 1 :
With black: ch 2, 6 sc in 2nd ch (6)
Tail Round 2-8 :
1 sc in each st (6) (work to desired length, typically 7 rounds for a 2.5" tail)
Info :
Leave long tail for sewing. Position tail at back of body slightly off-center for a playful line. You can insert a thin wire inside tail for poseable effect before sewing in if desired.
Face Embroidery :
Using pink yarn, embroider small triangular nose between eyes, then add three whisker stitches on each side with white or light gray. Add a tiny satin stitch mouth under nose. Fasten off and weave ends.
Info :
Make 3 cats total, repeat all sections. For variety, make one cat holding a star (see Star section) by sewing star to one arm before fully closing seam.
— Ghosts (Make 4) :
Round 1 :
With white: 6 sc in mr (6)
Round 3 :
(1 sc, inc) x 6 (18)
Round 4 :
(2 sc, inc) x 6 (24)
Round 5-9 :
1 sc in each st (24)
Info :
Gh ost bodies are cylindrical and will end with a scalloped base. Place safety eyes between rounds 6-7 approximately 6-8 stitches apart; embroider smiling mouth below eyes with black yarn.
Round 10 :
(3 sc, dec) x 6 (18)
Round 11 :
(2 sc, dec) x 6 (12)
Round 12 :
Stuff lightly, continue: (1 sc, dec) x 6 (6)
Round 14 (Scallop Base) :
*ch 3, sl st into next st, sl st into next st* rep around to create scalloped hem. Fasten off leaving long tail for hanging cord.
Info :
Make 4 ghosts. To create variation, add tiny applique roses (see small flower motif) or a little crocheted hat for one ghost: see 'Mini Hat' subsection. Attach safety eyes before final stuffing and secure backs inside body to prevent slippage.
— Mini Straw Hat for Ghost (Optional) :
Round 1 :
With tan yarn: ch 2, 6 sc in 2nd ch (6)
Round 2 :
(1 sc, inc) x 3 (9)
Round 3 :
1 sc in each st (9)
Round 4 :
Change to darker tan: *sc in next 2, fpdc around next st* rep around to create small brim (9)
Info :
Sew hat onto ghost head before final finishing. Add a tiny flower or band for extra charm.
— Pumpkin (Make 3) :
Round 1 :
With orange: 6 sc in mr (6)
Round 3 :
(1 sc, inc) x 6 (18)
Round 4 :
(2 sc, inc) x 6 (24)
Round 5-8 :
1 sc in each st (24)
Info :
We will shape segments by using running stitches later. Continue to form spherical shape by decreasing:
Round 9 :
(2 sc, dec) x 6 (18)
Round 10 :
(1 sc, dec) x 6 (12)
Info :
Do not fasten off. Stuff pumpkin firmly. Use a tapestry needle and a long tail to create ridged segments: wrap yarn around pumpkin lengthwise 4-6 times and pull lightly to form sections, securing inside. Add a green stem.
Stem :
With green: ch 4, sl st in 2nd ch and next ch, hdc in last ch; fasten off leaving tail for sewing. Alternatively make a small spiral: ch 10, sc 9 back along chain to create curly tendril. Sew stem to top center.
Info :
Make 3 pumpkins of varying sizes by stopping increases earlier or later. Sew pumpkins to hanging cord at desired points.
— Bat (Make 1-2) :
Head Round 1 :
With black: 6 sc in mr (6)
Head Round 3 :
(1 sc, inc) x 6 (18)
Head Round 4-7 :
1 sc in each st (18)
Head Round 8 :
(2 sc, dec) x 6 (12)
Info :
Stuff head lightly and fasten off. Add tiny safety eyes and a smiling mouth with white yarn. Ears are small triangles similar to cat ears but shorter; make 2 and sew into head top.
Wing (Make 2) Round 1 :
With black: ch 7, sc from 2nd ch back to start (6), continue around foundation chain to work small wing cup: 3 sc in last ch, continue along second side of chain 5 sc, sl st to base. Fasten off leaving tail for sewing.
Wing Round 2 :
Attach wing to sides of body by sewing base to head sides. Add small scalloped edging with sl st to create bat wing points if desired.
Info :
Make 1-2 bats. Sew to hanging cord lower on the spiral for a hovering effect. Add embroidery highlights for eyes or teeth with white yarn for a friendly look.
— Star Motif (Make 4) :
Round 1 :
With yellow: ch 2, 5 sc in 2nd ch (5)
Round 2 :
*ch 4, sl st into next sc, sc into next st* rep 5 times to form points. Fasten off leaving tail for hanging cord.
Info :
Optionally add a small surface slip stitch spiral in the center for texture. Sew or attach stars to hanging cords at alternating heights.
— Crescent Moon (Make 2) :
Round 1 :
With yellow: ch 8, sc in 2nd ch from hook and across (7 sc), sl st to base turning to work around chain to form a crescent shape; sc 5 back along next side. Join to create a small crescent cup.
Round 2 :
Work 1 sc in each st around, adding 2 sc in the outermost curve to shape (total approx 16-18 depending on working). Fasten off and weave in ends.
Info :
Stuff lightly; keep the moon slightly flat for a hanging silhouette. Sew one moon into wreath and one to hang mid-spiral.
— Assembly Ropes & Hanging Cords :
Info :
Cut lengths of yarn in coordinating colors (black, orange, white) for hanging charms at desired intervals. Each hanging length should be tripled if you want thicker cord — braid three strands and knot at bottom, or use single strong yarn. Make top loop approximately 6" long for hanging from ceiling hook.
Attach Charms :
Sew each charm to its cord by feeding the long tail of each charm up into the top opening and knotting yarn inside to secure. For charms worked with a long tail left for hanging, run the tail through the chord and knot; reinforce with a few stitches around the top of the charm for stability.
Info :
Balance the mobile by staggering charm positions along the spiral at approximately every 6-8" of tube length. Use pins to hold positions while checking from all sides to ensure balanced visual weight.
— Final Finishing :
Info :
Weave in all ends. If you inserted wire into the spiral tube, tuck end tips inside the top of the wreath and wrap with yarn to cover. Sew wreath securely to top of tube by sewing through both inner ring layers at several points around circumference to prevent slipping.
Info :
Optional: lightly steam-block pieces (not wire) to smooth stitches. Attach safety backs to all eyes and double check all seams for secure sewing before hanging as a decoration around children or pets.
This whimsical Halloween spiral mobile brings together classic amigurumi charm with seasonal flair — perfect to hang in a doorway or cozy hallway. Hand-stitching each tiny cat, ghost and pumpkin is a relaxing, rewarding process that results in a show-stopping decoration. 🧶 The finished mobile is playful, balanced and full of personality; once assembled it becomes an eye-catching focal point for holiday guests. Happy stitching — may every little charm bring a smile! 🎃✨