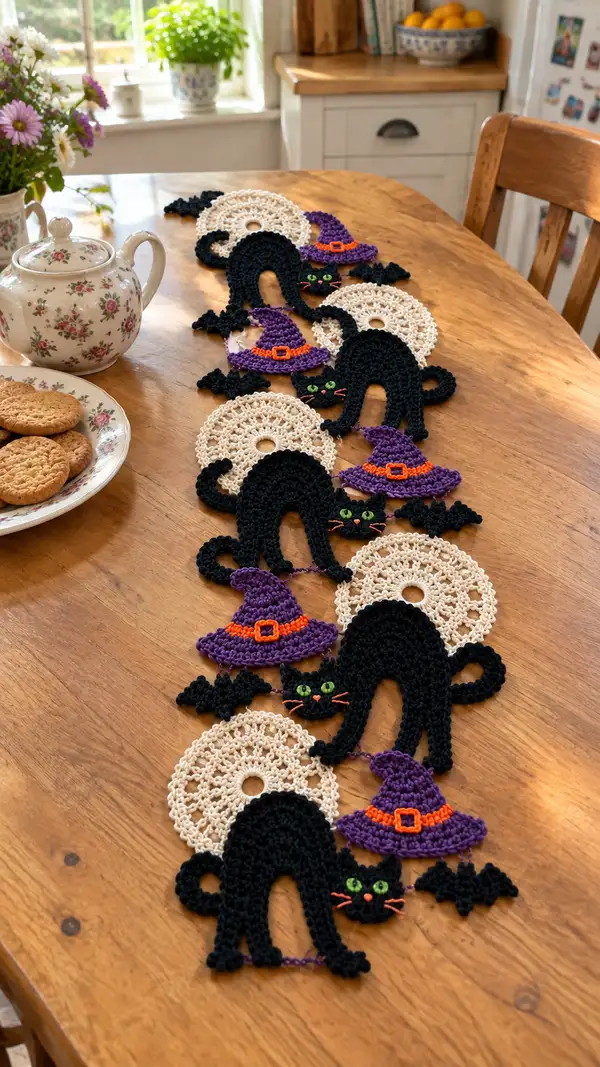
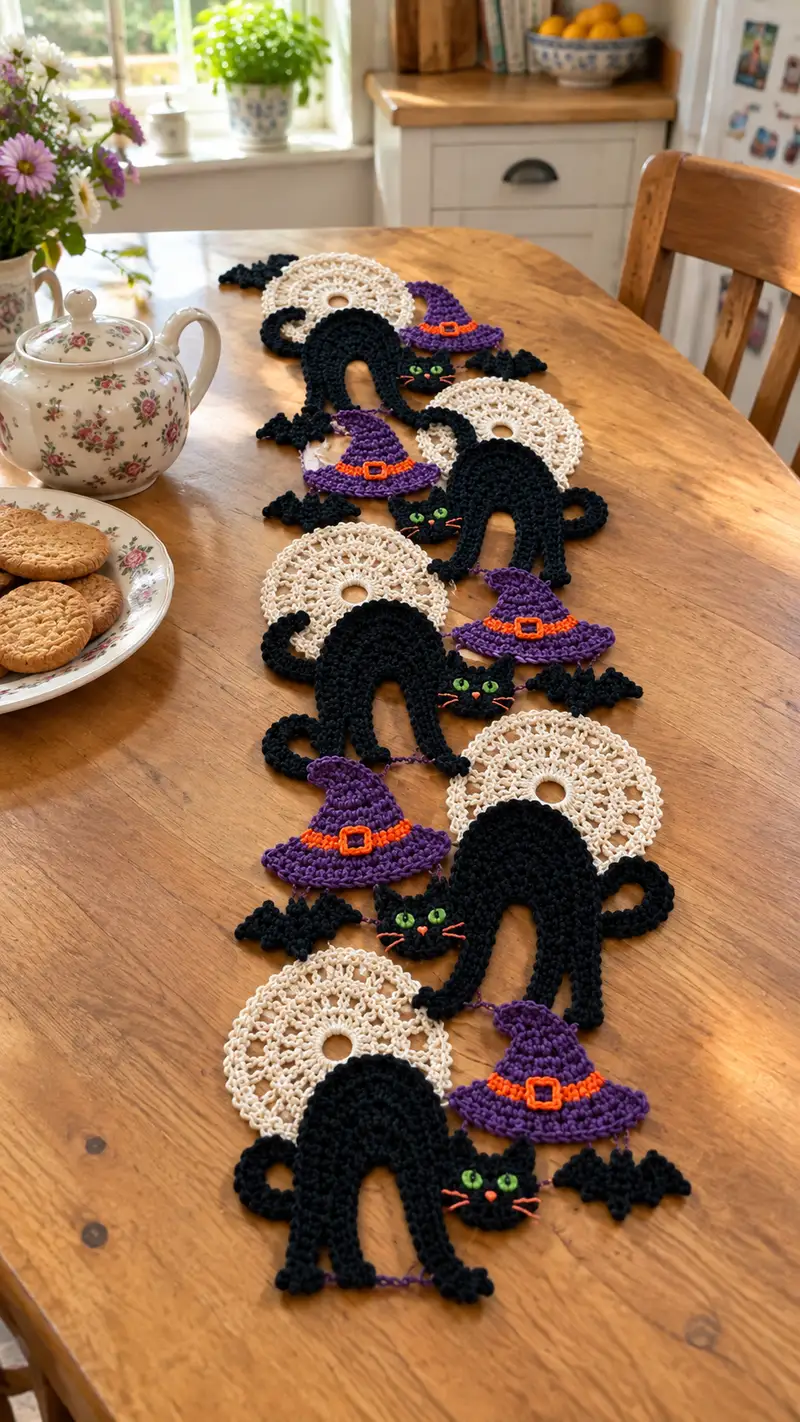
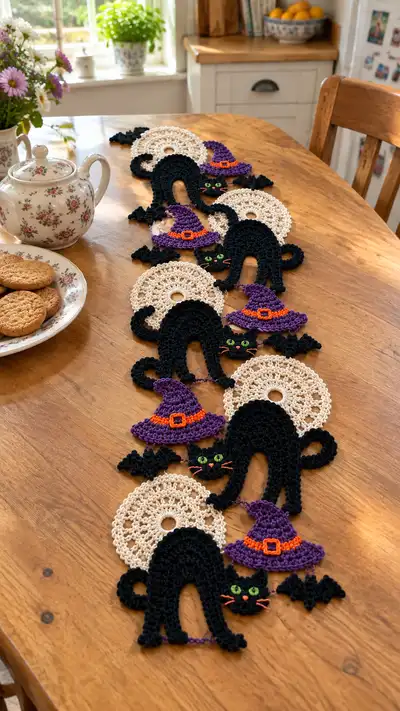
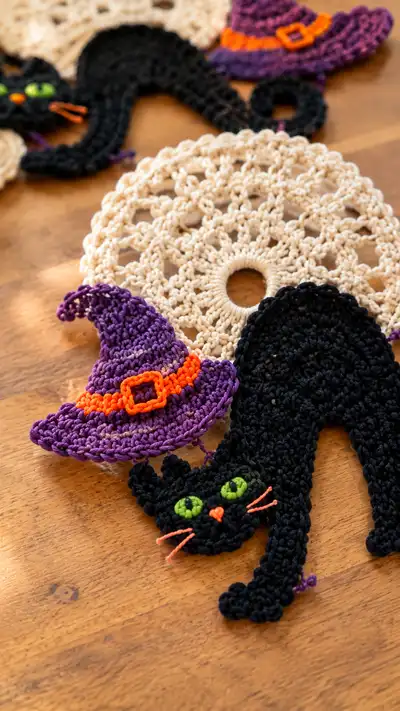
A festive Halloween table runner made from linked crocheted motifs: cream lace doilies, black arched cats, purple witch hats, and tiny bats. The motifs are connected by a slim purple chain to create a charming repeating runner perfect for seasonal decor. Bright green embroidered eyes and orange hat trims add playful, spooky pops of color.
Progress Tracker
0% Complete
— Materials & Gauge :
Info :
Gauge is not critical for a decorative runner, but for reference: using 3.5mm hook and worsted-light cotton, a 10cm/4in swatch in sc = approximately 20 sts x 28 rows. Adjust hook for firmer or looser fabric as desired.
— Notes :
Info :
Work motifs flat in rounds where noted. All motifs are worked in continuous rounds unless specified; use stitch marker to mark beginning of round. Join motifs with a 4 ch linking chain in purple (or whip-stitch if preferred). Block motifs flat before joining for best alignment.
— Lace Doily (Make multiple) :
Round 1 :
Make a magic ring. Ch 3 (counts as dc), work 11 dc into ring. Join with sl st to top of ch-3. (12)
Round 2 :
Ch 3, dc in same st, 2 dc in each st around. Join with sl st to top of ch-3. (24)
Round 3 :
Ch 3, (dc, ch 1, dc) in next st, *skip next st, (dc, ch1, dc) in next st; rep from * around. Join. (12 clusters, 12 ch-1 sps)
Round 4 :
Sl st into ch-1 sp, ch 1, sc in same sp, ch 3, sc in next ch-1 sp, *ch 3, sc in next ch-1 sp; rep from * around. Join. (12 sc, 12 ch-3 sps)
Round 5 :
Work into ch-3 sps: *(sc, hdc, 3 dc, hdc, sc) in ch-3 sp, ch 2; rep from * around. Join. (12 shells)
Info :
If you want a larger doily, repeat shell round increases outward; keep shells consistent. For this runner, one doily per motif is shown; final doily diameter should measure approx 9-10cm/3.5-4in after blocking.
Round 6 :
Working into spaces between shells: sl st into space, ch 1, sc in same sp, *ch 5, sc into center of next shell (between dc groups); rep from * around creating airy lace loops. Join. (12 sc and 12 ch-5 loops)
Round 7 :
In each ch-5 loop work: (sc, hdc, 3 dc, hdc, sc). Join. (12 larger shells)
Round 8 :
Sl st into next st, ch 1, sc in same st, *ch 3, sc in center of shell; rep from * around to create scalloped outer edge. Join and fasten off. Block flat to openwork circle (approx 9-10cm diameter).
Info :
For the central hole effect in the photo, you can leave the center slightly open by choosing a looser join at round 1 or by using a 2 cm cardboard washer under the center when blocking to maintain a visible hole. Block until flat and even.
— Cat Body (Arched Back) (Make multiple) :
Info :
The cat motif is worked flat starting at the top of the arch and progressing down to form legs; this is worked in rows/oval rounds to create a silhouette. Use black cotton. Final height approx 12-13cm from top of arch to paws; width approx 8-9cm across hips.
Round 1 :
Ch 11. Sc in 2nd ch from hook and across (10 sc). Turn (10)
Round 2 :
Ch 1, sc in each st across (10). Turn (10)
Round 3 :
Ch 1, sc in first 3 sts, hdc in next 2 sts, 2 dc in next 2 sts, hdc in next 2 sts, sc in last st (shape begins) (10)
Round 4 :
Ch 1, sc in each st across but work 2 sc in the center st to form top apex increase; results in 11 sc. Turn (11)
Round 5 :
Ch 1, sc across 11. Turn (11)
Round 6 :
Ch 1, sc in first 2, (2 sc in next) repeat once to widen shoulders, sc across to last 2 sts, (2 sc in next) repeat once at end. Total 15 sc. Turn (15)
Info :
These early rounds form the top of the arch and shoulders where the neck would be. Keep tension firm to maintain crisp silhouette.
Round 7 :
Ch 1, sc in each st across (15). Turn (15)
Round 8 :
Ch 1, sc 3, hdc 4, 2 dc 3, hdc 3, sc 2 to shape the arch visually. Turn (15)
Round 9 :
Ch 1, sc across (15). Turn (15)
Round 10 :
Begin to shape the curve by working in FLO: ch 1, sc in next 2 FLO, sc2tog, sc in next 7, sc2tog, sc in final 2 (13)
Round 11 :
Ch 1, sc across (13). Turn (13)
Round 12 :
Ch 1, sc in first 3, sc2tog, sc in next 3, sc2tog, sc in last 3 (11)
Info :
At this point the arch curve is established; you will now split for left and right legs while keeping center arch body intact. Place marker at left-most stitch that will form inside leg seam to keep counting consistent.
Round 13 :
Ch 1, sc in next 4 (this becomes left leg top), turn and work down left leg edge in rows for shaping (see Leg Section). Do not fasten off body center; continue on right side later.
— Left Leg (Continue from body Round 13) :
Round 14 :
Working back and forth on left leg section only: ch 1, sc across 4 sts, ch 1, turn (4)
Round 15 :
Ch 1, sc in first 2 sts, 2 sc in next st, sc in last st (5) Turn (5)
Round 16 :
Ch 1, sc across 5. Turn (5)
Round 17 :
Ch 1, sc2tog, sc in next, sc2tog across to narrow at ankle (3) Turn (3)
Round 18 :
Ch 1, sc across 3. Turn (3)
Round 19 :
Ch 1, sc in first st, 2 sc in next, sc in last (4). Turn (4)
Round 20 :
Ch 1, sc across 4. Turn (4)
Round 21 :
Work a small rounded paw: (sc, hdc, dc) in first st, sc in next 2 sts, (dc, hdc, sc) in last st. Fasten off leaving tail for sewing. (approx shaping creates 4 paw width)
Info :
Stuffing is not required for flats; if you prefer a slight 3D paw, lightly stuff paw with tiny bit of fiberfill before closing. Finish and sew paw to underside of leg opening if needed.
— Right Leg (Attach at body) :
Round 22 :
Return to body center: pick up next unworked stitch on body, ch 1, sc in next 4 (this becomes right leg top), turn and repeat left leg rows 14-21 mirrored. Fasten off and weave in ends.
Round 23 :
After both legs are done, rejoin at center of arch and work 2 rounds of even sc across the top arch edge to tidy join and create uniform silhouette: ch 1, sc in each top-edge stitch across (approx 11-13 sts depending on shaping). Fasten off.
Info :
If you want a slightly raised arched back, work one additional row in BLO around the arch before finishing; this will create a ridge that catches light and looks sculpted.
— Cat Head (Flat Face) :
Round 1 :
Using black, mr, ch 1, 6 sc in mr. Pull tight. (6)
Round 2 :
Inc in each st around (12)
Round 3 :
(1 sc, inc) x 6 (18)
Round 4 :
(2 sc, inc) x 6 (24)
Round 5 :
(3 sc, inc) x 6 (30)
Round 6 :
1 sc in each st around (30)
Round 7 :
1 sc in each st around (30)
Round 8 :
(3 sc, dec) x 6 (24)
Round 9 :
(2 sc, dec) x 6 (18)
Info :
Place embroidered eyes or small green circular motifs between Rounds 5 and 6. Eyes should be roughly 6 stitches apart center-to-center. Use lime green yarn to crocheted small eye disks or embroider later.
Round 10 :
(1 sc, dec) x 6 (12)
Round 11 :
6 dec (6). Fasten off leaving long tail for sewing to body or slip stitch join to body under arch, positioning head peeking out from under arch.
Info :
If you prefer the head attached directly to the body silhouette, place it under the arch and sew through head tail and arch row 2-4 evenly so head appears tucked under the arch. Otherwise leave head separate and sew in place later.
— Cat Ears (Make 2) :
Round 1 :
Using black, ch 4, sl st to form ring or mr, ch 1, 5 sc in ring (5)
Round 2 :
Inc in each st around (10)
Round 3 :
(1 sc, inc) x 5 (15)
Round 4 :
Sc across 15, but form a slight point by sc2tog in center top 3 sts to create ear tip shape; fasten off. (15 then shaped)
Info :
Sew ears to the top of the head with the inner base of each ear aligned with the edge of Round 5 of the head. Slightly angle them outward for a curious look.
— Cat Eyes (Embroidered or Crochet Disks) :
Round 1 :
Using lime yarn, make mr, ch 1, 6 sc in mr, pull tight, sl st and fasten off leaving tail for sewing. (6)
Round 2 :
If larger eyes desired, (1 sc, inc) x 3 = 9 or continue (2 sc, inc) x 3 = 12. Attach to head at positions noted in head Info. Embroider vertical black slit with embroidery thread for cat-eyes if you wish.
Info :
Sew eyes securely before attaching head to body if working them as separate motifs. Use a small dab of fabric glue on the back of each eye disk to keep it stable while sewing.
— Nose & Whiskers (Embroidered) :
Info :
Using bright orange or coral embroidery thread, stitch a small triangle nose centered under the eyes. For whiskers, use 3 short straight stitches each side, anchored securely and knot inside head or weave ends under several stitches to hide.
— Witch Hat (Make multiple) :
Round 1 :
Using purple yarn, mr, ch 3 (counts as dc), work 11 dc into ring. Join. (12)
Round 2 :
Ch 3, dc in same st, 2 dc in each st around. Join. (24)
Round 3 :
Ch 3, (dc, ch1, dc) in next st, *skip next, (dc,ch1,dc) in next; rep around to create 12 clusters. Join. (12 clusters)
Round 4 :
Sl st into ch-1 sp, ch 1, sc in same sp, ch 3, sc in next ch-1 sp; rep around. Join. (12 sc and 12 ch-3 sps)
Round 5 :
Work into ch-3 sps: (sc, hdc, 3 dc, hdc, sc) to make a flared brim at the lower edge. Join. (12 shells)
Round 6 :
Change to purple and working up the cone: sl st to base of first cluster, ch 1, sc into back loops around the lower circle to create base ridge. (12)
Round 7 :
Ch 1, sc in each st BLO (12)
Round 8 :
Ch 1, (sc, inc) x 6 (18) Begin shaping cone upward.
Round 9 :
Ch 1, sc in each st around (18)
Round 10 :
Ch 1, (2 sc, inc) x 6 (24)
Round 11 :
Ch 1, sc in each st around (24)
Round 12 :
To shape a whimsical point, work (3 sc, dec) x 6 (18)
Round 13 :
(2 sc, dec) x 6 (12)
Round 14 :
Ch 1, sc around (12). Sl st and fasten off leaving long tail to sew to cat head or arch top. Bend tip slightly and tack down with a few stitches to create jaunty droop.
Info :
Create hat band using orange: ch length that fits around base of cone; join ends and sew to hat. For buckle, work a small rectangle with orange then smaller inner rectangle in purple or leave as simple orange square stitched on top.
— Bat Motif (Small Accent) :
Round 1 :
Using black, ch 8, sc in 2nd ch from hook and across to form body (7 sc). Turn. (7)
Round 2 :
Ch 1, sc in first 3 sts, (sc, hdc, dc) in next st to form wing scallop, sc in next 3. Turn. (8 including scallop bump)
Round 3 :
Flip and repeat mirrored scallop on the opposite side by working into foundation row outer edge: sc across, form three scallops total (tiny wings). Fasten off, weave ends. Shape wing tips with small surface slip stitches if needed.
Info :
Bat scales are tiny accents and can be worked quickly; make 1-2 per repeat to tuck between doily and cat motifs. Sew in place with hidden stitches.
— Connecting Chain & Spacing :
Info :
Use purple yarn to crochet a linking chain that runs through the motifs connecting them. Standard spacing in the sample photo is: doily - 4 ch - cat - 4 ch - hat - 4 ch - bat - 4 ch - doily. Each motif is attached by a short slip stitch or sewn to the linking chain at predetermined points (center edge of motifs).
Round 1 :
Ch desired runner length in purple. For a nine-motif runner as photo, chain approx 180-220 ch depending on spacing. Do not fasten off. Work placement loops of 4 ch at points where motifs will be attached: ch 4, sc in next ch to form a small loop; continue chain placing loops every 18-24 ch to align with motif width.
Info :
Alternatively, make motifs and then sew a 4-ch cord to the back of each motif to join them. Whip-stitch method often gives a flatter look compared to visible slip-stitch joins.
— Assembly Prep :
Info :
Block every motif flat and pin to consistent measurements. Mark exact stitch locations where each motif will be attached to the linking chain: for a cat, attach at tail base and under-arch edge; for doily attach at outer scallop midpoint; for hat attach at brim center; for bat attach at body center. Ensure consistent left-right orientation when assembling multiples.
Round 1 :
Sew or slip-stitch each motif to the prepared linking chain at the planned attachment points. Use matching purple to make joins discreet or contrasting color if you want visible decorative joins. Weave in ends thoroughly.
Info :
Consider tacking hats and heads with a few extra stitches so they don't flip up when laid flat. Use pins first to check placement then sew through linking chain and motif to secure.
— Finishing Details & Embroidery :
Round 1 :
Sew the cat faces under arch: position head under center of arch then use whip-stitch or ladder stitch around the head base, attaching to arch rounds 2-4 evenly (approx 10-12 stitches) for stable placement.
Round 2 :
Embroider pupils and slits using black embroidery thread; place pupils vertically to achieve cat-eye look. Add three whiskers per side with short stitches. Stitch nose and tiny mouth if desired.
Info :
For safety, use embroidery rather than plastic eyes if the runner will be used around small children. Secure all small sewn parts by weaving tails and adding a small drop of glue on knots if desired.
— Optional Reinforcement :
Info :
If the runner will be handled often, consider crocheting a second thin chain for the back and whip-stitching it to the front chain at regular intervals for extra strength. Alternatively add a fabric backing strip sewn across joins to stabilize motifs.
— Troubleshooting & Tips :
Info :
If any motif looks uneven after blocking, lightly steam or re-block to even edges. For motifs that curl slightly, add one more round of sc in BLO to flatten. Keep a consistent hook for all motifs to ensure matching sizes.
This Halloween runner brings together airy lace with playful motifs for a unique seasonal centerpiece. The repeating pattern of cream doilies, arching black cats, jaunty purple witch hats and little bats creates a lively, handcrafted look that brightens any table. Each motif can be customized in color or scale, making this a perfect project for personal touches and gifts. 🎃🧶 Enjoy the process and share your spooky, charming creation with friends and family!