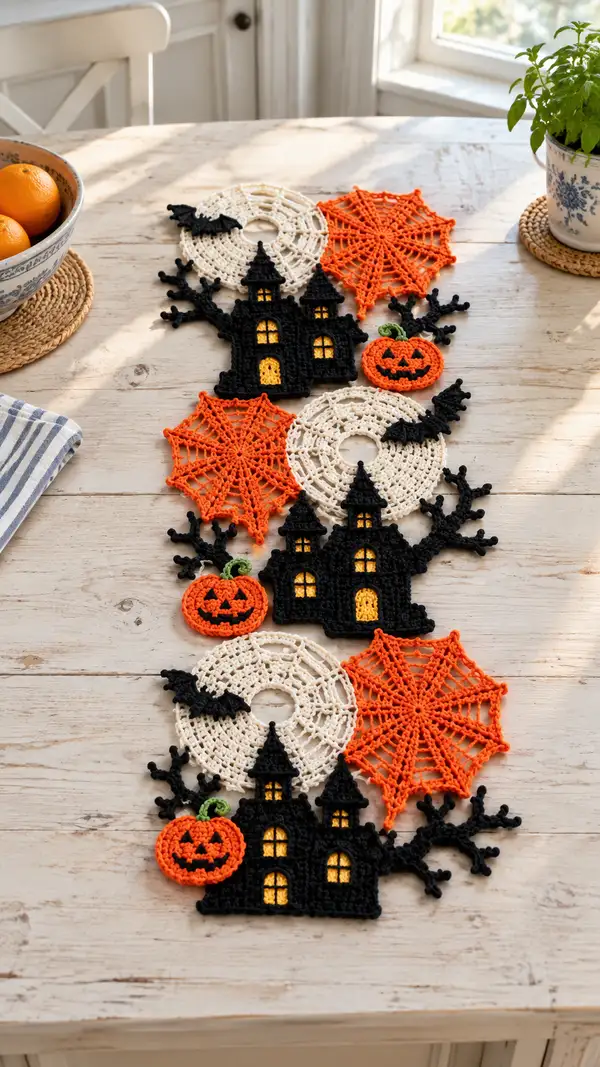
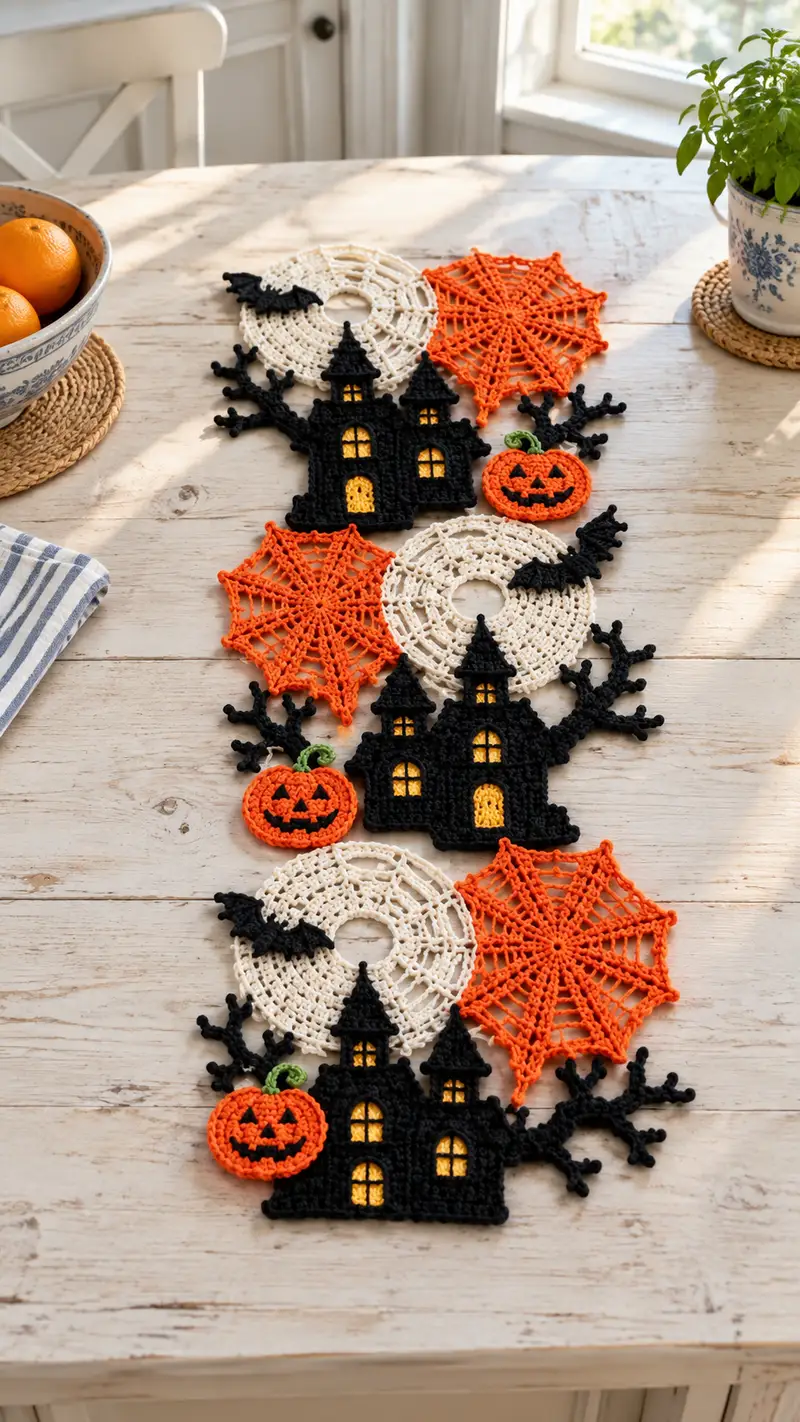
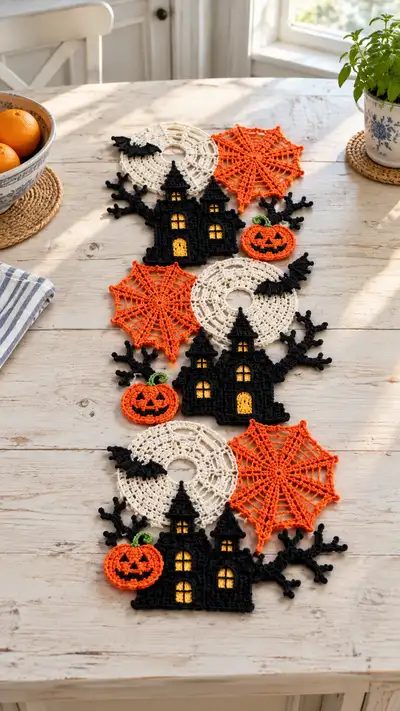
Create a charming Halloween table runner composed of linked crochet motifs: haunted houses, jack-o-lantern pumpkins, spiderweb doilies and moon rings. This pattern uses classic stitches and color changes to build a layered, whimsical runner. Perfect for seasonal decorating and gift-making, the design stacks repeating motif groups for a continuous runner. Detailed assembly instructions help you join motifs into a flat, stable tabletop centerpiece.
Progress Tracker
0% Complete
— Materials & Gauge :
Info :
Gauge is not strictly critical for motifs since runner is decorative, but aim for 22 sc and 24 rows = 10 cm in single crochet for more predictable motif sizing. Using DK yarn and 3.5mm hook will give crisp motifs similar to the photographed runner.
— General Notes :
Info :
Work motifs flat unless otherwise noted. Use a stitch marker to mark the first stitch of each round when working circular motifs. We recommend blocking each motif to the measurements shown to ensure even assembly. Carrying color inside motifs is not recommended for flat appliques because it shows; instead carry short tails and weave in or finish off between color changes.
— Haunted House Motif :
Round 1 :
With black, ch 16. Join with sl st to first ch to work in continuous rounds (16)
Round 2 :
Ch 1, sc in same st and in each ch around, join with sl st to first sc (16)
Round 3 :
Ch 1, inc in next st, 1 sc in next 5 sts, inc, 1 sc in next 6 sts, inc, 1 sc in next 2 sts (19)
Round 4 :
Ch 1, (1 sc, inc) x 3, 1 sc in next 5 sts, (1 sc, inc) x 3, 1 sc in next 6 sts (25)
Info :
This early shaping begins the main rectangle that forms the house base. Keep tension even; place a stitch marker where you began this round so window placement is stable later.
Round 5 :
Ch 2 (counts as hdc), hdc in next 2 sts, dc in next 6 sts, hdc in next 8 sts, dc in next 6 sts, hdc in last 2 sts, sl st to first hdc (25)
Round 6 :
Ch 1, sc in each st around (25)
Round 7 :
Ch 1, (2 sc, inc) x 5, 1 sc in next 5 sts (30)
Round 8 :
Ch 1, sc in each st around (30)
Round 9 :
Ch 1, (3 sc, inc) x 6 (36)
Round 10 :
Ch 1, sc in each st around (36)
Info :
At the end of Round 10 the rectangle is wide enough to mark out windows and the central door. Use a scrap of yellow yarn or backing fabric to plan window placement: typical house has three windows above door and one larger door opening below.
Round 11 :
Ch 1, sc in next 8 sts, ch 4, sk 4 sts, sc in next 8 sts, ch 4, sk 4 sts, sc in remaining sts (32 + 8 ch spaces)
Round 12 :
Change to yellow yarn. Join in first ch-4 space: ch1, work 4 sc into ch-4 space to form first window (4), sl st into next ch-4 and work 4 sc into that space (4), change back to black and sc across remaining sts, leaving a larger ch-6 gap for door area (see Info)
Info :
To create the door: after forming window spaces, leave a ch-6 space in the lower center by chaining 6 at the appropriate point instead of scing across; you will work door surrounds in the next rounds. Fasten off yellow tails and weave into wrong side later, or use a small piece of yellow fabric behind windows.
Round 13 :
With black, ch 1, sc across, working around ch-6 door space with 2 sc in first ch, 1 sc in next 4 ch, 2 sc in last ch (38)
Round 14 :
Ch 1, sc in each st around (38)
Round 15 :
Ch 1, (4 sc, inc) x 6 + sc across remaining 2 sts to maintain shape (44)
Round 16 :
Ch 1, sc in each st around (44)
Round 17 :
Ch 1, sc 10, ch 6 for turret base, sk 6 sts, sc across 12, ch 6 for second turret, sk 6 sts, sc remaining sts (44 with two ch-6 turret spaces)
Round 18 :
Change to black and work into ch-6 turret space: join and 6 sc into first turret, sl st to join, work 6 sc into second turret ch space, then sc remaining body sts (56 including turret rounds)
Info :
Turrets are built by working small circular towers attached to the rectangle. Keep stitches tight on turret rounds to maintain pointy shapes. You can use a smaller 3.0mm hook for turret rounds if you want crisper points.
Round 19 :
Ch 1, sc in each st around (56)
Round 20 :
(5 sc, inc) x 8 (64)
Round 21 :
Ch 1, sc in each st around (64)
Round 22 :
Form roof ridge: ch 3, *dc in next st, ch 1, sk next st* rep across to create scalloped roof texture; join (approx 32 dc and ch spaces)
Round 23 :
Change to black, work 1 sc in each dc and ch space around to tidy roof edge (64)
Round 24 :
Ch 1, (6 sc, inc) x 8 (72)
Info :
Windows: embroider crossbars on yellow window fills using tapestry needle and yellow floss; make sure yellow is secured before adding embroidery. Alternately, cut small rectangles of yellow felt and glue behind windows for a warm glow.
Round 25 :
Ch 1, sc in each st around (72)
Round 26 :
Ch 1, (7 sc, inc) x 8 (80)
Round 27 :
Ch 1, sc in each st around (80)
Round 28 :
Edge finish: switch to BLO for 1 round, 1 sc in each st BLO to create a crisp edge for sewing (80)
Round 29 :
Fasten off leaving long tail for joining. Weave in ends and block motif to rectangle approximately 10 cm wide by 8 cm tall depending on gauge.
— Haunted House Turret Tips & Variation :
Info :
For taller turrets, work additional 3-6 rounds of (sc in each st) on turret circles, decreasing gradually at the top to form a peaked roof. Add a small sl st loop at turret tops for hanging ornaments if desired.
— Spiderweb Doily Motif (Orange) :
Round 1 :
With orange, mr, ch 6 (counts as tr + ch 2), (tr, ch 2) x 7 into ring, sl st to top of initial ch-6 to form 8 spokes (8 spokes)
Round 2 :
Sl st into first ch-2 sp, ch 3 (counts as dc), dc in same sp, *ch 3, (2 dc) in next ch-2 sp; rep from * around, join with sl st (16 dc clusters and 8 ch-3 loops)
Round 3 :
Sl st to ch-3 sp, ch 3, (2 dc) into ch-3 sp, ch 3, 2 dc into next ch-3 sp; rep around, join (32 dc clusters)
Round 4 :
Ch 1, sc into each dc across cluster tops, ch 5 between each cluster to begin web arches; join (32 sc and 8 ch-5 spaces)
Info :
Counting spokes and arches is critical; the example runner uses 8 spokes to create an even octagonal web. If you prefer denser webbing, reduce ch spaces by using ch-3 instead of ch-5 in Round 4.
Round 5 :
Into each ch-5 space: (sc, hdc, 3 dc, hdc, sc) to form shell arch; sc between shell arches on top of previous scs (structured web appearance)
Round 6 :
Ch 1, sc across shells, ch 3 in valley between shells, repeat for a radial lattice (maintain counts so each shell and valley match across all spokes)
Round 7 :
Work 1 round of picot edging for a decorative point: *sc 3, ch 3, sl st in first ch to make picot, sc 3* rep around to create 8 scallops with picots at tips
Round 8 :
Fasten off and block web to a diameter of approximately 12 cm. Use a light spray starch if you want a firm decoupage-like texture for tabletop use.
Info :
If you want a larger web, add additional rounds of shell arches by repeating Round 5 increasing dc clusters by 2 each repeat to expand evenly. Keep symmetry by adding equal clusters between each spoke.
— Moon Ring Doily (Cream) :
Round 1 :
With cream, ch 10, join to form ring (10 ch ring)
Round 2 :
Ch 1, work 1 sc into each chain around (10)
Round 3 :
Ch 3 (counts as dc), 2 dc in next st, ch 2, sk next st, (3 dc, ch 2, sk next st) repeat around to form 5 shell clusters separated by ch-2 spaces; join (15 dc clusters with 5 ch-2 spaces)
Round 4 :
Ch 1, sc in each dc across cluster tops, in each ch-2 space work (sc, ch 3, sc) to form open arches (total sts 15 sc + 5 ch-3 arches)
Round 5 :
Ch 4, *tr in next sc, ch 1, sk next sc* rep across to shape spokes; join (approx 15 tr and ch-1 spaces)
Round 6 :
Ch 1, sc in each tr and ch-1 space to form mesh; then make an outer scalloped border: *sc 3, (2 dc, ch 2, 2 dc) in next space, sc 3* around
Round 7 :
Ch 1, trim and fasten off leaving a 15 cm tail for joining. Block into a circle approximately 11-12 cm diameter with a hole center ~3 cm diameter (moon ring look)
Info :
The moon ring uses a small center hole to suggest a moon with lace around it. The runner photo shows small black bats attached to moon edges; leave a tail for sewing bats later.
— Pumpkin Motif (Make 2-3 per repeat) :
Round 1 :
With orange, mr, 8 sc into ring (8)
Round 3 :
(1 sc, inc) x 8 (24)
Round 4 :
(2 sc, inc) x 8 (32)
Round 5 :
Sc in each st around (32)
Info :
To flatten pumpkin slightly for a jack-o-lantern look, work additional rounds in sc and then use tapestry needle and yarn to create vertical ribs by pulling a piece of yarn through front-to-back across the diameter in several evenly spaced sections. This makes traditional pumpkin segmentation.
Round 6 :
(3 sc, inc) x 8 (40)
Round 7 :
Sc in each st around (40)
Round 8 :
Switch to green for stem: join green at top, ch 4, sl st back into first ch to form small curled stem, 6 sc around base to secure, fasten off (stem created)
Round 9 :
With black embroidery floss or thin yarn, embroider triangular eyes and a toothy smile on pumpkin face: use simple satin stitch shapes and backstitch outlines for definition.
Round 10 :
Fasten off and block lightly flat. Optionally, add a small bit of stuffing behind center for subtle relief but keep profile flat for joining onto runner.
— Branch Motif (Black) :
Round 1 :
With black, ch 12, sc in 2nd ch from hook and in each ch across (11)
Round 2 :
Ch 1, turn, sc in each st across (11)
Round 3 :
To create forked twigs, ch 3 at desired twig point, sl st back into the base to create a small loop, continue sc across; Repeat this technique to create 3-4 forked twigs along branch length.
Round 4 :
Work 4 more rounds of sc to thicken branch (11 each round)
Round 5 :
Final round: BLO sc across to make a slight ridge and help branch sit flat when sewn under house motif; fasten off leaving long tail for attaching.
Info :
Branches are intentionally asymmetrical. Pin them under the house motif then sew so twig ends project outward. You can also add small picot leaves or nodules at twig ends for a more organic look.
— Bat Motif (Small Accent) :
Round 1 :
With black, mr, 6 sc into ring (6)
Round 2 :
Ch 1, (inc) x 6 (12)
Round 3 :
Ch 1, sc2tog, sc 2, sc2tog around to give small wingline (8)
Round 4 :
Working wings: ch 6 from one side, sl st at 3rd ch to create wing tip, sc back to base; repeat on other side for mirrored wing. Fasten off leaving tail for placement.
Info :
Bats are small and sewn onto moon rings or along runner edges. If you prefer, cut small black felt shapes for faster application.
— Additional Decorative Options :
Info :
Add small embroidered stitches or metallic thread as dew or spiderline accents. Tiny seed beads can be stitched in spiderweb centers for sparkle but ensure they are securely attached if runner will be used where beads may fall.
— Variation: Joining Rows into a Runner :
Info :
The photographed runner is a repeating stacked series: Moon ring + Orange web + Haunted house + Branch + Pumpkin. Each repeat is approximately 28-32 cm long depending on gauge. Plan how many repeats you need to reach desired runner length (e.g., 4 repeats ≈ 112-128 cm).
— Blocking & Preparation Before Assembly :
Info :
Block each motif to its intended size. Pin to blocking board, steam or spray with water and leave to dry. Blocking ensures motifs sit flat and edges align for precise joining. Trim long tails after motifs are fully dry and weave them in neatly on wrong sides.
— Joining Motifs (Detailed) :
Info :
1) Lay out the runner on a flat surface following your chosen repeat order. 2) Use locking stitch markers to temporarily hold motif edges that meet. 3) Join motifs using one of three methods described below.
Round 1 (Joining Method A) :
Join motifs with slip-stitch seam: right sides facing, work sl st through outermost stitches of both motifs every 2-3 stitches to create an even, slightly raised join that reads as a decorative ridge.
Round 2 (Joining Method B) :
Mattress stitch (invisible): With tapestry needle and matching yarn tail, whip small stitches from back loops of each motif through to the other motif, pulling gently to produce nearly invisible seams. This method is ideal for keeping motifs flush.
Round 3 (Joining Method C) :
Continuous join-as-you-go (JAYG): When crocheting the final round of a motif, pick up stitches into adjacent motif edges to connect them directly. This technique produces a strong one-step join but requires planning before final round.
Info :
For the runner, the slip-stitch seam with black yarn around houses and branches visually ties elements together. Use cream for moon-to-web joins and orange for web-to-pumpkin joins to keep color transitions natural and intentional.
— Final Assembly Suggestions :
Info :
Start assembling from one end and proceed across so motif edges align. For stability, weave an extra passing of yarn across the join on the wrong side. For flatness, check alignment frequently and re-block joined sections if needed.
— Edge Finishing :
Round 1 :
After joining all motifs, edge the entire runner with 2 rounds of sc in cream or black to create a tidy border: first round BLO sc to follow motif ridges, second round sc in each st to round off corners.
Round 2 :
Optional picot edge: *sc 3, ch 3, sl st in first ch to make picot, sc 3* repeat along long edges for delicate decorative points.
Info :
A finished edge unifies the runner and hides small differences in motif sizes. If you want a thin, unobtrusive border, use 1.75 mm hook with cream cotton for the final edging round.
— Final Touches & Care :
Info :
Weave all ends securely, and give a final steam or spray block to set the runner. For washing, hand wash gently in cool water and reshape flat. Avoid machine washing or high heat to maintain crisp motif structure.
This Halloween table runner brings handmade charm to your seasonal decor with layered motifs and crisp color contrast. The modular motifs let you lengthen the runner or remix elements to suit your style, and the detailed instructions ensure a delightful process from first stitch to finishing touches. 🧶 Add tiny embroidered details for extra personality and display proudly at spooky gatherings. 🎃