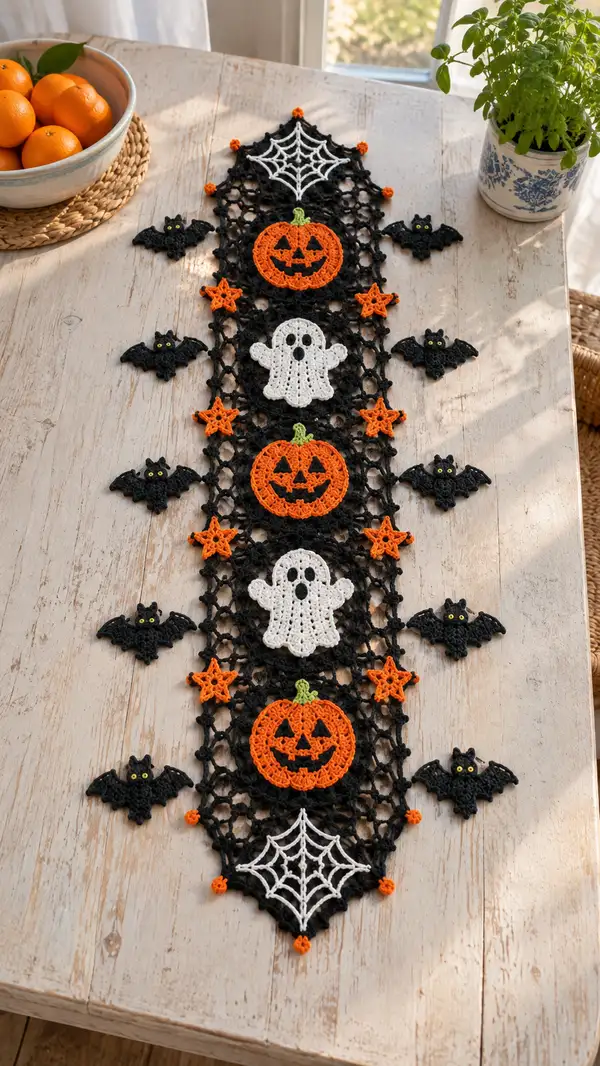
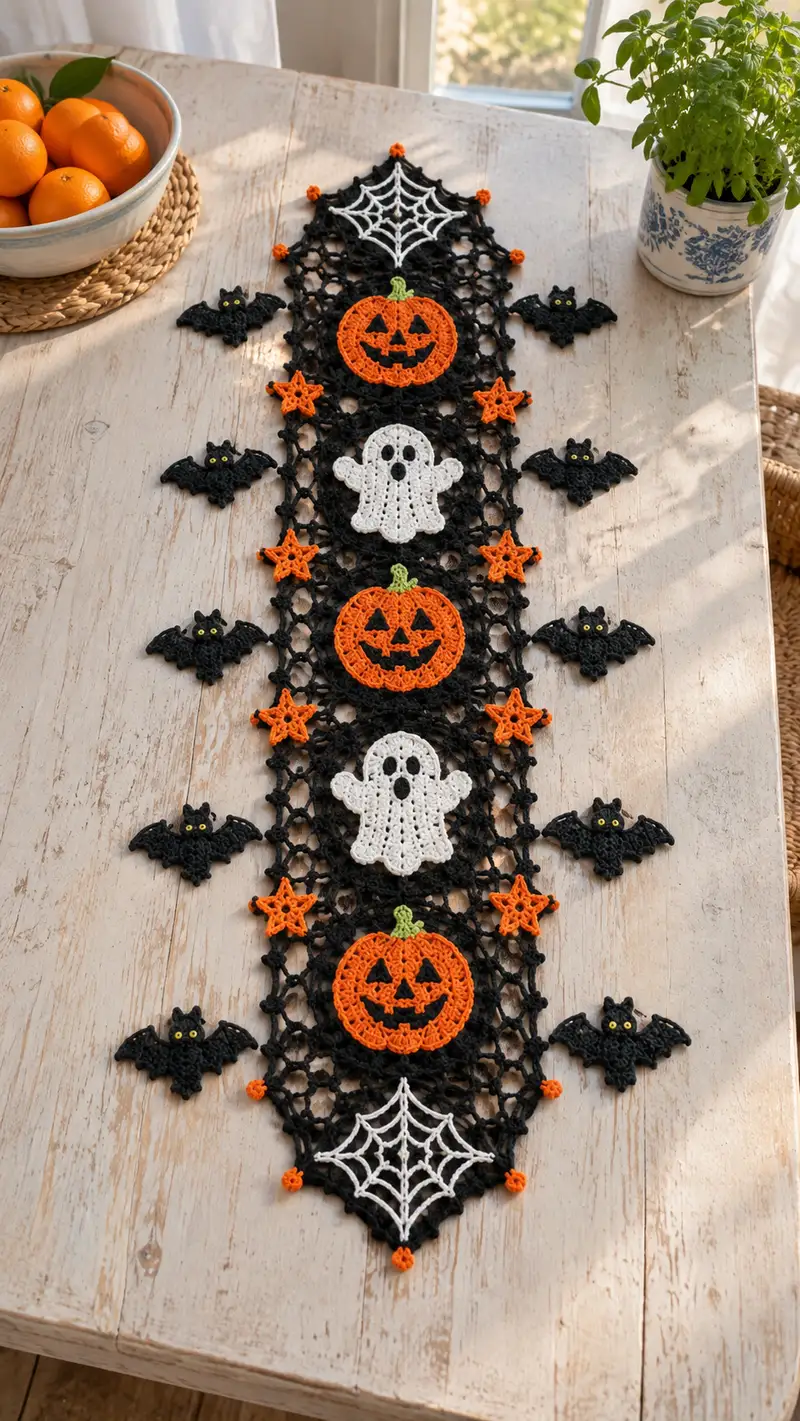
Create a striking Halloween table runner featuring open black lacework, three jack-o-lantern medallions, ghost motifs, spider webs and scattered bats and stars. This detailed pattern produces a decorative runner that lays flat on a table and makes a festive centerpiece. The design uses modular motifs joined with a lacy mesh so you can adapt length and spacing easily.
Progress Tracker
0% Complete
— Overview & Notes :
Info :
This runner is modular: make a long central mesh strip, crochet appliques (pumpkins, ghosts, spider webs, stars, bats), then join or sew motifs onto the mesh. All motifs are worked flat where possible. Work tight enough so appliques lie flat and mesh maintains shape. Blocking is recommended before assembly.
Info :
Gauge: not critical for design, but check pumpkin motif diameter: approx 10-11 cm (4-4.5 in) when using listed yarn and 3.5mm hook. Adjust hook to match desired size.
— Pumpkin Medallion (make 3) :
Round 1 :
MR, 6 sc into MR (6)
Round 2 :
Inc in each st around (12)
Round 3 :
(1 sc, inc) x6 (18)
Round 4 :
(2 sc, inc) x6 (24)
Round 5 :
(3 sc, inc) x6 (30)
Round 6 :
(4 sc, inc) x6 (36)
Round 7 :
(5 sc, inc) x6 (42)
Round 8 :
(6 sc, inc) x6 (48)
Round 9-11 :
1 sc in each st (48)
Info :
If you prefer a slightly domed pumpkin, work rounds 9-11 in BLO to create a subtle ridge; otherwise work in both loops. Place a stitch marker at the beginning of round 12 to mark the top center for stem placement.
Round 12 :
(6 sc, dec) x6 (42)
Round 13 :
(5 sc, dec) x6 (36)
Round 14 :
(4 sc, dec) x6 (30)
Info :
Begin to create pumpkin 'ribs' by working next rounds as alternating front-post and back-post dc clusters across the surface. This will give visual ridges without adding bulk.
Round 15 :
(1 sc, 1 fpdc around next sc, 1 sc, 1 bpdc around next sc) x10 (30)
Round 16 :
Repeat Round 15 to reinforce ribs (30)
Round 17 :
(3 sc, dec) x6 (24)
Round 18 :
(2 sc, dec) x6 (18)
Round 19 :
(1 sc, dec) x6 (12)
Info :
Fasten off orange leaving a long tail for sewing to mesh. Finish stuffing slightly if you want a puffier medallion but keep mostly flat to sit on mesh. The small inner hole can be closed with a few whip stitches; do not overstuff.
Round 21 (Stem - make 1 per pumpkin) :
Join green yarn to top center. MR, 6 sc into MR (6)
Round 22 :
Inc in each st (12)
Round 23 :
1 sc in each st (12)
Round 24 :
Work 12 sc in BLO to make a short tube (12)
Round 25 :
Ch 6, sl st to base of stem to create a curl, fasten off leaving long tail for sewing
Info :
Using black yarn, embroider jack-o-lantern face: two triangular eyes and a nose, and a jagged smile. Use duplicate stitch or surface sl st carefully so stitches remain flat. Position face centered on round 11-13 area for best proportion.
— Ghost Applique (make 2) :
Round 1 :
MR, 6 sc into MR (6)
Round 2 :
Inc in each st (12)
Round 3 :
(1 sc, inc) x6 (18)
Round 4 :
(2 sc, inc) x6 (24)
Round 5 :
1 sc in each st (24)
Round 6 :
Ch1, turn to work in rows now: 6 sc, ch1, turn (work across top to create slight flat forehead)
Round 7 :
Working in rows: 6 sc, ch1, turn. Repeat row shaping 4 times to make taller ghost body (6 x 4 rows)
Info :
Return to round construction by sc around the perimeter to create the ghost silhouette. This combination of rounds and rows creates a slightly elongated body with flat arms on the sides.
Round 8 :
Attach yarn on side, sc 6 along one side row edge, sc 12 along bottom edge as shell row: (sc, ch2, sc) in next st to create wavy hem, sc 6 up other side (24)
Round 9 :
1 sc in each st (24)
Round 10 :
Work a scalloped hem: *(ch3, sl st in 3rd ch from hook) in every 3rd sc across bottom to produce 8 scallops*, finish round by sl st join (24)
Round 11 :
Fasten off white leaving tail for sewing. Use black yarn or applique to make mouth and eyes: two oval eyes and an open round mouth. Use small black felt cutout if preferred and glue or sew in place.
Info :
Ghosts are intentionally flat so they sit on the mesh panel; minimal stuffing can be used if you prefer a puffed look, but keep them mostly flat to avoid distortion when joining.
— Spider Web End Motif (make 2) :
Round 1 :
MR, ch4 (counts as tr), 11 tr into ring, sl st to top (12 tr) (counts as 12 spokes)
Round 2 :
Ch2, *sl st into next tr to create a bridge between spokes*, repeat around to form a small ring connecting spokes (12 connecting sl sts)
Round 3 :
For each spoke: ch5, sl st in next spoke to make first arc; repeat around; sl st to join (12 arcs)
Round 4 :
In each arc, ch7, sl st to next spoke to form second larger arch (12 arcs)
Round 5 :
In each larger arc, ch9, sl st to next spoke to form outer web rings (12 arcs)
Round 6 :
Work a final round of sc around the outer ring, placing small picots at the web points for a spiky look: (sc, picot) x12 (24)
Info :
Spider webs are worked in white and are centered to the triangular tip of the runner. When joining to mesh at the ends, leave the outermost loops free for attaching orange bobble accents.
— Five-Point Star Accent (make 8) :
Round 1 :
Ch5, sl st to form ring. (or MR with 5 sc)
Round 2 :
*Ch4, sl st in ring; ch3, sl st in ring* repeat 5 times to create five points (5 points)
Round 3 :
Slip stitch to base of each point, then in each point work (sc, hdc, dc, hdc, sc) to flesh out point (5 points)
Round 4 :
Fasten off leaving tail for sewing. Block lightly so each star lies flat and points are crisp.
Info :
Use orange yarn for stars. Space them evenly between pumpkins and ghosts on the mesh; they act as small focal points and also help hide joins.
— Small Bat Applique (make 8) :
Round 1 :
MR, 6 sc into MR (6) - this forms bat head/body center
Round 2 :
Inc in each st (12)
Round 3 :
(1 sc, inc) x6 (18)
Round 4 :
Fasten off black, turn work to create wings by attaching yarn at side: ch8, sl st to next marked point to form wing scallop; repeat on other side for symmetrical wings
Round 5 :
In each wing chain work: sc, hdc, dc, hdc, sc to create shaped wing. Repeat on other wing (wings attached)
Round 6 :
Work surface sl sts to define wing veins: with right side facing, surface sl st across wings to create 3 small veins per wing
Round 7 :
Sew or glue two small yellow beads or embroider two yellow French knots for eyes. Fasten off leaving tail for sewing.
Info :
Bats are flat appliques with minimal bulk. If using safety eyes, place and secure before closing center. Small yellow beads make lively eyes but sew them on securely for safety.
— Central Mesh Diamond Repeat (make enough repeats to lengthen runner) :
Info :
The long central strip is made from repeating a diamond-shaped lacy motif joined as you go. Each diamond motif is worked in rounds and joined to adjacent diamonds along two opposing sides. Make a swatch first to determine how many diamonds you need to reach runner length.
Diamond Round 1 :
Ch8, sl st to form ring (or MR with 8 sc) - counts as 8 base loops
Diamond Round 2 :
*(Ch5, sl st in ring)* repeat 8 times to make 8 loops around ring (8 loops)
Diamond Round 3 :
In each loop: (sc, ch3, sc) to make 8 small mesh arches (16 sc placements)
Diamond Round 4 :
Work across arches: *(ch6, sl st to opposite arch to form cross-bridge) x4 to create diamond skeleton* (8 bridges)
Diamond Round 5 :
In each bridge arc, work (sc, ch4, sc) to define diamond edges (16 sc positions)
Diamond Round 6 :
Join-as-you-go: as you work the last 4 arcs of a diamond, instead of ch4, sl st into corresponding arc of adjacent completed diamond to join motifs side-by-side. Finish round with sl st join (diamond completes)
Info :
Create diamonds and join them in a single vertical column. For the runner in the photo there are approximately 11 diamonds spanning from spider web to spider web; you will create 11 diamonds in a straight line and then add triangular end diamonds at each end for the tapered shape.
Diamond Round 7 :
Repeat rounds 2-6 to make the next diamond and join on two sides (as appropriate). Each diamond remains flat and lacy (no extra stitches added to widen).
Info :
Spacing: plan to leave one full diamond where a pumpkin or ghost medallion will sit. For example, make column: web diamond - 2 diamonds - pumpkin diamond (integrated) - 2 diamonds - ghost diamond - and so on. Alternatively, you can sew motifs on top of completed diamonds.
— Integrating Pumpkin & Ghost Medallions into Mesh :
Info :
There are two ways to integrate medallions: crochet the medallion separately and sew onto the completed diamond, or work medallion and join it into the diamond by sewing along the edge. Sewing is simplest and gives the same look as the pictured runner.
Integration Step 1 :
Block mesh and medallions flat. Position pumpkin centered on its diamond; pin in place so pumpkin center aligns with diamond center.
Integration Step 2 :
Using long orange tail and yarn needle, whip stitch around the medallion into the diamond loops, catching both motif and mesh loops every 3-4 stitches to secure firmly but invisibly.
Info :
If using join-as-you-go method, position pumpkin while last round of relevant diamond is worked and slip-stitch into the pumpkin edge to join rather than making a separate diamond edge. Take care to keep tension even.
— Edge & Corner Finishing (both ends) :
Round 1 :
Work a round of sc along both long edges of mesh to tidy raw loops. Aim for 1 sc per loop or chain space (count varies with diamonds). Keep stitches snug (edge round)
Round 2 :
Work a decorative picot edging: *(sc 2, picot) repeat along edge* - this creates small points where orange bobbles will be attached at the diamond tips (edge round)
Round 3 :
At the end diamonds (top and bottom), work triangular shaping: in the final diamond work sc in each outer loop then (sc, ch3, sc) at tip to make pointed triangular end. Fasten off.
Info :
Make small orange bobbles at the points: using orange yarn, make a bobble by working 5 dc together (yarn over, insert, pull up loop) x5 in same stitch, close cluster, fasten off leaving tail. Make 6 bobbles to match pictured runner and sew into picot points at each tip of triangular web.
— Assembly & Placement :
Info :
Layout order seen in the photo from top (narrow end) to bottom: spider web triangular tip, small bobbles, small cluster of mesh diamonds, pumpkin medallion, star, ghost, pumpkin, star, ghost, pumpkin, spider web with bobbles. Bats are arranged symmetrically along the sides: place a bat next to each pumpkin and each ghost (~6-8 bats total).
Assemble Step 1 :
Pin all motifs to the mesh with fine pins. Check both sides of runner for symmetry before sewing. Use a ruler or measuring tape to ensure spacing is even (approx 6-8 cm between centers of medallions in the pictured layout).
Assemble Step 2 :
Sew each motif in place using matching yarn and small whip stitch or mattress stitch. For heavier motifs like pumpkins, take small stitches into the mesh arches to distribute stress. Reinforce with 2-3 passes if the runner will be handled frequently.
Info :
Emphasize that seams should be flat and invisible from the top. Use a shorter needle and thinner yarn tail for neater joins if needed. After sewing, block the entire runner again to relax joins and set shape.
— Final Blocking & Care :
Info :
Pin runner to blocking board or towel, shaping triangular ends and smoothing motif edges. Mist lightly with water or use steam from a distance. Allow to dry completely. To clean later, hand wash gently in cool water and reshape while damp.
Info :
Optional: for extra stability place a thin non-slip mat under runner when used on a polished table surface to keep motifs from sliding.
This Halloween table runner is a fun and festive project that combines lacy meshwork with playful motifs—pumpkins, ghosts, bats and spider webs—for a show-stopping centerpiece. The modular construction makes it easy to customize length and add extra decorations. Block, assemble, and enjoy the glow it brings to your holiday table! 🎃🕸️