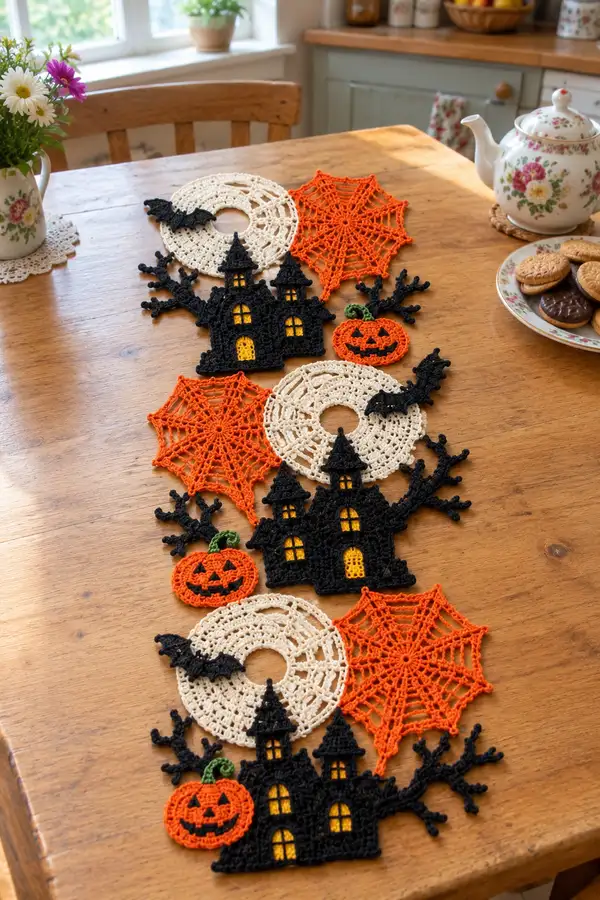
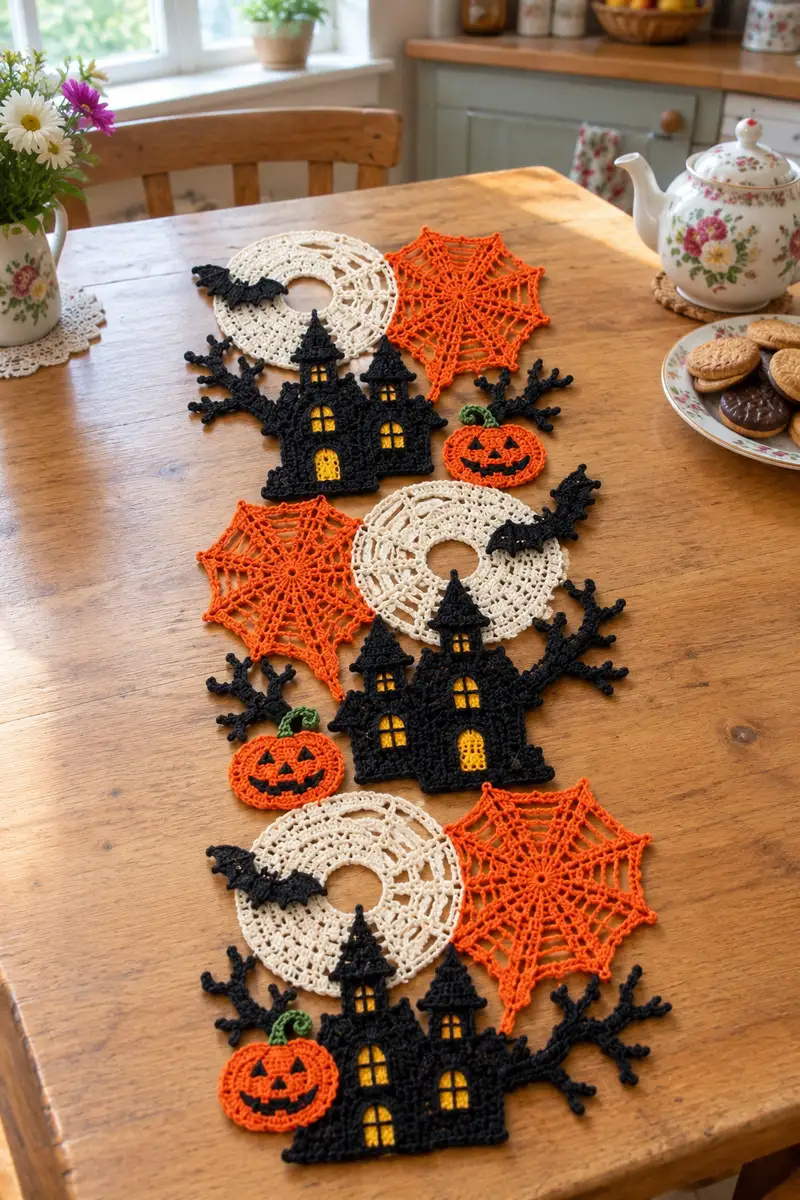
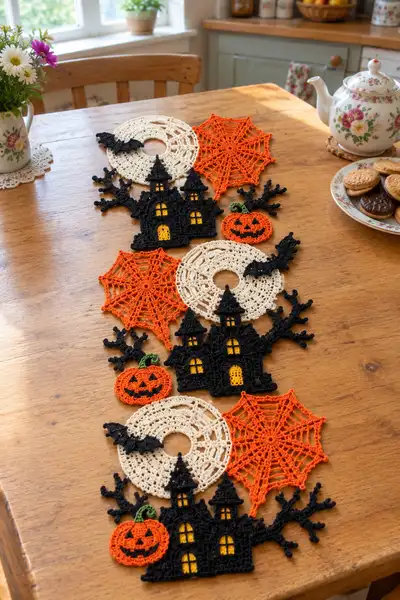
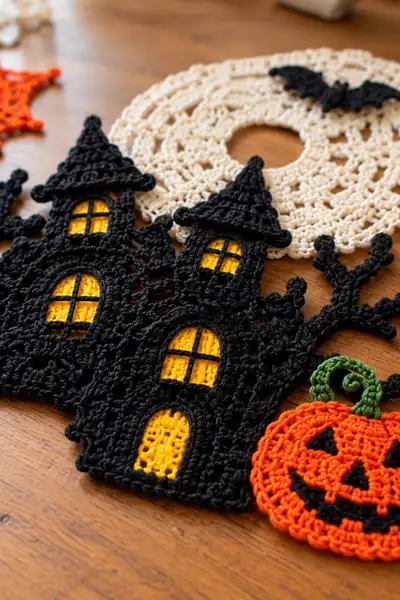
Create a charming, layered Halloween table runner made of crocheted motifs: haunted houses, spiderwebs, moons, pumpkins, bats and twisted branches. This pattern uses small, flat appliques crocheted in worsted/light-weight cotton for crisp lace-like detail. The motifs are joined to form a long, repeatable runner perfect for a rustic table setting or festive centerpiece.
Progress Tracker
0% Complete
— Haunted House (Main Silhouette) :
Round 1 :
6 sc in magic ring (6)
Round 3 :
(1 sc, inc) x 6 (18)
Round 4 :
(2 sc, inc) x 6 (24)
Round 5 :
(3 sc, inc) x 6 (30)
Round 6 :
1 sc in each st (30)
Info :
We are starting with a centered base to create a wide, flat silhouette. Black yarn is used for the house. Keep tension firm for sharp edges
Round 7 :
(4 sc, inc) x 6 (36)
Round 8 :
1 sc in each st (36)
Round 9 :
(5 sc, inc) x 6 (42)
Round 10 :
1 sc in each st (42)
Info :
Rounds 6-10 build a broad base which will be shaped into the bottom row of windows and door. If you'd like a taller house, add extra even rounds here before shaping
Round 11 :
(6 sc, inc) x 6 (48)
Round 12 :
1 sc in each st (48)
Round 13 :
Work in BLO for shaping: 1 sc in each st BLO (48)
Info :
Use BLO to create a subtle ridge that helps windows and door appear inset. Mark window positions now: place markers at stitches 8-12, 20-24 and 32-36 for three lower openings
Round 14 :
Start shaping lower openings. *Ch2, skip 2 sts, sc across next 4 sts, ch2, skip 2 sts* repeat across to create three shallow arches; end with sc to close (48)
Round 15 :
1 sc in each st (48)
Round 16 :
(7 sc, inc) x 6 (54)
Info :
Increase round adds extra width in preparation for towers. Maintain stitch marker positions for window alignment and take a moment to check symmetry
Round 17 :
1 sc in each st (54)
Round 18 :
(8 sc, inc) x 6 (60)
Round 19 :
1 sc in each st (60)
Round 20 :
Begins tower shaping: working across first 20 sts, 1 sc in each (20); skip 10 sts (gap for tower valley), 1 sc in next 20 sts (20); continue across remaining 20 sts (20) — this creates three panels for towers (60)
Info :
Use stitch markers to mark each panel (left, center, right). These panels will become the three house towers. Keep the skipped stitches as decorative space for branch placement later
Round 21 :
Work each panel individually in rows (still counting as rounds globally). Panel A (left tower): turn and sc 10, ch2, sc 10 (20); Panel B (center tower): repeat (20); Panel C (right tower): repeat (20) (60)
Round 22 :
Panel shaping continues: In each panel, (sc 4, hdc 2, dc 4, hdc 2, sc 4) to give a slight peak texture (60)
Info :
These taller panel rounds will form the vertical tower walls. Keep gauge even; panels remain attached so counts stay at 60
Round 23 :
Decrease across the valley between panels to deepen separation: *(sc 8, dec)* x 6 across each valley section, adjusting to maintain total 54 sts after shaping (54)
Round 24 :
1 sc in each st (54)
Round 25 :
Begin forming peaked roofs: *(3 sc, 1 inc)* repeat to raise the centers of each panel: (3 sc, inc) x 13 plus remaining scs = 60 (60)
Round 26 :
Work in FLO for a ridge: 1 sc in each st FLO (60)
Info :
FLO rounds create a narrow ridge for the roof edge. This helps the separate roof cap sit naturally when layered
Round 27 :
Form roof caps: *ch2, dc3 in next 3 sts, ch2, sl st to anchor* repeat across the top edge of each tower to create decorative scallops. Maintain total count 60
Round 28 :
1 sc around entire motif to neaten edges (60)
Round 29 :
Outline window openings using front-post sc: place FPsc around each arch (3 windows bottom) to emphasize openings (60)
Info :
Now is a good time to crochet yellow window backings. Work separate small window panels that will be sewn behind these openings for a lit appearance
Round 30 :
Start decorative branch anchor points: at the left and right valleys, ch1, sc, ch3, sc in same spot to begin branch extensions (60)
Round 31 :
Increase around base for scalloped bottom: *(2 sc, inc)* x 20 (80)
Round 32 :
1 sc in each st (80)
Info :
We are broadening the bottom edge to add the look of a foundation and to create room for sewn joint when assembling runner repeats
Round 33 :
Begin tree/branch formation from sides: Work 10 sts left side: (sc 3, ch4, turn, sc 4 along chain, sl st back into parent st) repeat cluster to form first fork; mirror on right side (80)
Round 34 :
Reinforce branch cores: in each branch base, work 2 sc, hdc, 2 sc along core to firm structure (80)
Round 35 :
Add branch fingers: at intervals along branch cores ch5, sl st to create twig loops; repeat to sculpt 3-4 twig points per branch (80)
Info :
Branches are best done with a slightly tighter tension to hold shape. After forming twig loops, block them into a natural spread before final assembly
Round 36 :
Create arched doorway center: mark center bottom arch and work (ch3, dc5, ch3) into opening to shape door frame; secure and sc around door (80)
Round 37 :
Surface detail: embroider scalloped stonework with surface slip stitch along bottom edge in black for texture (80)
Round 38 :
Neaten all edges with reverse single crochet (crab stitch) around entire house silhouette and branch tips to give a firm, rope-like edge (80)
Info :
If you prefer a softer edge, omit reverse single crochet and instead use one round of sc. Crab stitch emphasizes silhouette contrast
Round 39 :
Optional: Add tiny picot tips to roof peaks: *sl st, ch3, sl st into 1st ch (picot), sl st* across three peak tips (80)
Round 40 :
Fasten off leaving long tail for sewing. Weave in and block flat. The house panel should measure approximately 3.5-4.5 inches tall depending on tension and yarn
Info :
Make two or three identical house panels per runner repeat depending on table length. Keep counts identical for consistent joins
— Window Backings (Make 4 per house) :
Round 1 :
mr, 6 sc in mr (6)
Round 3 :
(1 sc, inc) x 6 (18)
Round 4 :
1 sc in each st (18)
Round 5 :
Flatten into arch: fold and sl st base to create semi-circle: sc 9 across to make arched window backing (9)
Info :
Work these in mustard yellow to appear as glowing windows when sewn behind house openings. Make 3 small arch backs for lower windows and one taller arch for center door
Round 6 :
Fasten off leaving long tail for sewing. Trim and block as needed (9)
— Tower Roof Caps (Make 3 per house) :
Round 1 :
ch4, join to form ring, ch3 (counts as dc), 11 dc into ring (12)
Round 2 :
(1 dc, inc) x 6 (18)
Round 3 :
(2 dc, inc) x 6 (24)
Round 4 :
1 dc in each st (24)
Round 5 :
Work in FLO: 1 sc in each st FLO to create a ridged cap edge (24)
Info :
Form these caps tightly so they hold triangular shape; block into a point by folding and tacking center tip under before sewing onto house peaks
Round 6 :
Fasten off leaving long tail for sewing (24)
— Creepy Branch Extensions (Make 2 per house, additional for runner) :
Round 1 :
ch6, sl st into 2nd ch from hook, sc next 4, sl st into previous anchor (a short chain forms core) (4)
Round 2 :
Work along chain core: sc in each chain, at intervals ch5 and sl st back to create twig loops; repeat to create 3 twig loops per branch (12)
Round 3 :
Reinforce core with sc around entire chain and around base to attach to main motif (12)
Round 4 :
Add tiny bumps (bobble-like): *sc, (ch3, sl st into ch1 to create picot bump), sc* across twig tips to create knobbly effect (12)
Info :
Branches are worked in black with small twig loops. Keep them flat rather than rounded — blocking helps maintain shape
Round 5 :
Fasten off; leave long tail to sew to the house sides (12)
— Jack-O'-Lantern Pumpkin :
Round 1 :
mr, 6 sc in mr (6)
Round 3 :
(1 sc, inc) x 6 (18)
Round 4 :
(2 sc, inc) x 6 (24)
Round 5 :
1 sc in each st (24)
Info :
Use pumpkin orange yarn. We will shape the pumpkin flat with segmented ridges using surface slip stitch and post stitches
Round 6 :
(3 sc, inc) x 6 (30)
Round 7 :
1 sc in each st (30)
Round 8 :
(4 sc, inc) x 6 (36)
Round 9 :
1 sc in each st (36)
Round 10 :
Add pumpkin face: with black yarn surface slip stitch mouth and triangular eyes across center of motif. Work slowly to control line placement (36)
Round 11 :
Form stem: attach green yarn to top edge, ch6, sl st into 2nd ch from hook and sc across chain to make a curly stem; fasten off leaving tail to sew to pumpkin top (36)
Info :
For a more raised face, embroider edges with satin stitch using yarn needle and black yarn. Keep pumpkin flat to match runner surface
Round 12 :
Edge the pumpkin with one round of sc to create a neat border and slightly firm the edge (36)
Round 13 :
Fasten off leaving long tail for sewing to runner (36)
— Spiderweb Motif :
Round 1 :
ch6, join with sl st to form ring, ch3 (counts as dc), 11 dc into ring (12)
Round 2 :
*(ch6, sl st into next st) x 6* to create 6 long spokes (12)
Round 3 :
Join yarn at first spoke. *Ch3 (counts as dc), dc into base of next spoke, ch3, sl st into third chain of spoke* working around to form first round of arcs (12)
Round 4 :
Work round of dc and ch3 arcs connecting spokes: *dc in spoke base, ch3, dc in next spoke base* repeat to make continuous lace ring (12)
Info :
The spiderweb uses chain loops and dc clusters to create open lace. Use pumpkin orange for bold contrast. Pull each loop slightly while blocking to make a flat open web
Round 5 :
Add a picot tip at each spoke meeting: *dc, ch3, picot, sl st into arc* around (12)
Round 6 :
Continue with narrower connecting rounds: ch2, sc around previous arcs (24)
Round 7 :
1 sc in each st (24)
Round 8 :
Edge with reverse sc for crispness (24)
Info :
Blocking is essential here: pin each picot and arc to keep the web circular and flat. If making a hanging decoration, add a small loop at one picot
Round 9 :
Fasten off leaving tail for sewing (24)
— Moon/Doily Ring :
Round 1 :
ch8, join with sl st to form ring, ch3, 15 dc into ring (16)
Round 2 :
*(2 dc, ch2) x 8* creating a slightly lacy round (32)
Round 3 :
1 sc in each st around, working into chain spaces: *(sc, ch3, sc) into ch2 space to widen ring (32)
Round 4 :
*(dc, ch2, dc) into each ch3 loop from previous round* repeat to maintain open lacy structure (32)
Info :
To create the center hole (donut look), leave inner ring unworked and focus on a wide outer lacy edge. Use cream/ivory yarn. The finished moon measures roughly 3.5-4 inches across
Round 5 :
Add decorative scallops: *(dc3, picot, sl st into next ch2)* repeat around outer edge (32)
Round 6 :
Fasten off and block to a flat ring (32)
— Little Bat (Make many) :
Round 1 :
mr, 6 sc in mr (6)
Round 3 :
(1 sc, inc) x 6 (18)
Round 4 :
Form bat body and wings as a single flat motif: ch5 from edge of body then (sc, hdc, dc, hdc, sc) back into body to create one wing, repeat on second side. Maintain overall count approximately (18)
Info :
Bats are tiny decorative accents placed on moons and between motifs. Use a tight tension so they sit flat. Make 6-8 bats per runner depending on layout
Round 5 :
Edge wings with reverse sc for crispness and slightly curve tips with blocking (18)
Round 6 :
Fasten off leaving tail for sewing (18)
— Assembly & Joining Motifs :
Info :
Layout your runner before sewing. Typical repeat sequence shown in photos is: Moon ring (cream) + Spiderweb (orange) + Haunted House (black) + Pumpkin accent + repeat. You can mirror the layout along the runner length for symmetry
Round 1 :
Pin the first moon and web together slightly overlapped by 0.5" and stitch using whip stitch through outer lacy edges (no stitch count)
Round 2 :
Place house motif with its bottom edge slightly overlapping the moon and web base. Sew along bottom scallop using mattress stitch for invisible join (no stitch count)
Round 3 :
Sew pumpkin beside house at porch level; sew branches from house into adjacent web spaces to make continuous organic flow (no stitch count)
Info :
Use small, even stitches on the back to attach motifs so the front appearance is clean. Weave tails through multiple stitches and secure with a few knots inside motif before trimming
Round 4 :
Sew yellow window backings behind each window opening using small whip stitches. Make sure they are centered before securing (no stitch count)
Round 5 :
Attach bats on moon edges using a couple of stitches through body center so wings remain free (no stitch count)
Info :
Block assembled runner gently after sewing to ensure all motifs lie flat. Use light steam or pin-and-spray if using cotton. For added stiffness, apply a light textile stiffener to moon/web motifs
Round 6 :
Fasten off and weave any remaining tail ends into the runner's back for a tidy finish (no stitch count)
Info :
Make additional repeats to reach desired length. The shown runner uses three repeats (approx. 36-42 inches); add more repeats for larger tables
This delightful Halloween table runner brings classic seasonal charm to your table with layered silhouetted motifs and delicate lace details. Each section is built to be repeatable, so you can customize length and color to your home. I hope you enjoy the satisfying contrast of solid silhouettes and airy spiderwebs as much as I do — happy stitching and have a spooktacular season! 🎃🕸️