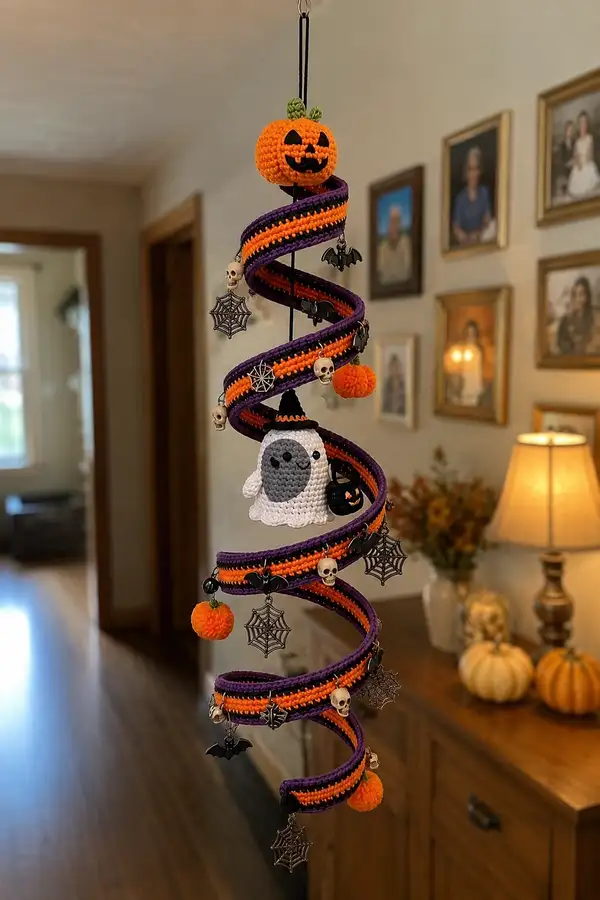
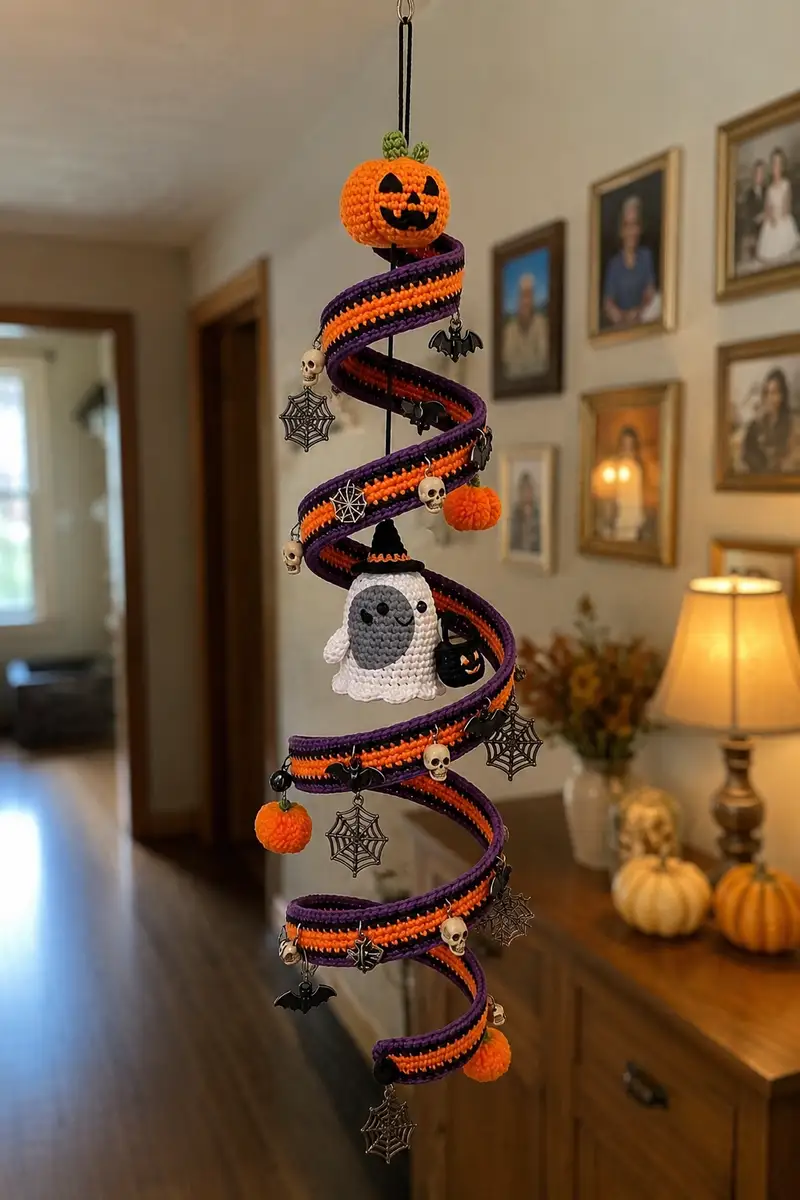
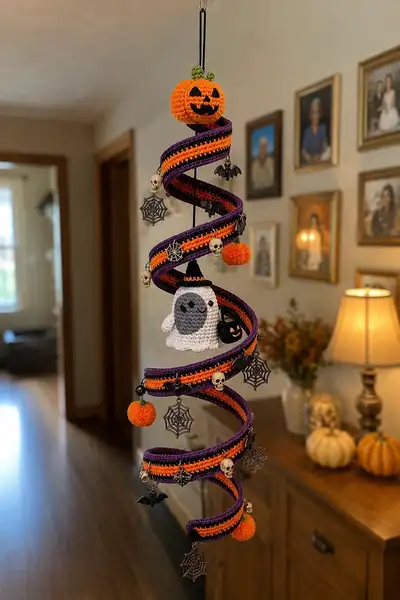
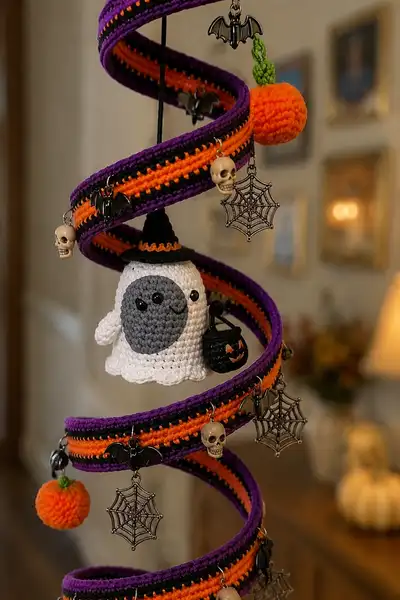
Make a spooky-sweet hanging spiral mobile featuring a smiling ghost with a witch hat, jack-o-lantern topper, tiny pumpkin pom-poms and a long purple/orange/black spiral ribbon. This richly detailed pattern guides you through crocheting each amigurumi charm, the tubular spiral strip, and assembly for a balanced, store-bought look. Perfect for Halloween decorating or as a thoughtful handmade gift, the finished mobile hangs as an eye-catching seasonal centerpiece.
Progress Tracker
0% Complete
— Notes :
Info :
Work in continuous rounds (spiral rounds) unless otherwise stated. Use a stitch marker to mark the first stitch of each round. All pieces are worked in worsted weight yarn unless noted. Maintain firm tension for amigurumi pieces so stuffing does not show through.
Info :
There are many small parts; pin positions before sewing. Metal charms are attached with jump rings and lobster clasps; add them after crocheted pieces are completed. The spiral strip is worked as three attached panels (orange center, black line, purple edgings) and joined to a central spine for hanging.
— Ghost Head :
Round 1 :
6 sc in magic ring (6)
Round 3 :
(1 sc, 1 inc) x 6 (18)
Round 4 :
(2 sc, 1 inc) x 6 (24)
Round 5 :
(3 sc, 1 inc) x 6 (30)
Round 6 :
(4 sc, 1 inc) x 6 (36)
Round 7 :
(5 sc, 1 inc) x 6 (42)
Round 8 :
(6 sc, 1 inc) x 6 (48)
Round 9-22 :
1 sc in each st (48)
Info :
Place safety eyes between rounds 11-12, approximately 8 stitches apart for a sweet expression (adjust spacing if you prefer a wider or narrower look). Attach eyes before stuffing; secure washers tightly.
Round 23 :
(6 sc, 1 dec) x 6 (42)
Round 24 :
(5 sc, 1 dec) x 6 (36)
Info :
Begin stuffing the head firmly now, distributing fiberfill evenly so the face rounds smoothly. Add smaller tufts of stuffing between decreases to keep shape without bulging seams.
Round 25 :
(4 sc, 1 dec) x 6 (30)
Round 26 :
(3 sc, 1 dec) x 6 (24)
Round 27 :
(2 sc, 1 dec) x 6 (18)
Round 28 :
(1 sc, 1 dec) x 6 (12)
Info :
Fasten off leaving a long tail for sewing the head to the body portion. Finish stuffing so the head is full but not over-packed; you want a little give when pressed.
— Ghost Face Applique (Make 1) :
Round 1 :
6 sc in magic ring with grey (6)
Round 3 :
(1 sc, 1 inc) x 6 (18)
Round 4-5 :
1 sc in each st (18)
Info :
Flatten applique and stitch to front center of ghost head/body region using matching grey thread. Embroider a small smile with black yarn using backstitch; place eyes using small black safety eyes or French knots positioned symmetrically on the grey disk.
— Ghost Body / Skirt :
Round 1 :
6 sc in magic ring (6)
Round 3 :
(1 sc, 1 inc) x 6 (18)
Round 4 :
(2 sc, 1 inc) x 6 (24)
Round 5 :
(3 sc, 1 inc) x 6 (30)
Round 6-10 :
1 sc in each st (30)
Info :
Attach the head to the body opening using the long tail from the head or sew after finishing the body. If you prefer a hollow skirt to slip over a small frame, leave the top unstuffed and slip over the spine later.
Round 11 :
(4 sc, 1 inc) x 6 (36)
Round 12-16 :
1 sc in each st (36)
Info :
If you want the ghost to appear to float, lightly stuff the upper skirt so the ghost has weight at the top only. Add a small amount of poly pellets or a scrap of fabric at the base to help it hang straight.
Round 17 :
(4 sc, 1 dec) x 6 (30)
Round 18 :
(3 sc, 1 dec) x 6 (24)
Round 19-20 :
1 sc in each st (24)
Round 21 :
1 sc in each st BLO (24)
Info :
Working in the BLO here prepares a neat ridge to attach the scalloped bottom. Pin the scallops evenly before stitching to keep the skirt symmetrical.
Round 22 :
(*skip next st, 5 dc in next st, sl st in next st, sc in next st*) rep around to create scallops (estimate 6-8 scallops depending on tension
Round 23 :
Sl st to secure scallops; finish off and weave in ends
Info :
If you prefer more or fewer scallops, adjust the skip-count and 5-dc cluster placement. Try on the hanging rod to check flare before finishing the scallop row.
— Ghost Arms (Make 2) :
Round 1 :
6 sc in magic ring (6)
Round 3-5 :
1 sc in each st (12)
Round 6 :
(3 sc, 1 dec) x 3 (9)
Round 7-10 :
1 sc in each st (9)
Round 11 :
(2 sc, 1 dec) x 3 (6)
Round 12-14 :
1 sc in each st (6)
Round 16 :
Fasten off leaving tail for sewing; lightly stuff the hand portion only (3)
Info :
Sew arms to sides of the ghost between body rounds 12-15 on each side so they peer out from under the brim. Use the long tail to stitch through several rounds and anchor firmly.
— Witch Hat :
Round 1 :
6 sc in magic ring with black (6)
Round 3 :
(1 sc, 1 inc) x 6 (18)
Round 4 :
(2 sc, 1 inc) x 6 (24)
Round 5-7 :
1 sc in each st (24)
Round 8 :
(2 sc, 1 dec) x 6 (18)
Round 9 :
1 sc in each st (18)
Round 10 :
Create brim: ch1, work 2 sc in each st around (36)
Round 11 :
Change to orange: 1 sc in each st around (36)
Round 12 :
Fasten off and weave tail through inside for a neat finish
Info :
Stiffen the brim slightly with a bit of craft glue or a thin cardboard disk inside the brim if you prefer a flat shape. Sew hat to top of ghost head, tilting slightly to one side for personality.
— Jack-o-Lantern Topper :
Round 1 :
6 sc in magic ring (6) using orange
Round 3 :
(1 sc, 1 inc) x 6 (18)
Round 4 :
(2 sc, 1 inc) x 6 (24)
Round 5 :
(3 sc, 1 inc) x 6 (30)
Round 6-8 :
1 sc in each st (30)
Round 9 :
(3 sc, 1 dec) x 6 (24)
Round 10 :
(2 sc, 1 dec) x 6 (18)
Round 11 :
(1 sc, 1 dec) x 6 (12)
Round 13 :
Fasten off leaving long tail for sewing; stuff firmly as you close
Round 14 :
Using green, ch6 and sl st back to make a small stem; attach two small leaves made with ch4 picot style; sew to top of pumpkin
Info :
Embroider the jack-o-lantern face with black yarn using satin stitch for triangles and a toothy grin. Alternatively, cut tiny felt shapes and glue inside before sewing the topper to the top of the spine.
— Small Pumpkin Ornament (Make 3) :
Round 1 :
6 sc in magic ring (6) orange
Round 3 :
(1 sc, 1 inc) x 6 (18)
Round 4-6 :
1 sc in each st (18)
Round 7 :
(1 sc, 1 dec) x 6 (12)
Round 9 :
Fasten off leaving long tail; stuff firmly and use a running stitch to close tightly
Round 10 :
Sew tiny green stem: ch4, sl st; leave tail for sewing. Optionally, add ridges by pulling a yarn tail around the pumpkin from top to bottom creating 6 segments to mimic pumpkin ribs
Info :
For the small bright pom-pom pumpkins you can also wrap yarn around a small fork and sew to secure to obtain a bud-like pom. Sew to spiral at staggered points so they dangle at different heights.
— Black Candy Bucket (Mini) :
Round 1 :
6 sc in magic ring (6) black
Round 3 :
(1 sc, 1 inc) x 6 (18)
Round 4-6 :
1 sc in each st (18)
Round 7 :
Create handle: ch12, attach to opposite stitch with sl st; sl st back along chain to form handle
Round 8 :
Fasten off and embroider a tiny orange pumpkin face on the bucket front (use satin stitch)
Info :
Fill bucket slightly with a scrap of stuffing to give it body and sewn weight before attaching to the ghost hand. Sew handle securely through bucket wall with several passes.
— Spiral Strip Construction Overview :
Info :
The spiral is assembled in three parts: (A) central orange flat strip (center stripe), (B) narrow black row attached on top of orange as a decorative line, and (C) two purple side edgings worked as tubular rounds and seamed to the orange panel to make a slightly raised spiral rail. Work the orange panel as rows to desired length, then add black and purple edges. Length here is flexible; aim for 120-150 cm / 47-59 in finished spiral to create 5-6 coils depending on rod spacing.
— Spiral Panel — Orange Center Stripe (Flat) :
Round 1 :
Ch 140 (this foundation sets the length; scale longer or shorter to taste), turn; sc in second ch from hook and across (139)
Round 2-6 :
Ch1, turn, sc across in each st (139)
Info :
These 6 rows give a central band approximately 1.5cm / 0.6in wide depending on gauge. Add or remove rows to increase or decrease center stripe width. Keep row count consistent so the black line and purple edges will align.
Round 7 :
Change to black at start of row: ch1, turn, sc across for one narrow row to be the decorative black line (139)
Round 8 :
Change back to orange: ch1, turn, sc across (139)
Round 9-12 :
Ch1, turn, sc across (139)
Info :
Finish the orange panel by fastening off and weaving in ends. Keep the panel flat; pressing lightly with a warm iron (protected cloth) will help even the rows.
— Spiral Edging Tubes — Purple Rail (Make 2) :
Round 1 :
With purple, make a foundation chain long enough to match the orange panel length: ch140, join to form a loop carefully matching ends (140)
Round 2 :
Work 1 sc in each chain around to create a flat loop (140)
Round 3 :
Join ends of the loop by folding and whip-stitching the long edges together to create a thin tube approximately 6-8 mm wide. Alternatively, fold in half lengthwise and sc through both layers in continuous rounds to create a firm tube (140)
Round 4-8 :
1 sc in each st around to lengthen the tube if needed (140)
Info :
The tube should be slightly raised above the orange panel once attached for a clear rail effect. Make two tubes — one for each side — ensuring both have the same length and tension.
— Attaching Edges and Finishing Spiral Strip :
Round 1 :
Pin one purple tube to one long edge of orange panel; using a yarn needle and matching purple yarn, sew through both layers with whip stitch every 4-6 stitches to secure (approx 140 stitches).
Round 2 :
Repeat on the opposite side with the second purple tube to complete the raised-rim look. Add small black decorative stitches along the orange center row if desired.
Info :
To create a firmer spiral that will hold shape, insert the floral wire or lightweight rod along the centerline (between panel and tube) before final stitching, leaving enough tail at each end for securing to top loop and bottom weight.
— Additional Reinforcement Row (Optional) :
Round 1 :
With black, sc around the very top edge of the purple tubes and orange panel junction to create a neat black piping (work through both pieces) (approx 280)
Info :
This black line gives the spiral the same thin central black stripe seen in the photo. Keep the tension even; if the spiral pulls in, release a few stitches or reduce whip stitch tension.
— Assembling the Spiral to the Spine :
Info :
Thread the floral wire or rod through the hollow channel made when you seamed tubes to the orange panel. Secure the top with a tight loop and a drop of glue; the bottom can be fastened to a small sewn loop and a decorative bead for weight.
— Decorative Metal Charms and Attachments :
Round 1 :
Plan charm placement by spacing charms approximately every 12-18 cm (4.5-7 in) alternately left and right down the spiral so the weight balances.
Round 2 :
Attach charms to the purple tube edge using small jump rings. For crocheted pumpkins and skulls, sew a small jump ring to each crocheted item and clip onto the spiral with a lobster clasp for easy repositioning.
Info :
Add a few small beads or metal spacer rings near the top and bottom to reduce sliding of charms. Use pliers to close jump rings fully so charms do not fall off when the mobile moves.
— Bottom Weight and Finishing :
Round 1 :
Sew a small stop knot at the bottom of the spine and attach a decorative pom pumpkin (see small pumpkin pattern) as the final weight. Add a small metal bead inside the pumpkin for extra weight if desired.
Info :
Balance the mobile by holding it from the top loop and adjusting charm positions. Move charms up or down the spiral until it hangs straight with gentle movement.
— Final Assembly :
Round 1 :
Sew jack-o-lantern topper to the top loop or secure to the spine with a short length of black cord and a few stitches; ensure it cannot slide off.
Round 2 :
Attach the ghost by stitching its head/neck to the spiral at a midpoint coil; reinforce with several passes. Clip the small bucket to the ghost hand using a jump ring and sew the hand closed around the handle if desired.
Round 3 :
Hang charms using jump rings and small lobster clasps through the purple rail so they dangle freely. Use multiple clasp lengths for variety if needed.
Info :
Double-check all knots and woven tails. Weave ends through multiple stitches and trim close. Add a dot of craft glue to knots at the top loop for long-term security.
This whimsical Halloween mobile brings together tiny amigurumi charms, playful colors, and dramatic spiral movement for a truly enchanting decoration! Each crocheted piece is small, satisfying and full of personality — from the pumpkin topper to the scalloped ghost skirt. Hang it in a doorway or near a window and enjoy the gentle spin of charms and handmade charm. 🧶🎃👻