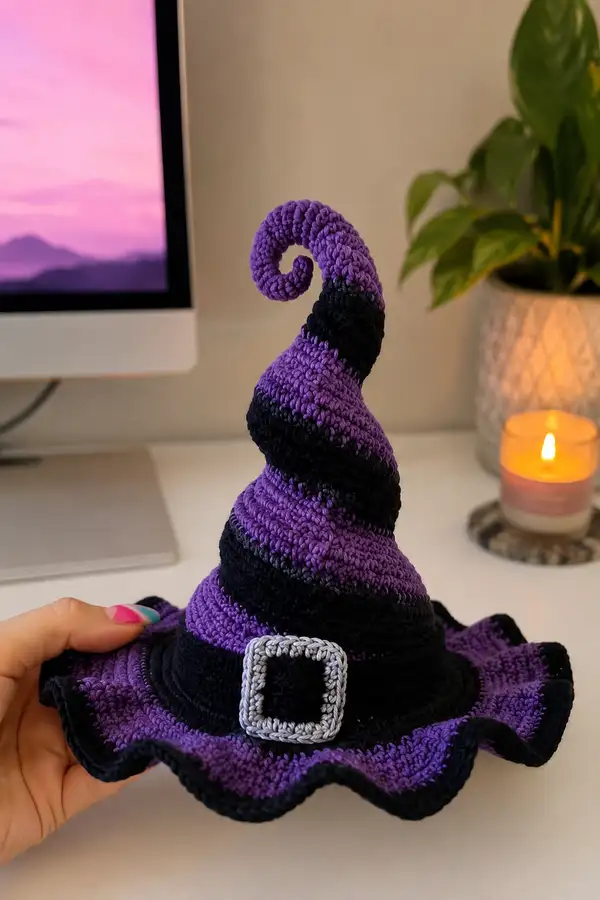
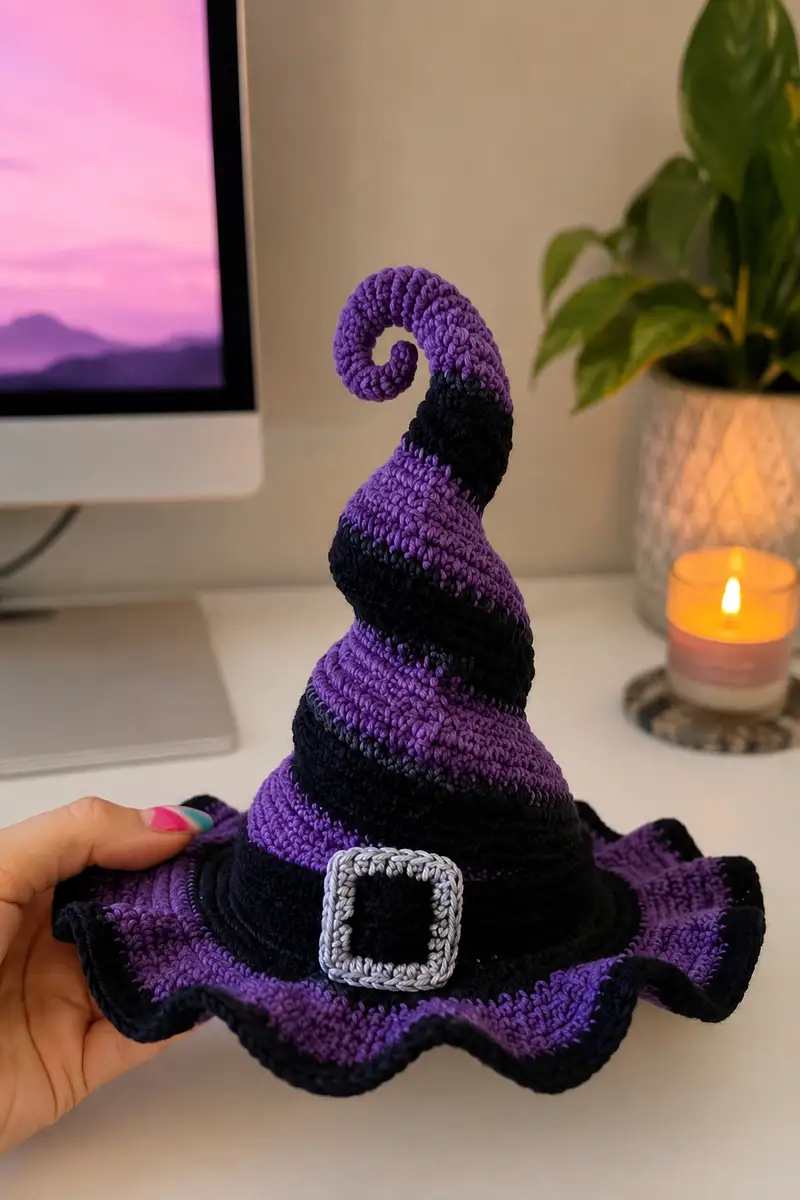
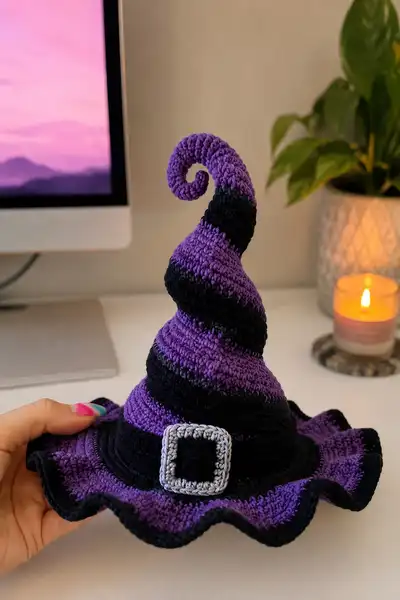
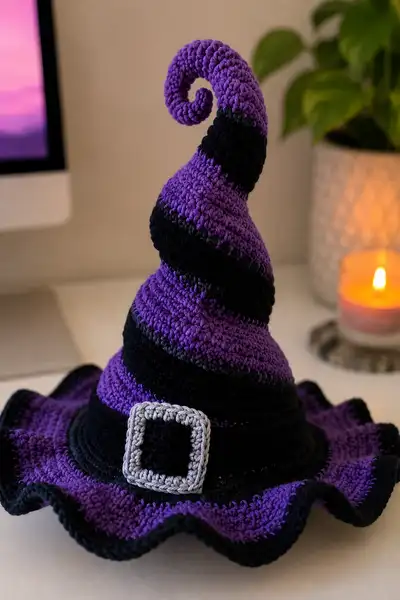
A whimsical spiral witch hat amigurumi worked in bold purple and black stripes with a ruffled brim and a silver buckle accent. The hat features a sculpted, curled tip that holds its shape thanks to an internal support and tight amigurumi fabric. Perfect for Halloween displays, shelf decor, or as a playful accessory for dolls and small figures.
Progress Tracker
0% Complete
— Head (Main Cone / Crown) :
Round 1 :
6 sc in magic ring (6)
Round 3 :
(1 sc, inc) x 6 (18)
Round 4 :
(2 sc, inc) x 6 (24)
Round 5 :
(3 sc, inc) x 6 (30)
Round 6 :
(4 sc, inc) x 6 (36)
Round 7 :
(5 sc, inc) x 6 (42)
Round 8 :
(6 sc, inc) x 6 (48)
Info :
Change to purple (if not already) and place a stitch marker at the beginning of this round. This forms the base of the crown. Tight amigurumi tension will give a neat fabric.
Round 9 :
1 sc in each st (48)
Round 10 :
1 sc in each st (48)
Round 11 :
1 sc in each st (48)
Round 12 :
1 sc in each st (48)
Info :
We are working a tall crown. These even rounds determine height. Keep counts consistent and swap to black yarn at the stripe transition starting Round 13 as pictured (thin black stripe after several purple rounds).
Round 13 :
Change to black. 1 sc in each st (48)
Round 14 :
Change to purple. 1 sc in each st (48)
Round 15 :
1 sc in each st (48)
Round 16 :
1 sc in each st (48)
Info :
To create the visible spiral swirl, we will use slight shaping: introduce short increases then holds to give the cone its subtle curvature. Keep color changes every 2-4 rounds to mimic the photographed stripes.
Round 17 :
(6 sc, inc) x 6 (54)
Round 18 :
1 sc in each st (54)
Round 19 :
1 sc in each st (54)
Round 20 :
(7 sc, inc) x 6 (60)
Info :
Start alternating stripes more frequently here: change to black for two rounds then back to purple for three. Carry unused color along inside and catch it occasionally to avoid long floats. Place a stitch marker at the front to monitor spiral orientation.
Round 21 :
Change to black. 1 sc in each st (60)
Round 22 :
Change to purple. 1 sc in each st (60)
Round 23 :
1 sc in each st (60)
Round 24 :
(8 sc, inc) x 6 (66)
Round 25 :
1 sc in each st (66)
Round 26 :
1 sc in each st (66)
Info :
We will now begin a very long, slightly leaning taper. Rather than steep decreases, use small decreases spaced to create the spiral lean. Keep color changes every 2-3 rounds to match photo stripes.
Round 27 :
(9 sc, dec) x 6 (60)
Round 28 :
1 sc in each st (60)
Round 29 :
(8 sc, dec) x 6 (54)
Round 30 :
Change to black. 1 sc in each st (54)
Round 31 :
Change to purple. (7 sc, dec) x 6 (48)
Round 32 :
1 sc in each st (48)
Info :
Begin stuffing gradually but lightly from this point forward; leave the top of the cone less filled as the curled tip will be shaped later. Use small amounts of fiberfill and push it down with a stuffing tool so the base is firmer and the tip slightly hollow for shaping.
Round 33 :
(6 sc, dec) x 6 (42)
Round 34 :
1 sc in each st (42)
Round 35 :
(5 sc, dec) x 6 (36)
Round 36 :
Change to black. 1 sc in each st (36)
Round 37 :
(4 sc, dec) x 6 (30)
Round 38 :
1 sc in each st (30)
Round 39 :
(3 sc, dec) x 6 (24)
Round 40 :
(2 sc, dec) x 6 (18)
Info :
At round 40 the cone narrows for the spiral tip. Fasten off if you will work the curled tip separately, leaving a long tail. If you prefer to work the tip continuous, continue below into the Curled Tip section. Continue stuffing lightly, shaping the cone to have a gentle lean to one side matching the reference spiral.
— Curled Tip (Top Spiral) :
Round 1 :
Join purple to the last round of cone if continuing, otherwise start mr: 6 sc in magic ring (6)
Round 3 :
(1 sc, inc) x 6 (18)
Round 4 :
1 sc in each st (18)
Info :
To create a curled tip that holds shape, work this section a bit tighter. Insert a length of floral wire now if using internal support — leave ends untrimmed until curl is finished. Fold wire into the center of the tip and continue crocheting around it so the wire is enclosed by stitches.
Round 5 :
(2 sc, inc) x 6 (24)
Round 6 :
1 sc in each st (24)
Round 7 :
(3 sc, inc) x 6 (30)
Round 8 :
1 sc in each st (30)
Round 9 :
Change to black. 1 sc in each st (30)
Round 10 :
Change to purple. (4 sc, inc) x 6 (36)
Info :
Start curling the tip by gradually decreasing on one side to bias the piece. One method: work decreases in the first 6-8 sts of the round only to start the spiral. Use your fingers to cup and turn the tip into a tight curl as you go.
Round 11 :
(5 sc, dec) x 6 (30)
Round 12 :
1 sc in each st (30)
Round 13 :
(4 sc, dec) x 6 (24)
Round 14 :
1 sc in each st (24)
Round 15 :
(3 sc, dec) x 6 (18)
Round 16 :
(2 sc, dec) x 6 (12)
Round 17 :
(1 sc, dec) x 6 (6)
Info :
Fold the small remaining center to finish a tight curl and sew it closed or stitch it to the cone securely. Shape the spiral with your hands and bend the internal wire as desired. If using no wire, fill lightly and overstuff the end minimally so it keeps some firmness for curling.
— Body (Mid Section & Spiral Banding) :
Round 1 :
Attach yarn at the base of the cone where it meets the brim area. 1 sc in each st around the base join (st count will vary with brim foundation; maintain continuity with cone rounds, for example 66 sts if you ended cone at that count)
Round 2 :
1 sc in each st (66)
Round 3 :
Change to black. 1 sc in each st (66)
Round 4 :
Change to purple. 1 sc in each st (66)
Info :
Work the banding section with alternating 2-4 rounds per color to create the thick stripe effect seen. The band area is worked in the round and will be the foundation for the brim. If your cone stitch count differs, adjust the repeating increase/decrease math consistently.
Round 5 :
1 sc in each st (66)
Round 6 :
Change to black. 1 sc in each st (66)
Round 7 :
Change to purple. 1 sc in each st (66)
Round 8 :
1 sc in each st (66)
Info :
To create a slightly flared base before the brim, work 2 rounds of BLO to create a small ridge that will help the brim sit naturally. 2 sc in each st BLO for 1 round, then regular sc rounds.
Round 9 :
1 sc in each st BLO (66)
Round 10 :
1 sc in each st (66)
Round 11 :
Change to black. 1 sc in each st (66)
Round 12 :
1 sc in each st (66)
Info :
If you want the band slightly raised, you can work 2-3 rounds in front loop only around the band area to create a subtle ridge for slipping the buckle on later.
Round 13 :
Change to purple. 1 sc in each st (66)
Round 14 :
1 sc in each st (66)
Round 15 :
Change to black. 1 sc in each st (66)
Round 16 :
1 sc in each st (66)
Info :
Make sure the cone-to-brim join is neat; you can use a contrasting join stitch or invisible join. Keep your tension consistent so the brim starts evenly and does not ripple inadvertently.
— Brim (Wavy Ruffle) :
Round 1 :
Starting at the base join, ch 1 and work 1 sc in same st and in next 6 sts around to mark 7 sections, then count total sts to base circumference. This round establishes the brim foundation. (66)
Round 2 :
1 sc in each st around (66)
Round 3 :
Change to purple. 1 sc in each st (66)
Round 4 :
1 sc in each st (66)
Info :
To achieve the ruffled wavy edge seen, we will increase progressively around the brim to create extra fabric. Work in multiples that divide evenly into your base count — using increases in groups of 5-7 will give the photographed scalloped look.
Round 5 :
(3 sc, inc) x 18 (84)
Round 6 :
1 sc in each st (84)
Round 7 :
(4 sc, inc) x 14 (98)
Round 8 :
1 sc in each st (98)
Round 9 :
Change to black. 1 sc in each st (98)
Round 10 :
(5 sc, inc) x 14 (112)
Info :
These increases make the large fullness of the brim. If your brim feels too full or too shallow, adjust the increase group sizes to taste (smaller groups = less ruffle). Keep color changes at the edging to match the photo: black edge round last.
Round 11 :
1 sc in each st (112)
Round 12 :
To create scalloped peaks, *skip 1 st, 5 dc in next st, skip 1 st, sl st in next; rep from * around (creates peaks). Adjust to match number of peaks desired (approx 28 peaks for 112 sts).
Round 13 :
Change to black. 1 sc in each st around (112)
Round 14 :
Work 1 sc in BLO around for a defined border (112)
Info :
For a firm brim edge, work a tighter hook for the last 2 edge rounds or use smaller hook (3.25mm) to produce a neat black border that flares slightly. Block the brim by pinning into waves and using a light steam to set the ruffle.
Round 15 :
Work 1 sc in each st (112). Fasten off and weave in ends, leaving long tail if you will sew brim to body for reinforcement.
— Belt (Hat Band) :
Round 1 :
With black, ch 41 (this length should be enough to wrap around the base of the cone — adjust to fit your crown circumference). Join with sl st to form band (or work as a long strip and sew).
Round 2 :
Ch 1, 1 sc in each ch around (41)
Round 3 :
1 sc in each st (41)
Round 4 :
1 sc in each st BLO (41) — creates a slightly raised edge for the buckle to sit on
Info :
Make this band to fit snugly around the cone at the base above the brim. Pin into position and sew with ladder stitch across the seam for an invisible join. If you worked a flat strip, slip it around and sew ends together then secure to cone.
Round 5 :
Sew band in place around round 13-16 of the cone (or where it visually matches photo) using matching black yarn; make sure buckle placement is centered front.
— Buckle :
Round 1 :
Using light gray, ch 10, join to form a small square frame: ch 10, sl st to first ch to join.
Round 2 :
Work 1 sc in each ch around the loop (10) adjusting corners to be slightly rounded; if ch 10 seems too small, ch 12 for a larger buckle
Round 3 :
(2 sc in corner st) at four corners to slightly square off the loop, 1 sc in between corners. Approx (16-20)
Round 4 :
Work 1 sc in each st BLO to create a crisp inner edge (same st count)
Round 5 :
Fasten off leaving a long tail. Use the tail to whip stitch the buckle frame to the black band, leaving the center open. Optionally back the buckle with a small square of black yarn to mimic the photographed closed center.
Info :
For a firmer buckle, cut a small square of cardboard slightly smaller than the buckle opening and sandwich it between stitched rounds before closing the trim. Secure cardboard with fabric glue if desired, then cover edges with yarn.
— Arms (Make 2) :
Round 1 :
NOT APPLICABLE AS LIMBS - Repurpose: Make 2 short reinforcement tubes to insert into the brim fold if you want the brim to hold more structure. mr, 6 sc (6)
Round 3 :
(1 sc, inc) x 6 (18)
Round 4 :
1 sc in each st (18)
Round 5 :
1 sc in each st (18)
Round 6 :
Fold tube flat and sc through both layers for 1 round to close partially (18)
Info :
These two small tubes are optional internal reinforcements to tuck into the brim fold when sewing for a sturdier brim curve. Stuff minimally and place near the brim under the band to add body.
Round 7 :
Fasten off leaving long tails for securing in brim cavity.
— Legs (Make 2) :
Round 1 :
NOT APPLICABLE AS LEGS - Repurpose: Make 2 longer support rods covers to insert into the cone for a more dramatic spiral hold. mr, 6 sc (6)
Round 3 :
(1 sc, inc) x 6 (18)
Round 4 :
1 sc in each st (18)
Round 5 :
1 sc in each st (18)
Round 6 :
Continue 1 sc in each st for 12 rounds to create a tube approximately 8-10 cm long; stuff lightly and insert wire before closing.
Info :
These tubes wrap internal wire or pipe cleaner to make the cone poseable. If you don't want poseability, skip these and work tip directly as in Curled Tip section.
Round 7 :
Fasten off leaving tail for insertion and sewing into place.
— Ears (Make 2) :
Round 1 :
Optional decorative points: mr, 6 sc (6)
Round 3 :
(1 sc, inc) x 6 (18)
Round 4 :
1 sc in each st (18)
Info :
Small triangular points can be added to the brim or band for extra character. These are optional and will be sewn flat to the brim for decoration.
Round 5 :
Fasten off and leave tails for sewing.
— Tail (Optional Spiral Accent) :
Round 3 :
(1 sc, inc) x 6 (18)
Round 4 :
Work 1 sc in each st for 8 rounds to make a short spiral extension (18)
Info :
This little decorative tail can be coiled and sewn to the side of the cone for an extra curl detail. Not required for the main hat structure.
Round 5 :
Fasten off leaving tail for sewing.
— Finishing & Trim :
Round 1 :
With black, slip stitch around the brim edge for a crisp outline. 1 sl st in each st (112)
Round 2 :
With gray, work a decorative edge around the buckle or add a small crochet flower or button to one side for personality
Info :
Weave in all yarn tails, sew the belt in place at the base of the cone, position the buckle and attach securely. If you used reinforcements, tuck the tubes into the brim cavity and sew the brim base closed to hold them in place.
Round 3 :
Shape the curl by bending the enclosed wire or shaping the stuffed tip. Pin into position if blocking. Optionally spray with starch or lightly steam to set the shape.
Info :
Final adjustments: check stripe transitions, trim stray fibres, and press gently where needed. If you want the hat to sit flat, add a few whip stitches from the band underside to the brim to hold a slight flare.
This spiral spooky witch hat is such a delightful little project — the curled tip, bold stripes, and ruffled brim come together to create a memorable Halloween decoration that is both playful and elegant. I love how easy it is to customize: change colors, add a charm, or make the curl more dramatic. 🧶✨ Display it on a shelf, add it to a costume, or gift it to a friend who loves seasonal decor. Happy stitching and enjoy the magical results! 🎃