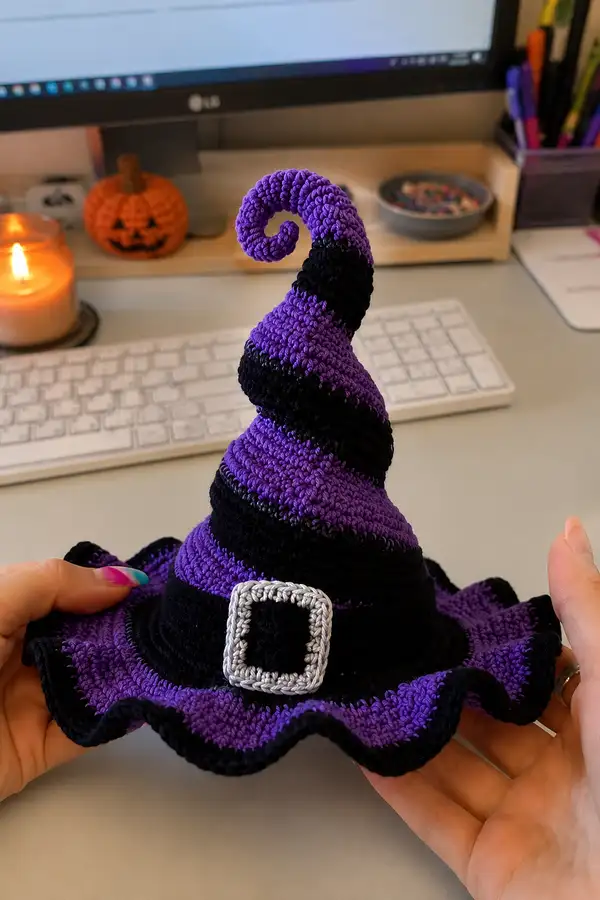
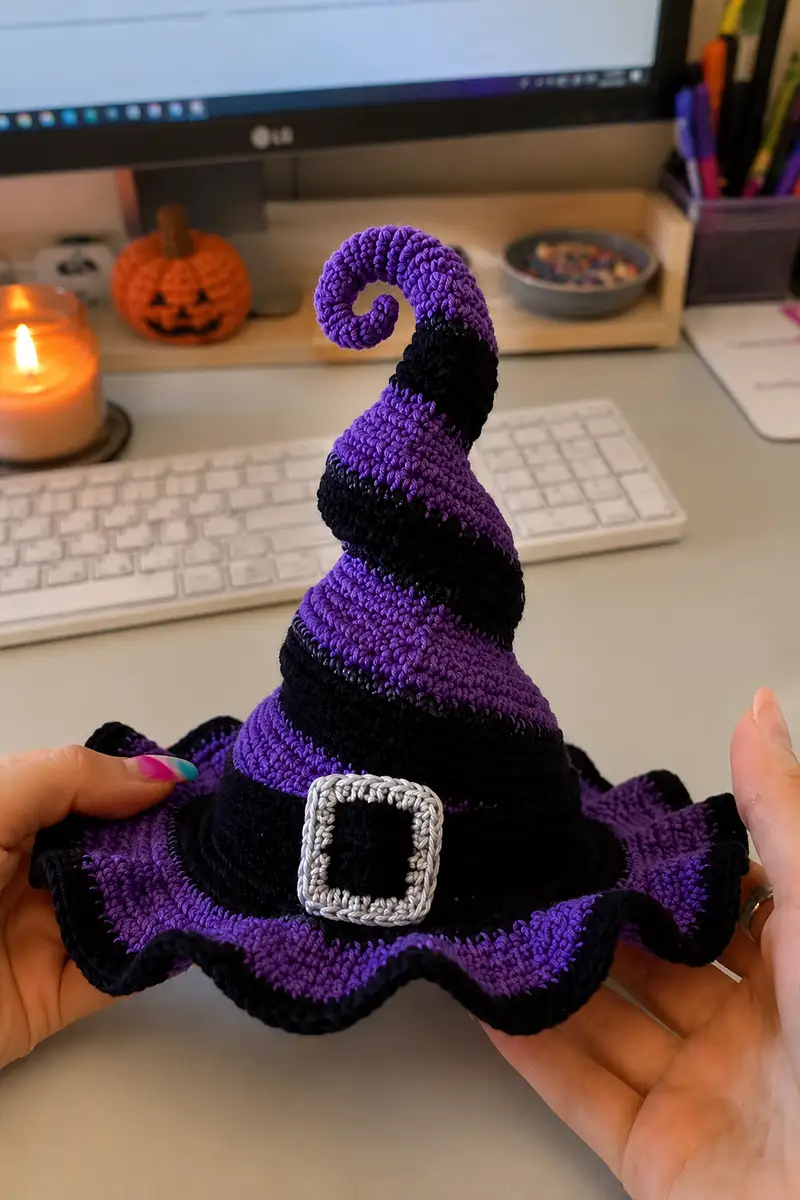
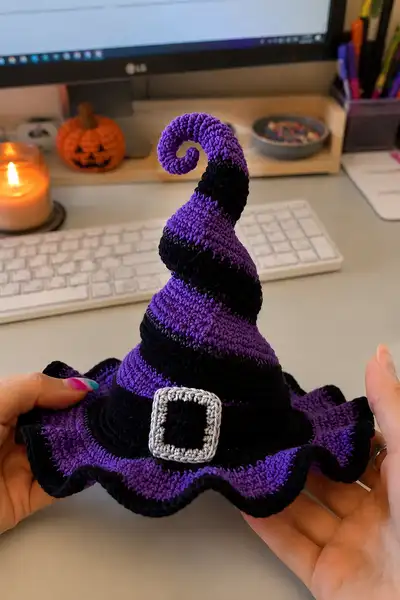
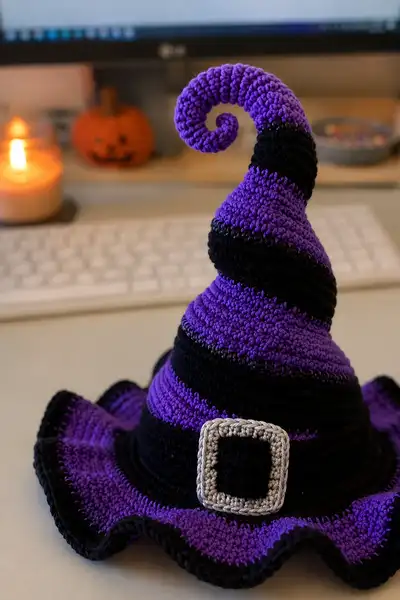
This cute, hand-crocheted witch hat features bold purple and black stripes, a dramatic wavy brim and a whimsical spiral tip with a curled end. The hat is structured to sit upright with a firm brim and a soft, sculpted cone that can be shaped into a spiral. A contrasting silver buckle finishes the front for a charming, classic touch. Perfect for seasonal decor, a desk accent, or a playful costume accessory.
Progress Tracker
0% Complete
— Notes & Gauge :
Info :
Gauge isn't critical for fit as this is an accessory, but aim for a firm fabric with 18-20 sc over 10 cm using recommended hook to ensure a crisp brim and sculptable cone. Work tightly for structure. The hat as pictured measures approximately 11-13 inches (28-33 cm) tall from brim to tip and about 12-14 inches (30-35 cm) across the brim when laid flat.
— Crown (Top section that becomes the cone) :
Round 3 :
(1 sc, 1 inc) x 6 (18)
Round 4 :
(2 sc, 1 inc) x 6 (24)
Round 5 :
(3 sc, 1 inc) x 6 (30)
Round 6 :
(4 sc, 1 inc) x 6 (36)
Round 7 :
(5 sc, 1 inc) x 6 (42)
Round 8 :
(6 sc, 1 inc) x 6 (48)
Round 9 :
(7 sc, 1 inc) x 6 (54)
Round 10 :
(8 sc, 1 inc) x 6 (60)
Round 11-16 :
1 sc in each st (60) (work 6 rounds to build initial crown height)
Info :
These rounds form the shallow dome of the cone. If you want a smaller crown diameter reduce rounds of even stitches; for a wider crown add one increase round (see next increase sequence) before continuing even rounds.
Round 17 :
Change to black yarn. 1 sc in each st (60)
Round 18-19 :
1 sc in each st (60) (2 rounds black to form the stripe)
Info :
Carry yarn neatly up the inside of the cone if you prefer not to weave many ends. When changing color, complete the last sc in the previous round using the new color to make a clean join.
Round 20-23 :
Change to purple. 1 sc in each st (60) (4 rounds purple stripe)
Round 24 :
Change to black. 1 sc in each st (60)
Round 25 :
(10 sc, 1 inc) x 6 (66)
Round 26 :
(11 sc, 1 inc) x 6 (72)
Round 27-30 :
1 sc in each st (72) (4 rounds even to build sloped cone)
Info :
If your hat is going to be more upright, work one or two more even rounds at this circumference; if you want a steeper cone reduce the number of even rounds before the next increase.
Round 31 :
Change to purple. 1 sc in each st (72)
Round 32-33 :
1 sc in each st (72) (2 rounds purple)
Round 34 :
Change to black. 1 sc in each st (72)
Round 35 :
(12 sc, 1 inc) x 6 (78)
Round 36-39 :
1 sc in each st (78) (4 rounds even)
Info :
By progressively increasing your stitch count in this manner you create a tapered slant for the cone. Maintain color striping every 3-6 rounds to replicate the pictured alternating bands; change colors on the first stitch of the round for tidiness.
Round 40 :
Change to purple. 1 sc in each st (78)
Round 41-42 :
1 sc in each st (78) (2 rounds purple)
Round 43 :
Change to black. 1 sc in each st (78)
Round 44 :
(13 sc, 1 inc) x 6 (84)
Round 45-48 :
1 sc in each st (84) (4 rounds even)
Info :
At this point you have built the wider lower cone portion which will join to the brim. If you prefer a shorter cone reduce the number of even rounds here; for a taller cone continue additional even rounds before beginning the spiral section.
Round 49 :
Change to purple. 1 sc in each st (84)
Round 50-51 :
1 sc in each st (84) (2 rounds purple)
Round 52 :
Change to black. 1 sc in each st (84)
Round 53 :
(14 sc, 1 inc) x 6 (90)
Round 54-58 :
1 sc in each st (90) (5 rounds even)
Info :
These counts are designed to keep the cone proportional for a desk-sized prop. If you are making the hat for a head, measure the wearer's circumference and adjust increases to match; you can skip or add increase rounds to fit.
Round 59 :
Change to purple. 1 sc in each st (90)
Round 60-62 :
1 sc in each st (90) (3 rounds purple)
Info :
Now you will begin the extended cone/spiral portion. This section is worked into a long tapered cone. We will build length with mostly even rounds, using occasional increases to create a gentle outward curve, then taper back to a narrow tip using decreases.
Round 63 :
(15 sc, 1 inc) x 6 (96)
Round 64-68 :
1 sc in each st (96) (5 rounds even to extend cone)
Round 69 :
Change to black. 1 sc in each st (96)
Round 70-71 :
1 sc in each st (96) (2 rounds black)
Round 72 :
Change to purple. 1 sc in each st (96)
Round 73-78 :
1 sc in each st (96) (6 rounds purple)
Info :
Work the cone in continuous rounds (spiral) without joining and use a stitch marker to mark the start of each 10-round block if desired. Stuff the spiral tip lightly as you work toward the narrow end (use small amounts of fiberfill rolled tightly rather than large clumps).
Round 79 :
(15 sc, 1 dec) x 6 (90)
Round 80-82 :
1 sc in each st (90) (3 rounds even)
Round 83 :
(14 sc, 1 dec) x 6 (84)
Round 84-86 :
1 sc in each st (84) (3 rounds even)
Round 87 :
(13 sc, 1 dec) x 6 (78)
Round 88-89 :
1 sc in each st (78) (2 rounds even)
Info :
At this stage the cone is narrowing. If you want a loose curl, stop decreasing earlier and allow more length; for a tight spiral, continue decreases until you reach a narrow tube and then form curl by sewing the tube into a coil.
Round 90 :
(12 sc, 1 dec) x 6 (72)
Round 91-93 :
1 sc in each st (72) (3 rounds even)
Round 94 :
(11 sc, 1 dec) x 6 (66)
Round 95-96 :
1 sc in each st (66) (2 rounds even)
Round 97 :
(10 sc, 1 dec) x 6 (60)
Round 98-99 :
1 sc in each st (60) (2 rounds even)
Round 100 :
(9 sc, 1 dec) x 6 (54)
Round 101-102 :
1 sc in each st (54) (2 rounds even)
Round 103 :
(8 sc, 1 dec) x 6 (48)
Round 104-105 :
1 sc in each st (48) (2 rounds even)
Round 106 :
(2 sc, 1 dec) x 12 (36)
Round 107 :
(1 sc, 1 dec) x 12 (24)
Info :
Fasten off leaving a long tail. Lightly stuff the narrow end and use the tail to sew the very tip closed. At this point you have created a tapered cone; the remaining shaping into a spiral curl is performed next.
— Creating the Spiral Curl :
Info :
There are two realistic ways to form the curl: A) Stuffed and coiled method: lightly stuff the cone and coil it into a spiral, sewing through adjacent coils to secure. B) Internal shaping method: insert a thin craft wire along one side before stuffing and wrap the cone onto the wire, then sew in place. The pictured hat uses coiling with internal shaping to hold the curl.
Step :
Take the finished cone and on a flat surface gently roll the tip inward to form a curl. Use pins to test the spiral shape. Starting at the narrowest point, stitch the inner coil to the next coil with small whip stitches, sewing through the wall of the cone only, so the exterior remains smooth.
Step :
Continue coiling and sewing until the spiral reaches the desired curl tightness (the picture shows a roughly 2.5 to 3 inch diameter curl at the tip). Secure the end with a few extra stitches and weave the tail inside the seam.
Info :
Optionally apply light steam or mist and shape gently with hands to soften the yarn and help the curl set. Allow to dry while pinned in the final shape.
— Joining Cone to Brim (Preparing the Brim Base) :
Info :
Decide brim placement by holding the cone upright and measuring how far down you want the brim to sit. The cone base we created is 60-90 sts circumference depending on your increases; the photos show a hat where the base joins a circular band that leads into a full ruffled brim.
Round Join 1 :
With cone inside out, fold the last round of cone edge and join purple (or color of choice) at any stitch on the base; sl st through both layers to create a stable join - work 1 round of sl st through both layers to form a flat band (60-90 sl st depending on your stitch count)
Info :
Tip :
If your base has 90 sts, work 1 sl st in each st to form the band; if fewer, still work 1 sl st per st. This creates a seam for the brim to be built outward from.
— Brim (Flat band then ruffle) :
Round 1 :
After joining, ch1, 1 sc in each st around (work in the round) (use your base count, example given with 90: 90 sc)
Round 2 :
1 sc in each st (90)
Round 3 :
(6 sc, 1 inc) x 10 = (7*10)=70? (Explanation below)
Info :
The previous line intentionally leaves space for you to adapt: you must use an increase pattern that distributes evenly around your base count. Example using a 90-st base: to increase to 120 (a generous brim), work (3 sc, inc) x 30 which is (4*30)=120. Choose the following increase strategy depending on your base count:
Info :
Example increase maps: If base=90, Round 3: (3 sc, inc) x 30 = 120. If base=84, Round 3: (3 sc, inc) x 28 = 112. Work an increase round that multiplies to a round total between 110-140 stitches for a wide brim.
Round 4 :
1 sc in each st (target 110-140 depending on your increase) (work 2 rounds even to create a stable brim band)
Info :
This flat band will act as the base for the ruffle. If you'd like a firmer brim, insert a circle of buckram or plastic cut to size here - slip it in between rounds before closing the hole and then continue ruffle rounds on top.
Round 5 (Ruffle Start) :
Change to contrasting stripe if desired. Work pattern for ruffle foundations: *1 sc in next st, 2 sc in next st* repeat around. This will roughly increase stitch count by 50% - example 120 -> 180 (if starting with 120)
Round 6 :
1 sc in each st (expanded count) (work 1 round even to stabilize)
Info :
To achieve the pronounced ruffled scallop as pictured, the easiest approach is to work a graduated increase round followed by one or two rounds of spaced cluster stitches to create waves. The pattern below gives two tested options you can adapt.
Ruffle Option A (Larger Scallops) - Round 7 :
*skip 2 sts, 5 dc in next st, skip 2 sts, sl st in next st* repeat around. This creates large scallops. Work 1 round of this and fasten off. (Stitch count will vary)
Ruffle Option B (Subtle Waves) - Round 7 :
*1 sc, hdc, 2 dc, hdc, 1 sc in next st* repeat around to form small scallops. Work 1 round of this and finish with a single round of slip stitches in black for the edge.
Info :
The pictured hat uses a ruffle that alternates a gentle wave and a sharper edge; replicate by alternating one round of cluster shells with one round of single crochet borders in the contrasting black.
Round 8 (Edge Trim) :
Change to black yarn. Work 1 round sc in BLO around the outer edge of the ruffle to tighten the scallops and create a crisp rim. If using clusters, sc in each st around to tidy up (final stitch count varies by ruffle method).
Info :
If you want extra stiffness on the edge, work two rounds of sc in BLO or consider single-crocheting over a thin wire or inserted plastic ring to hold shape. Use caution: insert the reinforcement before finishing the final edge and secure ends.
— Brim Finishing Rows (Detailed Ruffle example using base 120) :
Assumption :
This detailed ruffle example assumes your brim base was increased to 120 sts on the flat band.
Round B1 (foundational increase) :
(3 sc, inc) x 30 = 120 (if base 90 becomes 120) or adapt to match your base - see prior Info for mapping
Round B2 :
1 sc in each st (120)
Round B3 (ruffle foundation) :
*1 sc in next st, skip next st, 5 dc in next st, skip next st* repeat around. This will create 5-dc shells spaced by single crochets; final effective scallops approx 20-30 depending on spacing
Round B4 (secure scallops) :
sl st into center of each shell, ch1, sc around shell to secure (work 5-7 sl st across each shell center depending on circumference) (counts vary)
Round B5 (edge trim) :
Change to black. 1 sc in each st BLO around to finish the edge and create the crisp black outline seen in photo.
Info :
Because ruffle stitch counts vary with your base circumference, focus on consistent visual rhythm rather than exact count. Keep the shells evenly spaced and use pins to position scallops before stitching if necessary.
— Decorative Buckle :
Materials :
Small scrap of black yarn for buckle center and silver yarn for outer trim. Use smaller hook 3.0mm for tighter fabric.
Round 1 :
With black yarn, mr, 6 sc in mr (6)
Round 3 :
(1 sc, 1 inc) x 6 (18)
Round 4 :
Work 4 rounds even 1 sc in each st to create a small square-ish patch (18) (or until piece measures approx 1-1.25 inch square)
Info :
Fasten off black, weave in ends. The buckle front is a decorative frame worked separately next.
Buckle Frame Round 1 :
With silver yarn and 3.0mm hook, ch 16, join to make a small rectangle by sl st into first ch making a narrow loop. Work 1 sc evenly into each chain across, 3 sc in corner, 1 sc in each around loop to build a padded frame. Continue 2-3 rounds of sc around the rectangle until you have a visible raised frame that fits over the black center.
Info :
Sew the silver frame to the black center with matching thread and tidy edges. Lightly stuff the black center if you want a padded buckle look. Attach buckle to hat band using small, tight stitches on underside so the top appears neat.
— Final Shaping, Blocking & Securement :
Info :
Block the hat by pinning the brim scallops into place on a flat blocking board or towel, gently steam or mist and allow to dry. For the spiral, pin the curl shape and tack with small invisible stitches to hold. If using wiring, bend into the desired curve and tuck ends well inside the hat's interior.
Info :
Weave in all tails, trim excess. If you carried color changes, weave carried yarn neatly along inside rows and trim. Optionally add a small felt circle inside the base of the cone to distribute tension when wearing or placing the hat on surfaces.
Info :
If making this hat to fit a head, measure circumference at the place you want the hat to sit. Adjust the number of initial base stitches and increase rounds for the brim to achieve the necessary fit; use the same rate of increases to maintain proportion.
Info :
For extra stability, sew the bottom round of the cone to a thin plastic or buckram disc cut to the inside brim diameter, then cover with a row of sc to hide raw edges. This is especially helpful if the hat will be displayed rather than worn.
This striped spiral witch hat is a delightful blend of whimsy and structure — bold stripes, a curled tip, and a ruffled brim make it a standout piece for seasonal decor or costume play. I had so much fun shaping the spiral and creating the scalloped edge; each adjustment brings personality to the hat. Add a sparkly buckle or a feather for your own twist, and enjoy displaying your handmade creation! 🧶✨🎃